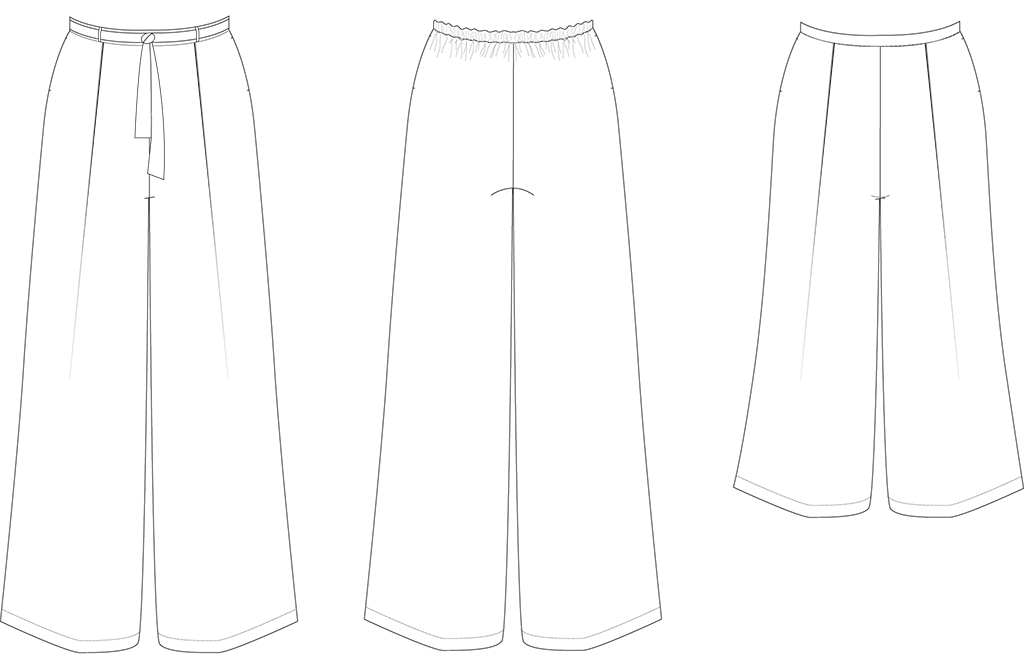
Everyone knows that sewing gives you superpowers. First on that long list is the ability to break the rules and make garments that represent you and your taste. We want to encourage you to think of our patterns as a blank canvas that you can customize to truly suit your style.
Our pattern hacks are designed to teach you hacking basics that help you customize patterns so that you can become a confident pattern hacker. Each month, we will show you how to draft and sew one new pattern hack, and we’ll share links to two additional pattern hacks from our pattern hacks library.
These hacks help you give your Seamwork patterns a custom spin—all you need is paper, a ruler, and a pencil!
In this special edition of pattern hackers, I’ll be walking you through three different pants hacks. You’ll learn how to create a belt and belt loops, how to create elastic-back pants, and how to crop pants.
Note: For best results, be sure to make any necessary fit adjustments before hacking your pattern.
You'll Need:
- The Marett pants
- Paper
- Pencil
- Scissors
- Tape
-
Clear ruler
HACK ONE: Add a Belt and Belt Loops

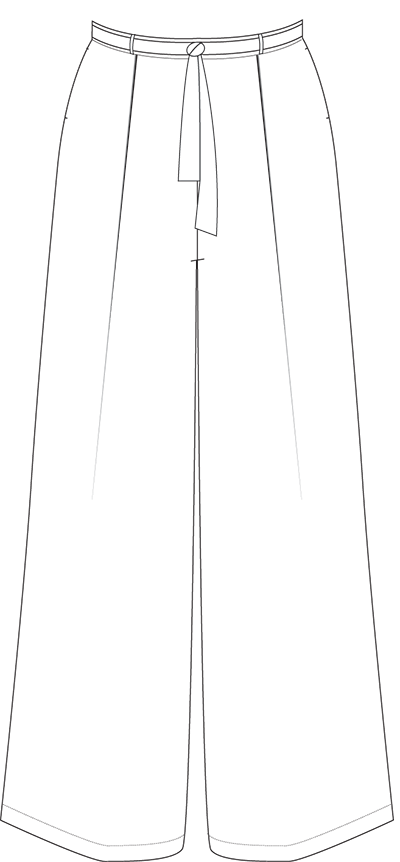
Looking to add a little extra pizzaz to your pants? Or just love the option of being able to wear your pants with a belt? This super simple hack walks you through adding both a belt and belt loops.
DRAFTING INSTRUCTIONS
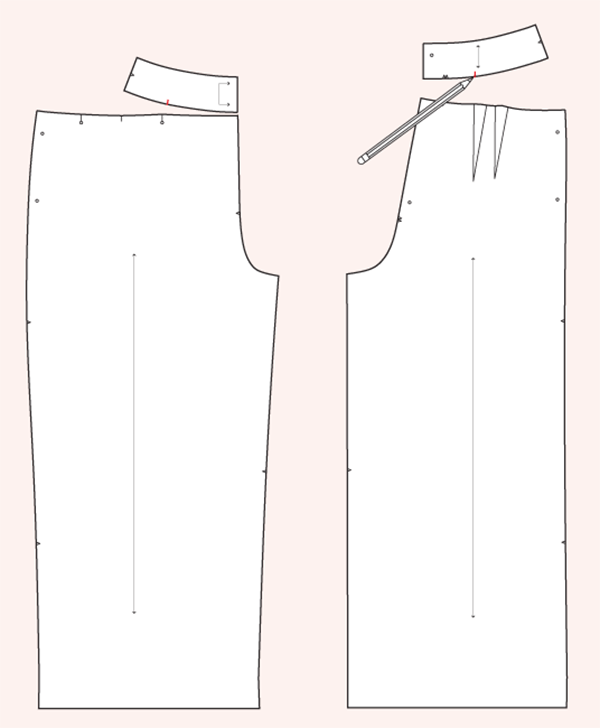
01 | On the front and back waistband pieces, make a mark just to the inside of where the pleat and darts align on the corresponding pants pieces.
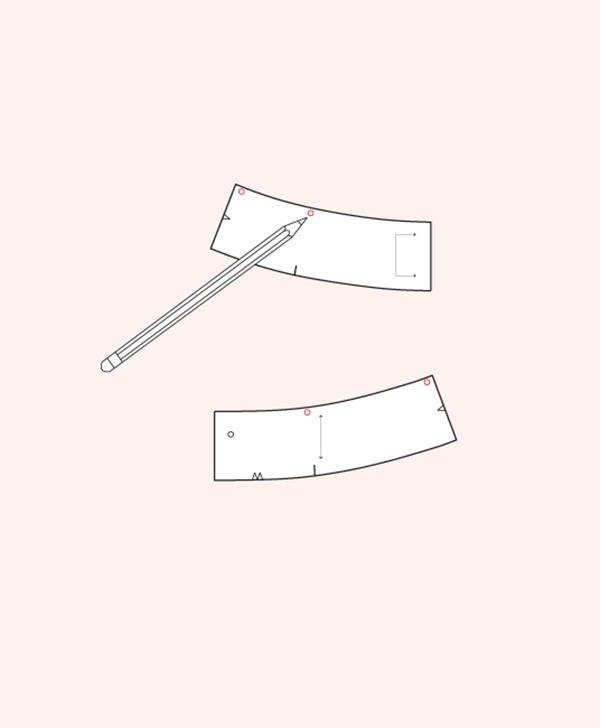
02 | Along the top edge of the waistband, create circular belt loop placement marks opposite of the marks made in step 1. Also, mark the side seams along the top edge of the waistband.
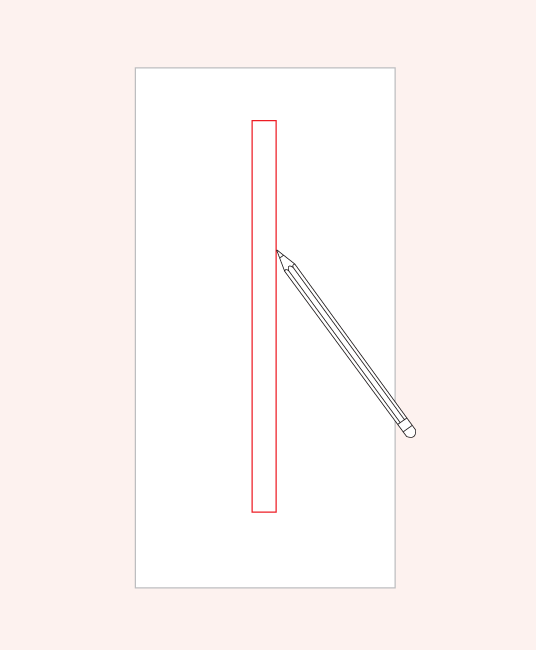
03 | Determine the length of the belt loops. To do this, measure the width of the waistband (including seam allowance) then multiply this number by 6. Draw a rectangle that is that length by 2”.
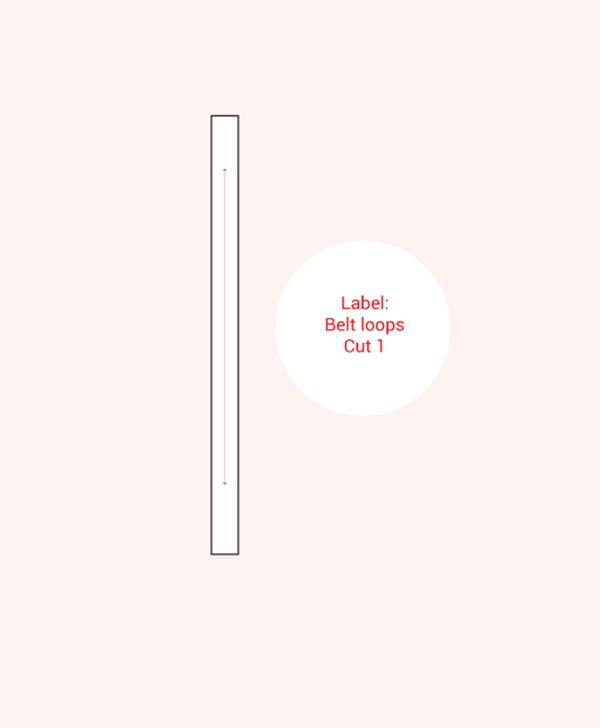
04 | Label this piece “belt loops cut 1." Add a grainline parallel to the cut lines.
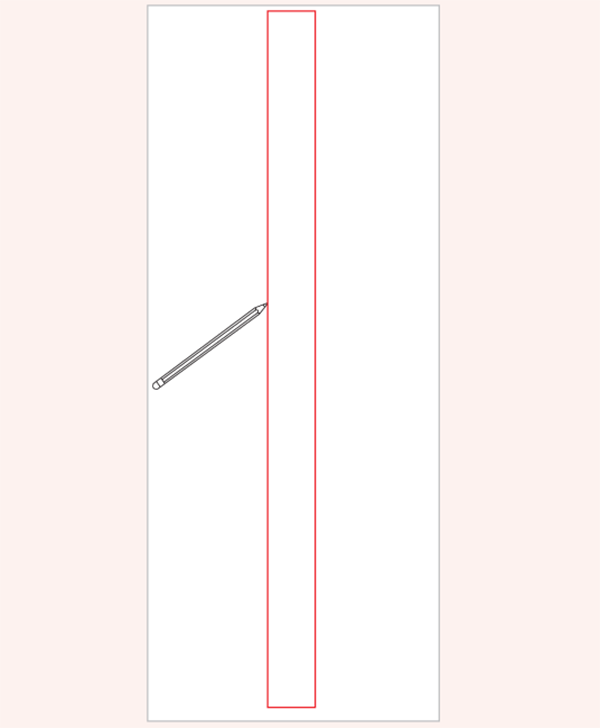
05 | Determine the length of the belt. To do this, measure the total circumference of the waistband, then add 14-20” depending on your preference for the belt length. To determine the width of your belt, just measure the width (without seam allowance) of your waistband, multiply by two, and add 1 1/4" for seam allowance. Draw a rectangle that is the dimensions determined in this step.
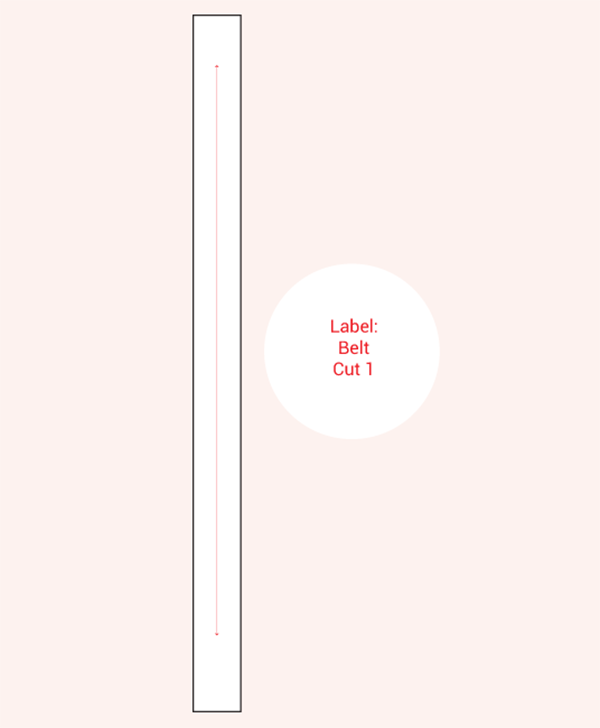
06 | Label this piece “belt cut 1.” Add a grainline parallel to the cut lines.
SEWING INSTRUCTIONS
With right sides together, fold the belt loops piece in half, lengthwise. Press.
Stitch along raw edge at 3/8”. Trim seam allowance in half, turn right side out, and press with seam centered.
Cut into six equal lengths.
Fold one bottom short edge of each belt loop to the wrong side at 1/4”. Press.
Baste belt loops to outer waistband at notches and side seams, with seam side facing down.
Finish assembling the waistband and attach to pants unit, being careful not to catch the lower edges of the belt loops.
After attaching the waistband unit to the pant unit, topstitch the folded lower edges of the belt loops to the pants unit.
With right sides together, fold the belt in half lengthwise.
Stitch, starting at the short ends of the belt and pivoting at the corner. Leave a 2” gap at the middle of the long edge, then continue sewing, pivoting at the second corner.
Trim seam allowances and clip corners.
Turn belt right side out and press. Hand or edgestitch the belt opening closed.
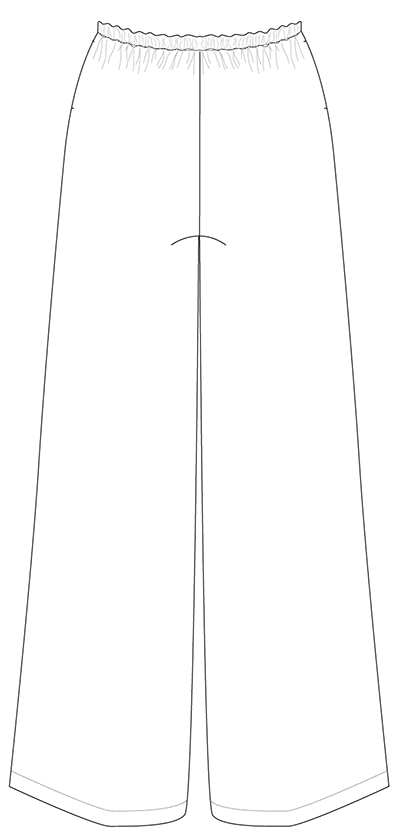
HACK TWO: Elastic-back Waistband
Add a little extra give and comfort to your pants by drafting an elastic-back waistband.
DRAFTING INSTRUCTIONS
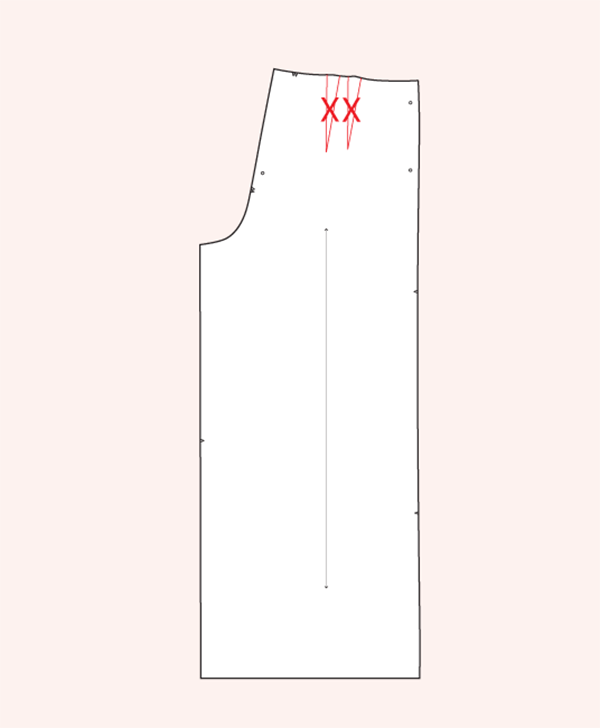
01 | Eliminate the back darts. To do this, cross out the darts and smooth the waistline of the back pants piece.
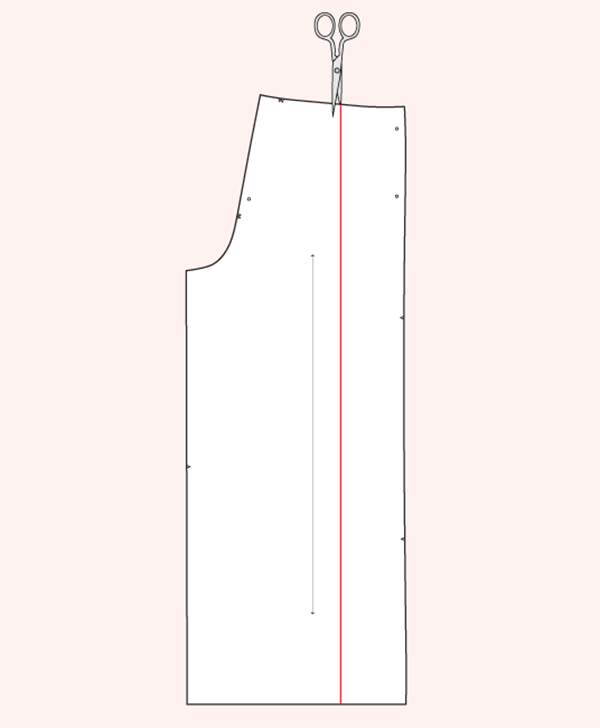
02 | Draw a line parallel to the grainline, from the waistline to the hem. Cut along this line from the waistline to the hem, leaving a small paper hinge.
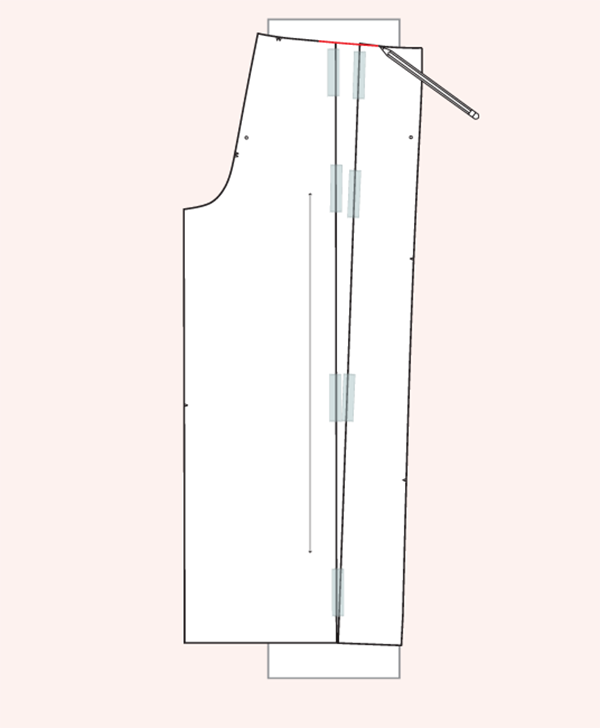
03 | Place a blank piece of pattern paper beneath your slashed pattern piece. Open the pattern at the waist by approximately 3". Tape the pattern to secure, then redraw the waistline.
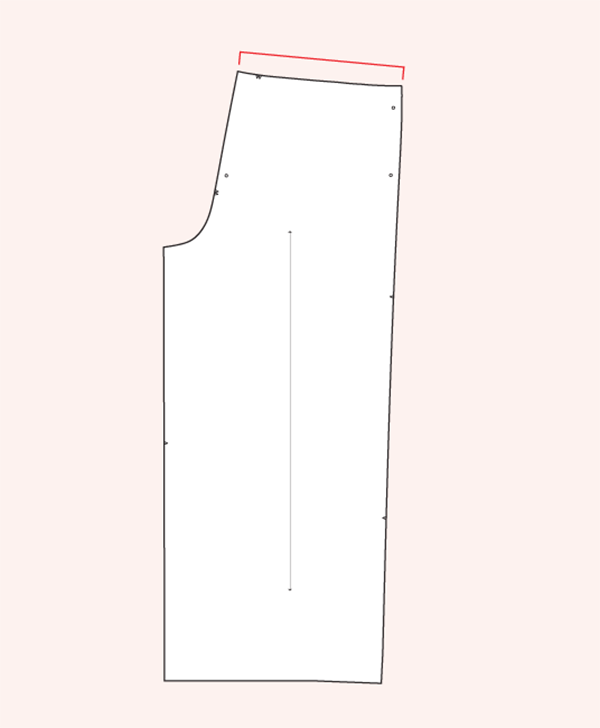
04 | Measure the new back waist.
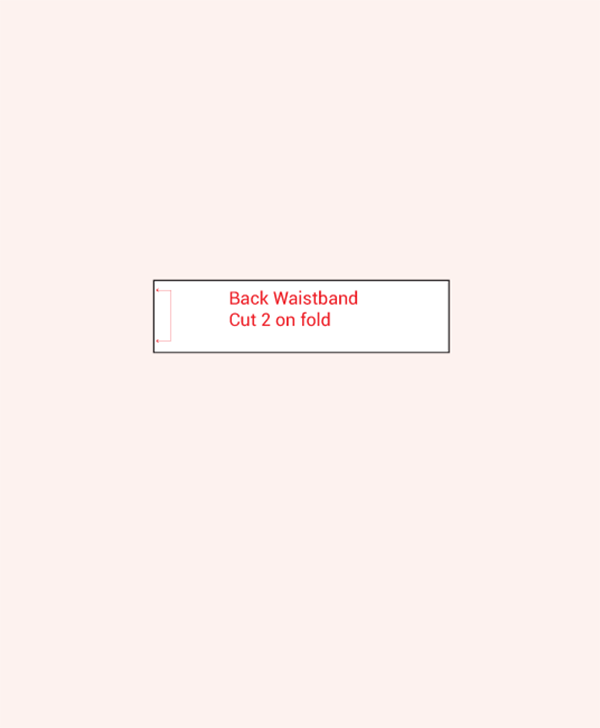
05 | Draw a rectangle that is the width of the back waistline minus 5/8” and the height of the front pattern piece. Label it “back waistband, cut 2 on fold.”
SEWING INSTRUCTIONS
Assemble the pants legs according to the pattern instructions, omitting the zipper closure.
Assemble the waistband pieces by sewing at the side seams and joining the inner and outer waistband along the upper edge. Finish the lower edge of the inner waistband.
Attach the outer waistband to the pants unit. Grade the seam allowance and press up and away from the pants unit.
Fold the inner waistband to the inside of the pants. Stitch in the ditch along the back waist only. Insert the elastic into the back waistband and stitch in the ditch at the side seams to secure.
Stitch in the ditch along the front waistband.
Hem pants according to the pattern instructions.
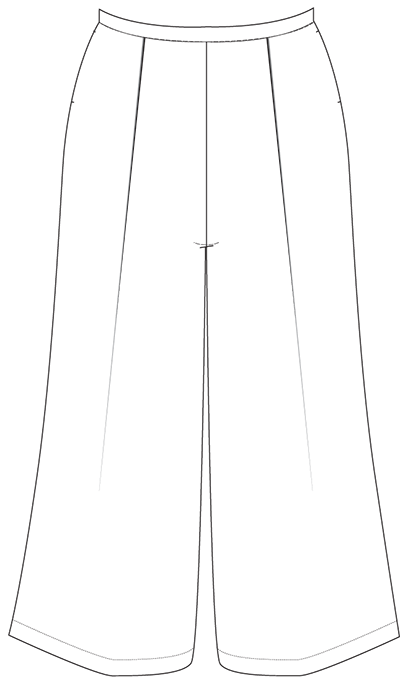
HACK THREE: Cropped Pants
Change up the silhouette of your pants by cropping the length.
DRAFTING INSTRUCTIONS
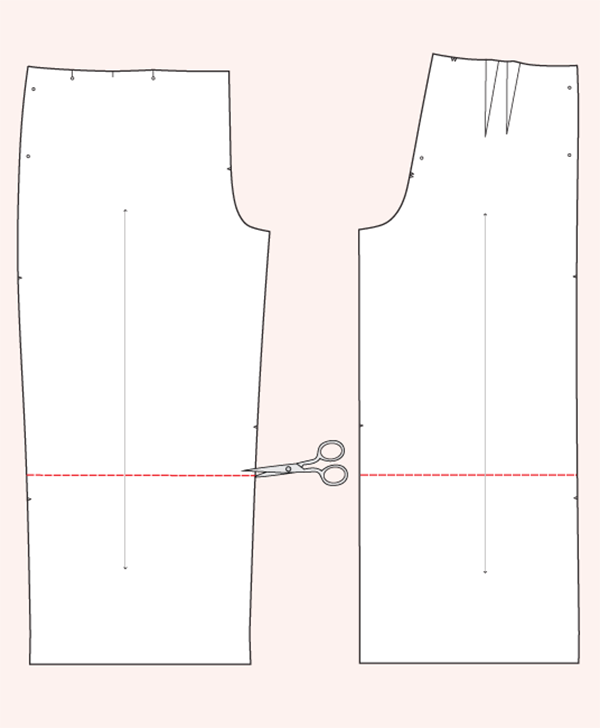
01 | Cut the front and back pants legs along the lengthen/shorten lines.
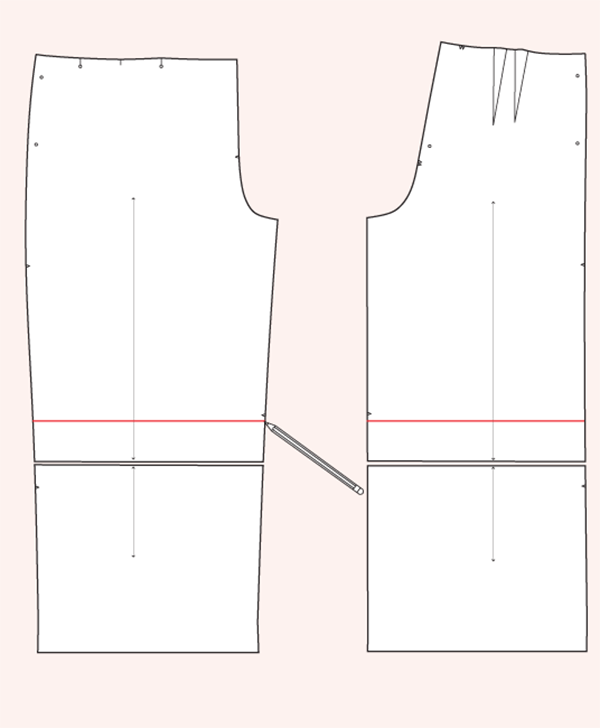
02 | Draw lines above and parallel to the lengthen/shorten lines. The distance between these and the lengthen/shorten lines should be the amount you wish to shorten your pants.
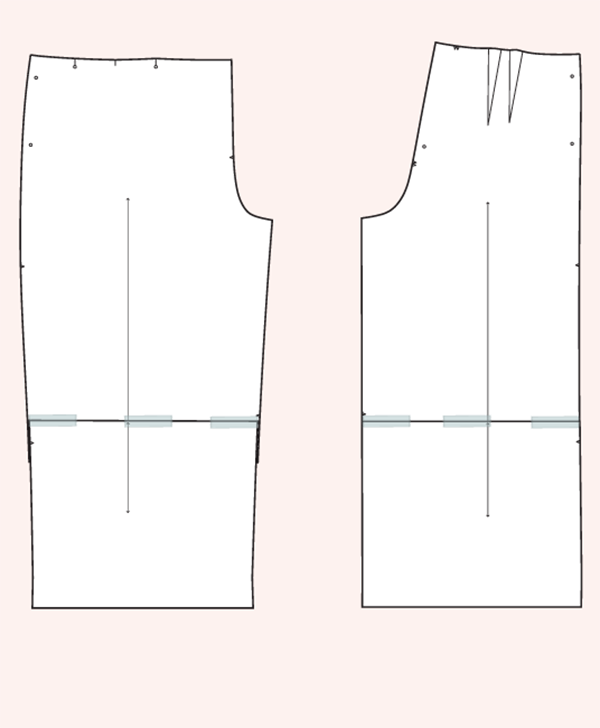
03 | Align the lengthen/shorten lines with the line drawn in step 1and the grainline—tape in place.
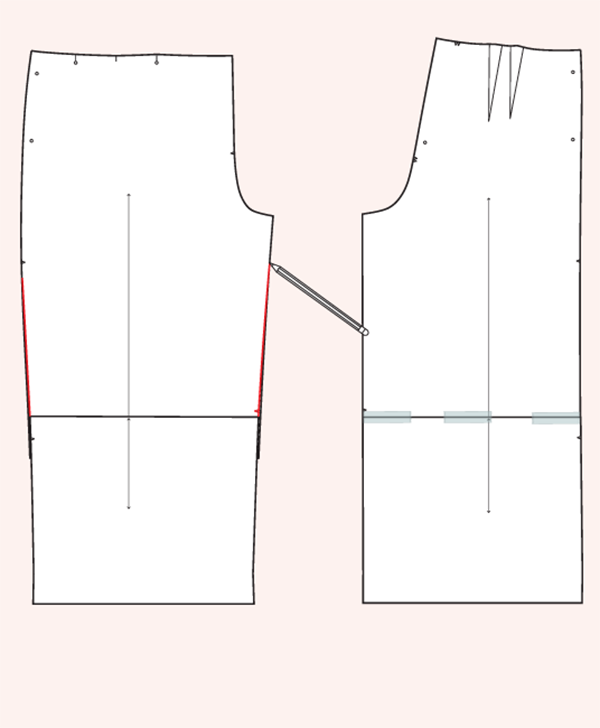
04 | Redraw the side seams and inseams if needed, transferring any notches.
Cut and sew your cropped pants according to the pattern instructions.


