Sign In
The first sewing machine I ever used was a treadle machine—my mom taught me, using one passed down through her family. Besides being beautiful to look at, these old tools do beautiful work, and I’m out to introduce more modern sewists to the joys of using them. Many treadle features seem like fresh ideas today: imagine a reliable, user-serviceable, zero-carbon, human-powered machine that’s so quiet you can listen to podcasts while it’s running, no earbuds required. A treadle machine is the perfect tool for intentional, slow sewing.
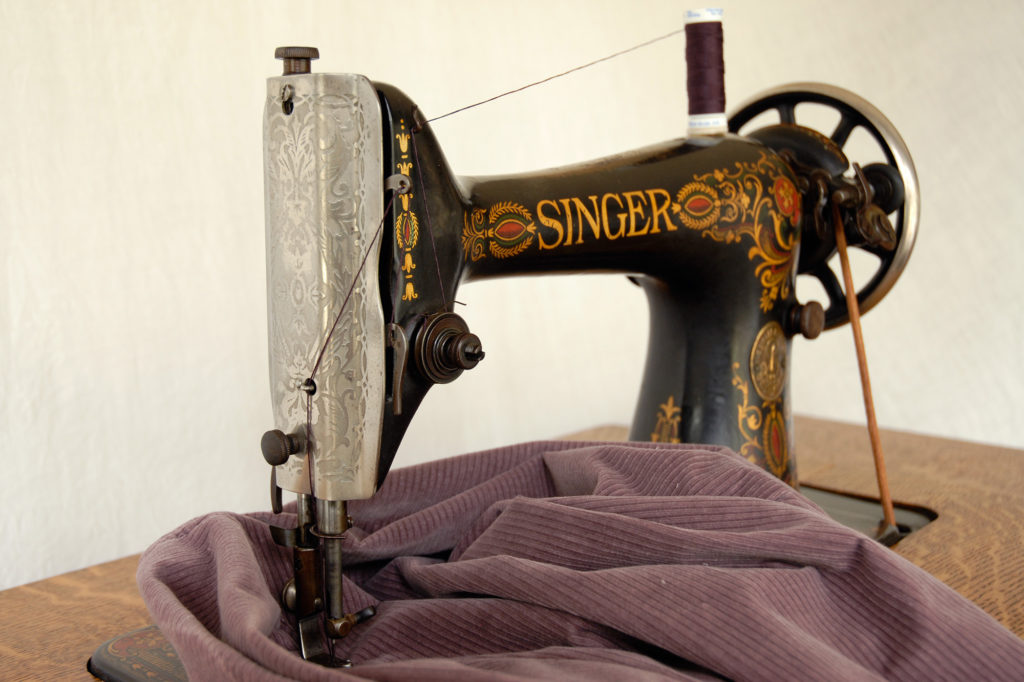
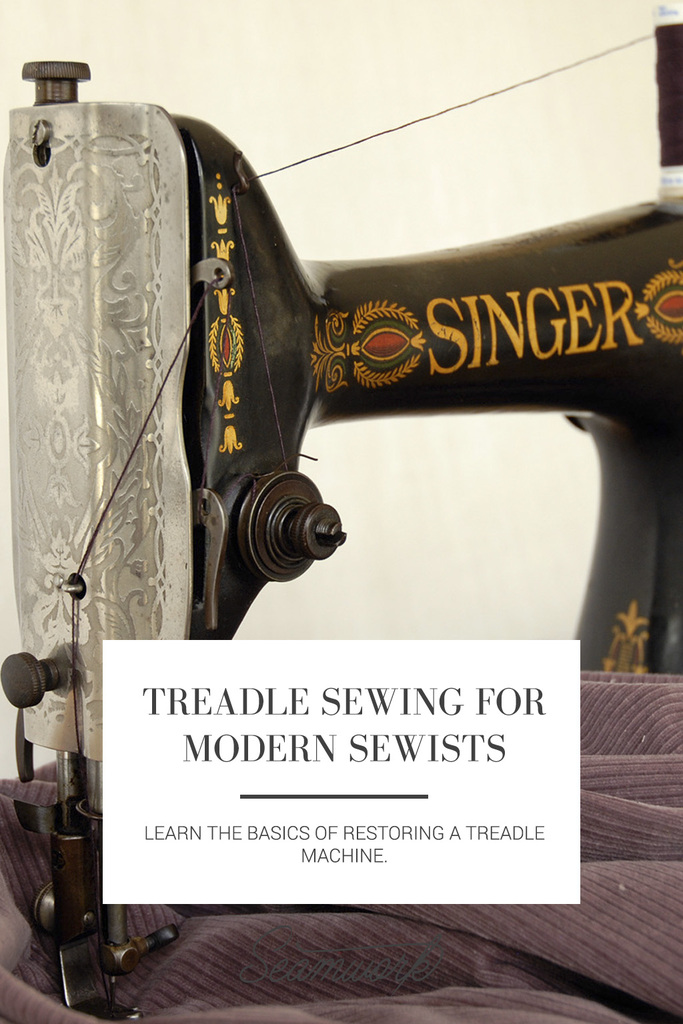
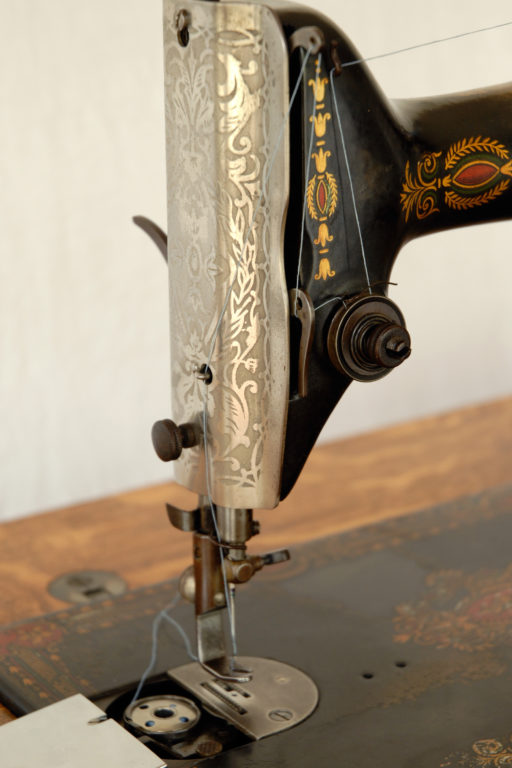
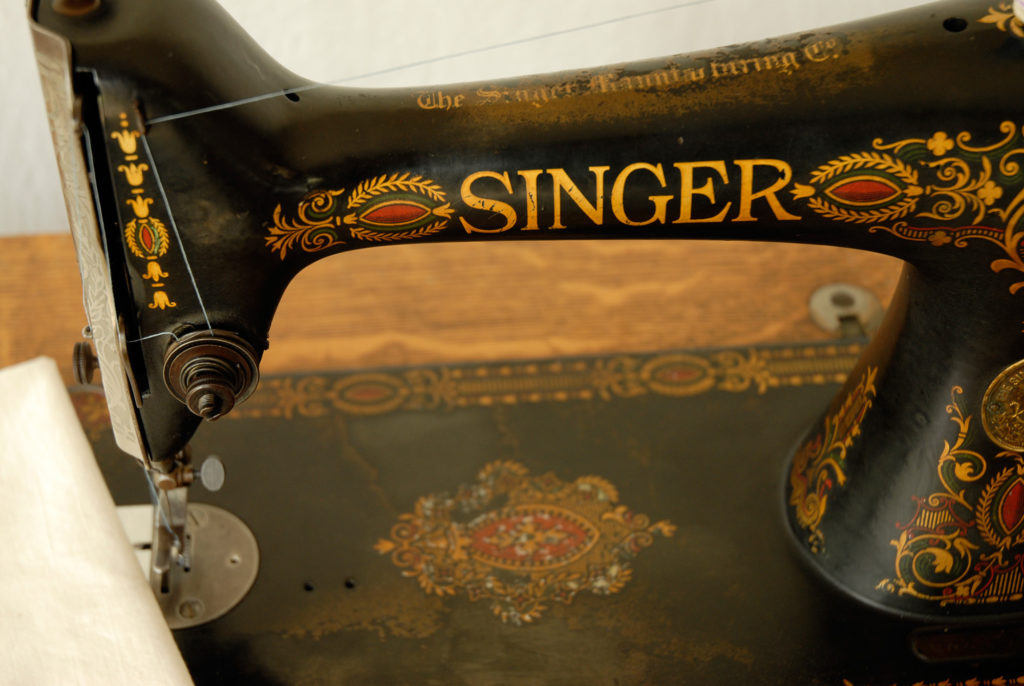
This is a Singer model 66, one of the most common old treadle machines found today. Mine is from 1913, almost the same age as the one I grew up using.
Most antique treadles are straight-stitch only, and make lovely, even stitches. Since there are no plastic gears inside to slip, they can sew through practically anything, and are perfect for topstitching and leather projects as well as fine wovens. If you have the original attachments, there are more options, from automatic rolled hems to ruffles. Some treadles can also use modern feet, and many can use new bobbins.
Older machines tend to need oil in more places than modern ones. Check the manual for points to oil, or just oil all the moving parts you have access to, including under any plates that are easy to remove, and underneath the machine as well. Unexplained holes in the case of the machine are probably also for oil.
Looking at the workings of these machines, I can see how little has really changed in sewing machine design over the last hundred years. I understand more about modern machines by working on my treadle.
Many brands and models of old treadles are still out there, and it’s easier than ever to find out your machine’s age and features on the Internet (see Resources). An outside wipe-down with a damp cloth, a brushing out of old lint, and a thorough oiling may be all a treadle needs to get back in business.
The Belt & The Treadle Motion
The main difference between these machines and the ones you’re probably familiar with is the treadle itself. The power for the machine comes from the rhythm of your feet, which allows you to sew as slowly and precisely as possible, or to roll along at a faster speed. The treadle motion spins a large flywheel, which is connected by a leather belt to the smaller hand wheel, which turns the machine.
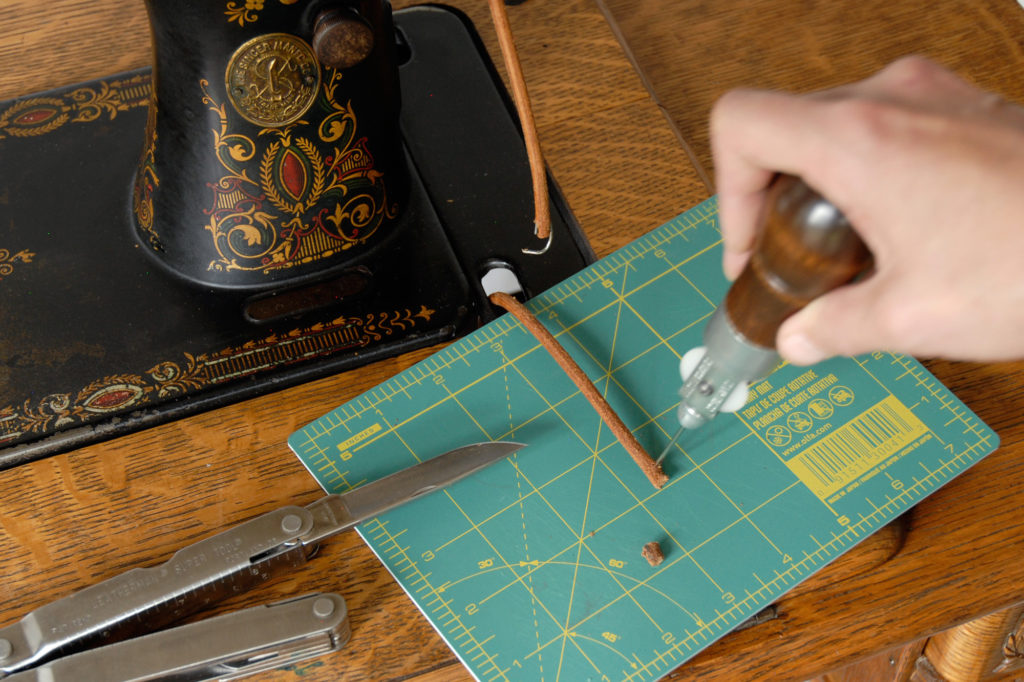
If your treadle machine has been sitting for a while, the belt may need tightening or replacing. It should be just tight enough to turn the hand wheel without slipping. The two ends of the belt fasten with a staple. To tighten the belt, use pliers to unbend one side of the staple, and slide one end of the belt off. Cut off just a little bit of the leather, and make a new hole for the staple about ¼” from the new end, using an awl or a thick leather needle. When you reattach the belt, make sure it goes through all guides near the large wheel, and follows a clear path through the cabinet to either side of the machine wheel.

To extend the life of the belt, release the tension on it whenever you’re done sewing for a while. Slip the belt off the large flywheel, using the lever near the wheel if there is one. When you get ready to sew again, just smooth the belt into the groove on the flywheel with your hand. Nevertheless, when the belt eventually gets stretched out and brittle, it’s time for a new one.
Once the belt is ready, it’s time to start treadling. Leave the machine unthreaded, and get a scrap of fabric to practice on. When I was a kid, my mom had me practice sewing on paper, so I could see the holes I made. You can do this too—just change the needle when you’re done, since the paper will dull it.
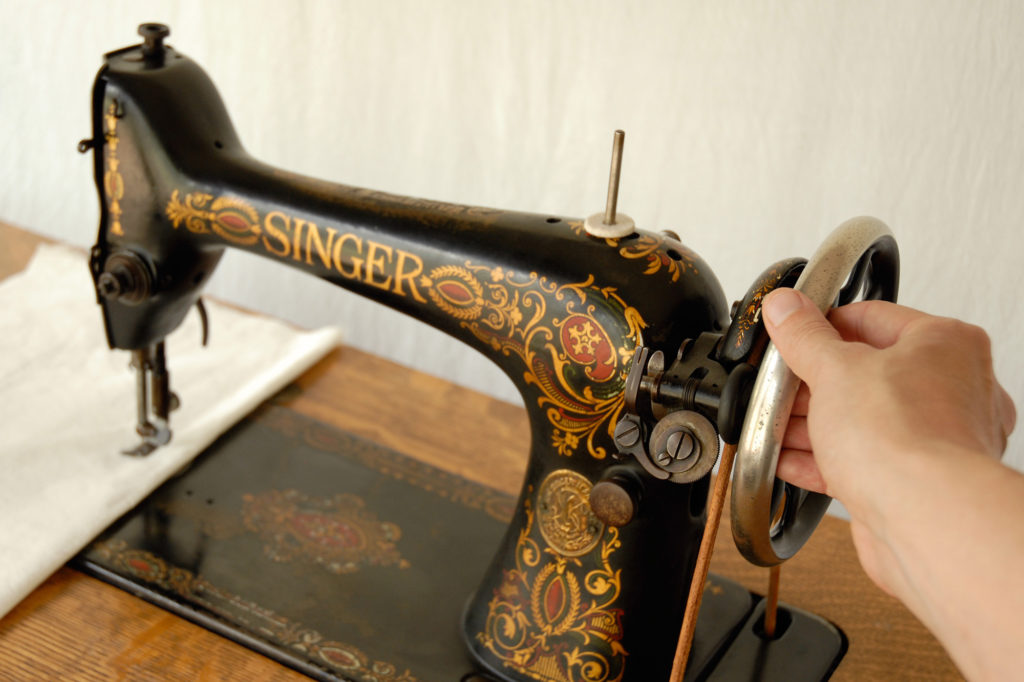
Put both feet flat on the treadle. Turn the hand wheel from the top toward you to start the machine moving, and then try to keep the wheel turning using just your feet on the treadle to rock it back and forth. It’s not a gas pedal, but more like being on a swing—you want to add energy at the right time to keep the momentum going.
If the wheel reverses, it’s probably because you’re getting ahead of the machine. (This is why you’re practicing without thread.) Wait until you feel the wheel come around, and get in rhythm with its motion.
Even when you get comfortable with the treadle, you’ll still turn the hand wheel to start each seam in motion. To stop with the needle in a certain position, use your feet on the treadle as a brake, and move the hand wheel to position the needle up or down.
Once you get the hang of treadling, try threading the machine and sewing some practice seams. The threading is usually very similar to modern machines.
Because the stitches looked so nice, I used to be wary of changing the settings on my mom’s treadle. Now I know that these machines have endured because they’re very robust, and not at all finicky. Go ahead and turn the dials to get the results you want for your project.
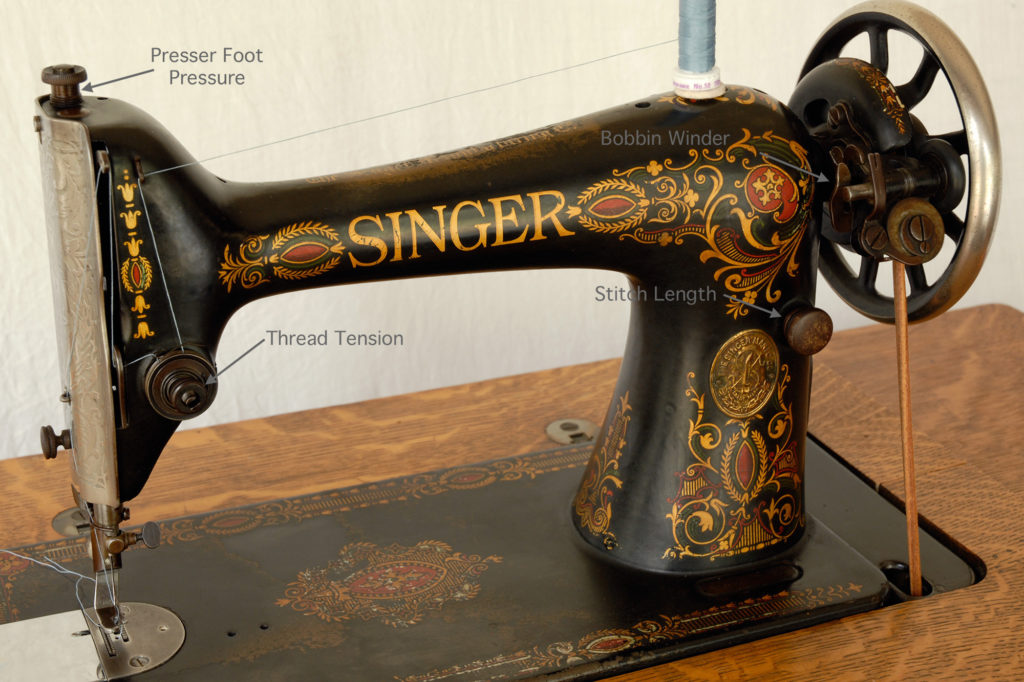
The controls on a treadle machine vary little from modern machines.
The Bobbin Winder
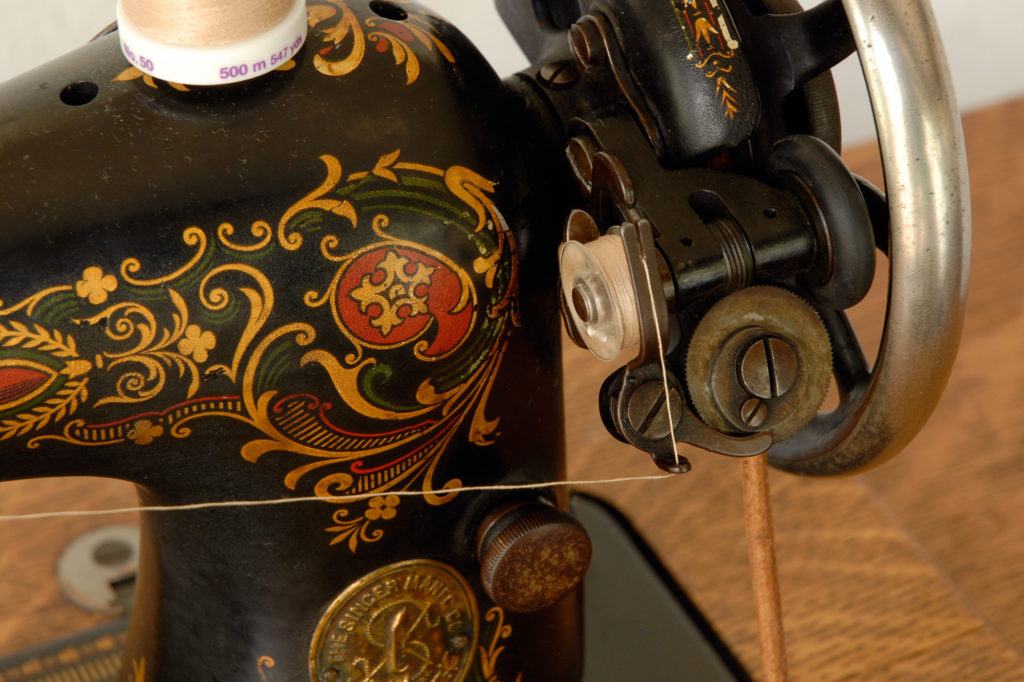
I love watching this vintage bobbin winder work—something I never thought I would say! If your treadle takes modern bobbins, you can wind them on a modern machine, which is a good option if the original bobbin winder is broken or missing. But even if you don’t need a machine-specific bobbin, you may find yourself enchanted by the mechanism of the old winder.
Just like on a modern machine, there’s a way for the bobbin winder to engage and disengage (contacting the wheel or the belt for power), and a mechanism to spin the bobbin and to move the thread back and forth. The difference here is that all the workings are out in the open, making them interesting to watch, and much easier for you to tinker with if necessary.
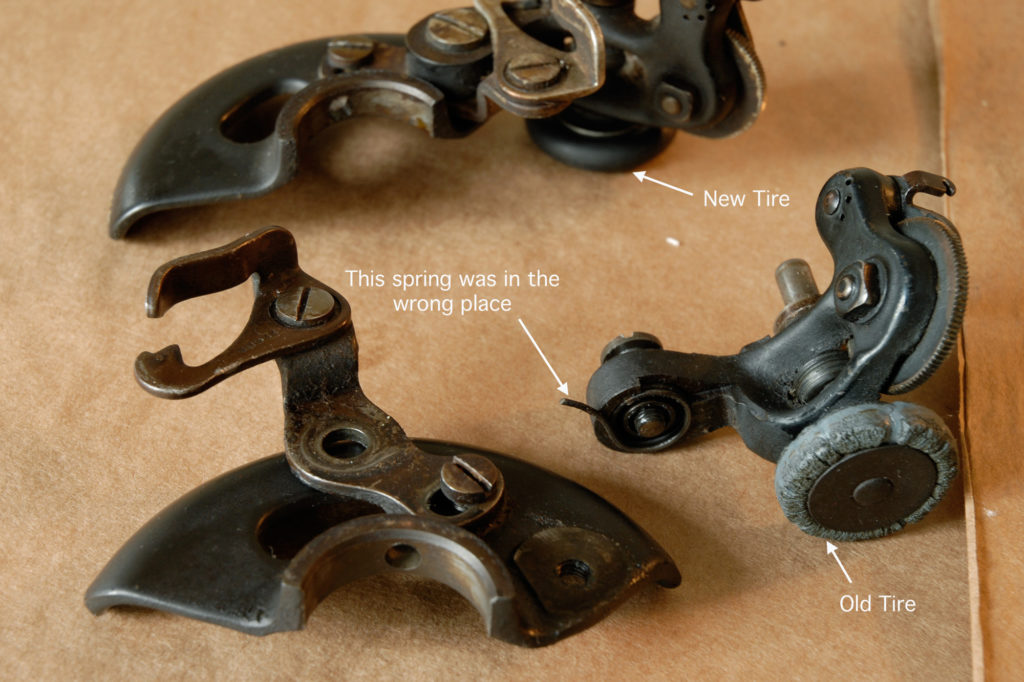
On many old Singers like mine, there’s a little rubber tire that contacts the hand wheel when you press the bobbin winder down, and a lever that holds it in place—until that gets pushed back by the full bobbin, and the winder disengages automatically! Those little tires get crackly and brittle with age, but they are easy to replace. Pry the old one off with your fingers, and pop a new one on.
Restoration
It would be great if every re-discovered treadle was in wonderful condition, but sometimes they’re far from it. This one, which I inherited from my husband’s family, had been in a garage in Florida, and before that, it was used as a plant stand (the sad fate of many). It ran if you turned the hand wheel but not very smoothly.
If you’re not into DIY restoration, or if your machine is in worse shape than you want to tackle, see if there’s a repair shop in your area that has a good reputation for working on old machines. They’ll be able to professionally clean and oil it, and probably make any repairs it may need as well.
I take a fairly minimalist approach to restoration. I enjoy doing it myself and figuring things out as I go. But unlike some of the blogs and sites I’ve found, I’m not concerned that every bit of exposed metal is polished to gleaming. If the machine is working as it is, I’m certainly not interested in taking it all apart and putting it back together! My goal is a machine that sews well, and if its age shows, that’s just part of the charm.
If your machine needs some work, it’s likely to get messy, and you’ll probably want to lift it completely out of the cabinet to another work surface. On mine, if you tilt the machine back, there are two screws underneath the hinges at the back of the bed. When loosened, you can lift the whole machine head straight up from pins in the hinges. Disconnect the belt first. Beware—it’s heavy!
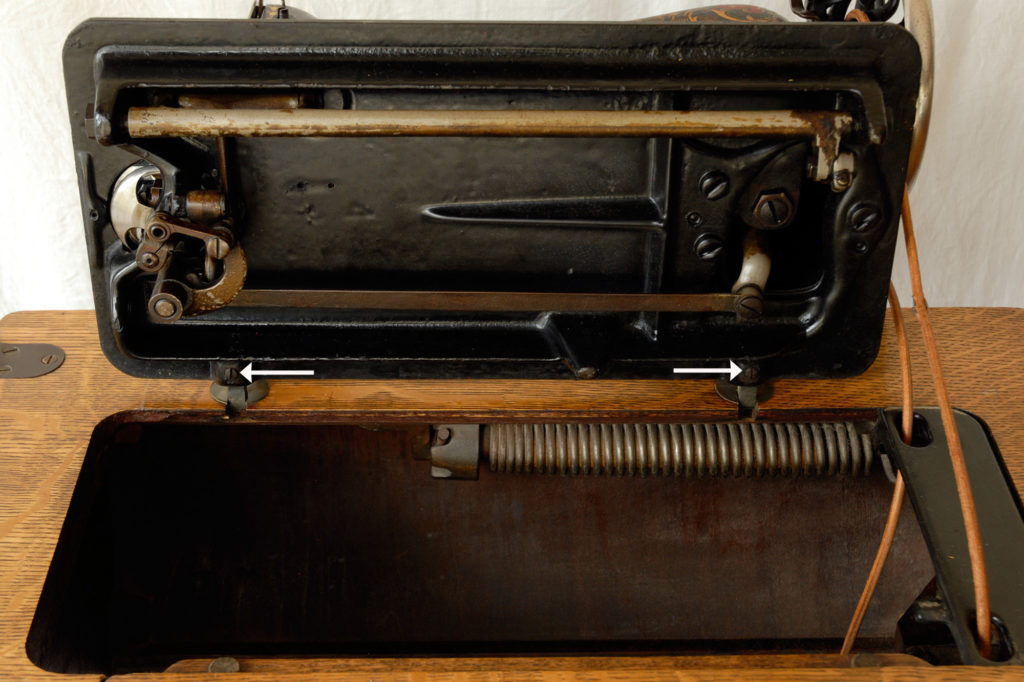
Loosen these screws to lift the machine out of the cabinet.
Start by oiling everything that moves. Always use good quality sewing machine oil. Although it takes a little more time and elbow grease, oil can dissolve residues left in the moving parts, and you may be able to avoid using harsher chemicals. Try letting the oil sit for a while on any joints that are sticking, then rubbing off all of the oil and gunk you can with a soft rag and/or an old toothbrush. Apply oil again and repeat the process. Turn the hand wheel to run the machine regularly, to encourage oil to work into all the joints. If there are some places that don’t work loose with oil alone, you can use a product like WD-40 or Liquid Wrench. Just be sure to wipe off the residue from the product, and re-oil the joint once it’s loose. Steel wool or fine sandpaper work well to remove any little burrs on metal parts like the foot.
This is the kind of project that can be frustrating if you tackle it all at once, but since the machine only benefits from being oiled and left alone for a while, you can work on it bit by bit, whenever you have a few minutes of time. After a while, mine started to loosen up and run much more freely, making a velvety clicking sound I remember from my mom’s treadle.
No matter your approach, you may need to disassemble some pieces of the machine to clean or repair them. Don’t be afraid to tinker, just be careful to document what you do, so you can get everything back in the right place. Your camera phone can be a good tool for this. Photos of a machine like yours in working order are incredibly helpful if you can find them. I figured out that the tension assembly and the bobbin winder on my machine both had parts in the wrong place by comparing my machine to my mom’s.
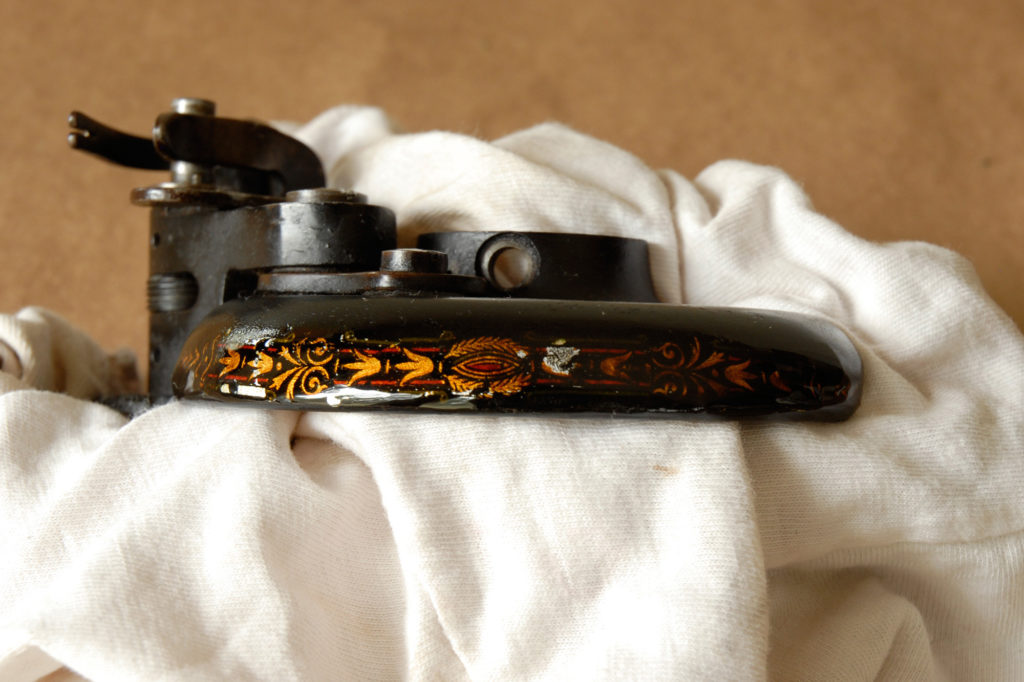
Once the machine is running well, it’s up to you how much time and energy you want to spend on its looks. I ended up using much the same method to clean the outside of my machine as I did the workings, rubbing the accumulated grime from the bed and the decorative decals with oil and a soft rag. Typically, decals are fragile, and it’s easy to accidentally strip off the gold color by using various chemicals, so I kept it simple. In my experience, no amount of rubbing with sewing machine oil will take off the decals, although scratching will.
Machine oil, rags, and patience can take care of many treadle issues.
To finish the outside of the machine, I gently removed the remaining oil with a rag dipped in warm water and mild dish detergent. Then I rinsed it with a plain, damp rag. After the machine was dry, I wiped furniture paste wax on the bed and over the rest of the decals, and buffed it off (follow the directions on the wax, and work in a well-ventilated space). Although the scratches and defects in the finish are more visible under the wax than they are when oily, the wax is a clean finish, and it provides a little bit of protection for the decals.
Whether you find a treadle machine disguised as a plant stand at your aunt’s house, or rescue one in need of a lot of love from a garage sale, it’s well worth the effort to get it working again. You’ll be rewarded with at least another hundred years of beautiful, slow sewing.
Resources
-
Selecting an Old Treadle Machine for Use is especially helpful if you’re looking to buy a treadle. -
Sew-Classic is a good source for new replacement parts, including belts, bobbin winder tires, and various screws and springs. Their search doesn’t always work to find what you want, so try looking through the categories or searching by part number. -
Singer has an online guide to finding your machine’s model number and free PDF manuals you can download for many models. If your machine is as old as mine, you can email Singer with the serial number, and they’ll tell you the model, year, and where it was made. Singer also has made this same service available for White machines. You can find White manuals on the Singer website by entering the letter W followed by the model number. You can also get help finding the history and model number of White machines through the Husqvarna Viking site. -
Treadle On has been around practically since the dawn of the Internet and contains lots of useful tidbits, many from the members’ personal experiences. - Lastly, if you have a treadle machine similar to mine and can’t figure something out, I’d be happy to help you if I can! You can always contact me through my blog

About the Author
Tasha Miller Griffith is a maker and teacher who loves figuring out how things work. She has more about treadle sewing and restoration on her blog,
Stale Bread into French Toast.