Sign In
There's a universal truth in sewing that will help you feel better about your skills. No matter the technique, there is more than one "right" way to do it. This gives you the ultimate power to pick the way that feels best to you, no matter how anyone else might feel.
We're going to prove this in a new series. We're thinking about calling it a "Sewdown." Get it? Kind of like a showdown? What do you think? (Comment with any other ideas you have.)


Anyway, in this sewing technique showdown, Sarai and Haley bring their preferred methods to the cutting table and go face-to-face to see whose method is better.
So whose approach will reign? That's up to you to decide! Vote in the comments on the YouTube video, or let us know below. And if you do this a totally different way, say it loud and proud! You might help someone find a better way to tackle this technique.
The first challenge is pressing and folding bias tape. Sarai will do this using only a pin and her ironing board. Haley will press and fold hers using a bias tape maker.
Let the sewdown begin!
Sarai's Method: Press and Fold Bias Tape with a Pin
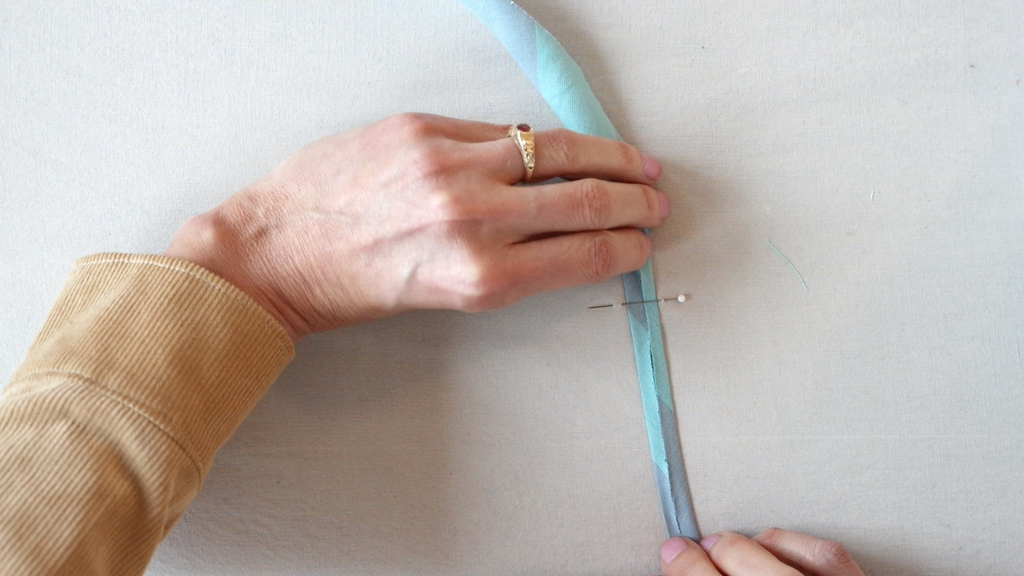
Grab a glass head pin (it won’t melt under your iron) and your ironing board.
Fold each long raw edge of your bias strip to meet in the center and press. You only need to fold and press the first inch or so of the strip.
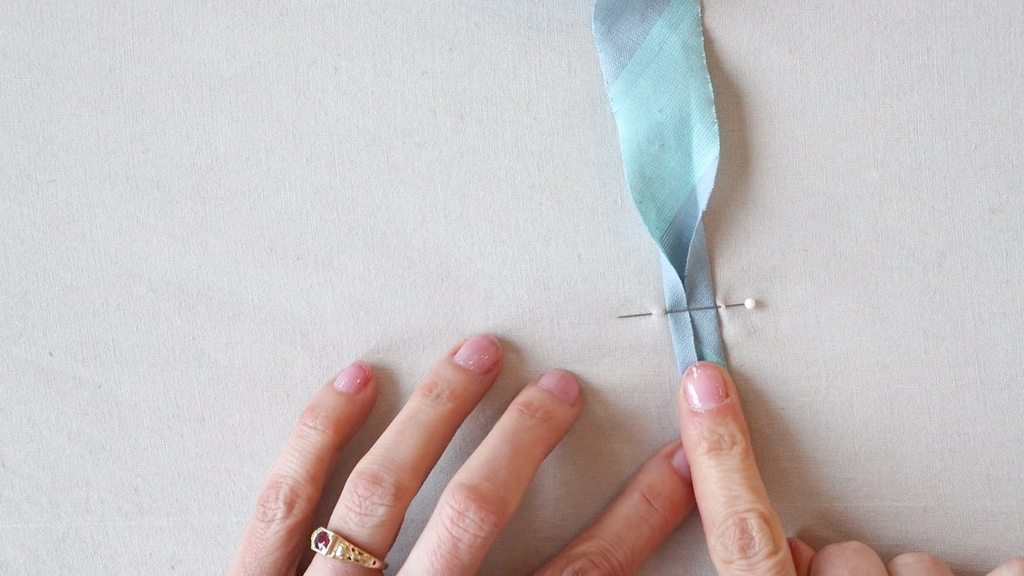
Then take a pin and place it through the ironing board's cover, over the top of your folded bias tape, and back through the cover of your ironing board.
From there, all you need to do is pull your bias tape under the pin and press it as it emerges folded from the other side.
Pros: All you need is a glass head pin! You don’t need to buy several different-sized bias tape makers. If you’re a minimalist, this is the choice for you.
Cons: Getting your bias tape to measure exactly the right width can be hard since you are manually creating the fold.
Haley's Method: Press and Fold with a Bias Tape Maker
Grab a bias tape maker that is the width you need for your project.
Feed your bias tape through the wider end of your bias tape maker. The trickiest part of this whole process is getting started. You can use a pin to grab the end of the bias and pull it through.
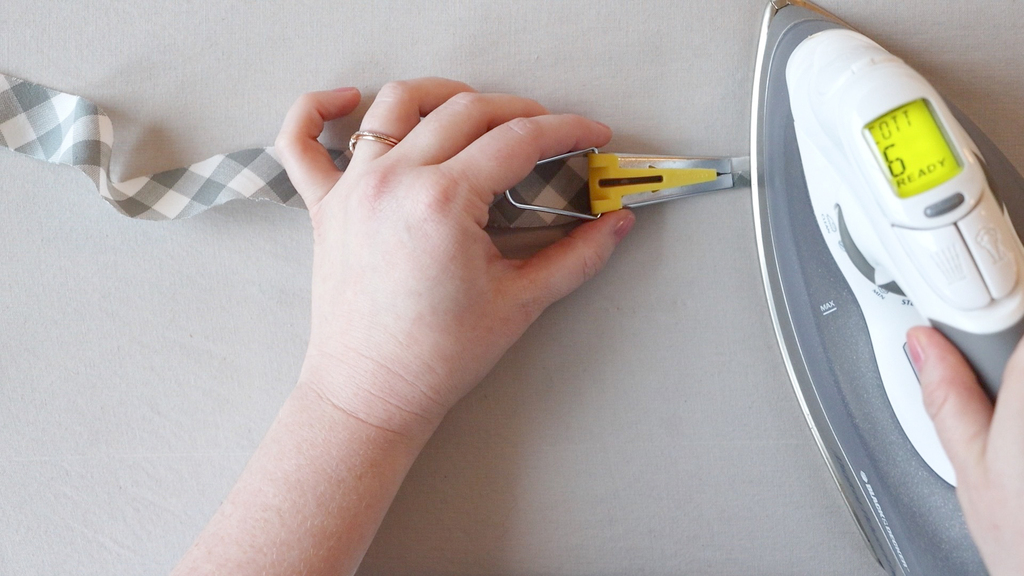
Once the tape emerges from the narrow end of the maker, press it with your iron. Then, continue to drag your bias tape maker along the strip, pressing as you go.
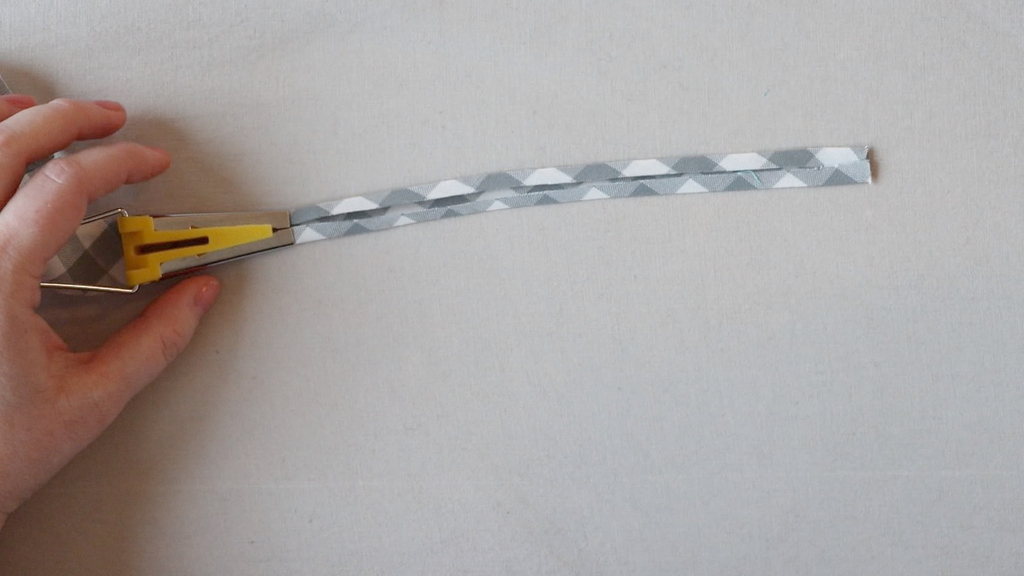
Pros: You’ll get exactly the right width for your bias tape.
Cons: You have to buy a specialty tool, and each maker only creates one width of bias. So you might need to buy several.
So which way do you like to press and fold bias tape? Comment and vote!
Related Links
-
How to Sew a Bias Tape Facing: Learn to finish edges with single fold bias tape. -
Learning Curves: A Guide to Bias Binding, by Brooks Ann Camper. -
The Easton Jacket: Practice finishing edges with bias tape with this pattern.
Love the article? Pin it for later.