Sign In
If there’s one thing that sewing has taught me, it’s that my body is worth the effort and time it takes to construct a well-made garment. There is a time and place for quick-and-dirty makes—maybe you want to jump on a trend before it fizzles out, maybe you’re trying out a new silhouette or constructing a wearable muslin. But what good is the knowledge and skills you’ve acquired through those smaller projects if you don’t apply it to something truly exceptional once in a while?
Enter heirloom sewing. You deserve to inherit heirlooms, and it’s completely acceptable to inherit them from yourself. As the seasons change, I feel a little thrill when I finally get to wear that particular dress or those particular pants—pieces I constructed slowly and deliberately, with long-lasting textiles and techniques.
These garments wrap me in my own history. They are landmarks on the path of my life, reminding me of my own growth. An heirloom, by definition, is something valuable that has been passed down through generations, but what if you are the first generation? Create your own heirlooms as a gift to the future you—and as a reminder of your power. Imbue them with value through your thought and care. Pass these objects down to yourself, season after season, year after year, a whispered reminder of your inherent worth.
Create your own heirlooms as a gift to the future you—and as a reminder of your power.
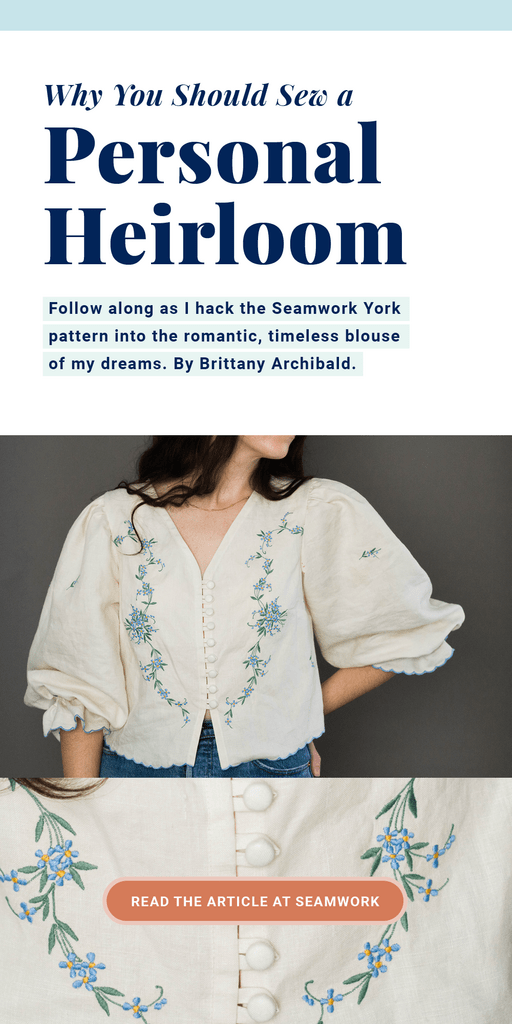
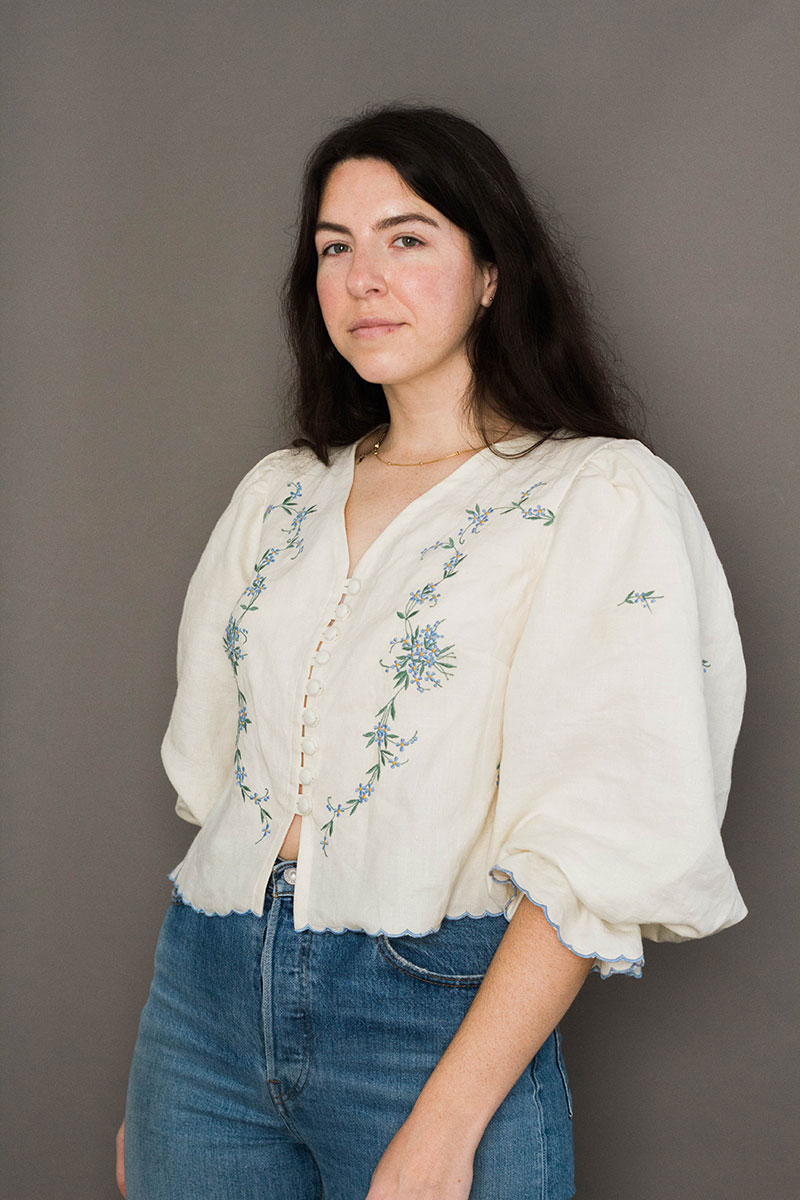
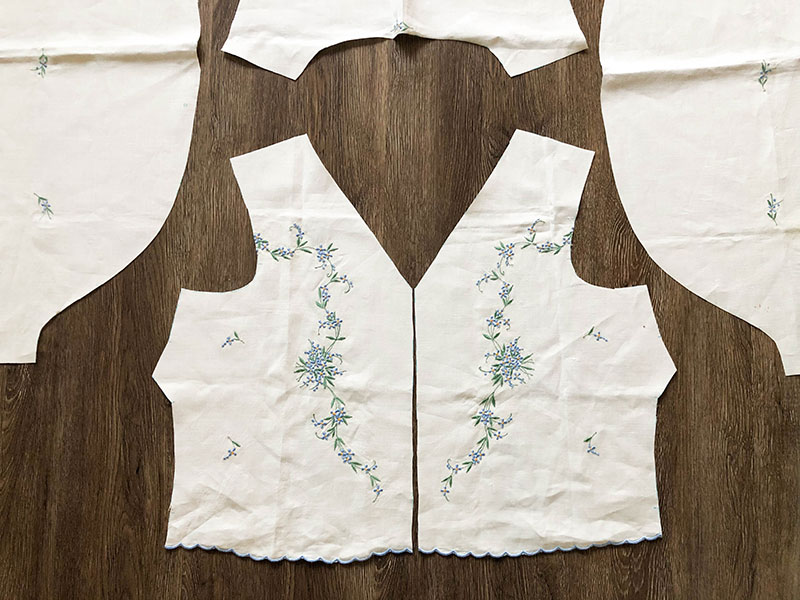
For my personal heirloom top, I was inspired by a vintage linen tablecloth I’d thrifted over a year ago and had been saving for the perfect project. I wanted something romantic, with dramatic full sleeves and neat, long-lasting finishes. Follow along with me as I hack the Seamwork York pattern into the romantic, timeless blouse of my dreams.
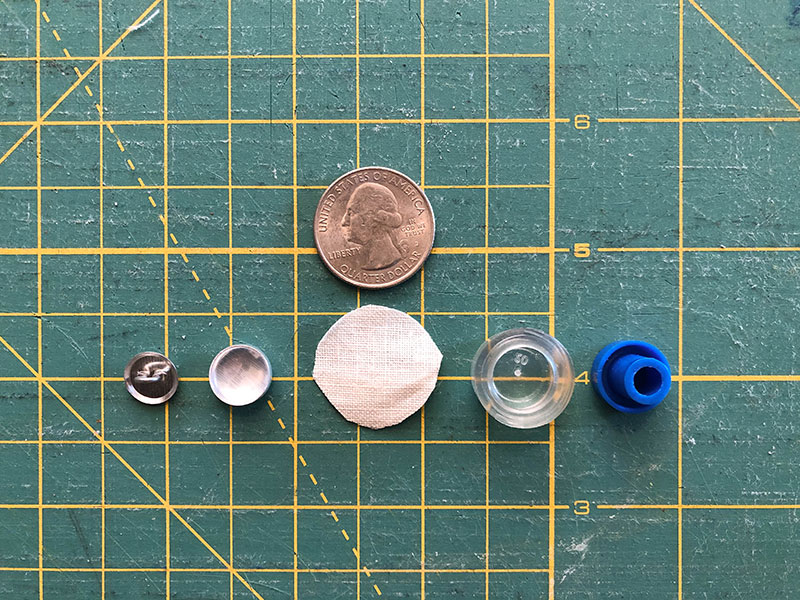
You'll Need:
You'll Learn:
Step 01: Prepare Your Pattern Pieces
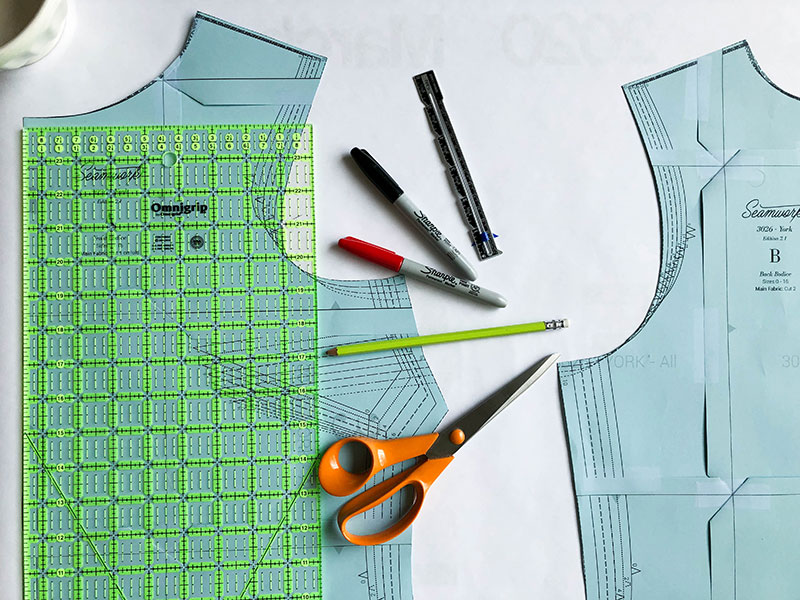
For this top, you’ll need a simple woven blouse pattern with set-in sleeves (I chose the Seamwork York pattern). Prepare your pattern pieces and trace them onto your pattern paper, transferring all markings.
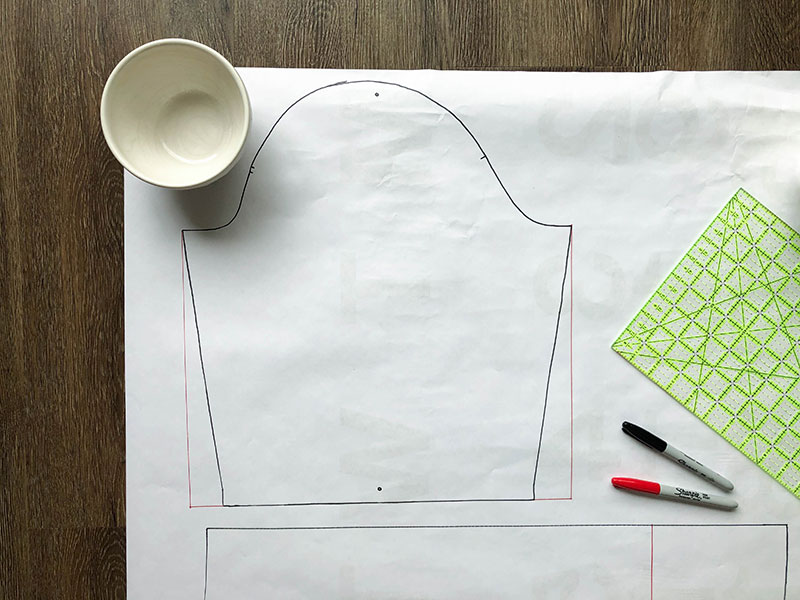
Bodice
For the blouse front, determine your new neckline by comparing the pattern piece to a garment you already own. Mark the low point of the neckline. Using a ruler, connect the shoulder to your marked point. Add your seam allowance (I used a 1/4 inch on the neckline).
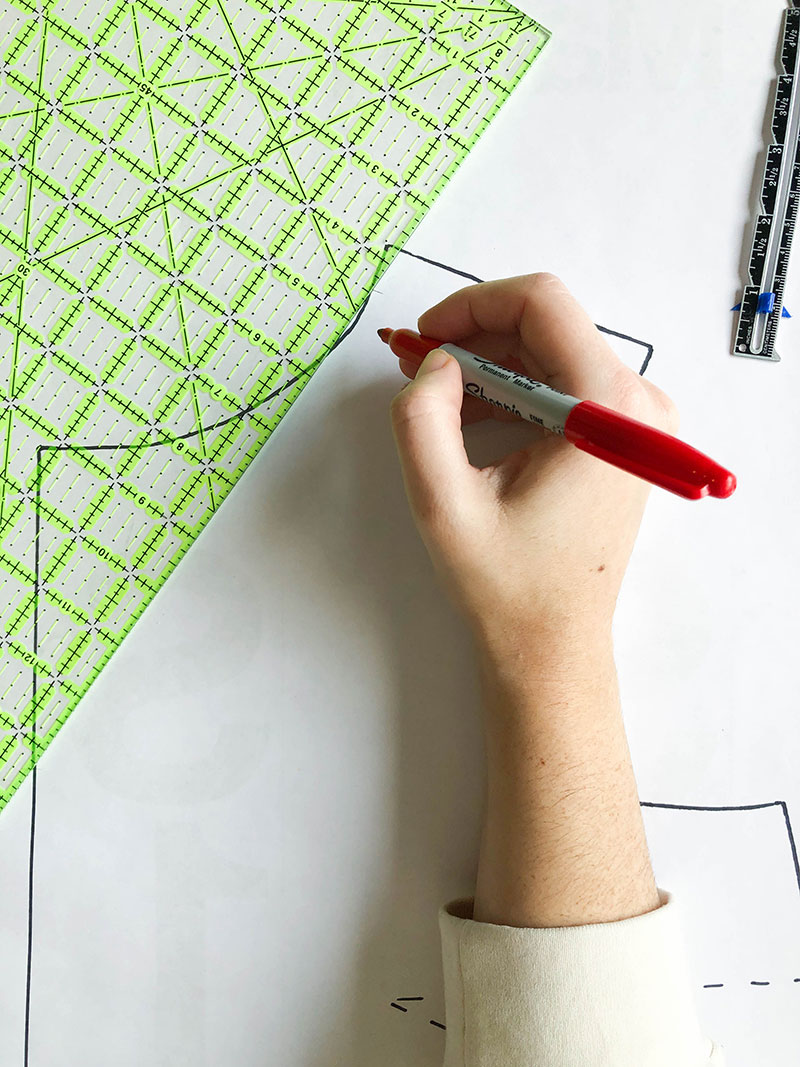
Crop the pattern pieces to your desired length. I chose to crop 6 inches off the bodice front and back. I also chose to omit the back tie on the York.
Sleeves
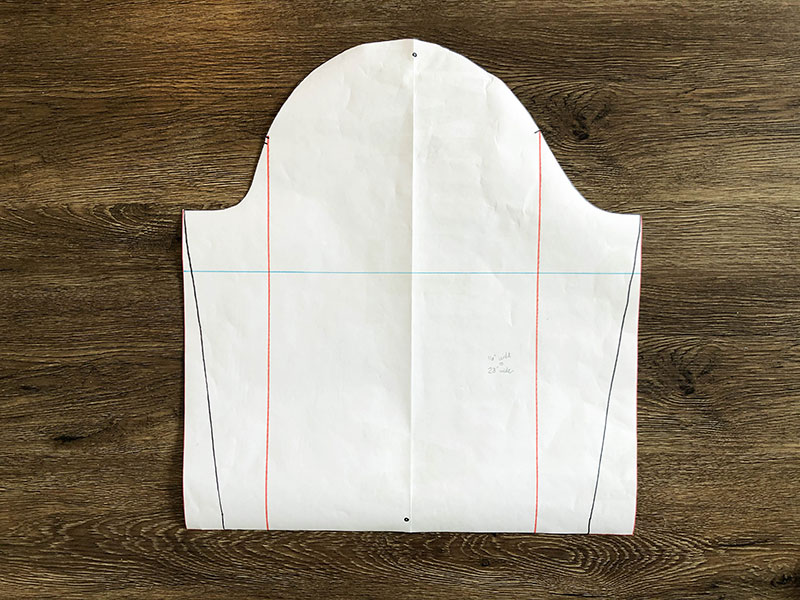
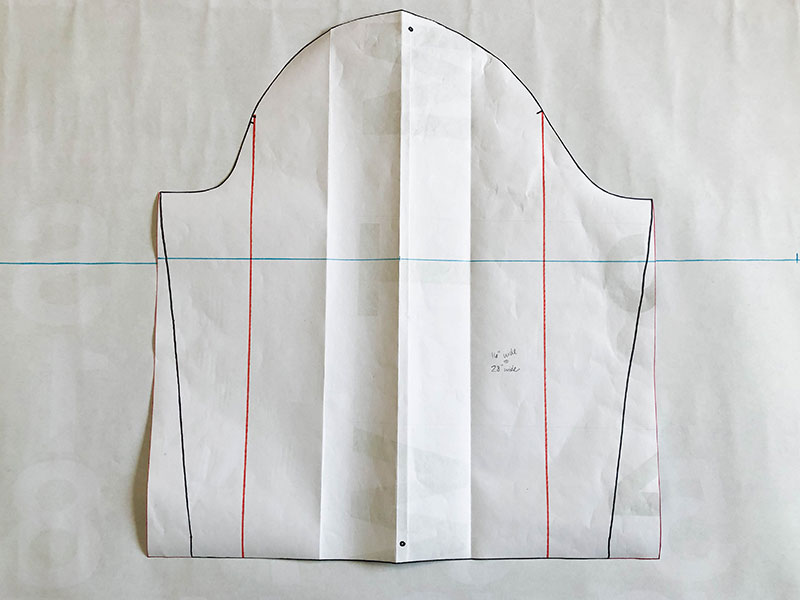
To create this top’s full sleeves, we need to lengthen and slash and spread the pattern piece. Begin by tracing the original sleeve pattern, transferring all markings. Straighten the sleeve length.
Cut out your pattern pieces.

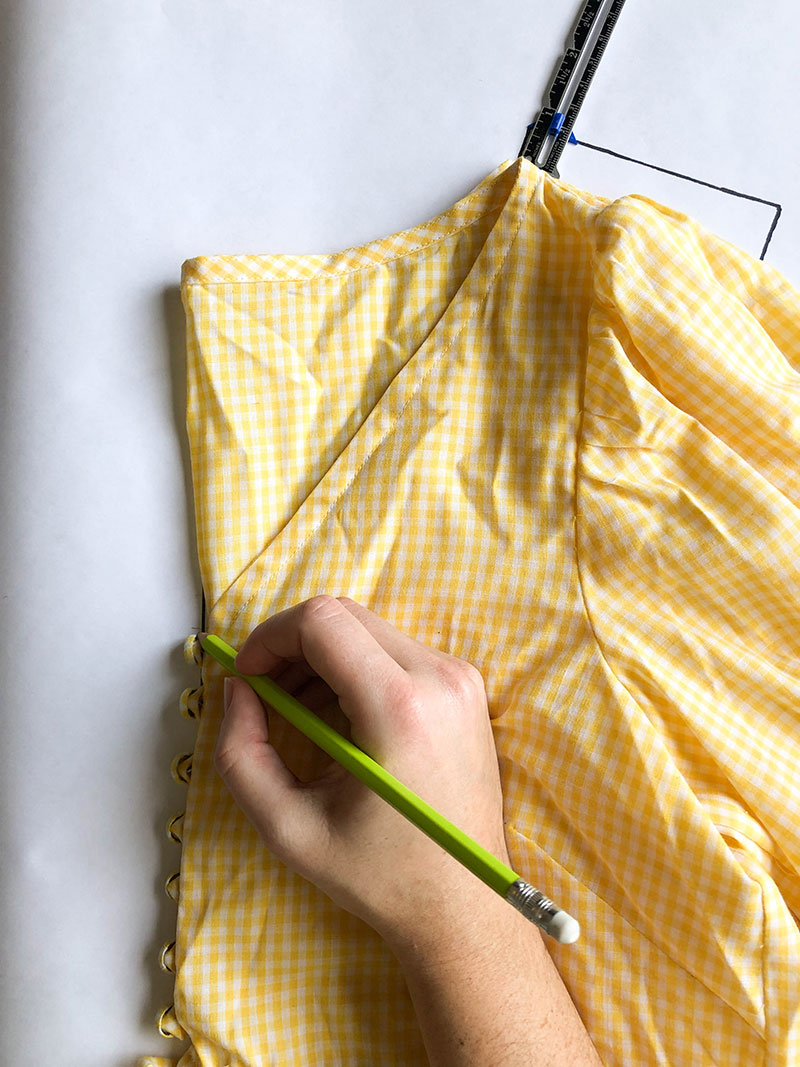
If you have limited yardage, you may want to place your pattern pieces on your fabric to gauge how big you can make your sleeves. My original sleeve piece is 16 inches wide, and I decided to spread it to 28 inches wide.
Begin by drawing a straight line from the sleeve markings to the sleeve hem. We will not spread the area outside these markings because we don’t want gathering at the underarm. Draw a line across the width of the sleeve at any level, parallel to the sleeve hem. Draw a line on another sheet of pattern paper delineating the width of the new sleeve (28 inches in my case). This will act as a guide when we spread our pattern piece.
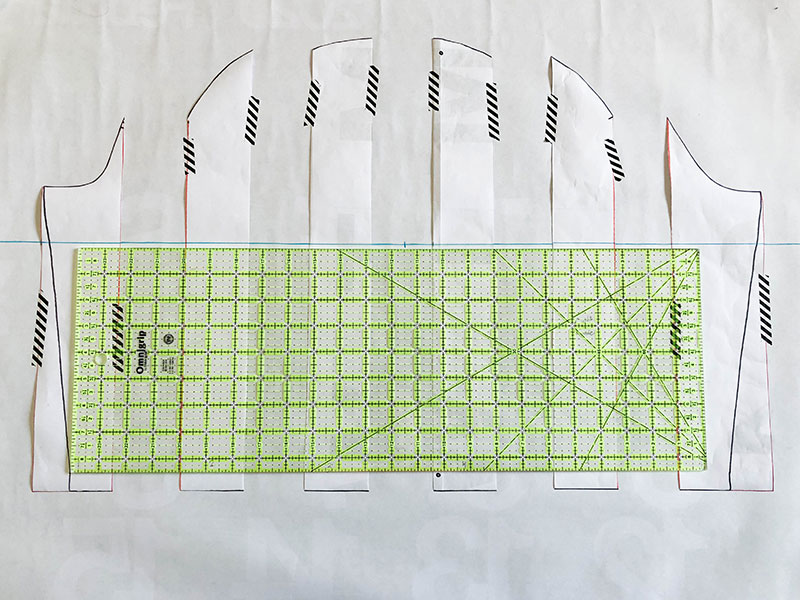
Divide the area between the red lines into four equal strips by folding the pattern piece in half, so the red lines meet, and then in half again. Crease and unfold.
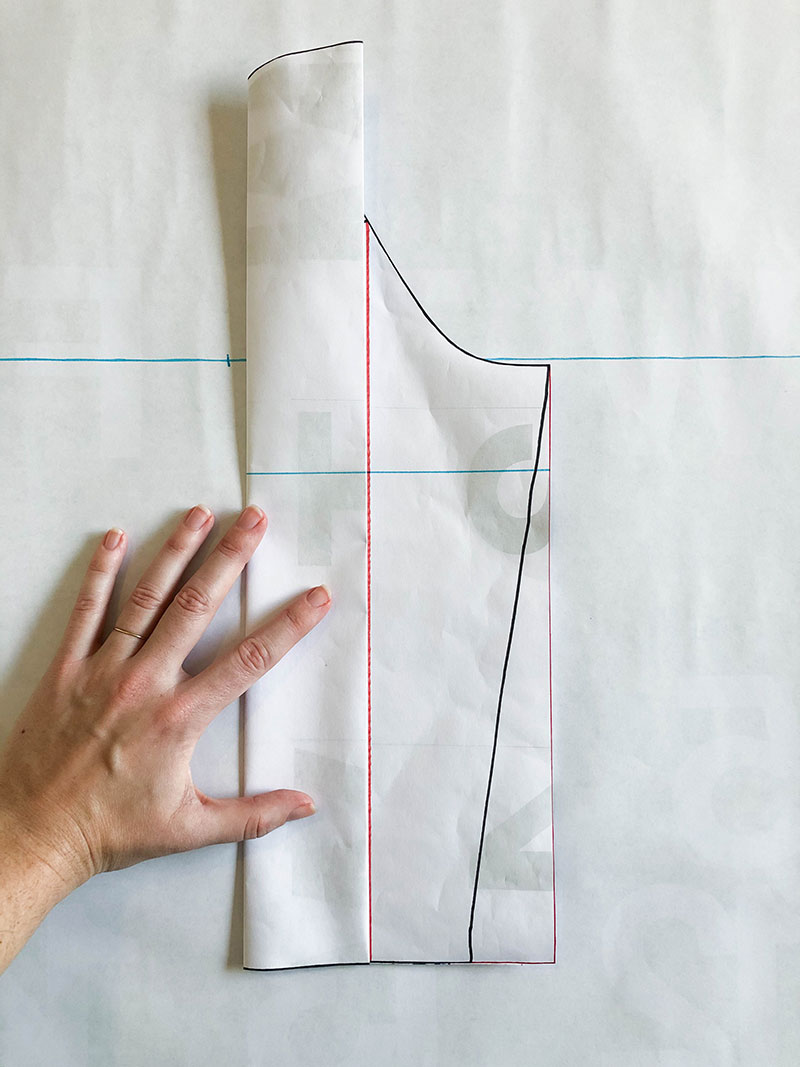
Cut along red lines and folds, creating six strips. Spread them along the guideline, equidistant from one another. Tape down.
Draw a new sleeve shape, taking care not to alter the curve of the underarm crook. The new cap shape will naturally fall above the original pattern pieces. To preserve the sleeve shape, I marked 1 1/2 inches above each cap strip's midpoint and connected the curve. Transfer all markings.
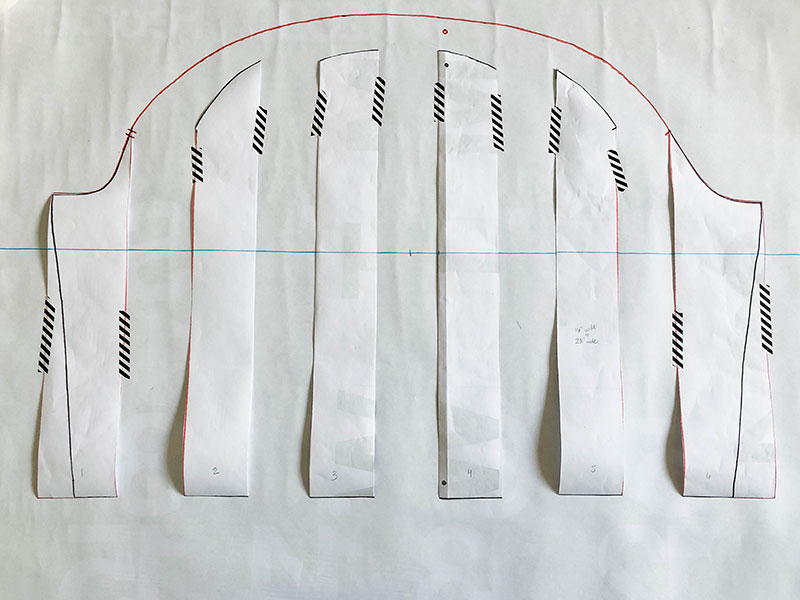
Add any desired length to the sleeve. For a gathered ruffled cuff, we will need to add additional length. Determine how big you’d like your ruffle to be, and what size elastic you’ll be using.
For a 2 inch ruffle and 3/8 inch elastic, we’ll need to add 4 inches for the ruffle, 5/8 inches for the elastic casing, and 1/2 inch seam allowance for a total of 5 1/8 inches.
Cut out your pattern pieces, arrange on fabric, and cut out, transferring all markings.
Step 2: Preparing Finishes
Bias Tape
Measure the neckline from the right front hem, up around the neck, to the left front neck. Cut bias tape at 1 1/4 inches times the neckline length.
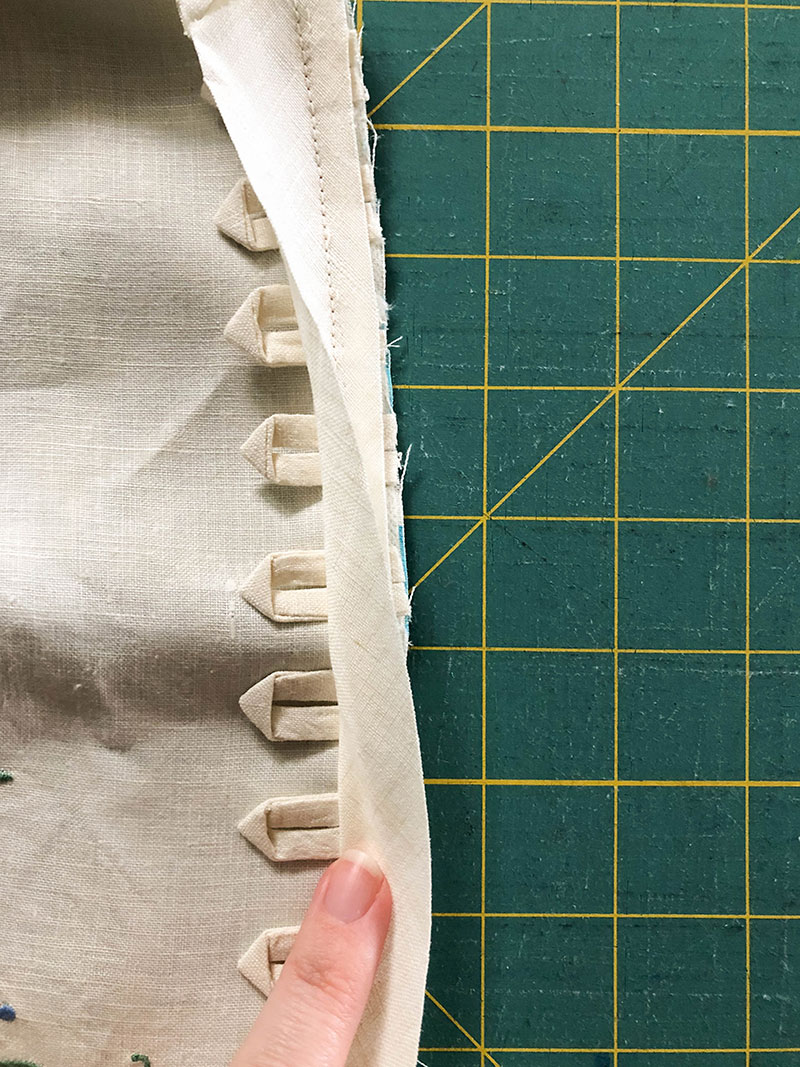
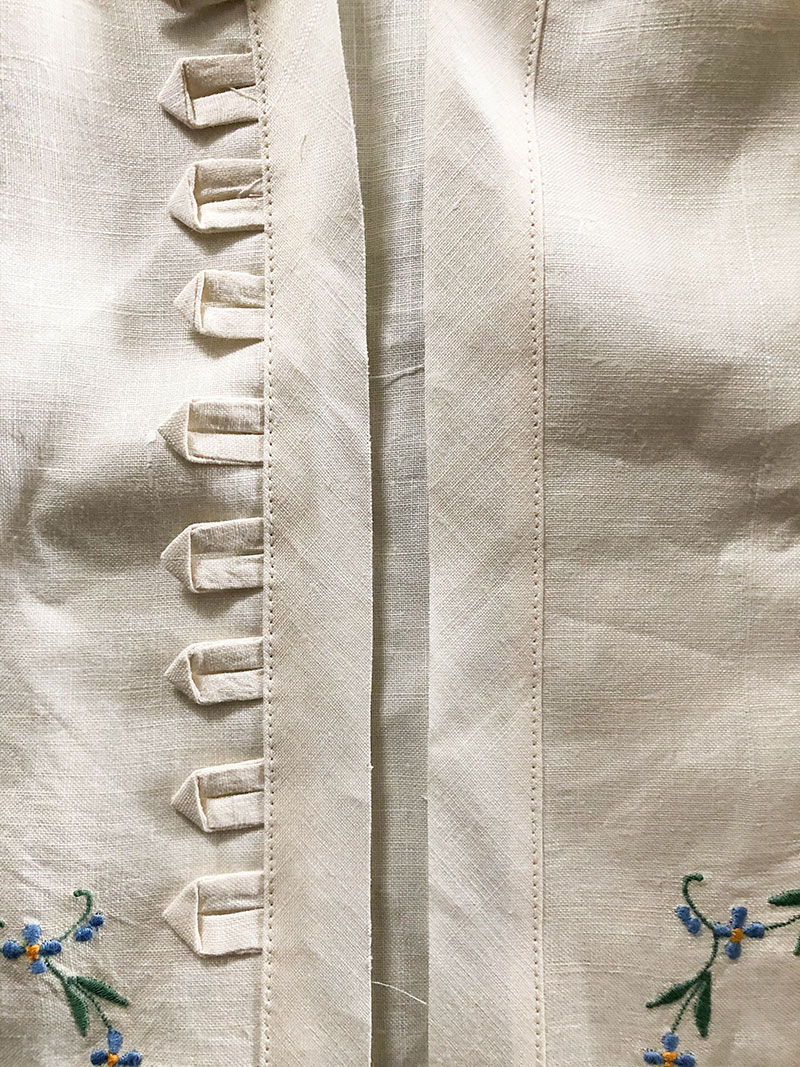
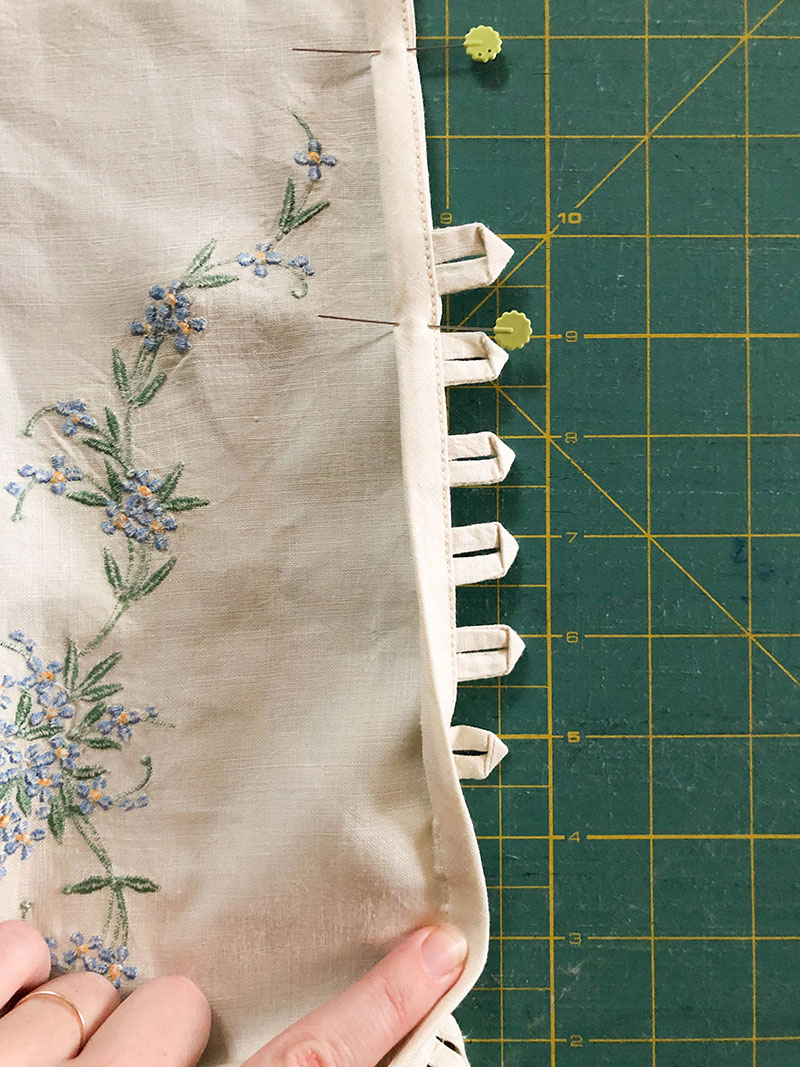
Button Loops
Create button loops out of a narrow (1 inch) rectangle stitched into a tube. Button size will impact how much length is required for each loop, but I’ve found I need about 2 1/2 inches of length per size 20 (1/2 inch) button. Determine how many buttons your top will have. I chose to have nine buttons spaced 1 inch apart, so I cut a 1 inch by 22 1/2 inches rectangle (plus a little extra). Note: turning narrow tubes can be very difficult, so you can choose to divide the length and turn two shorter tubes.
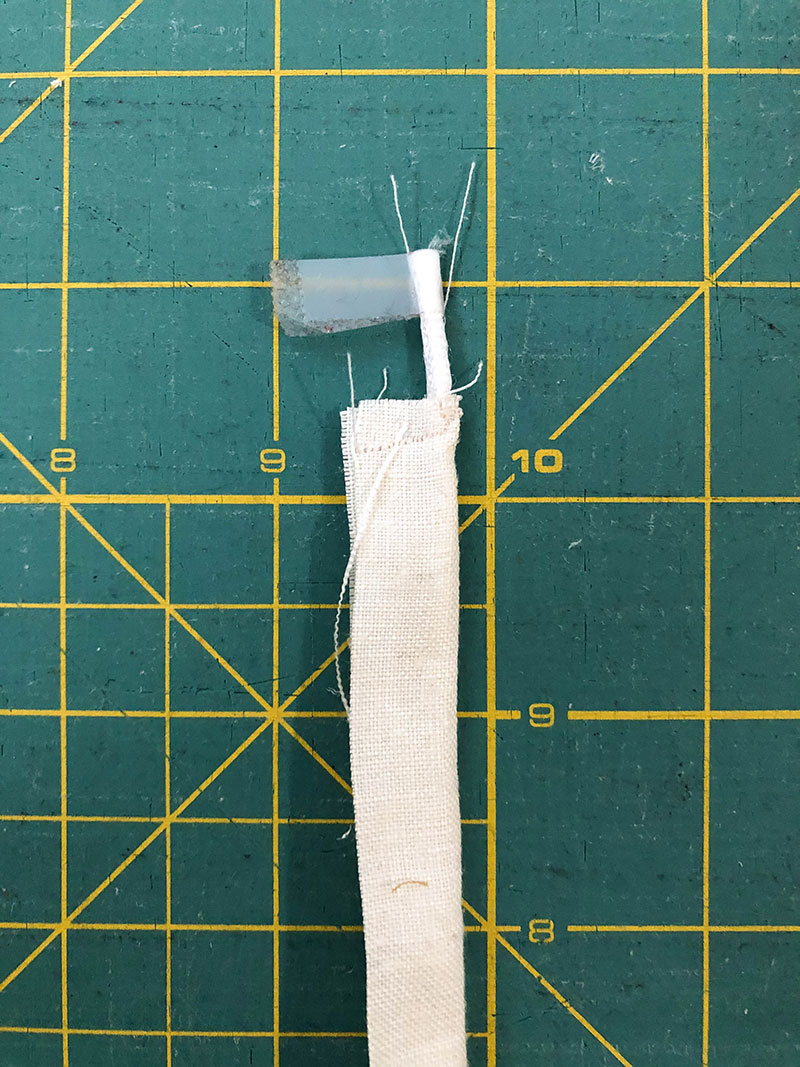
To turn tubes using nylon cording, fold the 1 inch rectangle in half with nylon cording inside against fold, allowing 1 inch to extend out the top of the tube. Using a narrow stitch, sew back and forth across the top of the tube, securing the cord to the fabric.
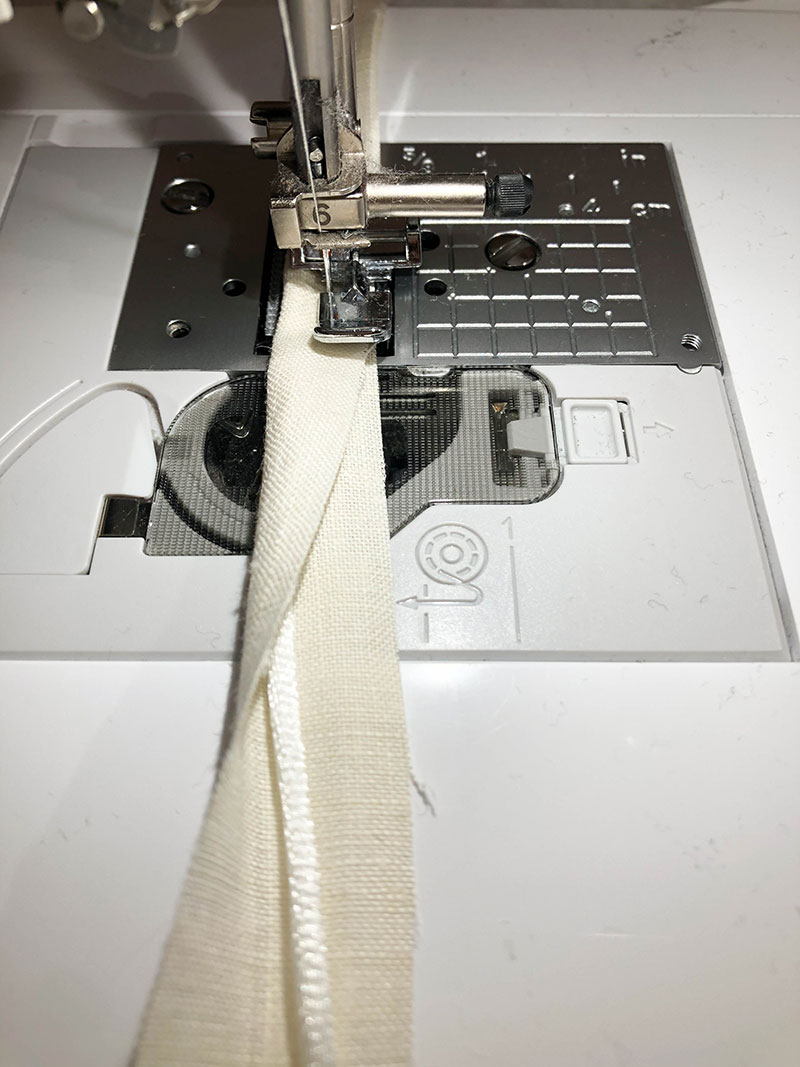
Using a zipper foot, sew down the length of the tube at 1/4 inch seam allowance, taking care not to stitch through the cording.
Trim seam allowance to 1/8 inch. Starting at the top, gently begin to work your fabric up and over the cord, pulling on the tail and of the cord as you go to turn right side out. This can be frustrating, so take your time and go slowly.
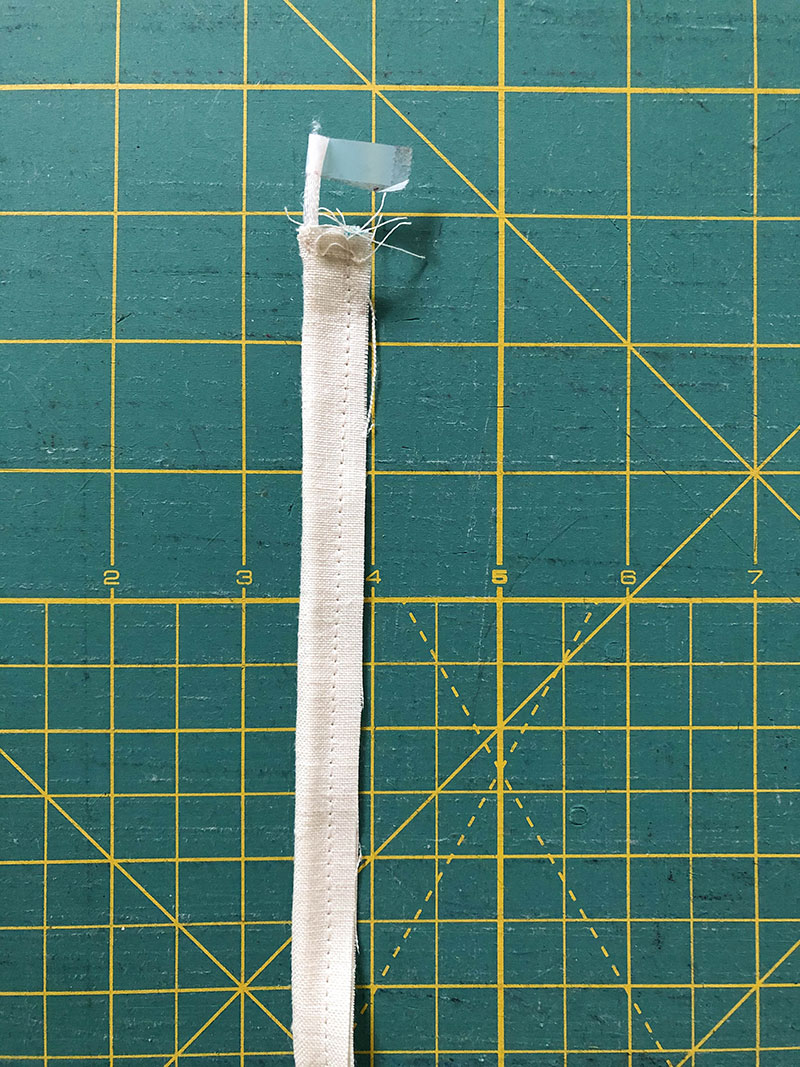
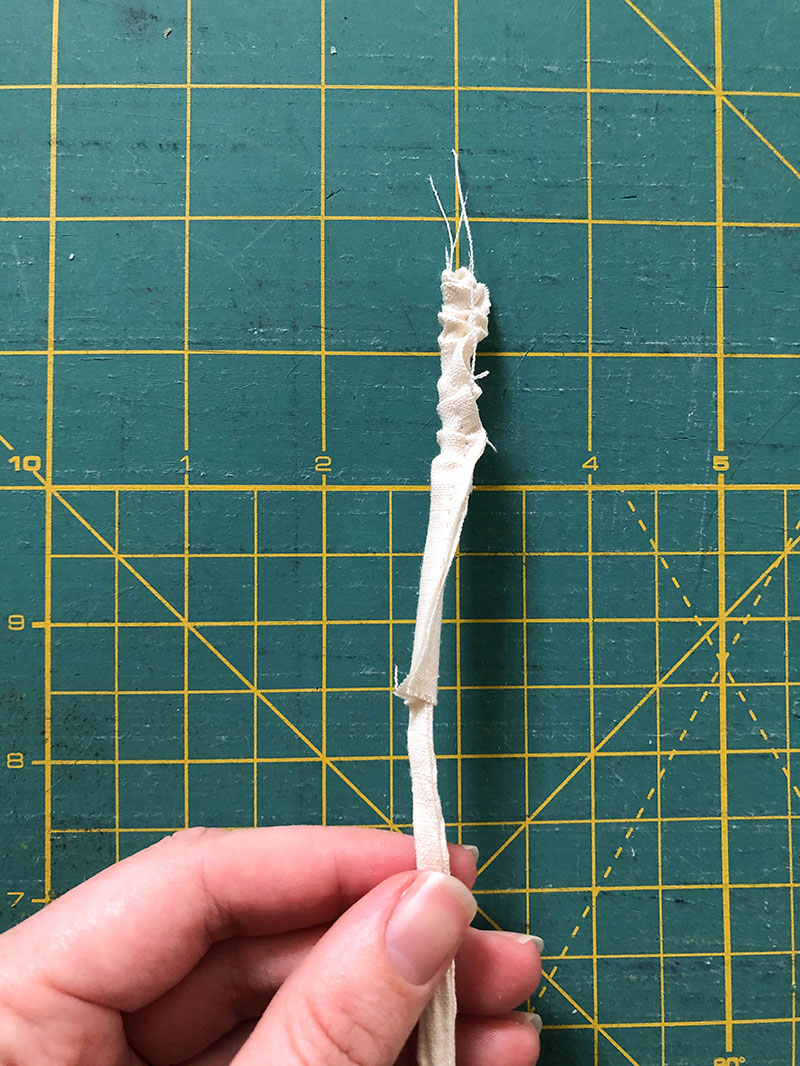
Press the tube, so the seam is on one side. Cut into 2 1/2 inch lengths and press into button loops. Place along the bodice opening at your desired spacing. Using pins, glue, or double-sided basting tape, adhere in place. Stay stitch at a scant 1/4 inch.

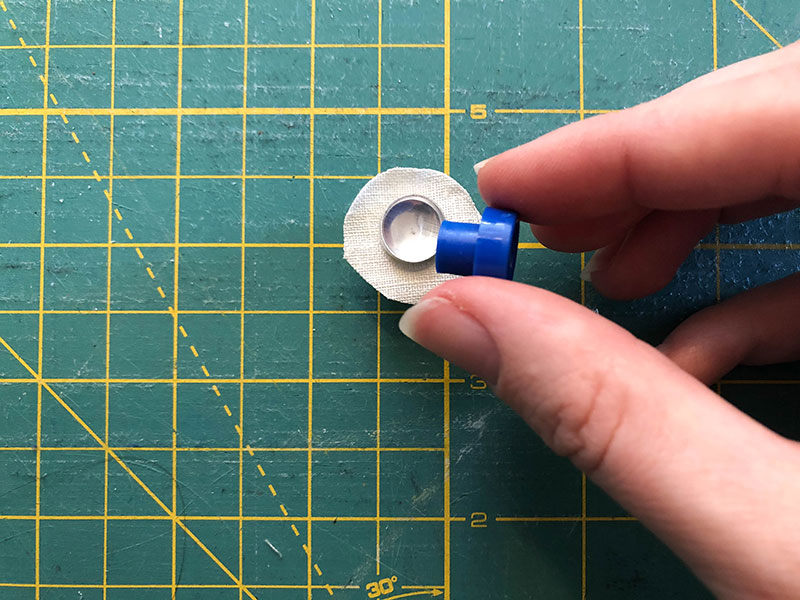
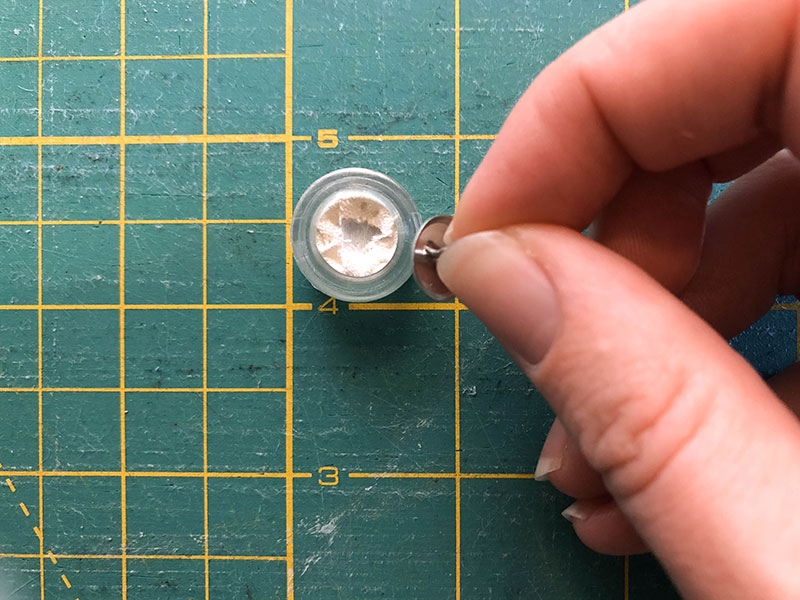
Covered Buttons
A covered button kit is the easiest way to make beautiful covered buttons. I found mine on Etsy for about $10. Cut a circle of fabric for each button (I used a quarter as a guide). Place the fabric on the base under the button front. Use the pusher to push the button and fabric into the base. Collect your excess fabric into the button. Place the button back on top and use the pusher for popping it into place.

Step 3: Constructing the Garment
Sew the shoulder seams together, finishing as desired. Apply bias tape to the right side of the neckline with 1/4 inch seam allowance.
Finger-press open and topstitch bias tape to the seam allowance.
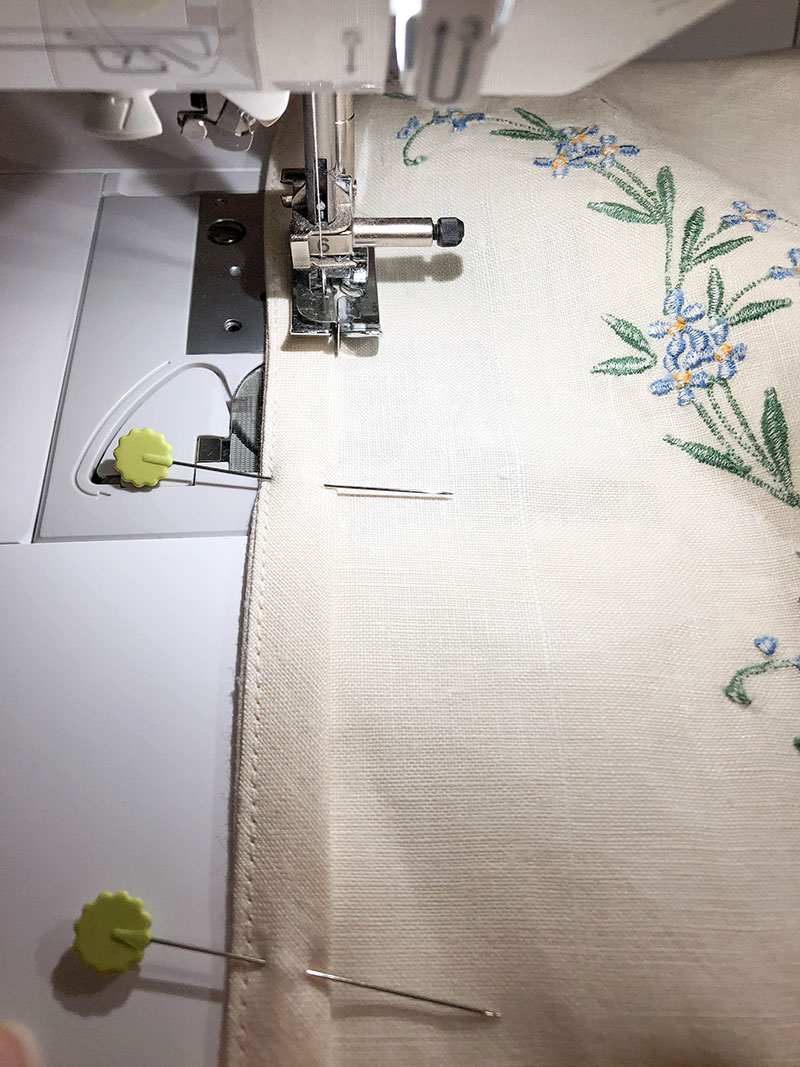
Turn inside out. Fold and press bias tape edge to the seam allowance. Fold bias tape under and press, encasing edges of button loops. Pin.
Stitch the bias tape down.
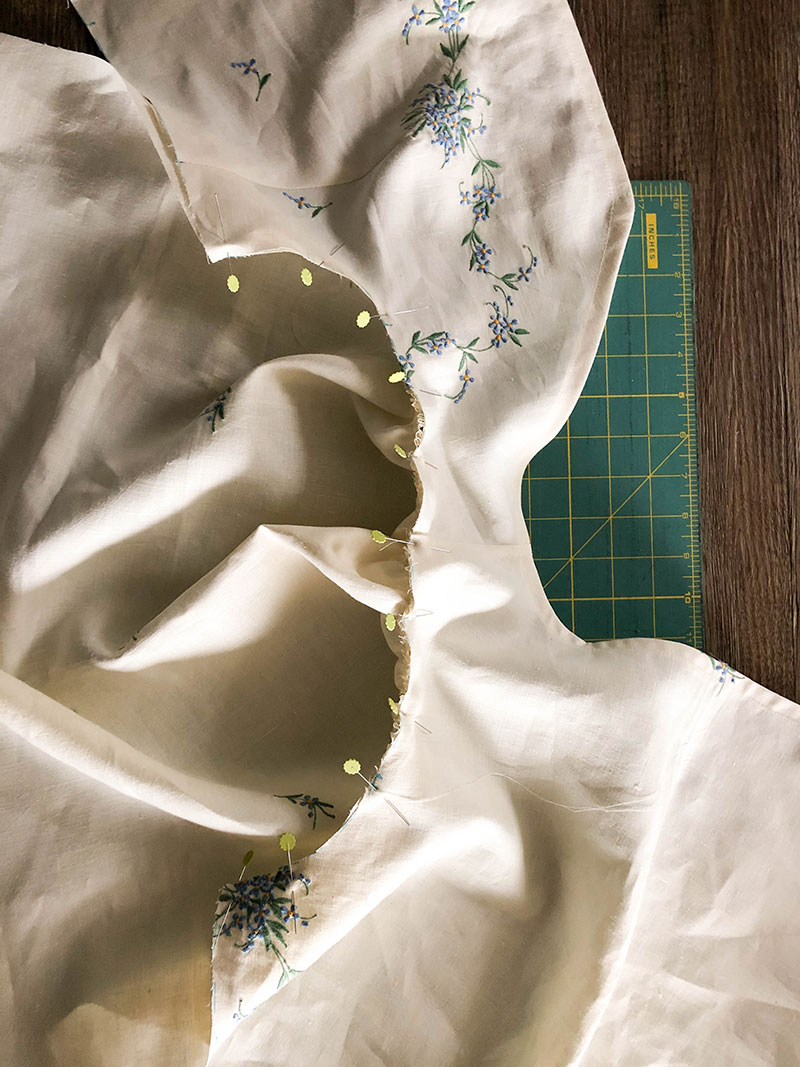
Gather sleeve caps between markings to fit to armscye, and sew to the bodice with your preferred finish. If you’d like to do a French seam, sew wrong side to wrong side with a scant 1/4 inch seam allowance. Press the seam allowance toward the sleeve. Turn the garment to the wrong side and press the bodice toward the sleeve. Sew at 3/8 inch seam allowance. Press seam allowance toward the shoulder.
Sew the side seams from armpit to bodice hem, then armpit to sleeve hem, finish the seams, and hem the bodice in your desired method.
Step 4: Making the Ruffle Cuff
You're almost done! The next step is to create the ruffle cuff. I used the scalloped edge of the tablecloth for the hem on my sleeves, so your cuff might look different than mine. Use your preferred hemming method for your sleeves.
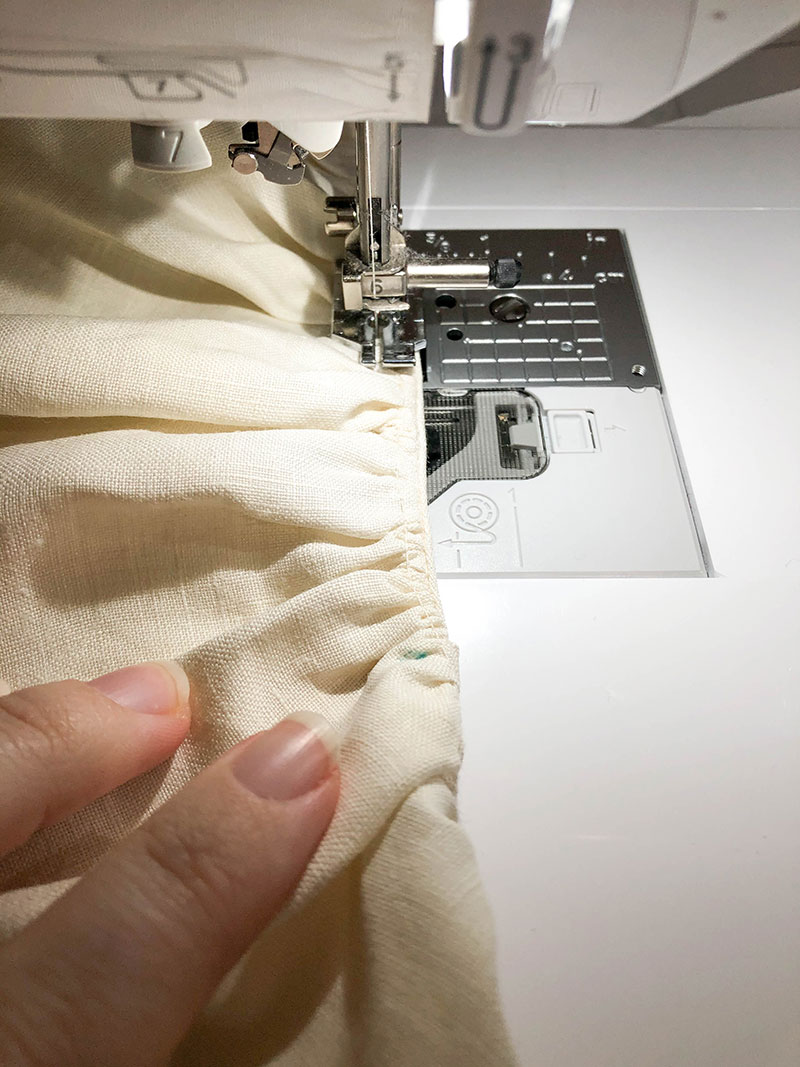
Turn garment inside out. For a 2 inch ruffle and 3/8 inch elastic, fold up 1/2 inch from sleeve hem and press. Fold up another 2 5/8 inches and press. Understitch very close to the folded edge, leaving a 2 inch gap for elastic. Understitch 5/8 inch from the first stitch line all the way around the sleeve circumference, creating a 5/8 inch casing. Measure your elastic around your arm. Cut to length and thread through casing, stitching ends together. Stitch casing closed.
Mark your button placement and attach your buttons.
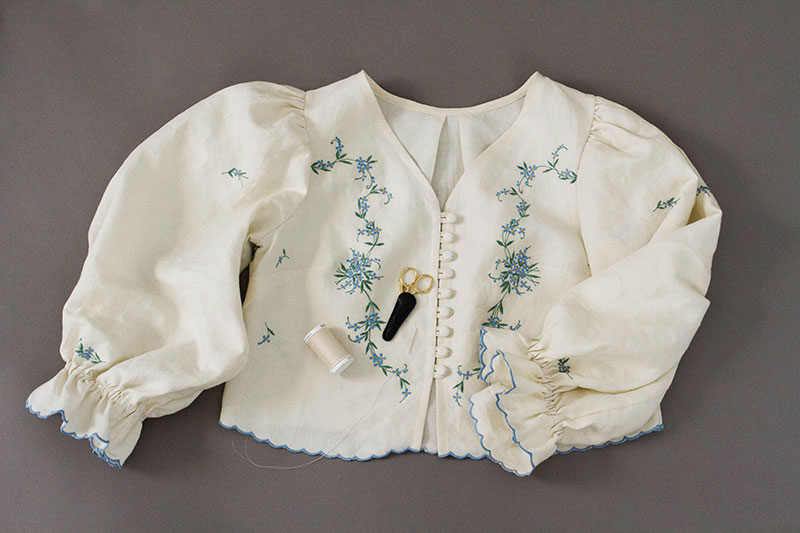
Give your new garment a good press and enjoy for years to come. Let this piece be a marker of self-love and a reminder of your hard-earned skills.

Brittany Archibald
Contributing Writer
Brittany is an artist and quilter living in Washington State. She has a BFA in Studio Arts and thinks of her garment making as an extension of her creative practice. You can find her on Instagram @brttnlsn.
Related Articles
A Living Garment: When Quilts Become Clothes
I started to make a coat out of a vintage quilt, but I couldn’t bring myself to make the first cut. By Brittany Archibald.
How to Get the Most Out of Your Muslin Toile
Taking time to sew a toile can be as fun as it is frustrating, but the path to a well-fitting garment always begins with a toile. By Trudy Williams.
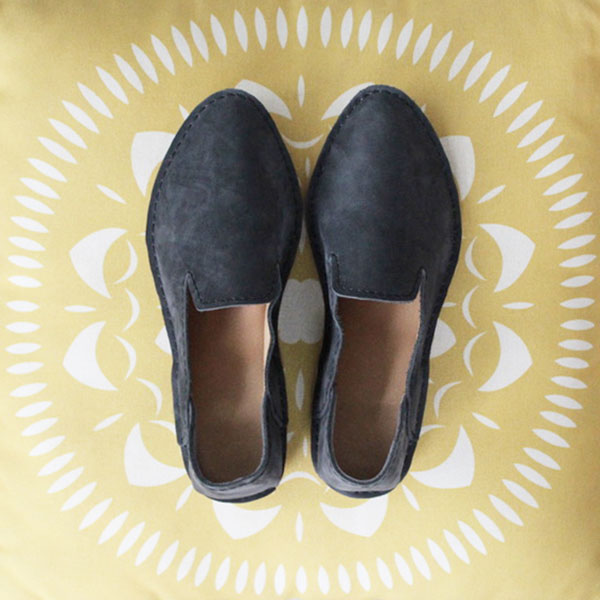
How to Sew Leather House Shoes
A pattern and step-by-step tutorial for making a comfortable pair of house shoes. By Hilary Webb.