
 Sign In
You don't need a bigger sewing room—you need smarter pieces inside it.
Most of us assume we have to buy specialty organizers or brand-new furniture when some of the most useful upgrades are sitting at thrift stores, or maybe even already in your house. If your space stays cluttered and inefficient, sewing will always feel harder than it needs to.
I'm sharing five thrifted finds that completely transformed my sewing room. These are practical items most people overlook, but that make storage and daily sewing noticeably easier. So the next time you walk into a thrift store—or even look around your own home—you'll know exactly what to look for.

Why Your Sewing Room Gets Overwhelmed (And How to Fix It)
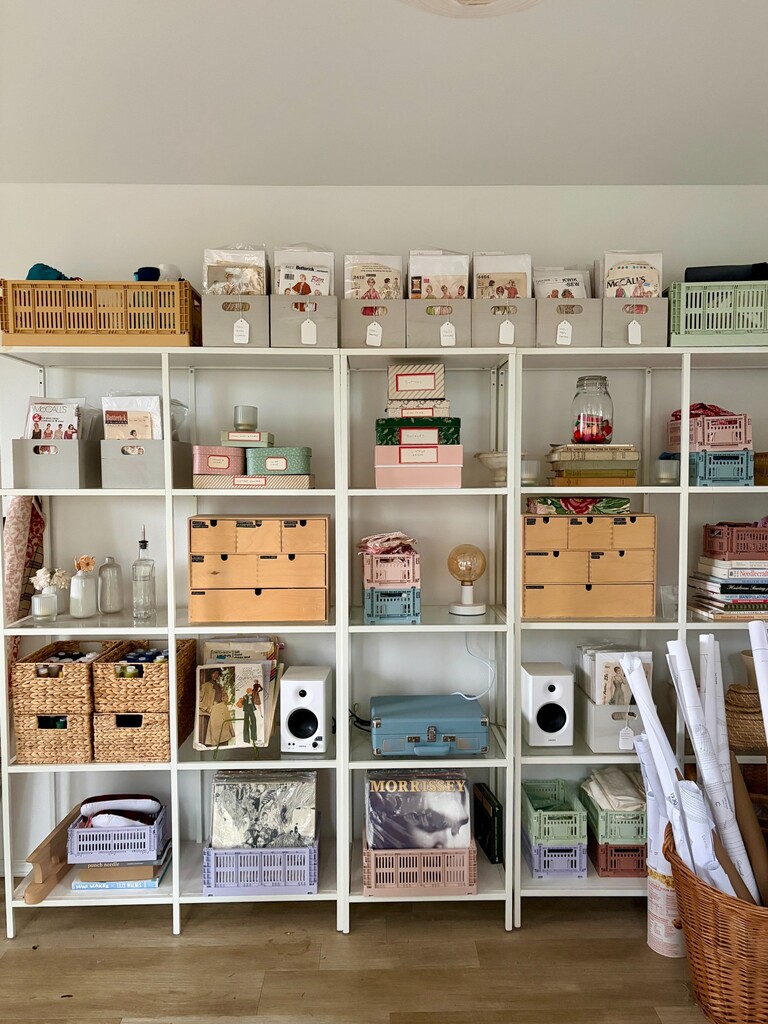
My sewing shed has become a complete mess lately—it's overflowing with fabric, notions, and trims, and it was finally time for me to do an audit, declutter, and get organized. This is what it typically looks like after I've finished a sewing project: scraps everywhere, all my tools laying around, and it's generally messy and chaotic.
I usually spend about 15 minutes cleaning up between each project, and that system has been working pretty well for me. But lately I've been noticing that I don't have a designated place to put certain things—especially scraps and trims—and they're starting to take over every surface. When things don't have a specific spot, they just end up everywhere.
So I sat down and made a list of all the areas in my sewing room that needed organization and all the things that didn't have a home, and then I headed to the thrift store on a mission.
Here's what I've learned: you don't need to spend a fortune on those fancy organizing systems. Some of my best storage solutions have come from the most unexpected thrift store finds.
Principle One: Hunt for Large to Medium Containers for Corralling
The first thing I always look for are baskets of various sizes. I use thrifted baskets all over my sewing room and they're brilliant for keeping everything accessible.
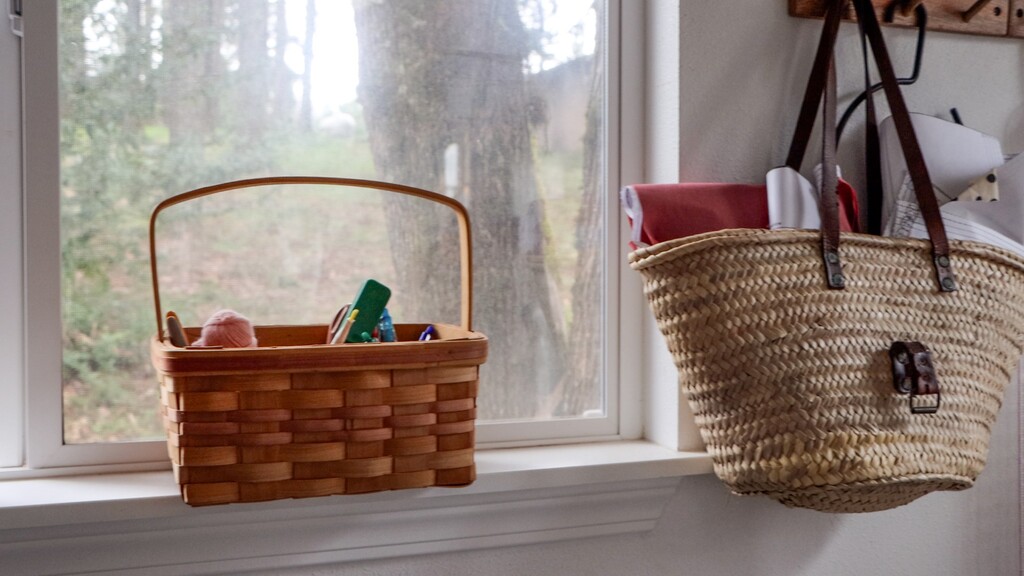
Use big floor baskets for corralling bulky items like printed patterns, while smaller baskets can be mounted on the wall to hold works in progress. Everything stays contained but visible, and when projects have a visible home, you're way more likely to finish them.
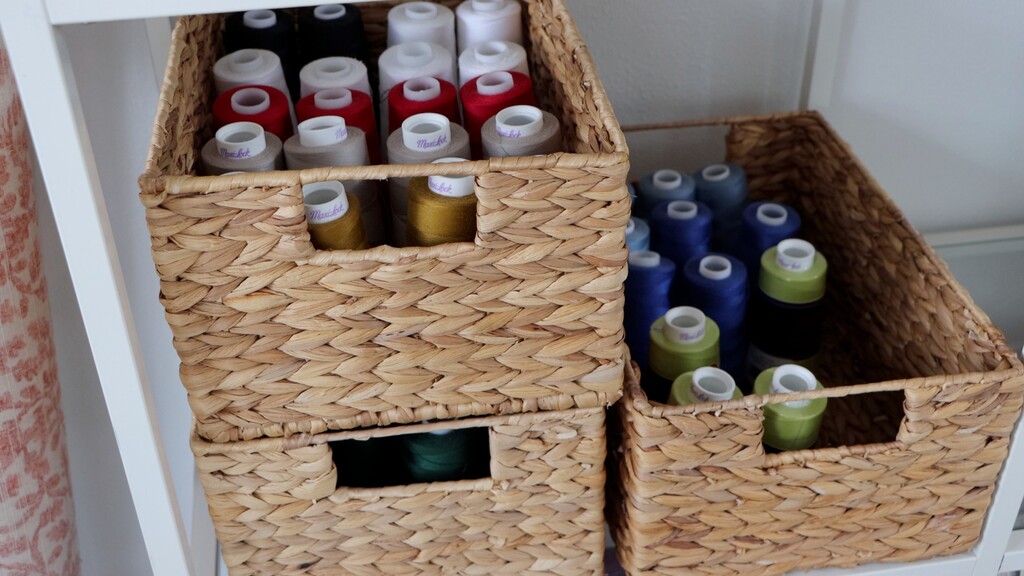
For this organizing session, I used new baskets to wrangle all my serger thread, which had gotten really messy on the shelf because those cones are so easy to knock over. The brilliant thing about these particular baskets is that they're stackable, so once I corralled all that serger thread, it actually took up way less shelf space.
Pro tip: Look for baskets with straight sides rather than flared ones—they stack more efficiently and make better use of vertical space.
Principle Two: Find Containers with Built-in Dividers
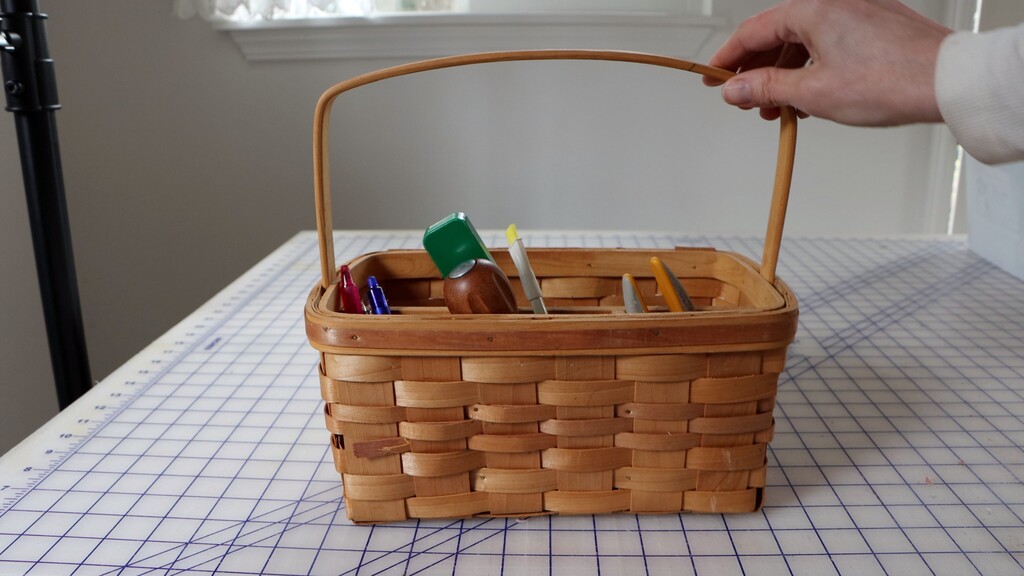
Now let's talk about containers that do the organizing work for you. I found this adorable silverware caddy, and it's absolutely perfect for my marking and cutting tools. The handle means I can easily move it around my workspace, and those built-in dividers keep everything upright so I can see exactly what's available at a glance.
Vintage jewelry boxes are goldmines for small notion storage. This compact style slides out in tiers, and these little compartments are perfect because each type of notion gets its own space. Use them for buttons, presser feet, bobbins—basically any small items that get lost in the shuffle. The separate compartments keep snaps away from buttons, hooks away from bobbins—no more mixed-up messes.
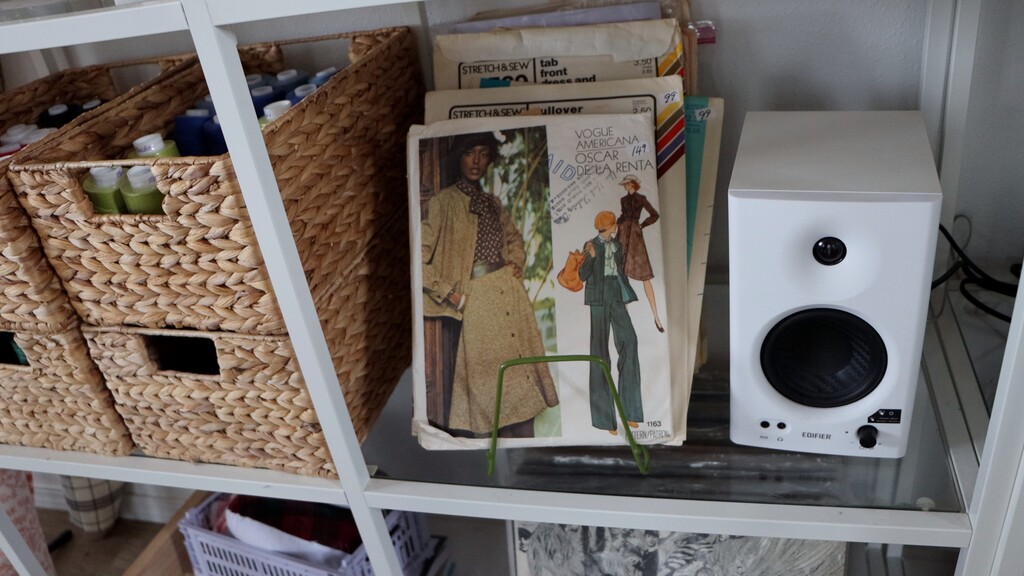
And here's a completely unexpected find—this little green dish rack. I was struggling with my oversized patterns that don't fit in my regular pattern storage boxes, and this dish rack is absolutely perfect for holding patterns of any size. You just stack them up like plates, and if they're too floppy, add some cardboard as backing.
Principle Three: Look for Containers with Lids for Stackability
Cookie tins are something I always hunt for at thrift stores. Sure, I save most of them for holiday cookie gifts, but they're also incredible for organizing on shelves because they stack so beautifully.
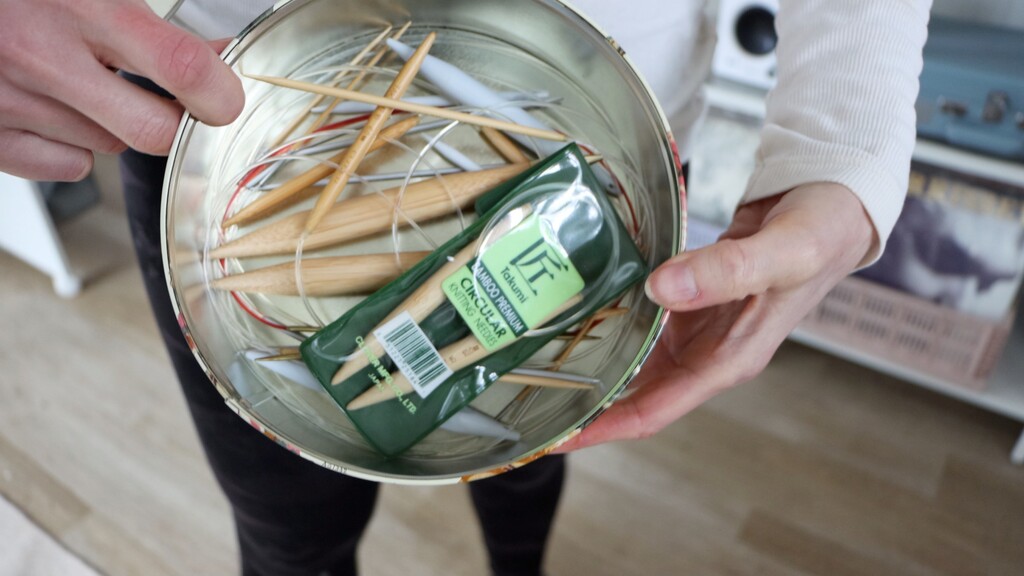
I found this cute tin with roses on it and used it to hold some of my circular knitting needles. Round tins like this are great for flexible items like these needles, ribbons, or elastic.
Large swing-top jars are another treasure I always seek out. A big jar like this can hold an enormous amount of trims, ribbons, or yarn, plus you can see everything inside at a glance. Because they seal completely, your supplies are protected from pests and dust. Just be sure to keep them out of direct sun if you're worried about fading.
Here's something most people overlook but shouldn't—old department store gift boxes. These simple cardboard boxes often have beautiful patterns and they're perfect for stackable storage. The key is adding labels on the side so you can see what's inside when they're stacked.
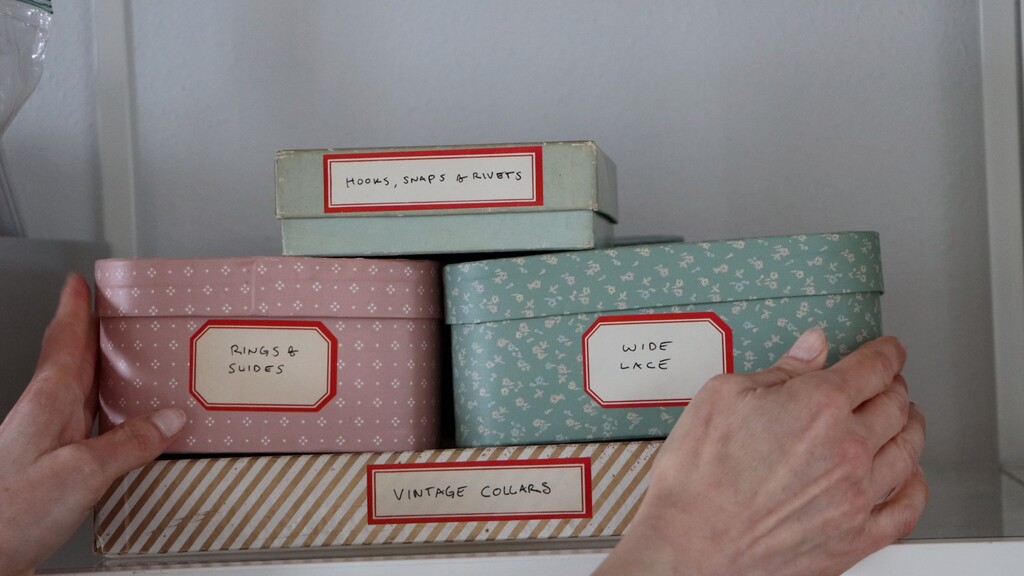
I had these vintage gummed labels in my stash, and I love how they give all my various boxes a consistent, intentional look. The vintage aesthetic beats plastic bins every time, and they cost almost nothing. Vintage hat boxes work beautifully for this too, and they often have the most gorgeous patterns.
Principle Four: Use Small Kitchenware for Grouping
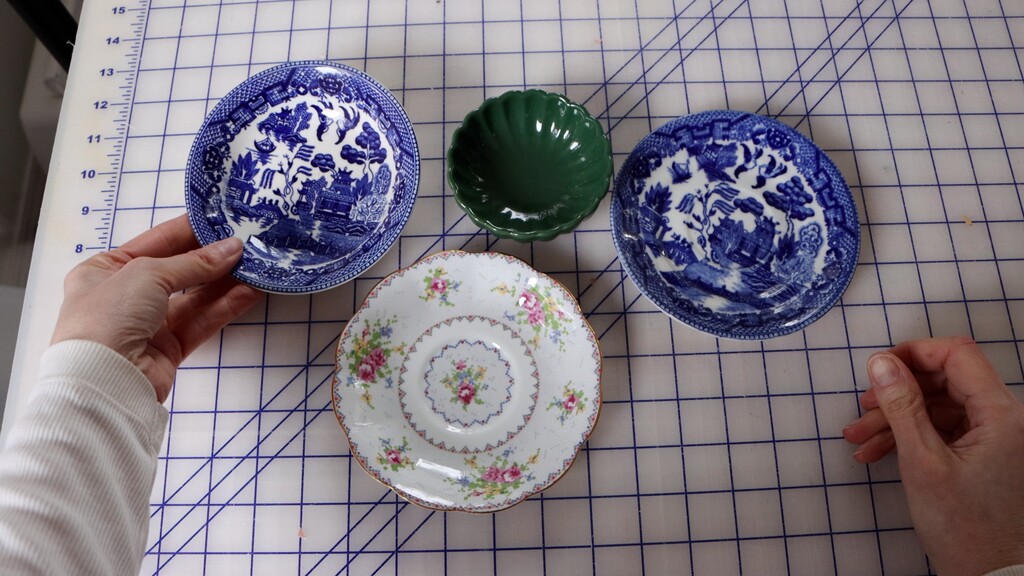
Small dishes and bowls are absolute workhorses in sewing room organization. You can use them on shelves to hold tiny items, or even put them in drawers and secure them with command strips so they don't slide around.
Here's a clever trick—glue a magnet to the underside and you've got yourself a magnetic pin dish. These small containers basically act as dividers to keep small items organized and prevent that "junk drawer" situation we've all experienced.
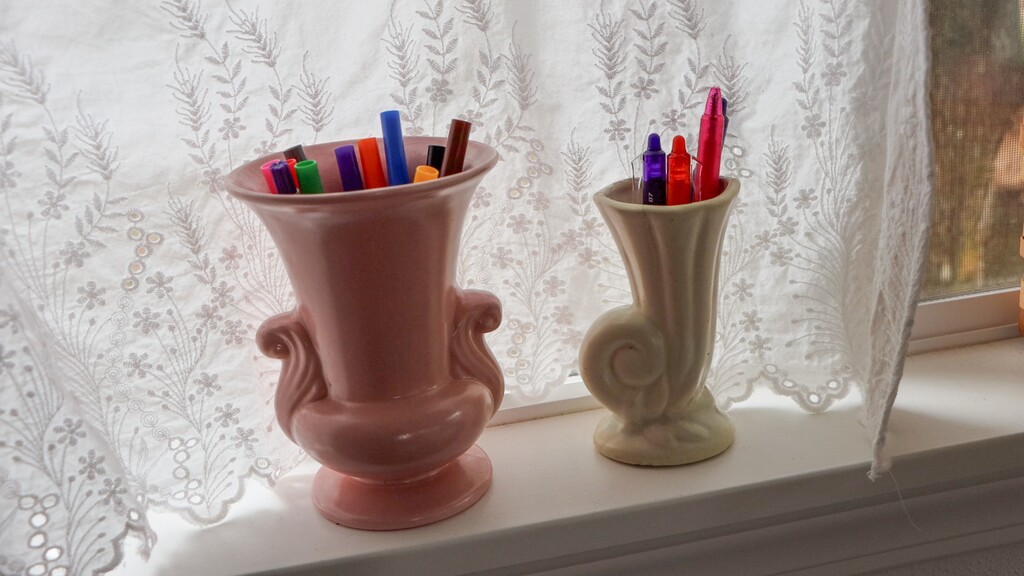
And here's another thing I collect: vintage vases. Not only are they great for flowers, but they can also hold so many tools and implements. These vessels solve the ugly tool storage problem perfectly—they hide less attractive supplies while keeping everything accessible. The ceramic conceals what's inside but you can still grab what you need instantly. Your tools stay organized and your room looks intentionally designed, not cluttered.
Principle Five: Don't Forget Furniture Pieces
This might be my favorite find of the day—this rack with slide-out baskets for only twenty dollars. You could achieve the same thing with small bookshelves or dressers, but I thought these would be perfect for my overflow fabric—specifically those pieces that are less than a yard but aren't quite small scraps.
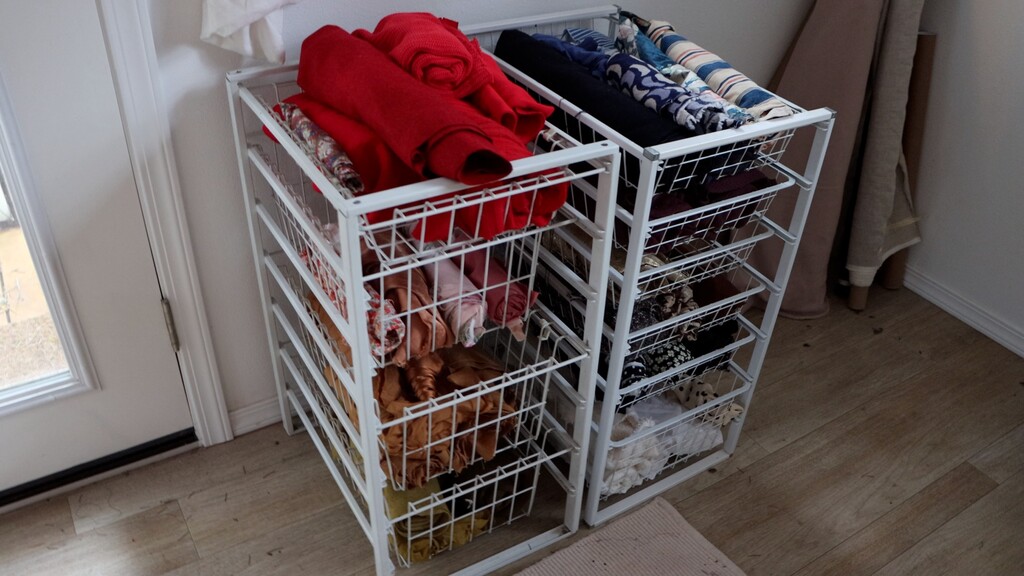
I have so many of these medium pieces that I struggle to get rid of because I use them for accessories, pockets, or lining pieces. The open design means I can see what's available, which makes me way more likely to actually use these fabrics instead of forgetting about them.
The downside is sun exposure, so I'm thinking about making a cover for it. For now, I rolled up all these pieces and sorted them by color in the baskets.
Making It Work in Your Space
Whether you're working with an entire sewing room or just a corner of your kitchen table, these thrift store organizing principles work at any scale. The key is maximizing vertical storage and choosing containers that multitask—exactly what we're covering here.
When you're shopping secondhand for sewing room organization, keep these guidelines in mind:
-
Measure first: Know your shelf dimensions and bring a measuring tape -
Think beyond original purpose: A dish rack becomes pattern storage, a vase becomes tool storage -
Prioritize visibility: You're more likely to use supplies you can see -
Choose stackable when possible: Vertical storage is your friend in small spaces -
Look for quality construction: Vintage pieces often outlast modern equivalents
The transformation in my sewing space is honestly incredible. Everything has a designated home, I can find what I need quickly, and the whole space feels so much more inspiring to work in. When your tools and supplies are organized and accessible, you spend more time actually sewing and less time hunting for what you need.
Ready to tackle your fabric stash next? Read this article about fabric storage solutions that actually work—including which methods failed spectacularly and which ones were game-changers.

