Sign In
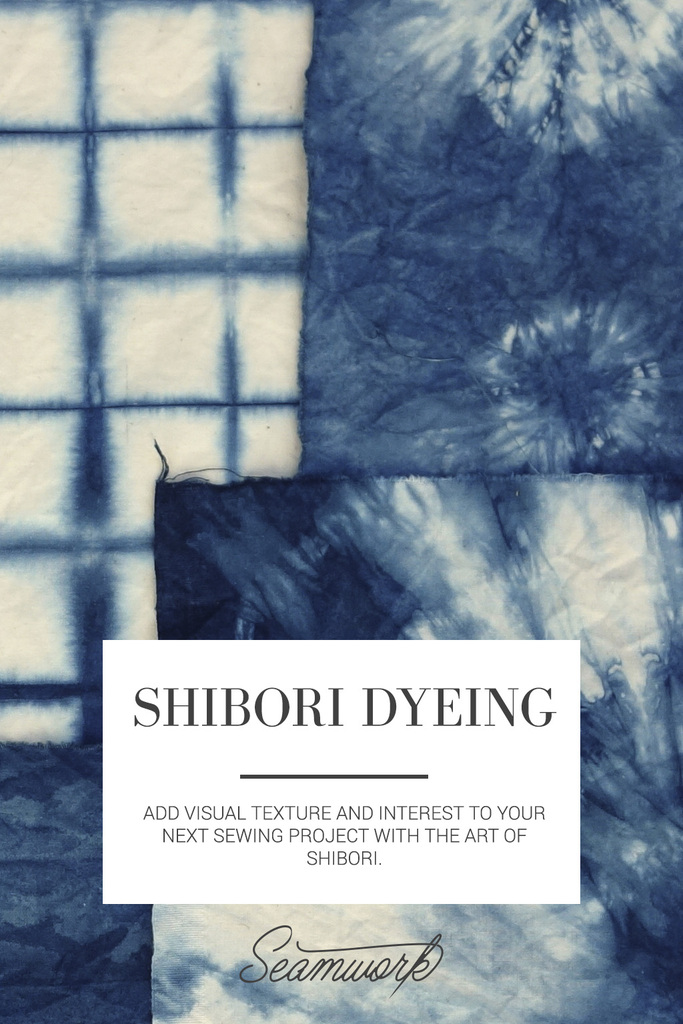
I came to shibori through simple desire: I saw a throw pillow with a beautiful pattern, a grid with soft edges and occasional erratics, called itajime shibori. After some research about the oldest form of indigo dyeing in Japan, I decided to try my hand at making it. That first day of dyeing was such a thrill! I am a printmaker, and I have a deep place in my heart for the watery, ink-wash-like qualities of monotype. Making similar work on fabric was a dream.
The exciting thing about shibori is that everything you do, in each stage of the process, has a result. With shibori, the whole point is to cause variations in the dye! I promise that even during your first time, you will make something unique and beautiful. I still display my very first shibori experiment as a throw pillow.
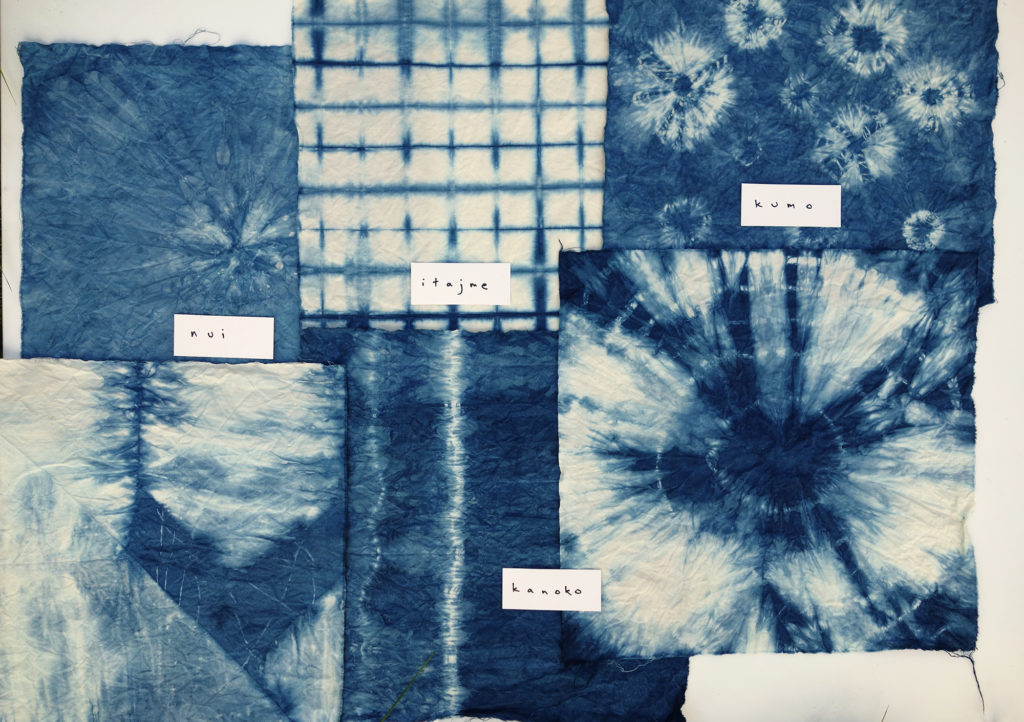
I will introduce you to four different shibori techniques, with instructions for each technique. If you become as obsessed as I have, you can find many more styles of shibori dyeing at the World Shibori Network (I have seen incredible pieces there—several that even I have no idea how to replicate).
Before You Begin
Like many crafts, the preparation required of shibori is half the work. Luckily this technique yields such interesting and varied results, you won’t mind a bit. Begin by gathering your supplies and preparing your work space to facilitate an organized and creative work flow.
You will need...
Feel free to use gear you already have, but keep in mind that anything that you use for dye will then become dye-only for safety and practical reasons.
Fabric. Shibori is often done on natural fabrics, such as silk, hemp, or cotton. For these examples, I used indigo on a simple cotton muslin. Commercial fabric is often coated, and it’s important to wash this coating off so it won’t interfere with the dye. Synthrapol fabric detergent is specifically formulated and works great. If you don’t have any, regular laundry detergent will be fine.
Dye: I used pre-reduced indigo crystals, available from Dharma Trading Company. To follow in my footsteps, buy: 0.75 oz pre-reduced indigo; 2.3 oz Thiourea Dioxide; and 3.5 oz Soda Ash. This will make 2–3 gallons of indigo, which is an easy amount to work with in a 5-gallon bucket. If indigo isn’t your jam, use another dye. I recommend Dharma’s Procion dyes–easy to use and available in a wealth of colors.
Organic fume respirator for the Thiourea Dioxide in the indigo recipe, or a basic dust mask otherwise. This is non-negotiable safety gear for mixing the dye.
5-gallon bucket (and a lid if you would like to save your indigo vat for future dye sessions)
Long rubber gloves
Small plastic or glass containers for mixing dye
A postal scale for weighing indigo ingredients
Wood mixing stick
Plastic tarp (to protect the ground)
A second bucket or tub for transferring the dyed fabric to your sink for wash-out
Small square wooden blocks for itajime
Rubber bands for itajime, kanoko, and kumo
Small objects such as river rocks, marbles, or dried beans for kumo
Polyester thread for nui
Folding Techniques
At its core, shibori is a way of making patterns on fabric through exposing only some portions of the fabric to dye. Much of the work of shibori is in the preparation: the fabric is folded, tied, sewn, or pleated to dictate the pattern of the dye. Use the following four techniques to create a unique dyed surface:
Itajime Shibori
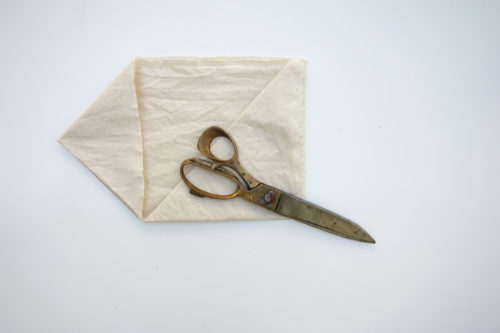
Accordion-fold fabric vertically, then again horizontally. This fabric stack is then sandwiched between two pieces of wood the size of the folded fabric. It produces a grid-like pattern by exposing only the edges of the folds to the dye.
Variations on this technique to consider: use larger wood blocks for a larger pattern (just be sure you have a bucket to match!), or blocks of a different shape (any fabric that overlaps the edge of the blocks will be dark/dyed).
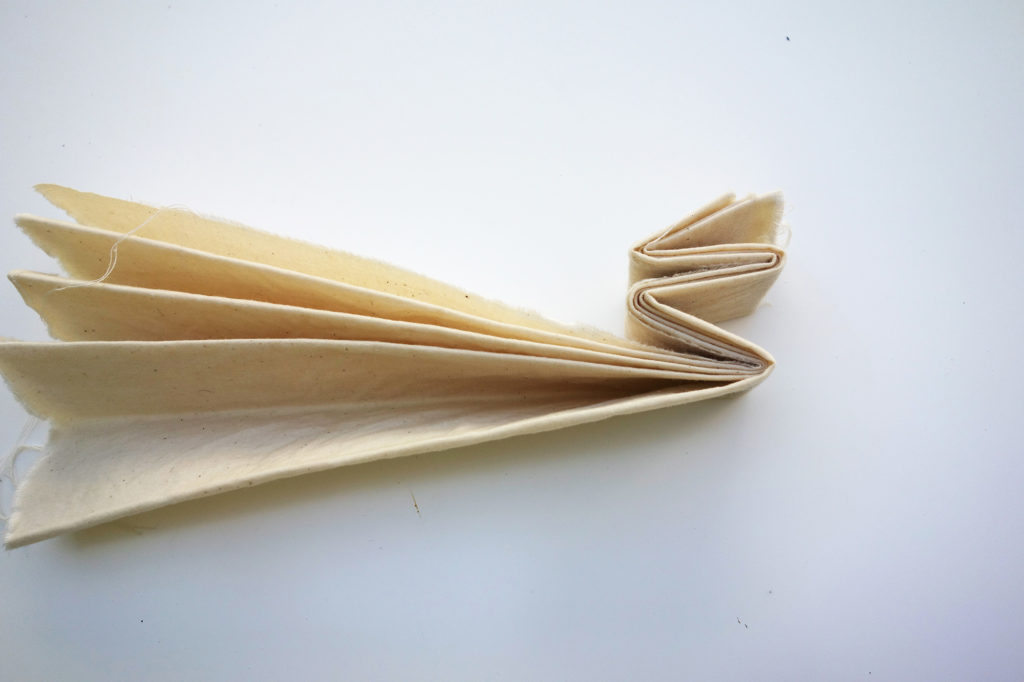
Accordion fold first in one direction, then again the other way.
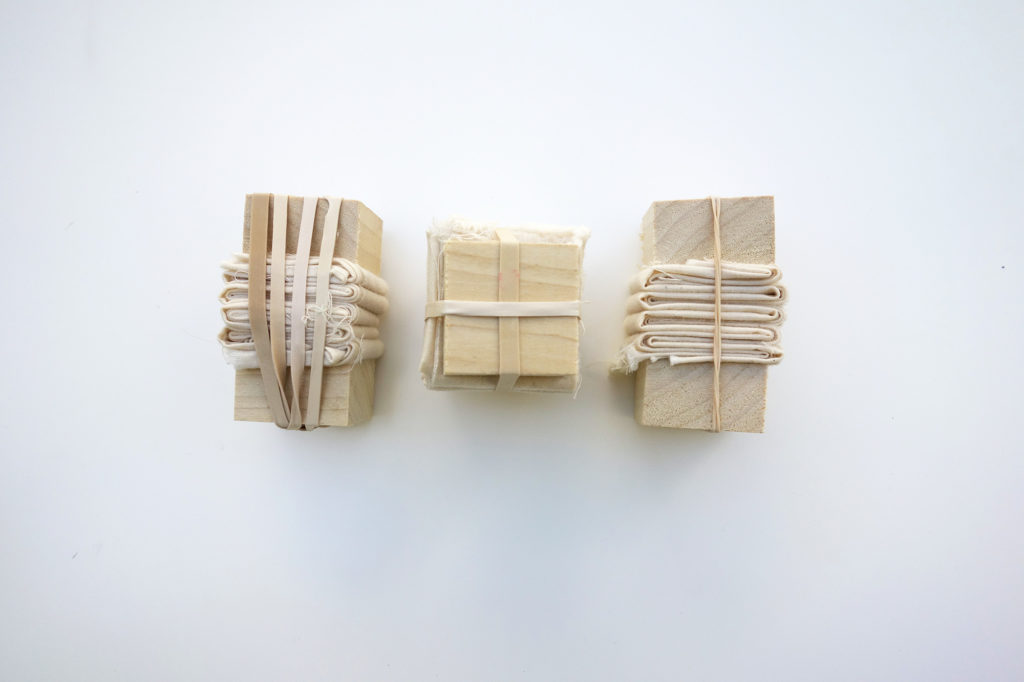
Place a wooden block on both sides of the folded fabric, then secure with rubber bands.
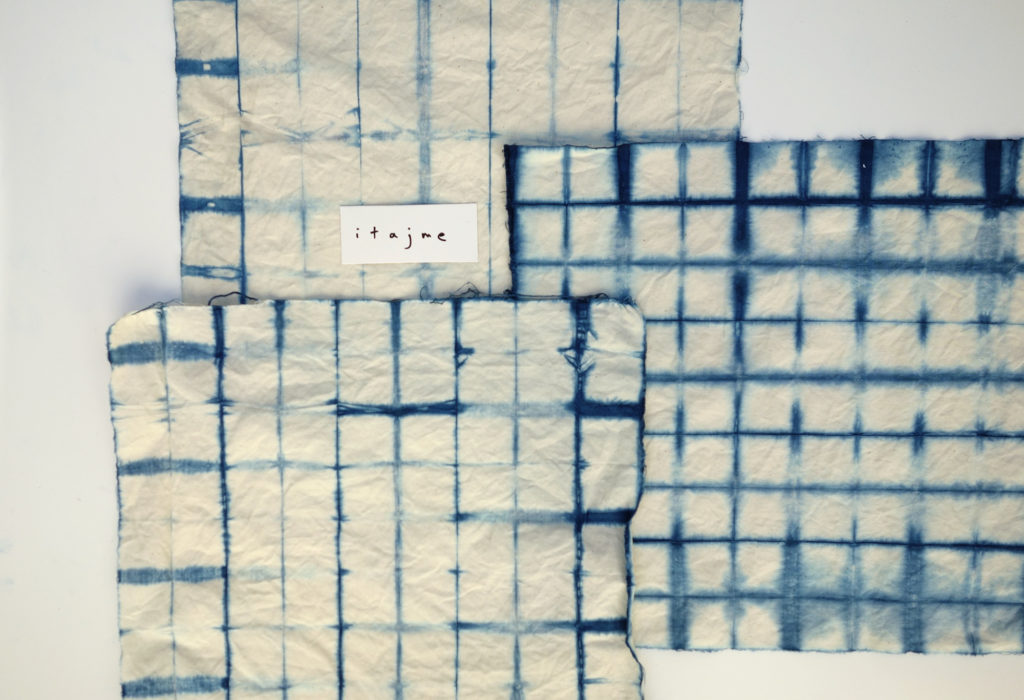
The grid pattern is variable and organic.
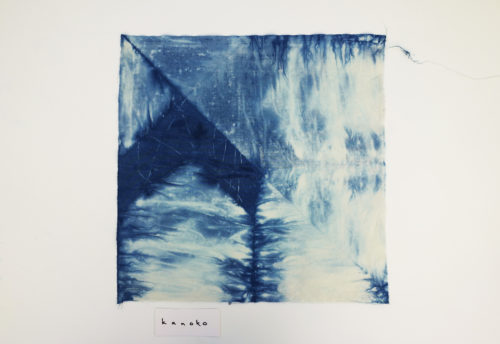
Kanoko Shibori
This technique involves tying fabric (in this case using rubber bands) in areas where you would like the dye to be resisted. Use different fold and securing techniques to yield different results.
For a line, bunch the fabric laterally, then rubber band over the whole bunch. For a circle, pull the fabric up in the middle like a tent, then rubber band around this peak.
Before the erratic folding-then-binding technique
After dyeing using the erratic folding-then-binding technique
Variations include using different widths of rubber bands, and twisting or folding the fabric erratically before tying on the rubber bands. There are many possible end results that can be achieved with only rubber bands.
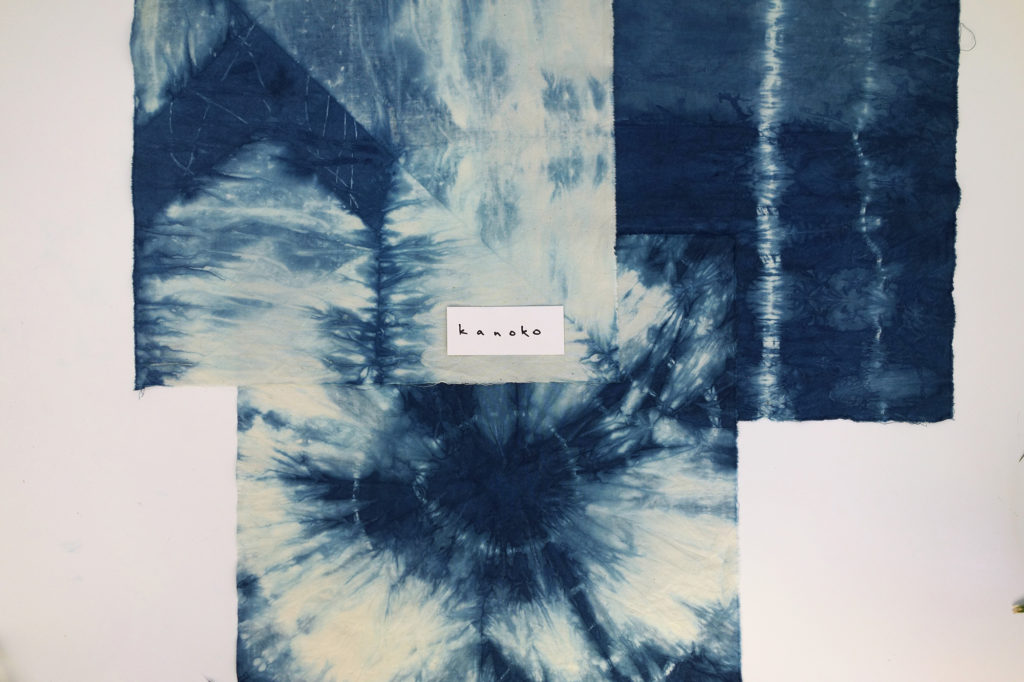
A wide variety of patterns, all made using only rubber bands.
Nui Shibori
Nui shibori uses the same resist technique as Kanoko, but instead of using rubber band to create variation, basting stitches are used.
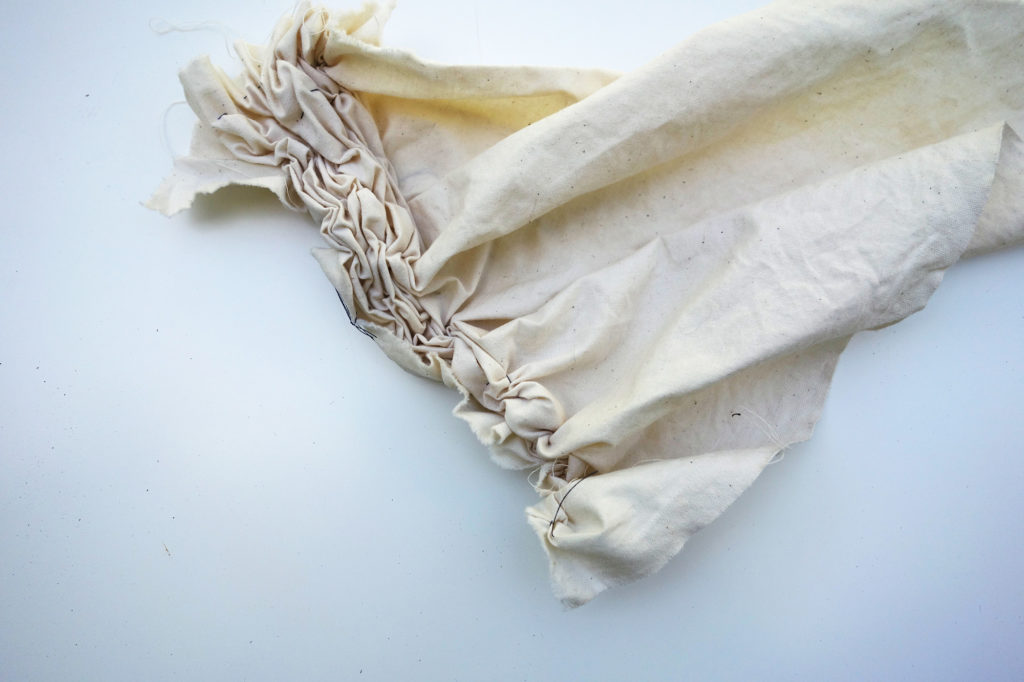
To achieve this technique, sew a basting stitch, then pull tight and knot securely. I sewed a spiral, as well as parallel lines, both by machine and by hand. The tighter you pull the thread, the greater the contrast.
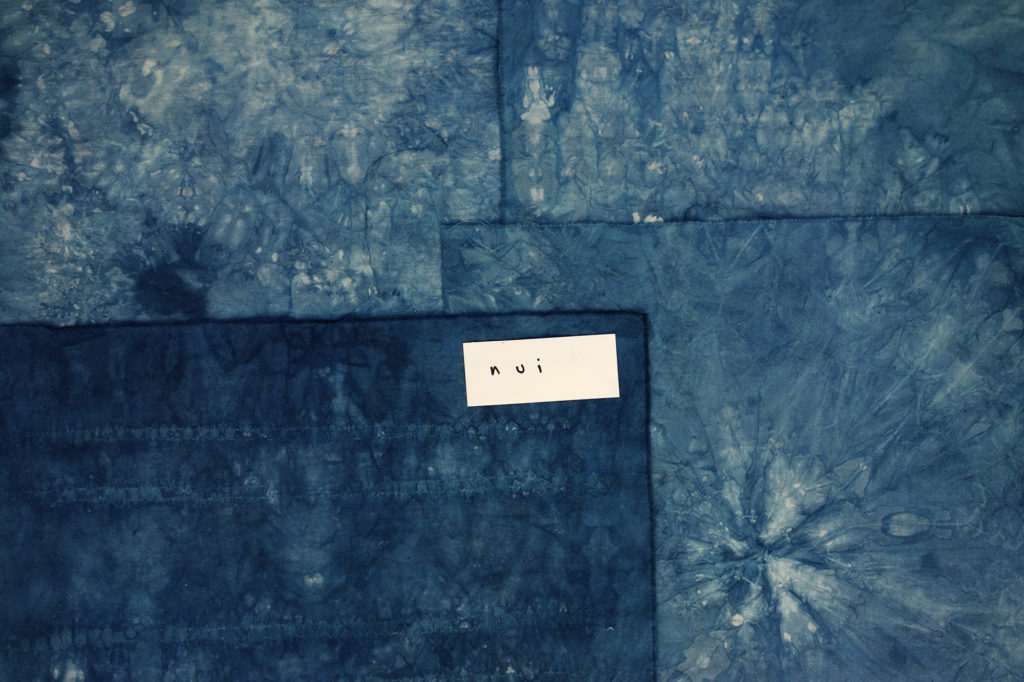
Several different variations on the nui method, with machine-sewn fabric shown on lower-left.
This technique offers a more subtle mottled effect. This low-contrast application of shibori is simple and unexpected.
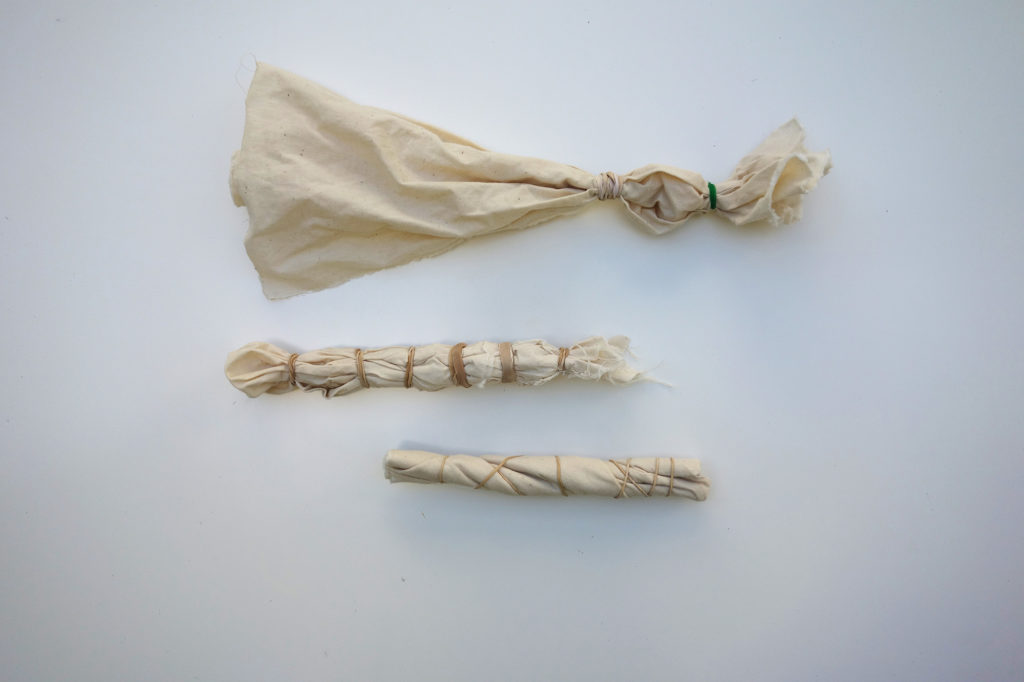
Kumo shibori
Bind an object into the fabric, creating a sort of “finger” with the object at the tip. The bound portion will turn into a white, spider-web-like circle. Experiment with using objects of different sizes, or creating longer fingers by using multiple rubber bands. River rocks are often used for this technique. I didn’t have any, so I used black beans.
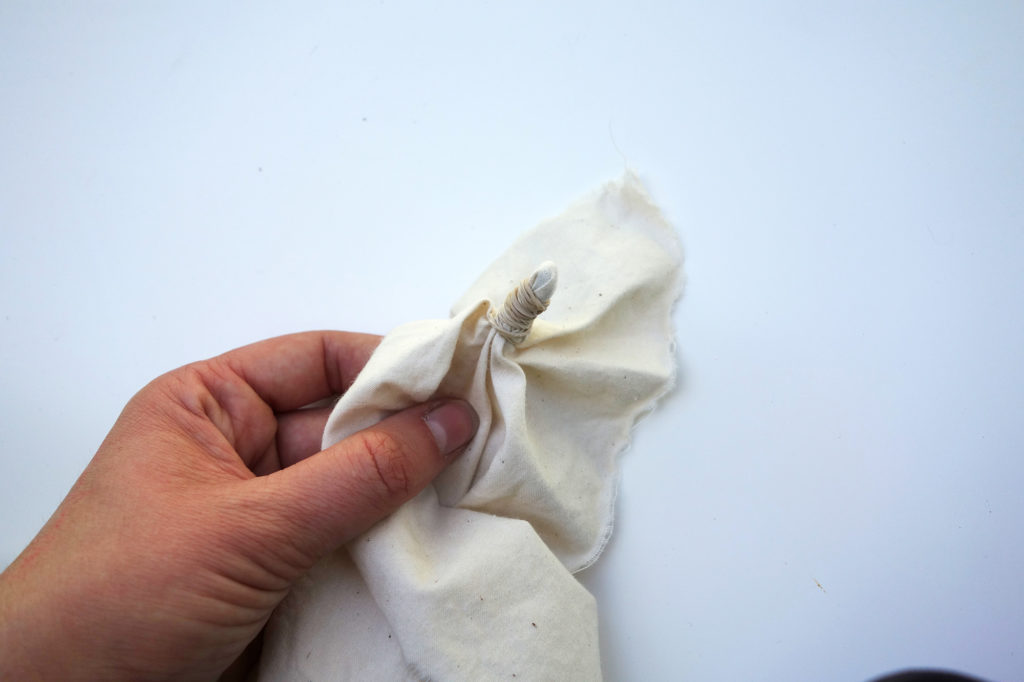
The fabric is gathered around the object, then bound with rubber bands.
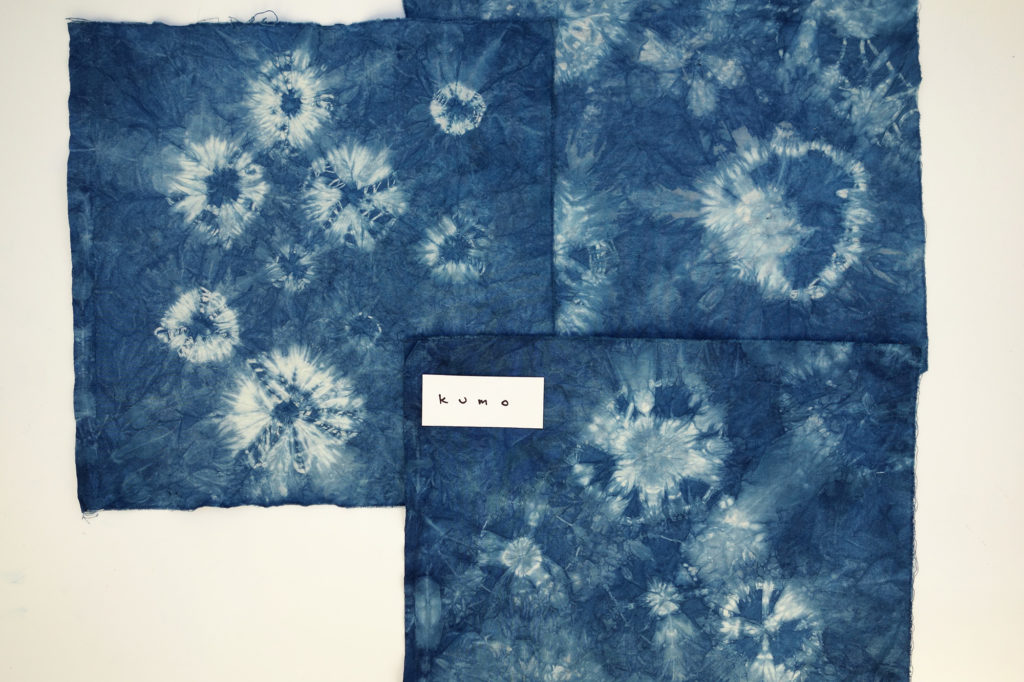
What seems like small differences, from the size of the rubber band to how tightly you have bound the fabric, will actually result in dramatic and beautiful differences.
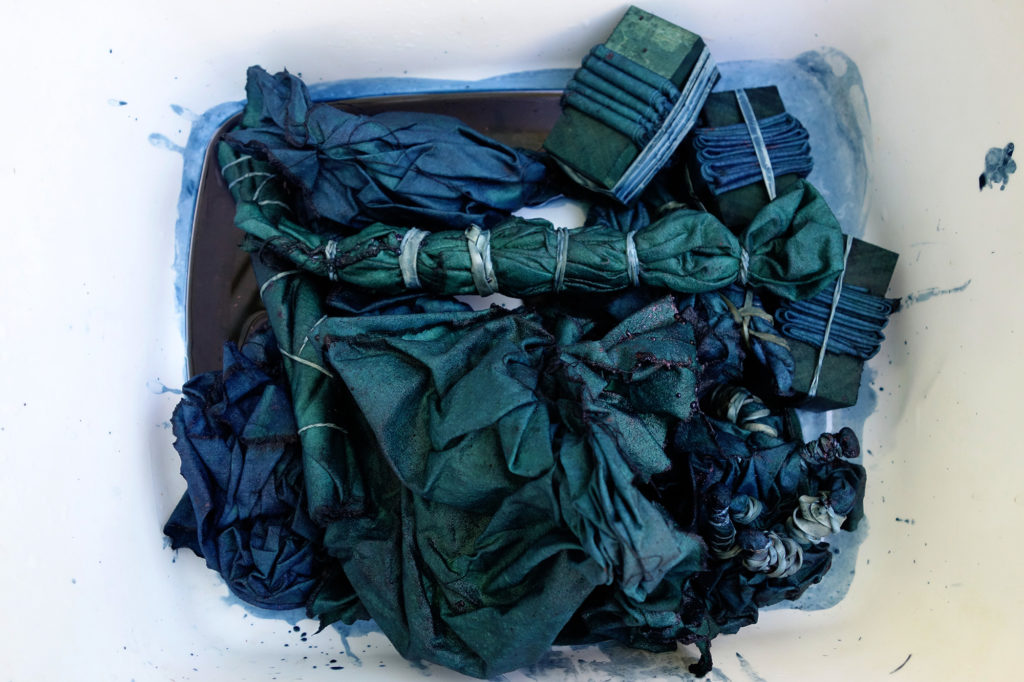
Dyeing

Now that your fabric is all bunched and folded, we’re ready to dye. If you’re in a time crunch, separate the fabric preparation stage from the dyeing stage. I’m usually too impatient and excited to see the designs, but this is the perfect time to take a break for lunch or until next weekend. Give yourself a couple of hours for the dye process. It may not take that long, but it’s important not to rush.
I prepared an indigo vat using pre-reduced indigo crystals, following the reliable instructions of Dharma Trading Company
If you have chosen a different route, prepare a bucket of dye according to the manufacturer’s instructions, and dye your fabric following either the tub-dye or tie-dye instructions.
After preparing the indigo vat, dip the pieces in water, then dunk them individually into the indigo. Indigo is a bit like magic: you dunk the piece fairly briefly, and when you remove it, it is green. Exposure to air is what turns it blue (it will take 15–20 minutes). One dunk will create a lighter blue, and with each successive dunk it will get darker. Wait those 15-20 minutes for the fabric to turn totally blue before doing either the next dunk or washing out the dye.
A fun fact while you wait: natural dyes like indigo require reducing agents (this is the purpose of the Thiourea Dioxide in our recipe). The original reducing agent in shibori was large quantities of urine, and according to Dharma, dye houses, often built next door to bars, would leave out pots for drunk folks to pee in! It’s stories like this that make me happy to be able to buy all my dye chemicals powdered and in plastic bags.
Whatever dye you are using, be sure to rinse your shibori pieces until the water runs clear before unwrapping them. This will keep your designs crisp with contrast.
After you have rinsed the bundles, it is time for the great unveiling. This is my favorite part of the process. Gather round any available friends, so they can “ooh” and “ahh” with you. I always feel like a kid unwrapping presents at this step. No matter how many times I’ve done this, there are elements that are unplanned and fantastic. Carefully unfold your fabric, admire its unique patterns, do a final rinse, then pop it in a washing machine. If you’ve only dyed in one color, you can wash it all up together. Just like new jeans, you should wash this fabric with similar colors for the next several washes. Fabric can be line- or machine-dried. The end color will be lighter than it appeared when you unwrapped it, so don’t be surprised to find that your colors have faded a bit.
As you experiment and explore the wealth of shibori patterns developed over its long history, you will encounter many variations and unique designs. I’m sure you will invent your own, through experimentation and mistakes. This is the true joy of the process.
As sewists, you have the great advantage of being able to make garments and housewares from fabric dyed as yardage, which allows for greater control and design possibilities than dyeing a pre-made garment.
As a printmaker, I love the fluidity and experimental nature of the fabric dye medium. Much like the monotype process that I work frequently with, the end result is a collaboration between you and the nature of the medium.

Resources
-
Dharma Trading Company - the best and most comprehensive fabric dye selection anywhere. I buy all of my dye and chemicals there. -
World Shibori Network - comprehensive website with gorgeous photos, and a wealth of unique designs to drool over. -
Paula Burch’s All About Hand Dyeing - a good detailed look at a variety of dyes and dyeing practices. - If you’re interested in trying shibori but short on workspace, get started with a Tulip one-step dye kit. If you buy the black, it will wash up to be a grey navy. Follow my fabric prep instructions, then put all of your fabric in a plastic tub and cover with dye from the squeeze bottle. You will need about one bottle for every 1–2 yards of fabric, depending on technique. This dye is a good way to get your feet wet, but of course you will get better results with indigo or procion.

About the Author
Alyson Provax is a printmaker and experimental dyer in Portland, Oregon. Her prints are available through Tappan Collective and Uprise Art, and her work will be shown in the Bellingham National at the Whatcom Museum this summer. Find her at alysonprovax.com.