Sign In

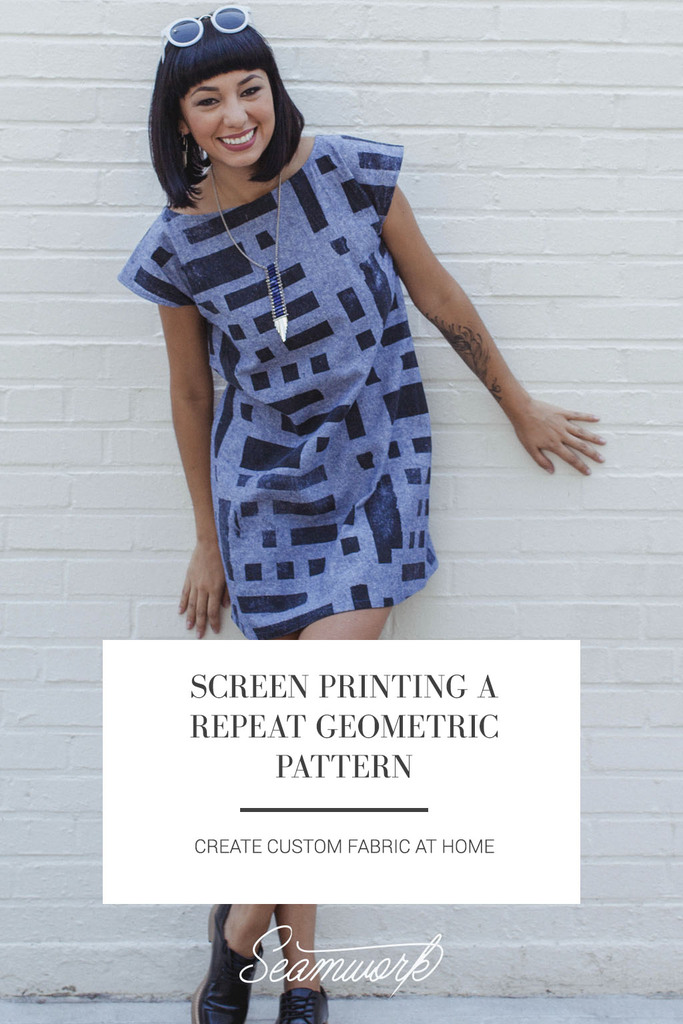
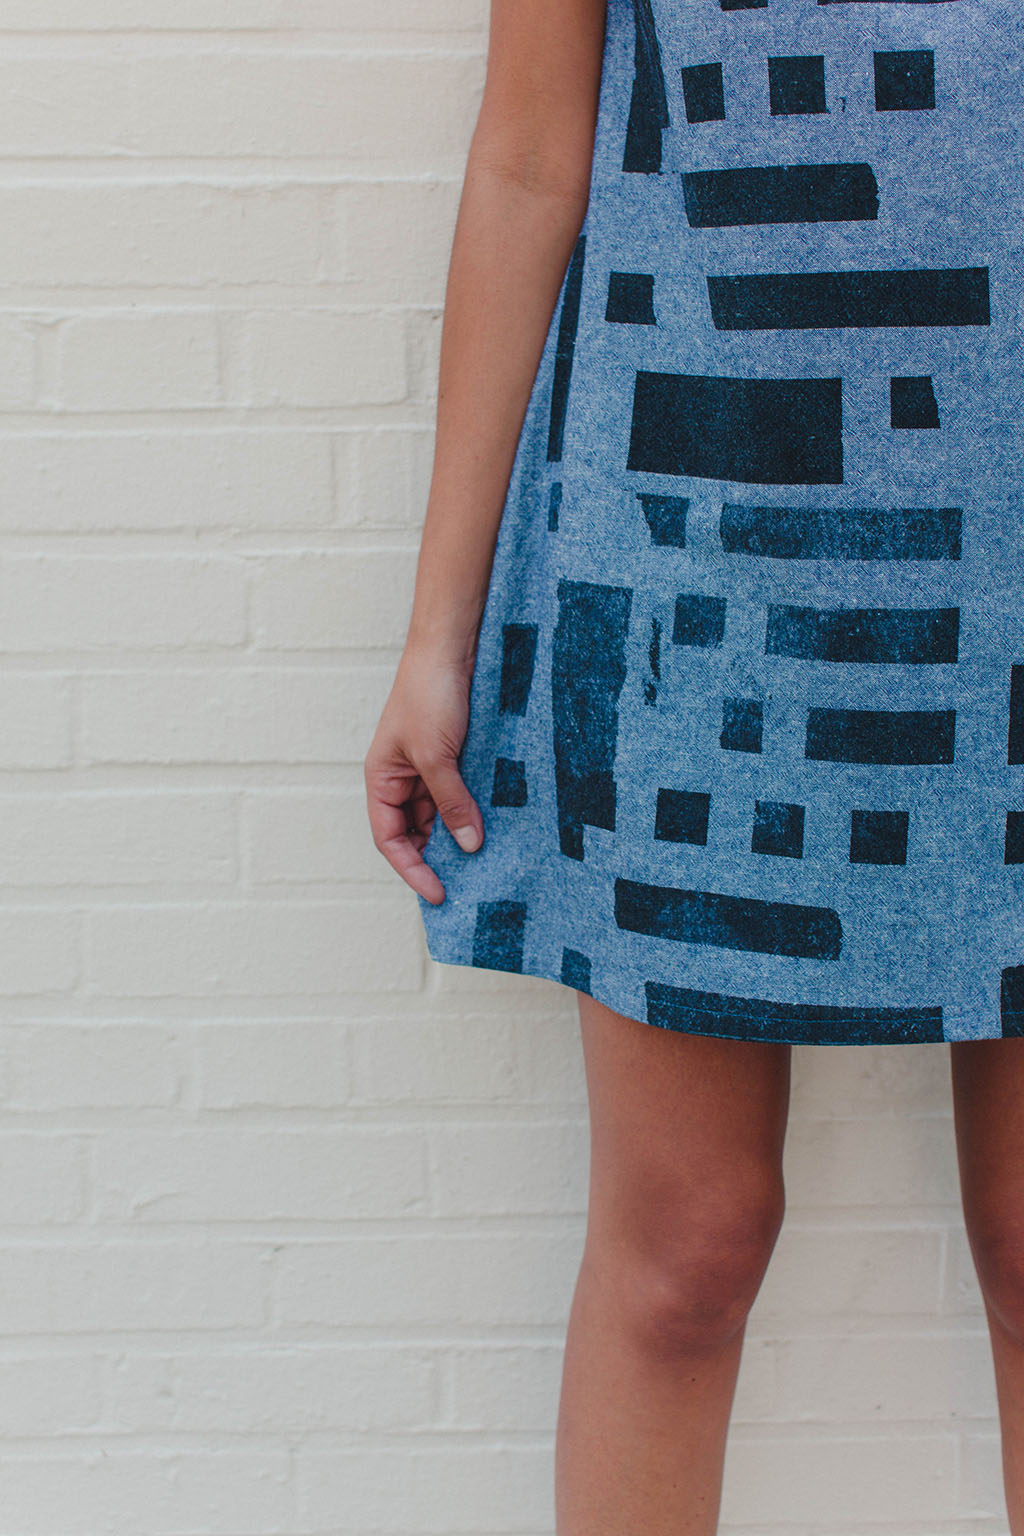
Surface pattern design has experienced a revival in recent years, with increased interest in decorated objects to use and wear. Hand-printed fabric is especially appealing if you’re interested in sewing and making things by hand. If you’ve been thinking about making your own printed fabric with a repeat pattern, one way to achieve this is by screen printing.
Screen printing fabric can be intimidating; screen printing, like sewing, is a skill you get better at with practice. In this tutorial, we will be screen printing a repeat geometric pattern onto yardage. I’ve tried to keep the steps as simple as possible, so that whether or not you have screen printing experience, it can be something that you can try at home. The techniques outlined here are not meant for perfect precision, so be prepared to embrace your mistakes and go with the flow. While most of the materials used in this project are common household objects, you will need to invest in a screen and a squeegee.
01 Section
Gather Supplies
Before you start, gather together your fabric, screen printing supplies, and other needed items.
Mesh Counts
Screens are available in different mesh counts, which refers to the “openness" of the polyester mesh stretched in the screen. A screen with a lower mesh count of 110–160 is recommended for printing on fabric. A lower mesh count means the holes of the mesh are more open, and therefore more ink can be pushed through.
Screens are available in either wooden or aluminum frames. Wooden frames will be less expensive; however, they are prone to warping over time. Aluminum frames cost more but last longer.
Selecting & preparing fabric
You can screen print on knit or woven fabrics. A nonstretch woven will be easier to print on because it will stay in place on your table, and will not stretch or shift like a knit fabric might. Fabric with a smooth surface is also recommended for printing. If printing on fabric is new to you, muslin would be an inexpensive and smooth surface fabric to practice with. You may want to get extra fabric, in case it takes a few impressions to get the hang of the process. Consider the length of your work surface when choosing fabric. The fabric shouldn’t be wider than the length of the table you will be printing on. This tutorial was written for ~45” wide fabric.
Make sure your chosen fabric can withstand high heat, because the fabric will be heat set at a high temperature after it’s printed.
Pre-wash your fabric, as you should before sewing any project. Prewashing rinses away any sizing and finishing chemicals on the fabric, which can affect printing results.
Purchasing screen printing supplies
- Water-based screen printing ink
- 20” x 24” screen printing screen
- A 16" squeegee
You will need a squeegee, screen printing screen, and other supplies to complete this project.
Other supplies
- Masking tape in 1” width. In this tutorial, we will be printing a design based on a grid. Using masking tape with a width that corresponds to the grid will make taping your screen easier.
- Grid paper, to plan out your design.
- Felt, to cover your table and allow more give under your fabric when you print. Look for felt by the yard.
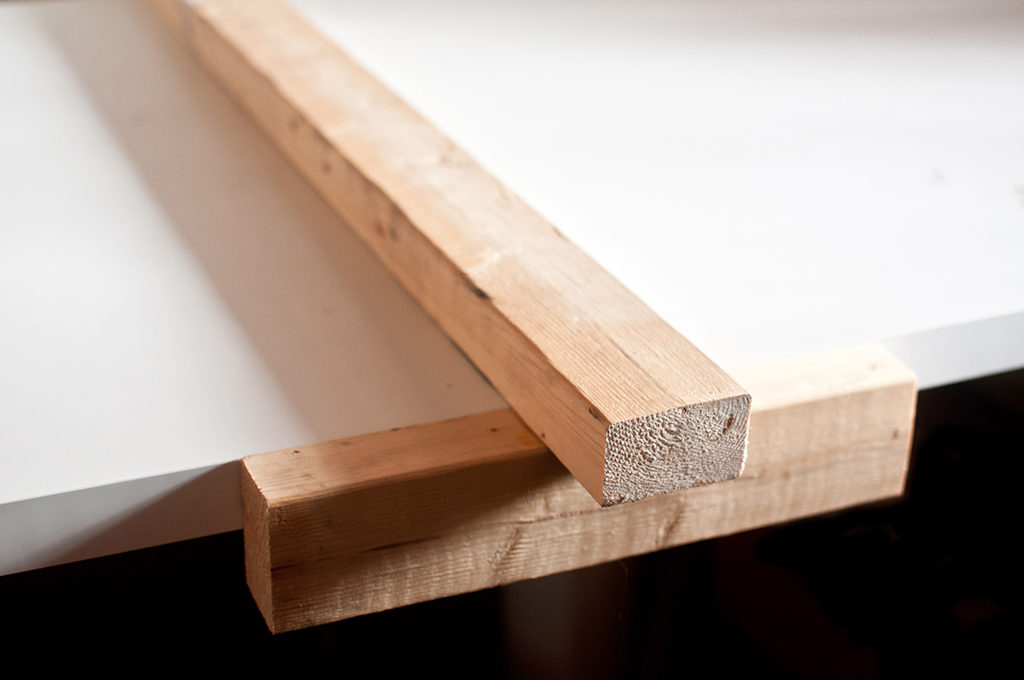
- T-ruler, to line up, or “register,” your screen while printing. You can use a pre-made T-ruler, or make one yourself with two pieces of 2x4 wood.
- Ruler and fabric chalk, to measure and make marks on your fabric that will register your screen as you print.
- Blow dryer, to dry the ink and prevent it from getting on the back of your screen. You will also be heat setting the fabric as you blow dry it.
- Newspaper or cardboard, to catch ink drips and other messes, and to rest your squeegee on when you’re not using it.
- Sponge, to wipe and clean up.
- Spray bottle filled with water, to spritz your screen in between prints.
- Spoon, to stir and spread ink.
- (optional) Light tack spray adhesive can help keep your fabric flat while printing, preventing it from lifting when you pick up your screen after making an impression.
Making your own T-ruler
You can use a premade T-ruler or make one yourself. I made a T-ruler using two pieces of 2x4 scrap wood (one 12” and one 30”) and glued them together with wood glue. One piece will rest flush against the edge of the table, and the other piece will rest on the top of the table.

02 Section
Design & Prepare Your Screen
Create a simple design to screen print, and tape it into your screen using masking tape.
Sketching your design
Since we’ll be using masking tape and grid paper as the basis for our design, your design will need to rely on simple shapes with straight edges like lines, squares, rectangles, triangles, and the like.
The printable image area in the screen will be 12” wide by 15” high, giving us a comfortable 2”–3” of extra space around it in the screen. On your grid paper, outline a space that is 12 squares wide and 15 squares high. Each square on your paper will equal 1” on your screen.
Screen printing fabric for beginners
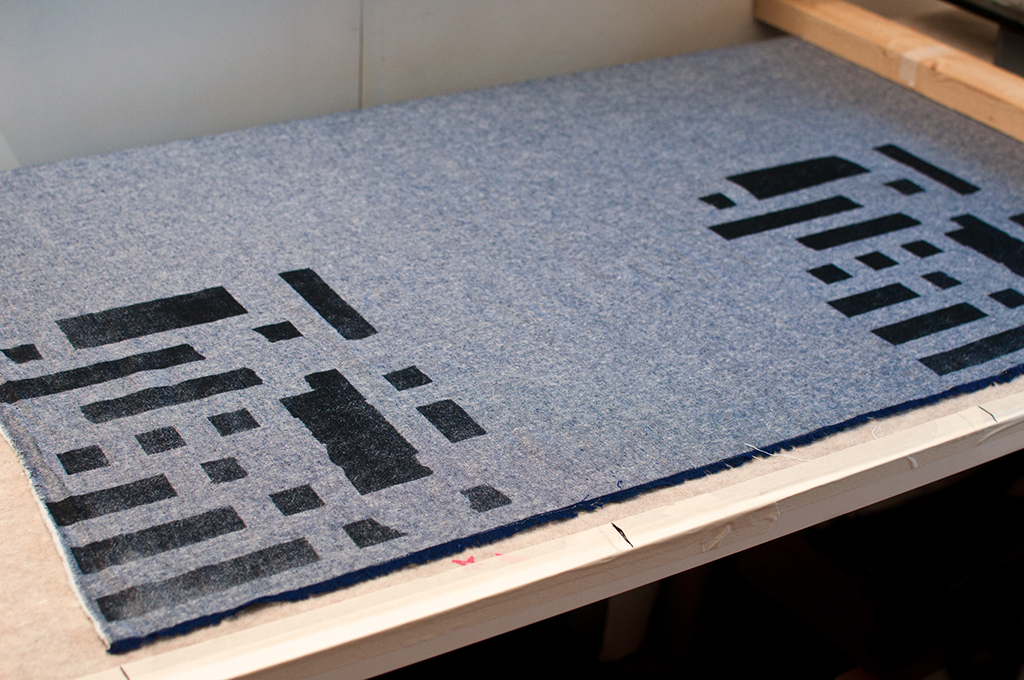
If you are new to screen printing on fabric, you can simplify this project by printing a loose, all over pattern that does not need to be registered. In that case, you do not need to make any marks or measurements on the fabric or on your screen. Print each image in numeric order (instead of one/three and two/four), placing the screen down on the fabric as close as possible to the previous print, without touching it. Continue to screen print the images side by side, row by row until you have printed all of the yardage.
In your 12” x 15” outlined space on paper, leave one row at the top and one row at the right empty. This creates space in between repeated impressions that is proportional to the rest of your gridded design. Even though it’s empty, it’s still a part of the 12” x 15” image area that will go in your screen.
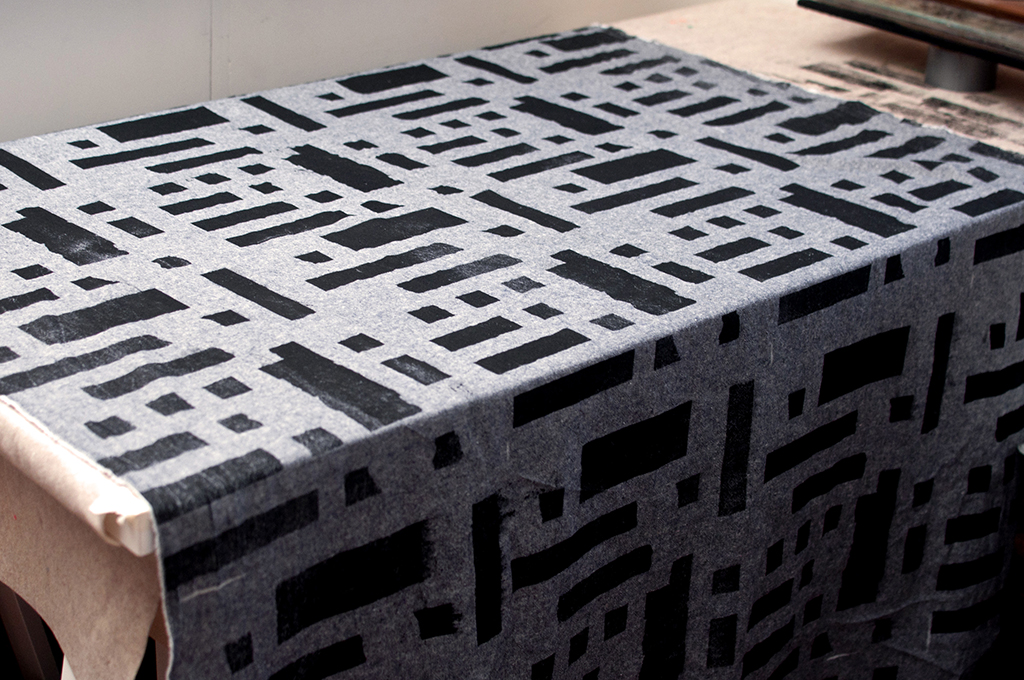
Sketch out your design in the 12”x15” outlined space on paper, making sure to leave those two rows empty. The shaded in areas are what you will screen print in black ink. To help inspire you, I’ve created a geometric pattern inspiration board on Pinterest.
One important thing to consider when creating your design is that you will be taping it to the back, or ”print side,” of the screen, so the design will be flipped from what is on paper. If your design has a defined top/bottom or left/right, draw the flipped version on paper.
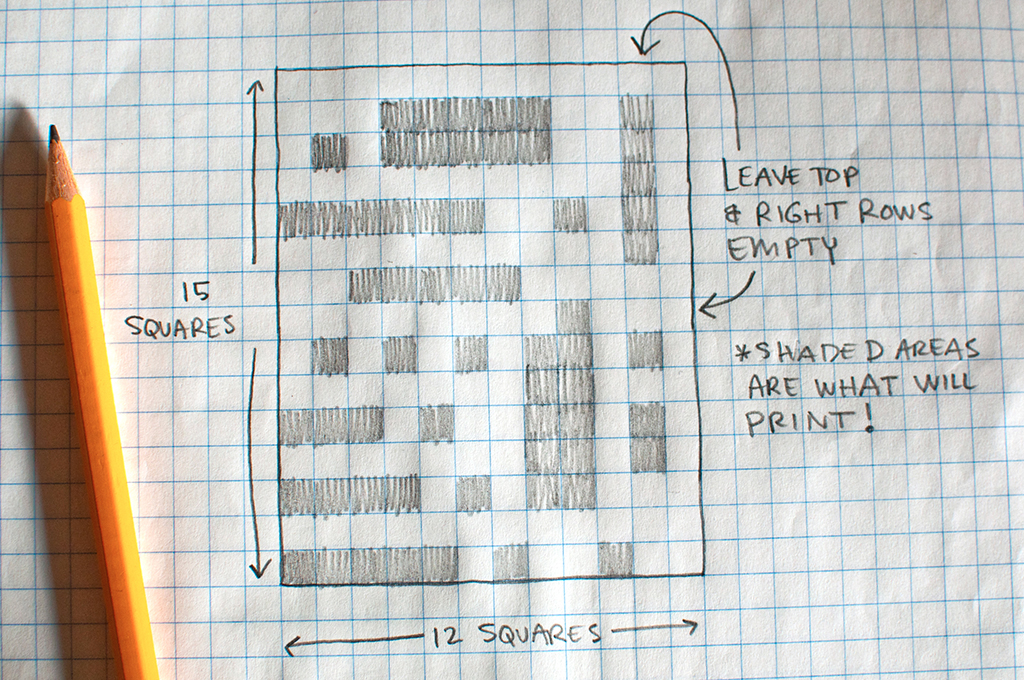
Use grid paper to sketch out your design on a 12” x 15” grid, making sure to leave the top and right rows empty. The shaded areas are what will print.
Taping your design into your screen
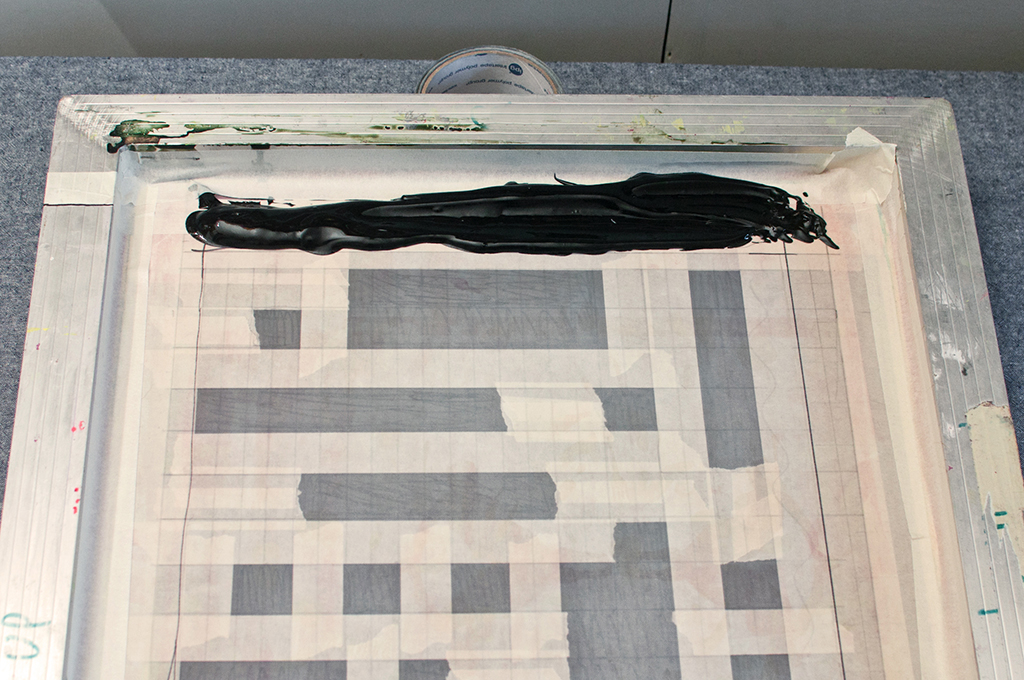
Once you have a design you want to print, you are ready to tape it into your screen. We are going to apply the tape to the back, or ”print side,” of the screen, so that the squeegee doesn’t get caught on the tape while printing. Start by masking off your 12” x 15” image area, overlapping the tape and covering the edge of the frame. Use a pencil and a ruler to lightly draw the image area in the center of the screen, and tape around it.
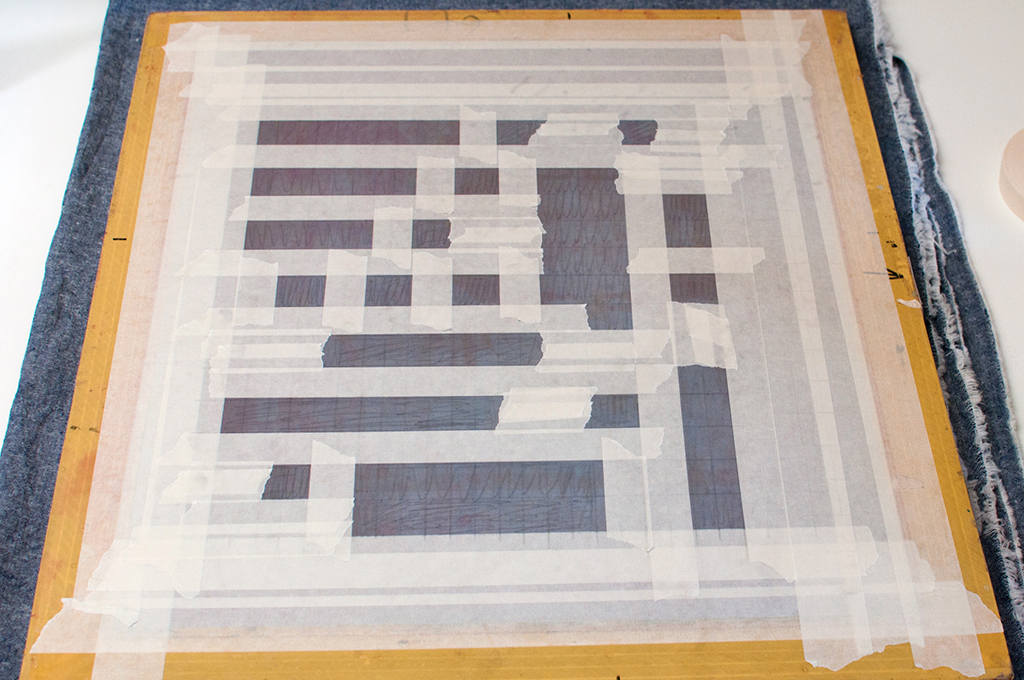
Use a penciled in grid to guide you as you tape your design onto the print side of your screen.
Using your sketch as a guide, tape your design into your screen. You can cut the tape into pieces with scissors or tear it for a more organic look. The shaded in sections of your sketch are the printable areas where the ink will go through, so you want to tape the nonshaded sections to block the ink from printing. Draw a 1” grid on your screen with a pencil and ruler to create a guide, marking where to tape and where not to tape. Make sure there are no gaps for ink to seep through, but don’t overlap more than two layers of tape at a time. Too much tape creates extra space between the screen and your fabric, increasing the depth that ink has to be pushed through.
Once you’ve taped your design, flip the screen over so it is squeegee side up. To keep ink from seeping in between the screen and the frame, apply tape to the inside edges of the screen, where the screen and the frame meet on the squeegee side.
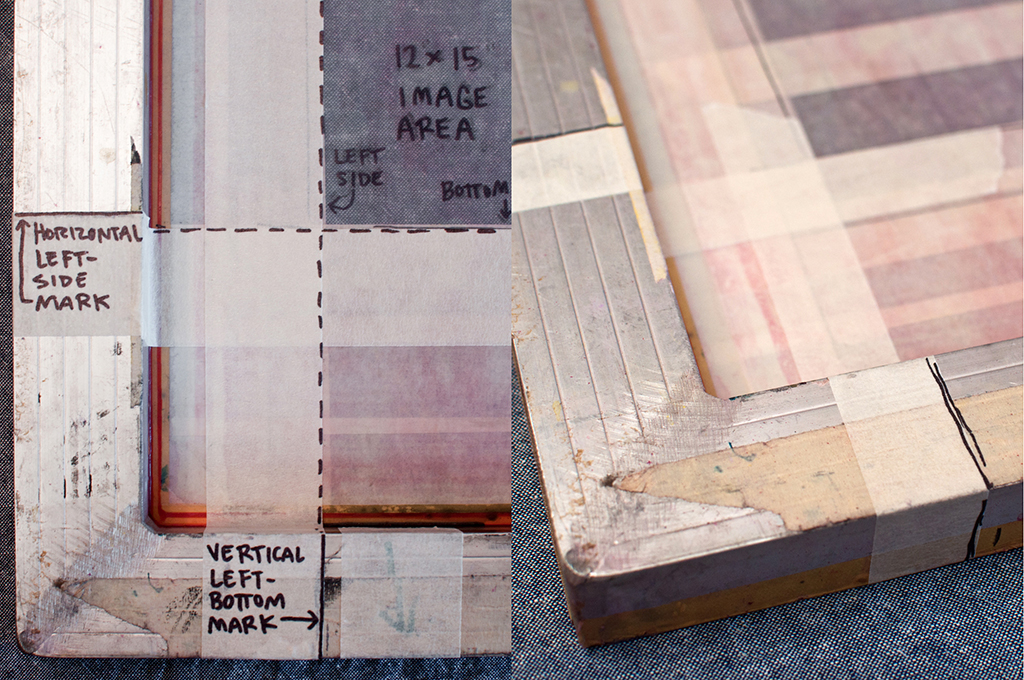
Mark both the horizontal left side and the vertical left bottom of the image area with tape on the squeegee side of the screen. The tape should fold over all three visible sides of the frame, so that you can use it to register your screen even when it’s covered in ink.
Now mark both the left side and the left bottom of the image area with tape on the screen. I will refer to these marks as the “horizontal left side mark” and “vertical left/bottom mark” in the steps that follow. The tape should fold over all three visible sides of the frame as it does in the photo, so that you can use it to register your screen even when the screen is covered in ink.
03 Section
Prepare to Screen Print
Get your ink, work space, and fabric ready for screen printing.
Preparing ink
Open the ink container and stir the ink until it is a uniform consistency. We are using black ink in this tutorial, because its opacity and viscosity prints well. You can use any color, but keep in mind that ink generally dries lighter than it appears wet, and most colors don’t offer as much opacity as black.
Setting up your space
When you are ready to start printing, cover your table with the felt. The felt will go under your fabric, allowing more give under the screen while you print. Tape the felt to the table at the table’s edges with masking tape.
Laying out your fabric
Lay out your fabric on the table. Place the selvage edge parallel to the left edge of the table, and the cut edge parallel to the bottom edge of the table. Let the rest of the fabric drape over the opposite edge of the table. If you find the fabric lifts too much as you print, you can use a light tack spray adhesive to adhere the fabric to the felt.
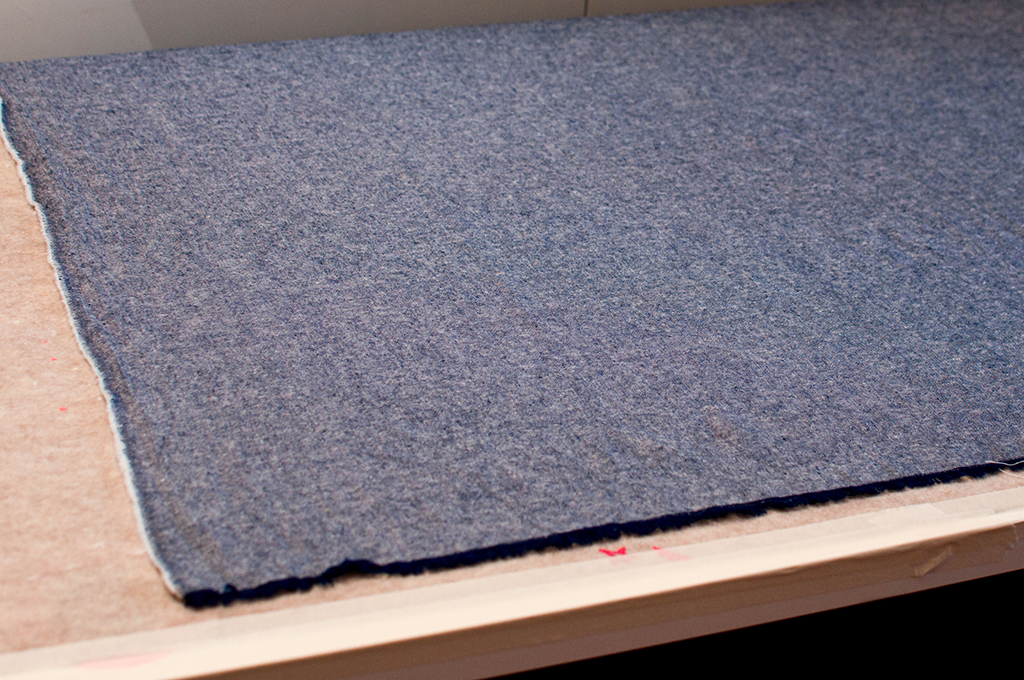
Tape the felt to the edges of your table, and lay your fabric on top of it, draping the yardage off of one end.
04 Section
Screen print a repeating geometric pattern using measured markings as your guide.
Measuring and marking
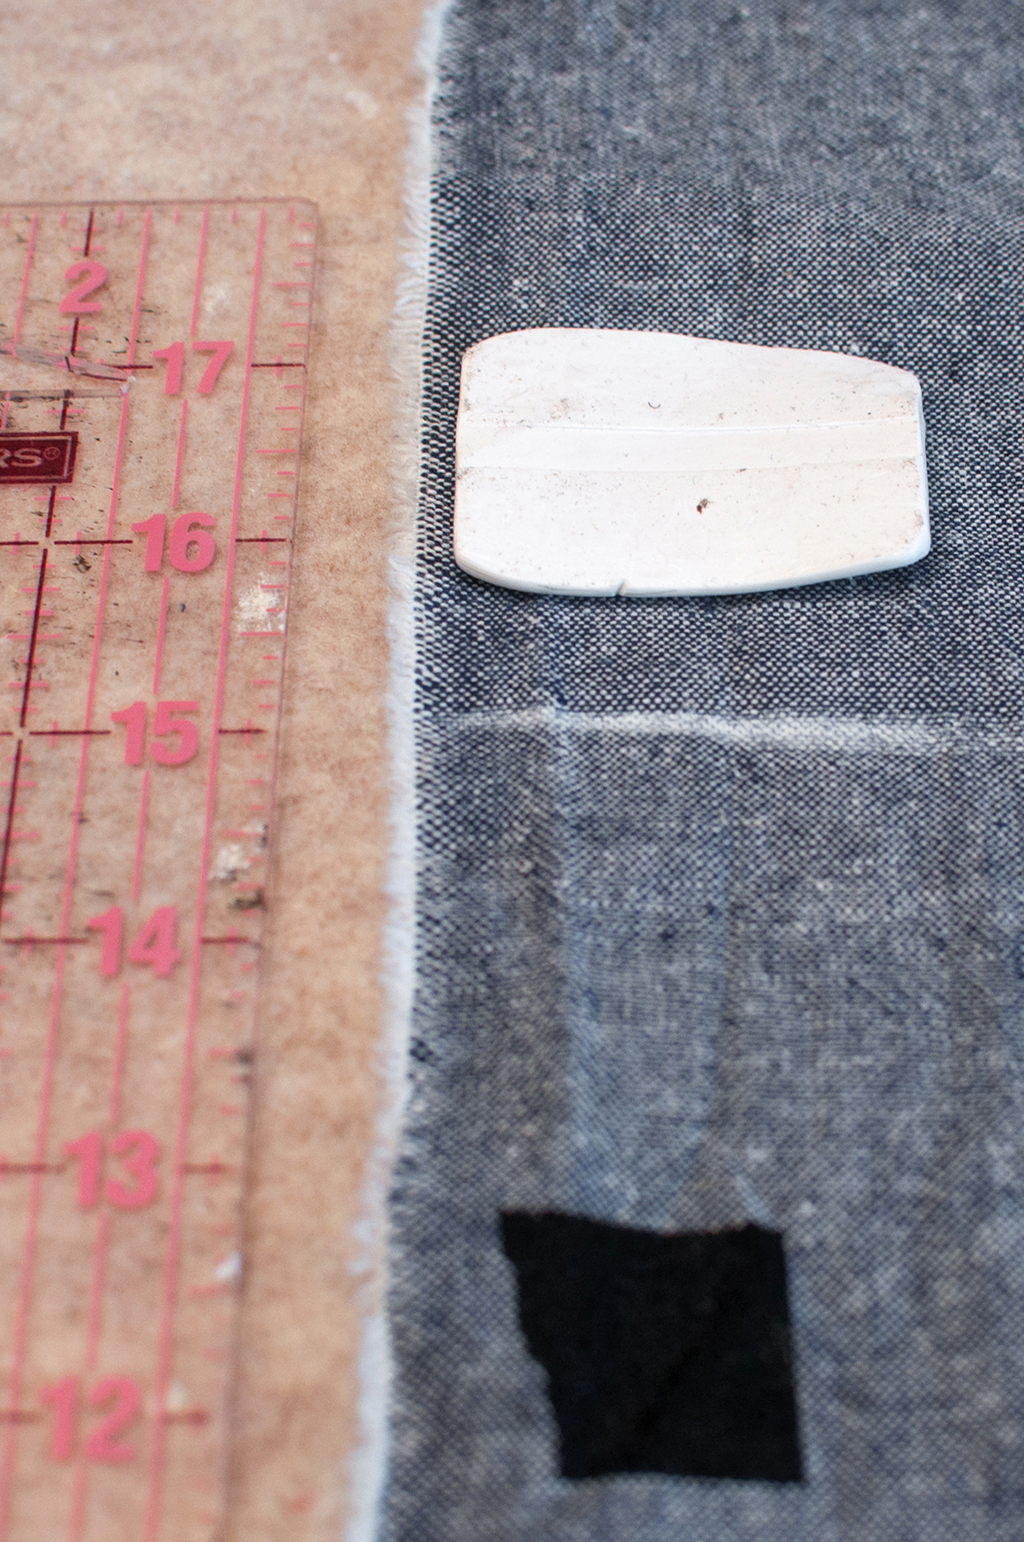
Before you start printing, mark the image area widths across the width of the fabric with fabric chalk. You will be marking every 12” across the width of the fabric, beginning at the selvage edge, creating four “image sections.” The selvage edge marks image section one, your first chalk mark marks image section two, the second chalk mark marks image section three, and the fourth chalk mark marks image section four. Make a mental note of these numbered image width marks, because I will refer to them in the steps that follow.
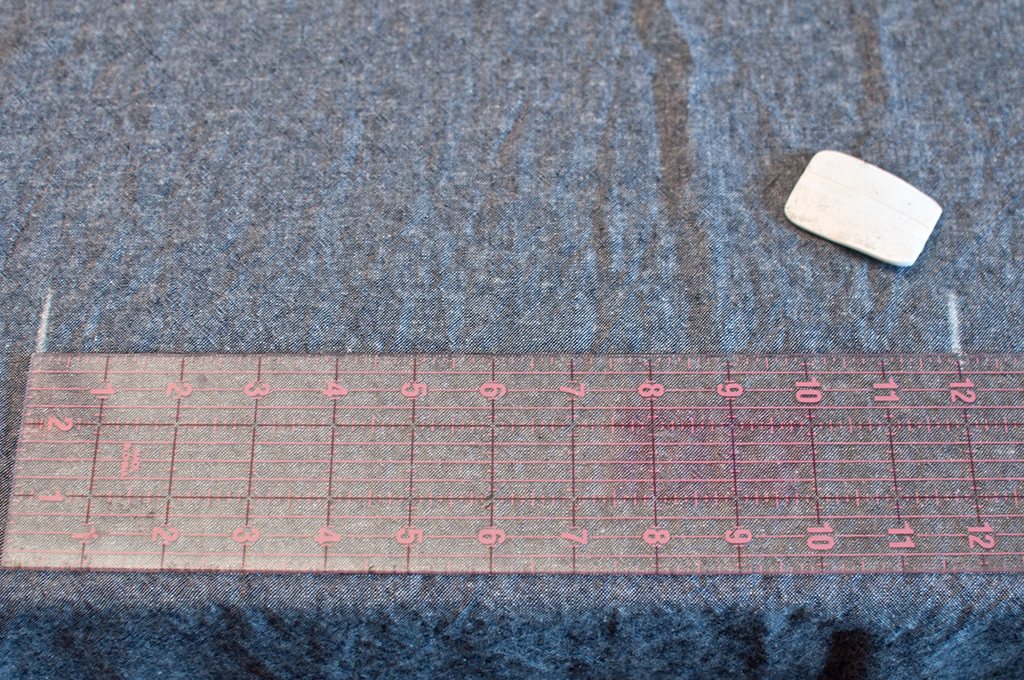
Mark the image area widths across the width of the fabric with fabric chalk. The selvage edge marks image section one, your first chalk mark marks image section two, the second chalk mark marks image section three, and the fourth chalk mark marks image section four.
Place the screen on the fabric, print side down. Align the horizontal mark on the left side of your screen with the cut edge of the fabric. Keeping the screen in line, move it left to align the vertical mark on the left bottom of your screen with the selvage edge.
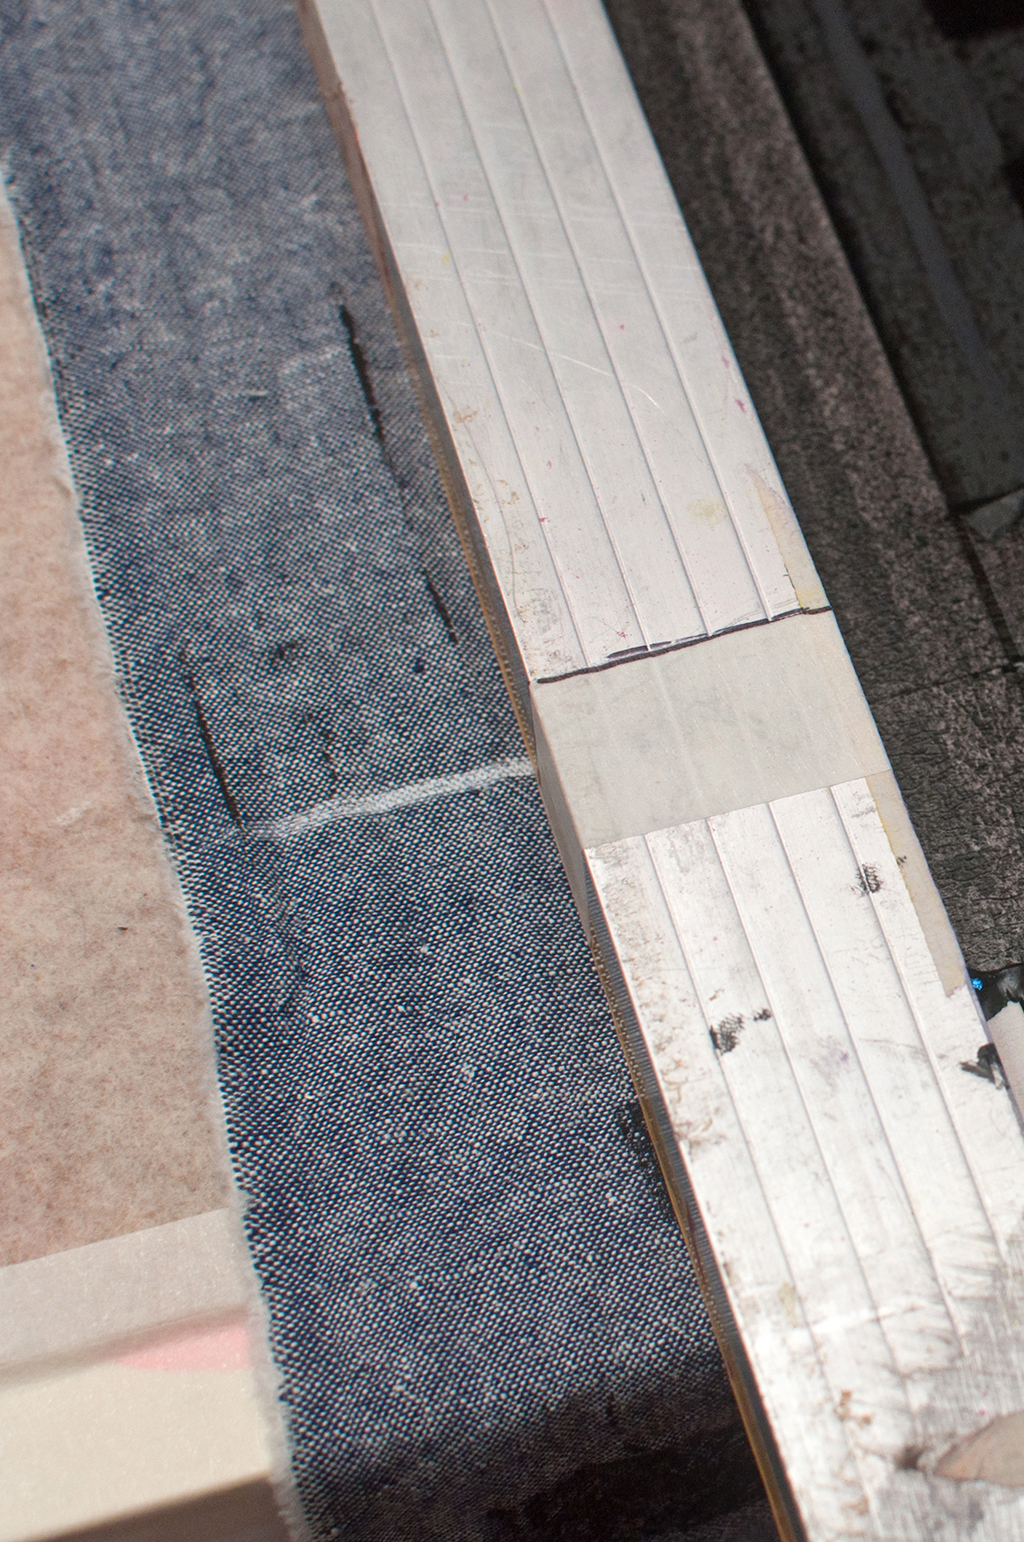
Place the T-ruler on the right side of your screen and make sure the T-ruler’s short end sits flush against the edge of the table. Mark where the top edge of the screen touches the T-ruler. You’ll use this mark to register your screen as you print in a row across the fabric. Use masking tape to make the mark, because you will be re-marking where the screen touches the T-ruler with every new row.
We will be screen printing every other image section across the row, so that they can dry in between impressions. You will print section one and three first, and then move on to sections two and four.
Screen printing the first row
Begin screen printing the first row by flooding the screen. “Flooding” means filling the screen with ink. Without moving the screen out of place, prop up one end by placing a roll of tape beneath it, lifting the screen off the table so you don’t deposit any ink onto the fabric as you flood. Using a spoon, spread ink across the screen in a line above your image area. Using the squeegee, pull the ink down to the bottom of the screen, filling in the printable areas with a thin layer of ink. You will flood the screen after every impression to keep the ink wet in the screen.
We will be screen printing every other image section across the row, so that they can dry in between impressions. You will print section one and three first, and then move on to sections two and four.
Prop one end of the screen off the table by placing a roll of tape beneath it, lifting the screen so you don’t deposit any ink onto the fabric as you flood the screen with ink. With a spoon, spread ink across the screen in a line above your image area.
Once the screen is flooded, remove the prop and place the screen back on the fabric. Print the first impression by pulling the squeegee toward you at a 45 to 60 degree angle while applying pressure into the screen. You can pull more than once; two or three passes is common when printing on fabric. Lift the screen and flood it. How did your first print turn out?
Quickly move onto the next impression so the ink doesn’t dry in the screen. Move the screen to align the vertical mark on the left bottom of your screen to the third image width mark on the fabric. Place the T-ruler on the right side of your screen, and make sure the T-ruler’s short end sits flush against the edge of the table. Move the screen until its top edge aligns with the marking on the T-ruler. Print, lift, and flood the screen. Spritz the screen with water to keep it wet while you prepare to print the next two impressions in the row. Set the screen aside, and blow-dry the two images you just printed until they are dry. This also heat sets the fabric.
Once the impressions are dry, place the screen on the fabric, print side down. Align the vertical mark on the left bottom of your screen to the second image width mark on the fabric. Place the T-ruler on the right side of your screen, and make sure the T-ruler’s short end sits flush against the edge of the table. Move the screen until its top edge aligns with the marking on the T-ruler. Print, lift, and flood the screen.
Now move the screen to align the vertical mark on the left bottom of your screen to the fourth image width mark on the fabric. Place the T-ruler on the right side of your screen, and make sure the T-ruler’s short end sits flush against the edge of the table. Move the screen until its top edge aligns with the marking on the T-ruler. If your screen is wider than the remaining fabric, use newspaper to catch the ink and remove it after printing. Print, lift, and flood the screen. Spritz the screen with water to keep it wet while you prepare to print the next row. Set the screen aside, and blow-dry the two newly printed images until dry.
Screen printing the second row
Before you pull down the fabric for the next row, measure the height of image area (15”) from the fabric’s cut edge, and mark it with chalk on the left selvage edge of the fabric. Pull the fabric down for the next row of prints, keeping the selvage edge parallel to the table’s edge. As you did for row one, you will be using the selvage edge to help register the screen for the first print of the second row.
Measure the image area widths (12”) across the width of fabric and mark with chalk, like you did for the first row.
Place the screen on the fabric, print side down. Align the horizontal mark on the left side of your screen to the 15” height mark you just made on the fabric. Keeping the screen in line with this height mark, move the screen to the left to align the vertical mark on the left bottom of your screen to the selvage edge of fabric. Place the T-ruler on the right side of your screen, and make sure the T-ruler’s short end sits flush against the edge of the table. Mark with tape where the top edge of the screen touches the T-ruler.
Align the horizontal left side mark on the screen to the 15” height mark you just made on the fabric.
Repeat the steps above to screen print the second row as you did for the first row, and then continue printing the rest of the yardage row by row. If the ink stops spreading when you are flooding, add more ink to the screen.
Continue printing row by row, until you have printed all of the yardage.
05 Section
Clean Up and Heat Setting
Cleaning up is easy and can be done in your bathroom.
When you are done printing, remove the tape from your screen. In the bathtub, wash away the ink on the screen using a sponge and warm water. Do this promptly after printing, so the ink doesn’t dry in the screen. Wash the squeegee, spoon, sponge, and anything else with ink on it using soap and warm water in the sink.
Though heat setting ensures your screen printed design will last through many washings, wait a week before washing to allow the ink to cure.

About the Author
Melissa Dettloff is a freelance designer and printmaker in Detroit who fills her days and nights with drawing, screen printing, and sewing. View her portfolio at melissadettloff.com.