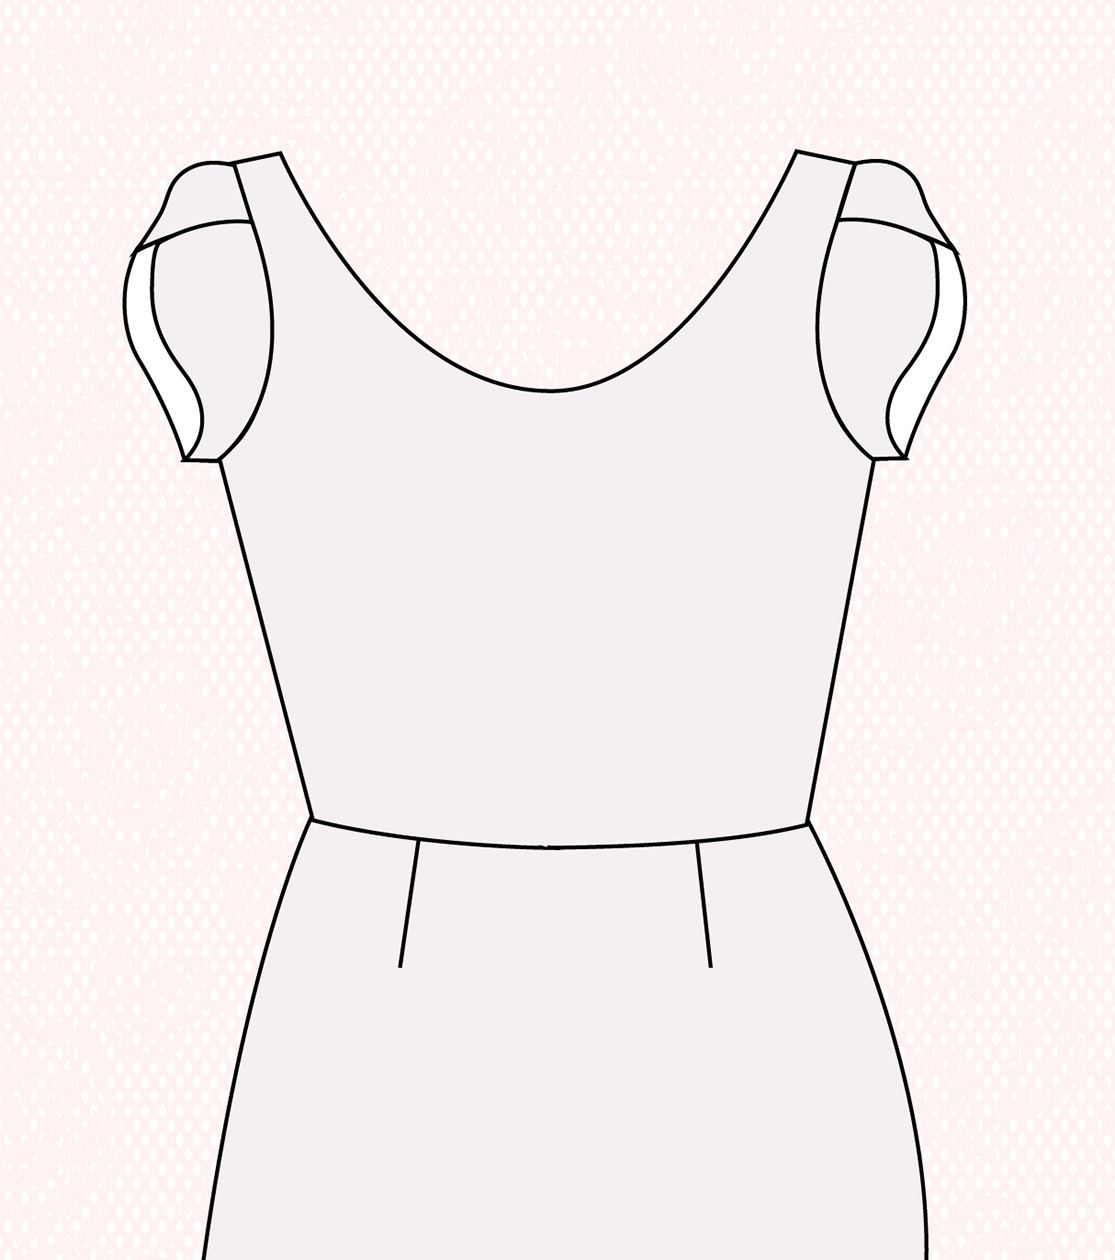
Block Paper Scissors is a patternmaking series featuring easy-to-follow tutorials—no experience necessary to join in! Each time we’ll start with a basic bodice pattern (also called a block or a sloper) with an underarm bust dart and a waist dart. We’ll use that as a jumping off point to create a different bodice design each time.
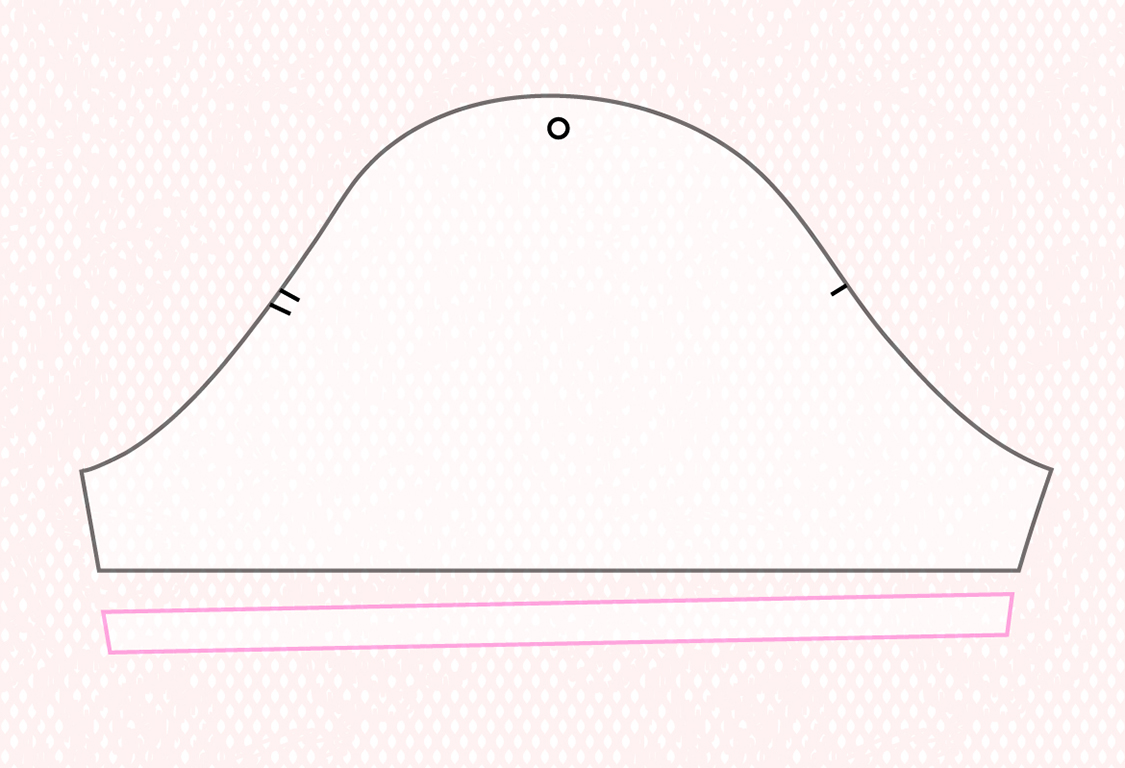
This month, we are deviating a little bit and playing around with the sleeve. You’ll want to start with a standard dart-less, short sleeve (if it’s long, just shorten it). The Peony, Laurel, and Hawthorn patterns would all be great options. Make sure you do any and all fit adjustments before attempting any patternmaking modifications.
In this tutorial, we’ll be adding a petal sleeve detail to our standard sleeve. Play with layers by making it out of sheer fabric with a baby hem, or line it and pipe the edge for a bolder look. This would be an elegant detail to add to a holiday dress—imagine it in a subtle, metallic brocade lined with lush garnet silk. Gorgeous!
How to:
Step | 01
Remove the hem allowance from the bottom edge of sleeve. If working with a long sleeve, shorten so the finished side seam measures around 5/8”–2” (personal preference).
Step | 02
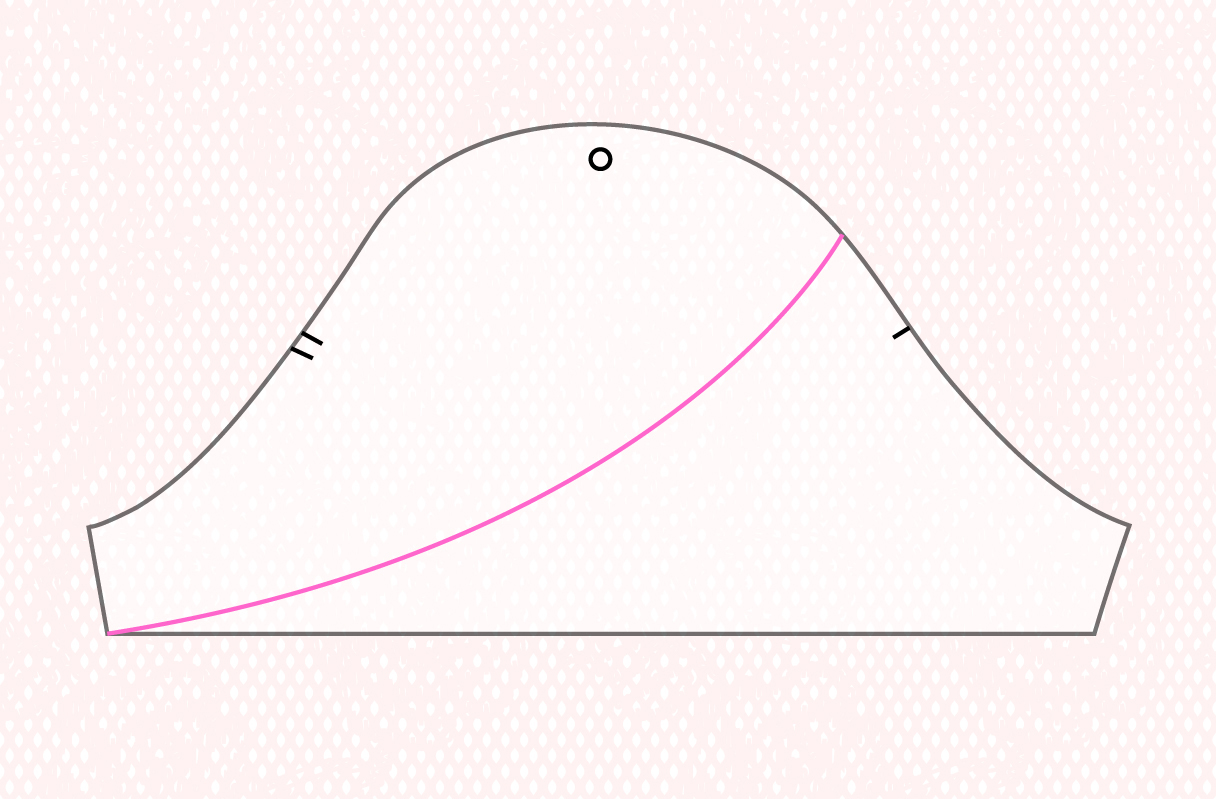
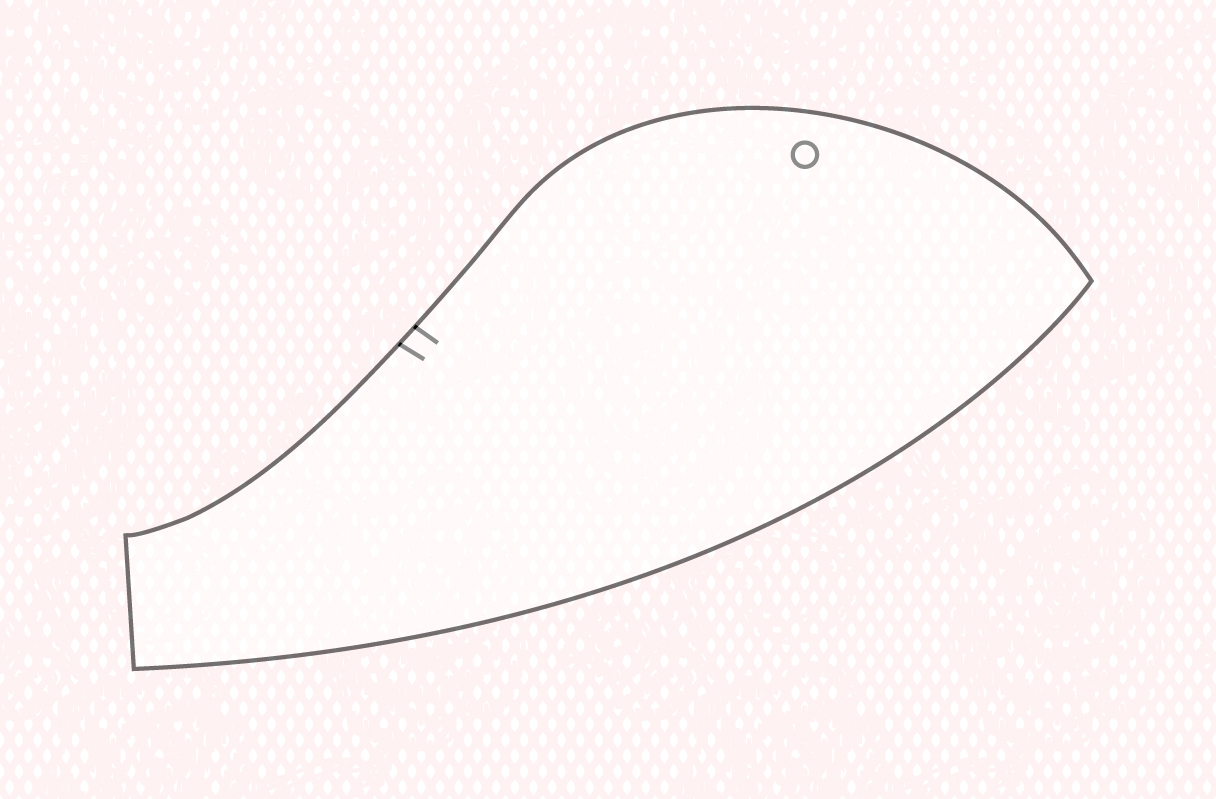
Trace off the sleeve, transferring marks. Draw a curved line from the bottom of the back side seam up to just above the front notch as shown, or at the desired design point.
Step | 03
Remove the lower half.
Step | 04
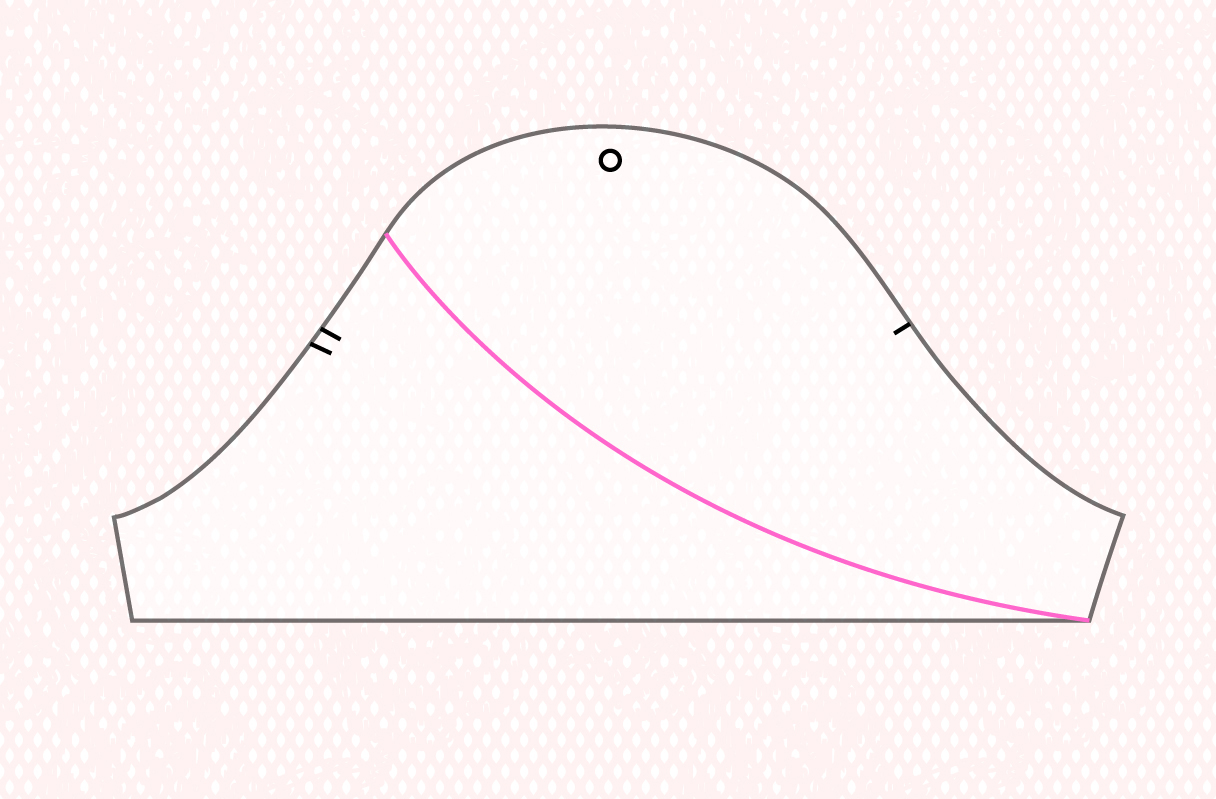
Trace off the original sleeve again, transferring marks. Draw a curved line from the front side seam to just above the back notch as shown, or at the desired design point.
Step | 05
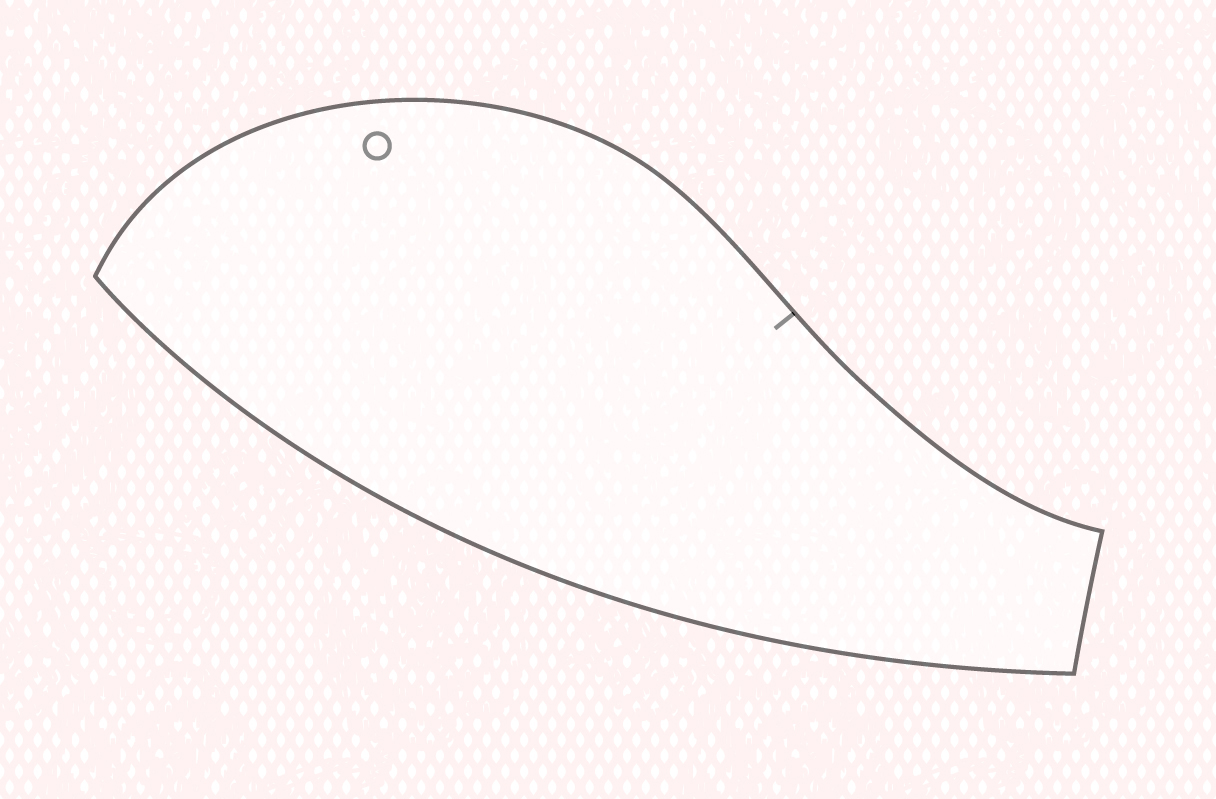
Remove the lower half.
Step | 06
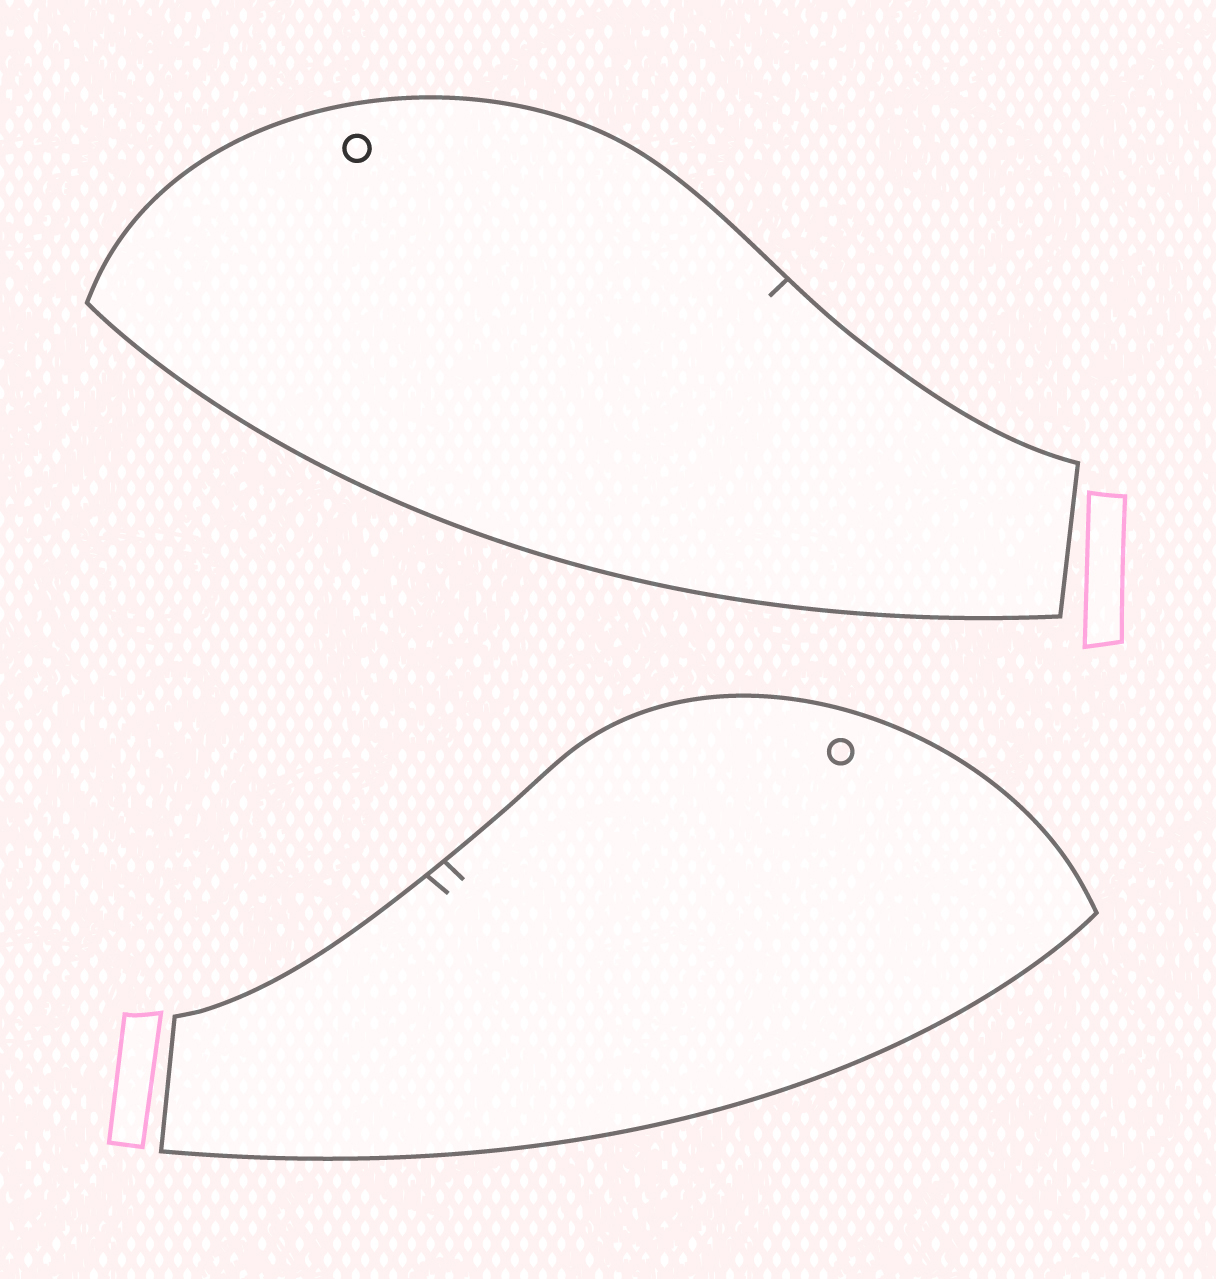
Trim the seam allowances from both side seams.
Step | 07
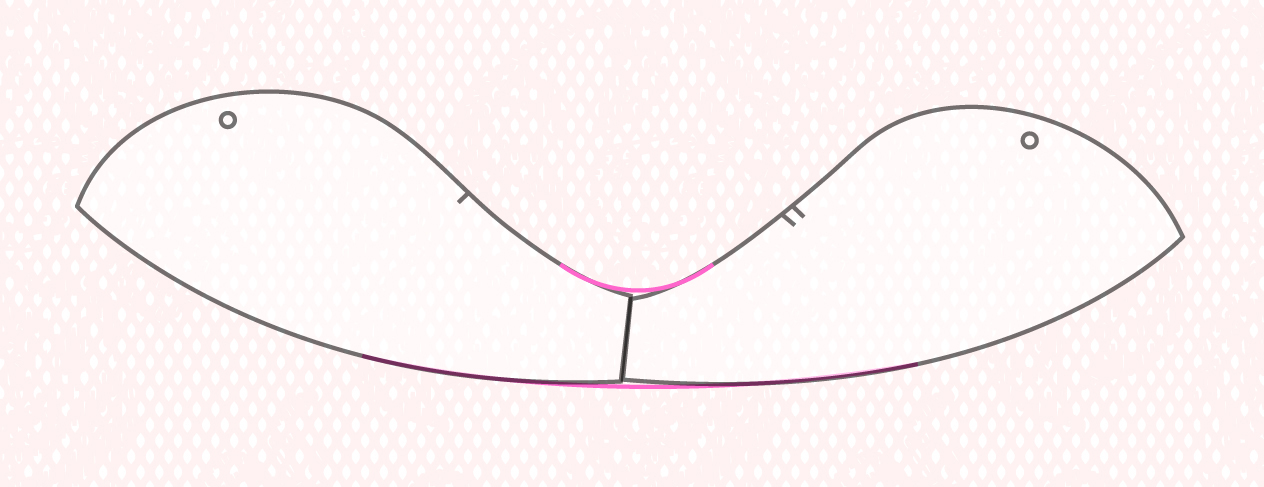
Align the side seams flush with each other and tape together. Place the paper behind the pattern piece and redraw the bottom and top curves at the side seam to blend the jagged edges. Trim.
Step | 08
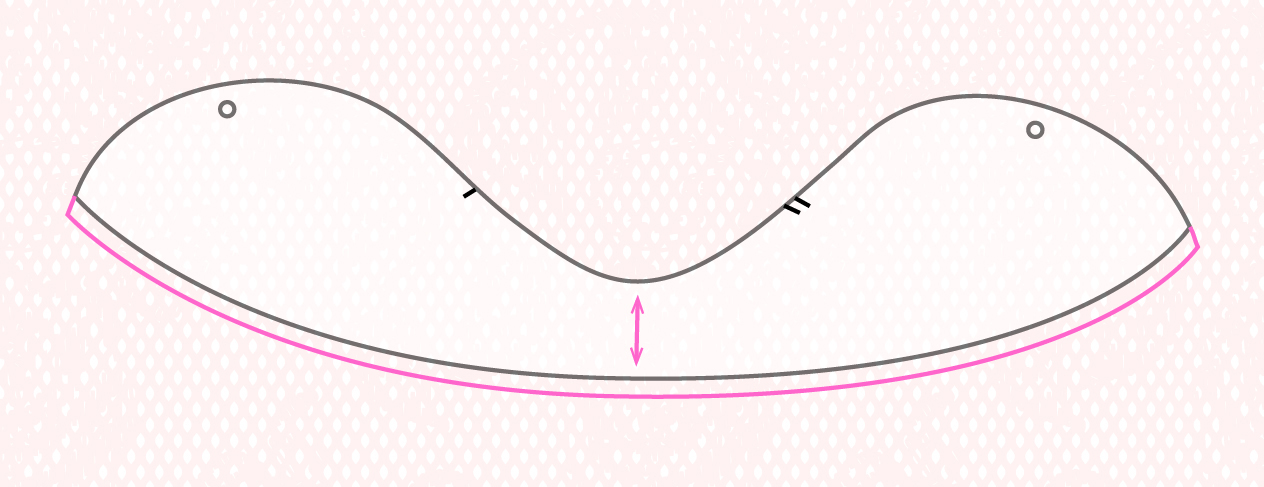
Redraw the grainline parallel to the taped side seam. Add the hem allowance to the bottom edge.
Sewing notes
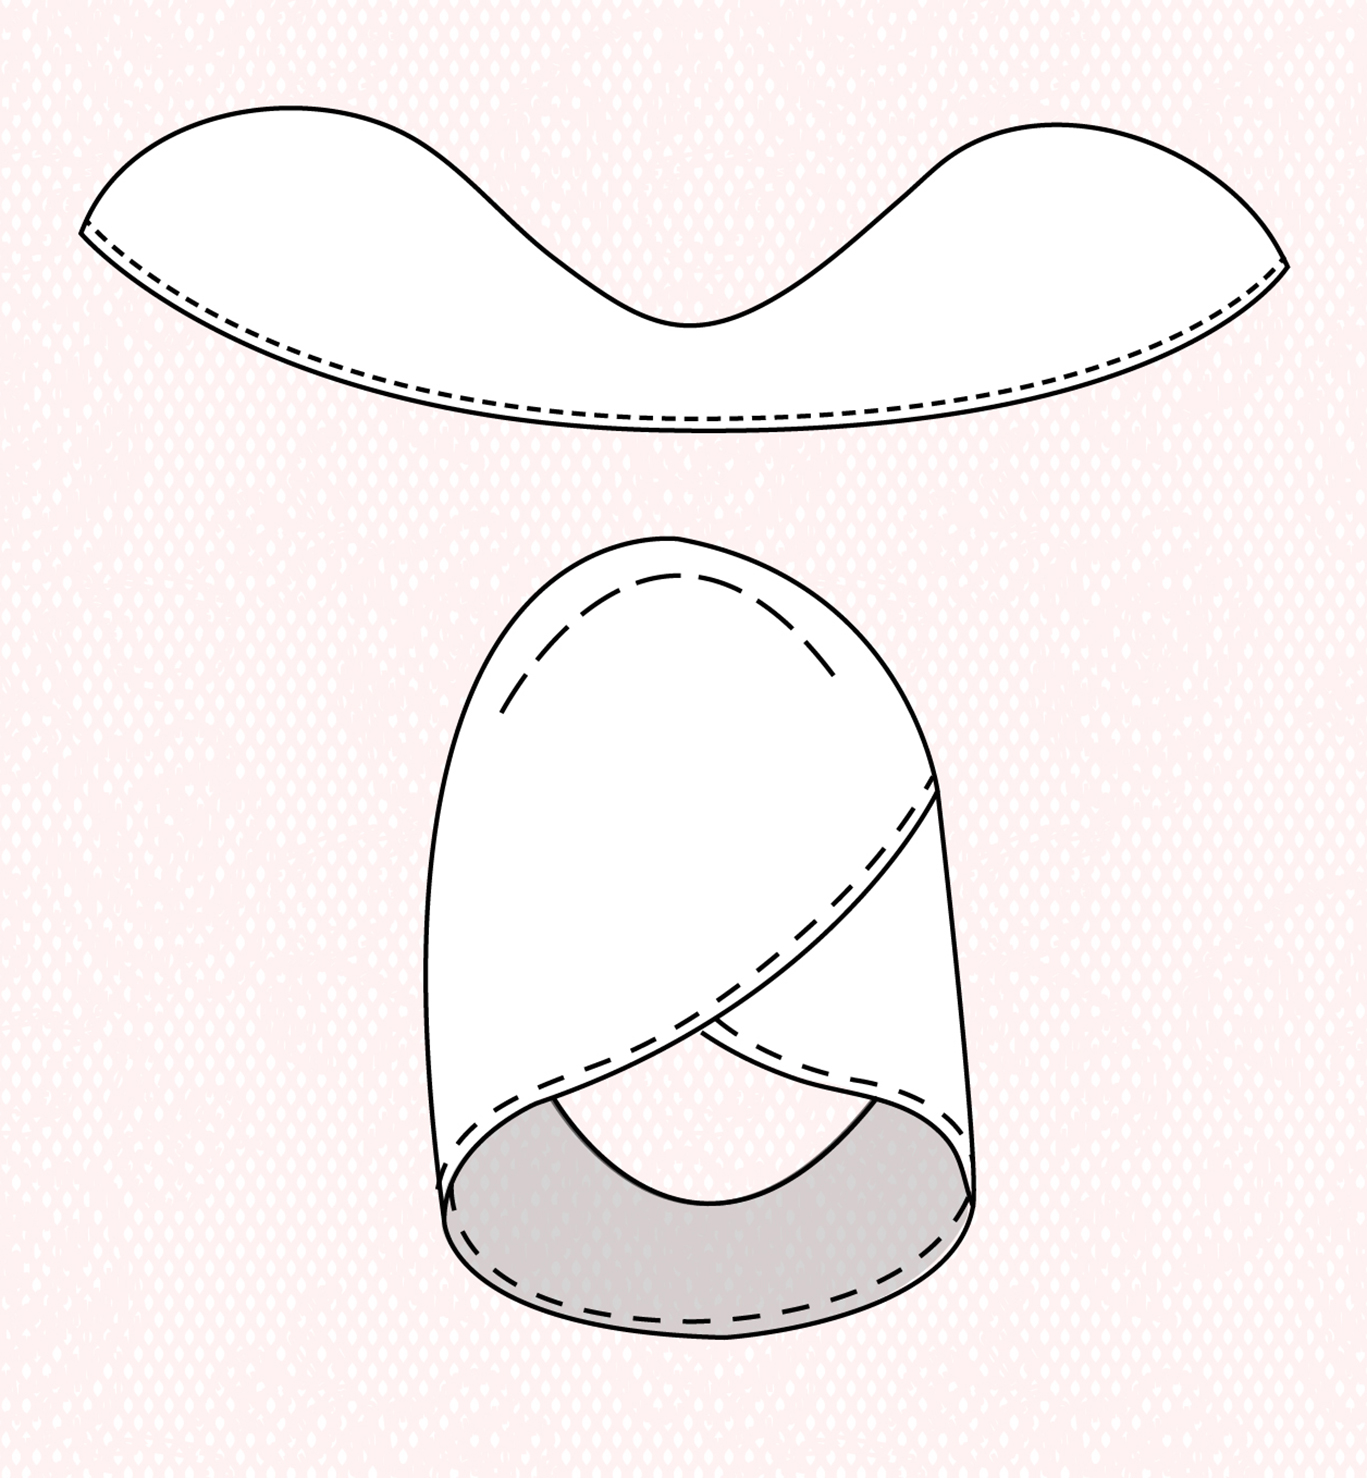
Hem the bottom edge of the sleeve. A very narrow, baby, or rolled hem will likely look best with this sleeve style. Then, bring the back of sleeve cap over the front of sleeve cap, so that the wrong side of the back is against the right side of the front. Align the marks and baste the overlapping portions together. Proceed with the sleeve insertion as instructed in the pattern.
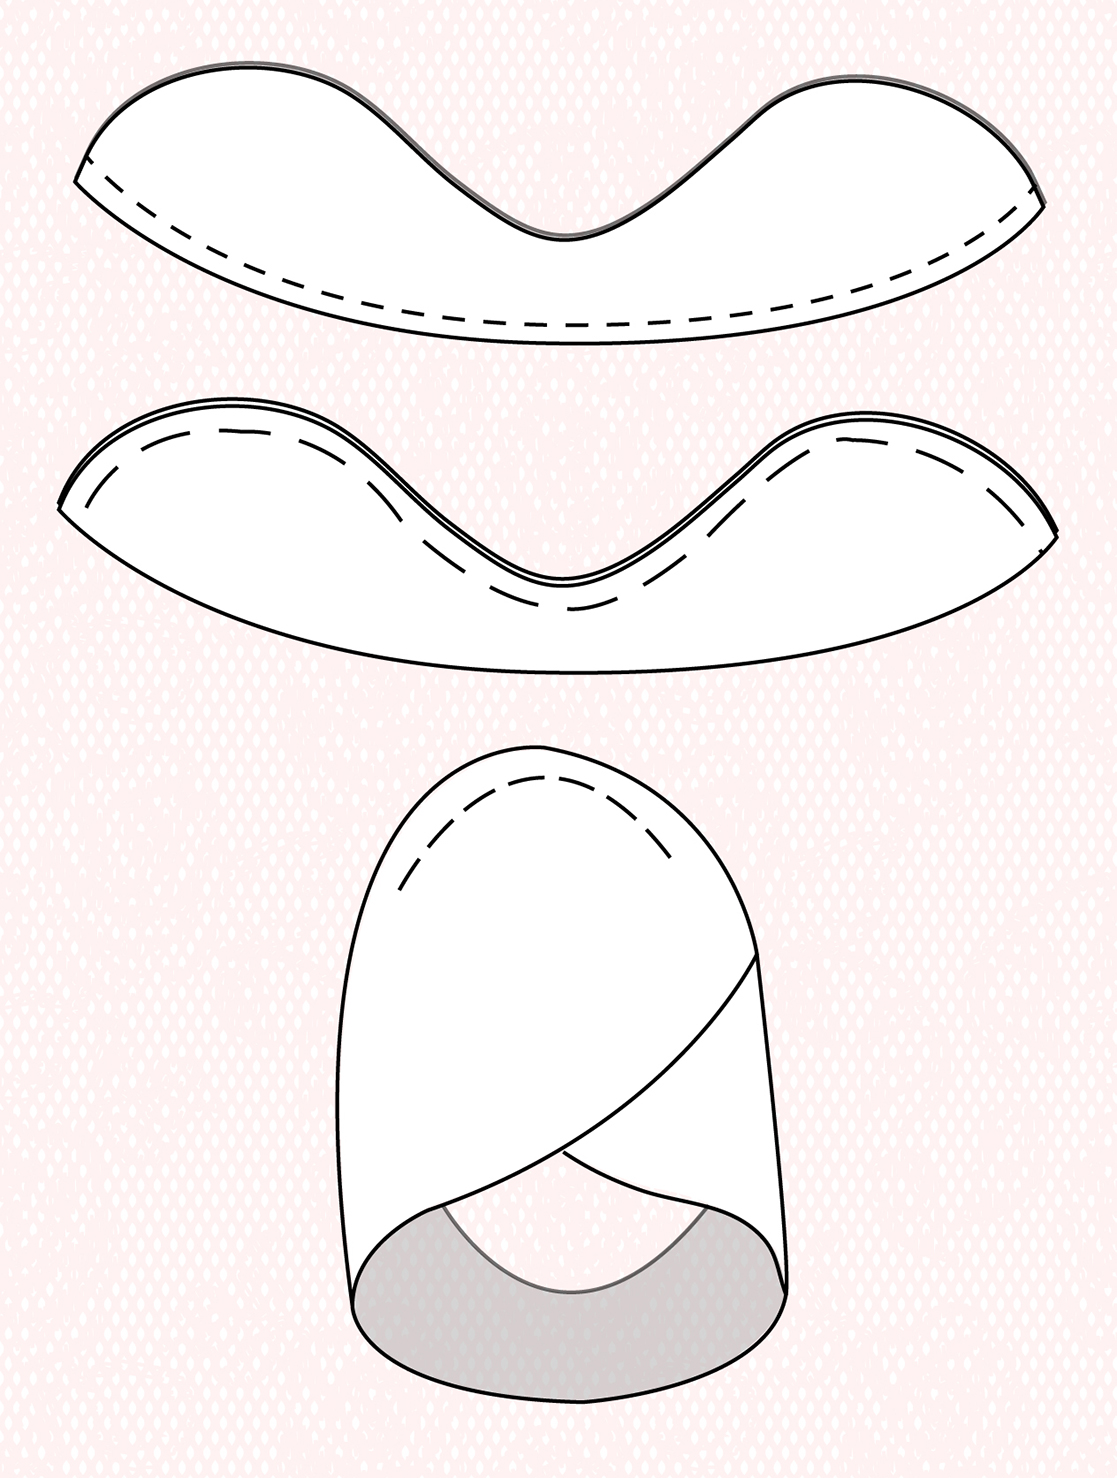
Alternatively, line the sleeve. Cut one outer sleeve and one lining for each sleeve. Stitch the bottom edges right sides together at the hem allowance. Trim/grade seam and clip curves, then turn right side out. Understitch and press. Align the top raw edges of outer sleeve and sleeve lining and baste together. Bring the back of the sleeve cap over the front of the sleeve cap, so that the lining side of the back is against the outer side of the front. Align the shoulder seam mark and baste the overlapping portions together. Proceed with the sleeve insertion as instructed.

About the Author
Devon Iott is a sewing teacher that works for Husqvarna Viking® and Pfaff® brand sewing machines. She blogs at Miss Make in Nashville, TN with two chickens and a cat.
 Related Articles
 Best Articles