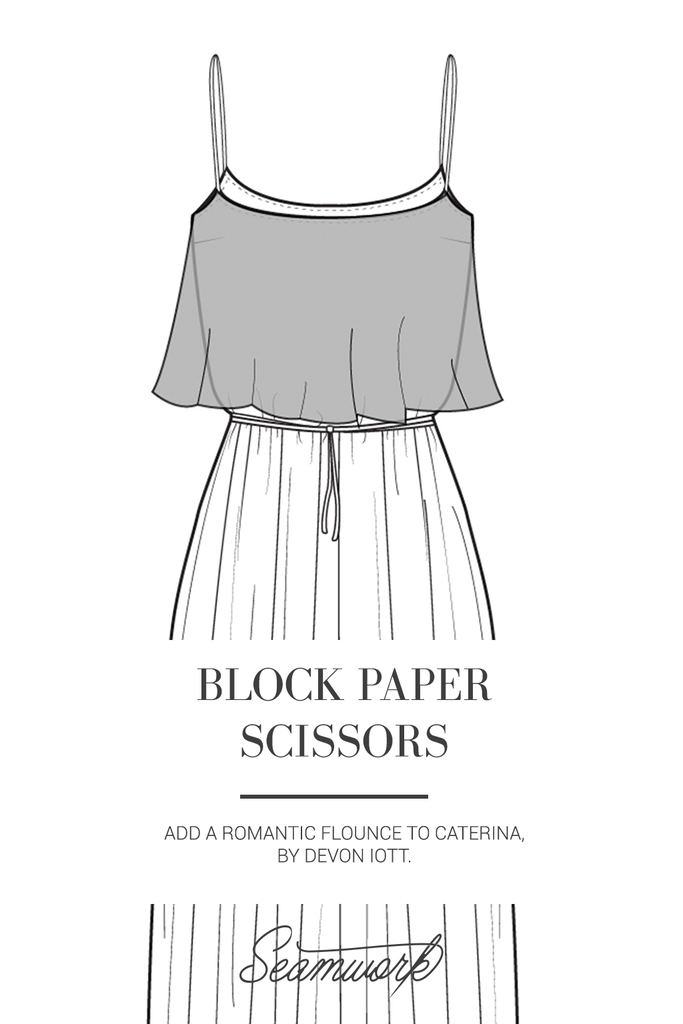
Block Paper Scissors is a monthly column featuring patternmaking hacks that will help you give your Seamwork patterns a custom spin – all you need is paper, a ruler, and a pencil!
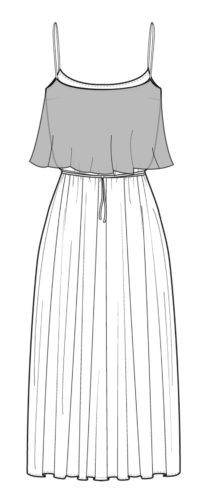
This pattern adds a soft outer bodice layer to the Catarina dress. By slashing and spreading we’ll add some floaty and flattering ease. Use a contrast chiffon for ultimate lightweight dreaminess!
Note: Be sure to make any fit adjustments before doing the pattern hack.
You'll Need:
- Tracing or pattern paper
- ½-1 yard chiffon (yardage depends on pattern size and fabric width, use pattern pieces to determine).
- Yardage and materials as required by pattern
How to:
Step | 01
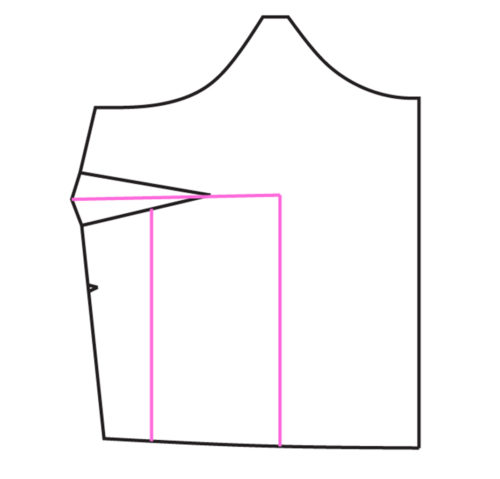
Trace off the front and the back bodice pieces. On the front bodice tracing, mark the bust point by holding the pattern up to the body. Draw a line through the center of the dart to the bust point. Draw a line from the bust point to the waist, perpendicular to the center front. Draw a second line halfway through the dart to the waist, perpendicular to the center front.
Step | 02
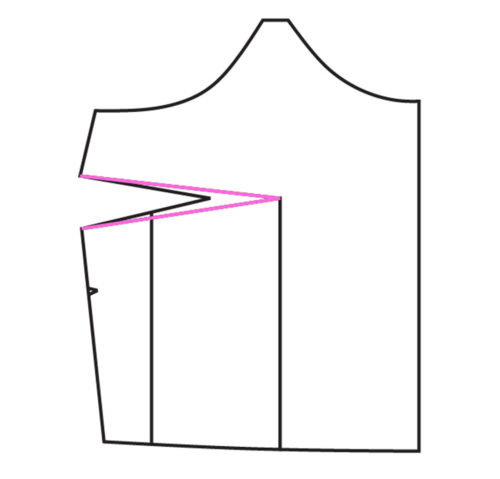
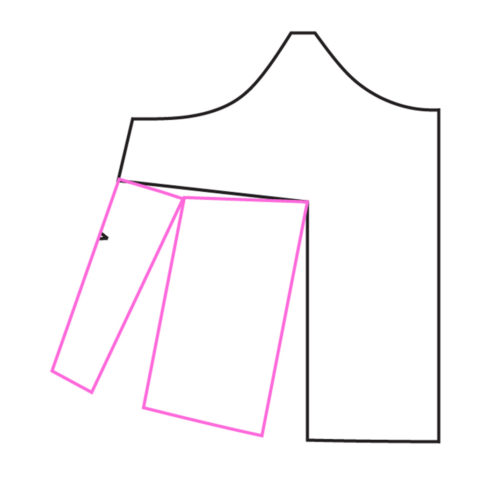
Draw lines from the ends of the dart legs to the bust point. Cut along these lines and remove the dart.
Step | 03
Slash up to but not through the ends of both vertical lines to create a hinge. Rotate pattern pieces so the bust dart is closed and the bottom ends are 1.5” apart.
Step | 04
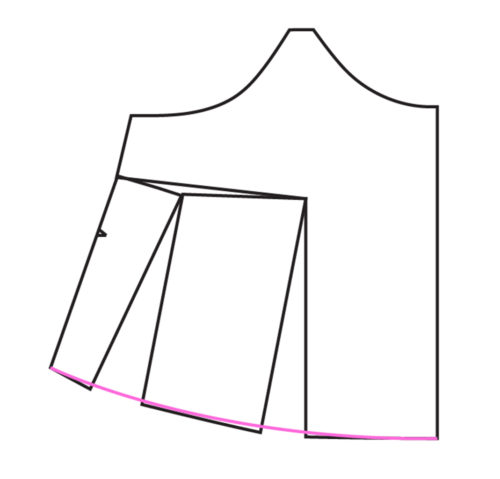
Redraw the bottom edge to blend.
Step | 05
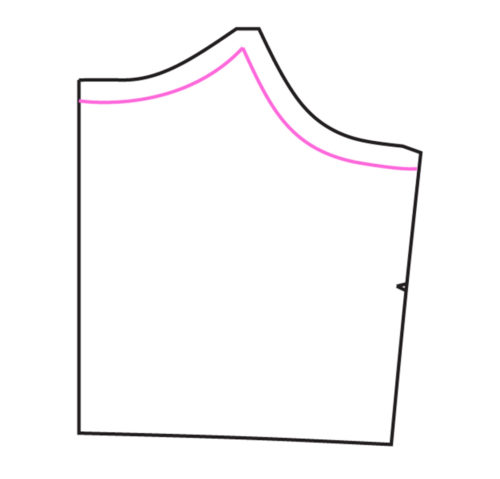
On the back bodice tracing, draw the sewing line along the top edge of the pattern piece.
Step | 06
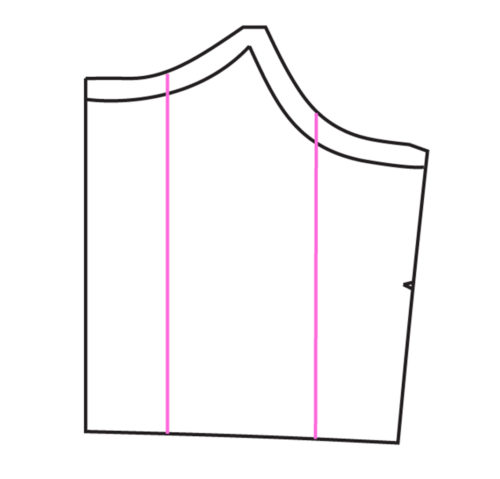
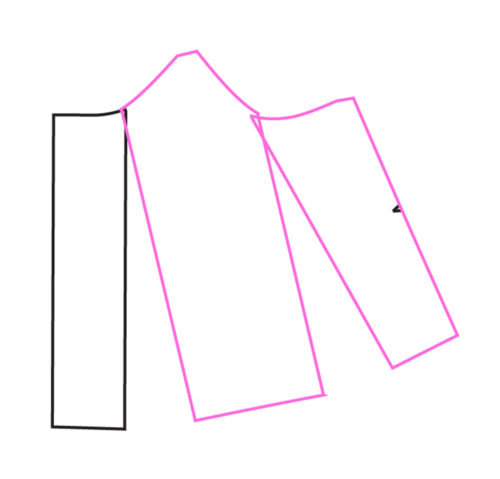
Draw a vertical line up through the center of the back neckline, parallel to the center back. Draw a second vertical line up through the armscye and parallel to the center back.v
Step | 07
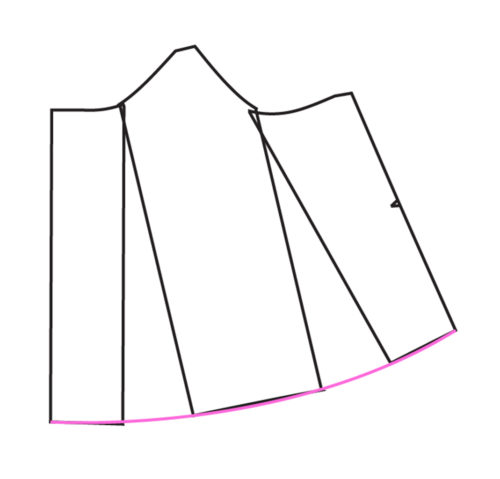
Slash vertical lines to but not through the sewing lines from both sides to the hinge. Separate the pattern pieces so the bottom edges are 1.5” apart.
Step | 08
Redraw the bottom edge to blend.
Sewing notes:
Cut the altered bodice pieces from chiffon.
Sew the side seams using a French seam and finish the bottom edge with a rolled hem or baby hem using a hem allowance of 5/8”.
Before basting the straps to the bodice, place the chiffon bodice and the main bodice together with the wrong side of chiffon against the right side of main. Baste together around top edge at 1/4”. Continue sewing according to the pattern instructions. Be careful to avoid catching the lower free edge of chiffon in any seams.

About the Author
Devon Iott is a sewing teacher that works for Husqvarna Viking and Pfaff brand sewing machines. She blogs at Miss Make and lives in Nashville, Tennessee with two chickens and a cat.
 Related Articles
 Best Articles