Sign In
When I first started sewing my own clothes, I would always omit the lining in my rush to complete the garment. Over time, I discovered that these unlined garments did not feel nice to wear or look nice from the inside, and I gradually came to the realization that the lining is an indispensable part of most garments. Linings can do a number of magical things: they cover up interfacings, pocket bags, and other interior construction elements to give the garment a clean interior finish; they prolong the life of the garment; they allow the garment to slip on and off smoothly; and they make the garment feel nice against the skin so it is more comfortable to wear.

Adding linings to garments is a relatively simple process, though care must be taken to draft the lining pattern correctly, select appropriate lining fabric, and use suitable construction methods.
Drafting a Lining from an Existing Pattern
If your sewing pattern does not include a lining pattern, fear not—it is easy to draft a lining pattern from an existing jacket or coat pattern following the step-by-step instructions below.
Before we launch into the detailed instructions, it is worth noting that these instructions are for drafting a full coat or jacket lining (not a partial lining), with front and back facings. This lining method gives the garment a more professional finish, and is closer to the look of ready-to-wear.
Preparing Your Pattern
Whenever you are making big changes to a pattern—for instance changing the structure or construction, rather than moving a dart or executing a small bust adjustment—it is key to trace your sewing pattern onto a new fresh piece of pattern paper.
When tracing your pattern, be sure to transfer all vital marks such as grainline, darts, and notches. Don't forget to clearly label all pieces!
Lastly, you will also want to remove all seam allowances. This step, though sometimes tedious, saves a lot of confusion later in the process.
The Front Lining

Step | 01
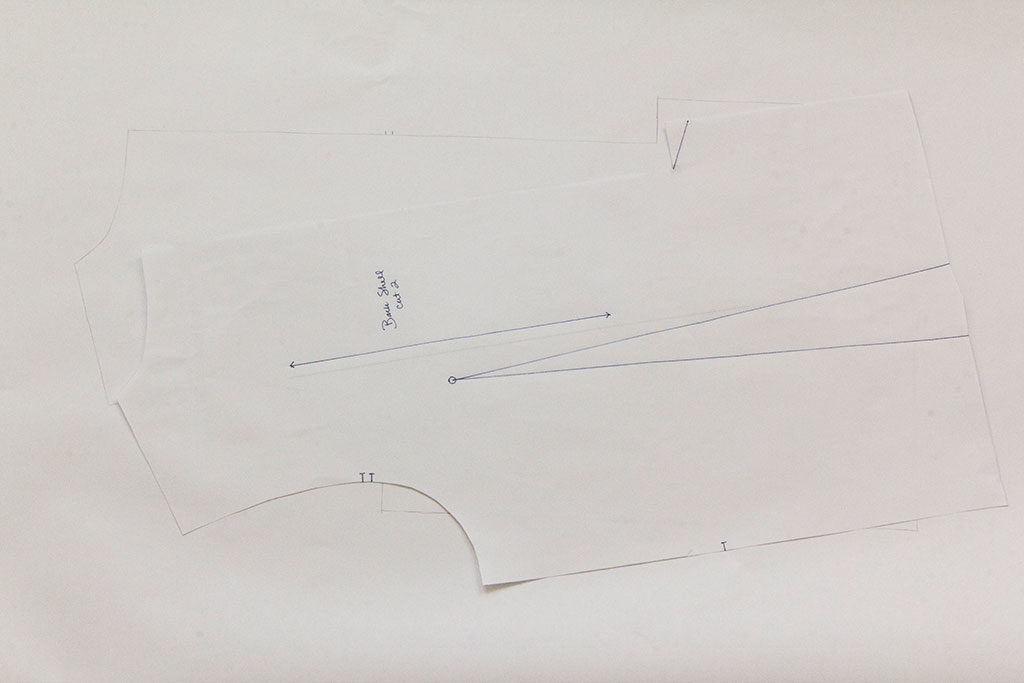
On a fresh piece of trace or pattern paper, trace the front jacket piece. Transfer all vital marks such as grainline, darts, and notches.
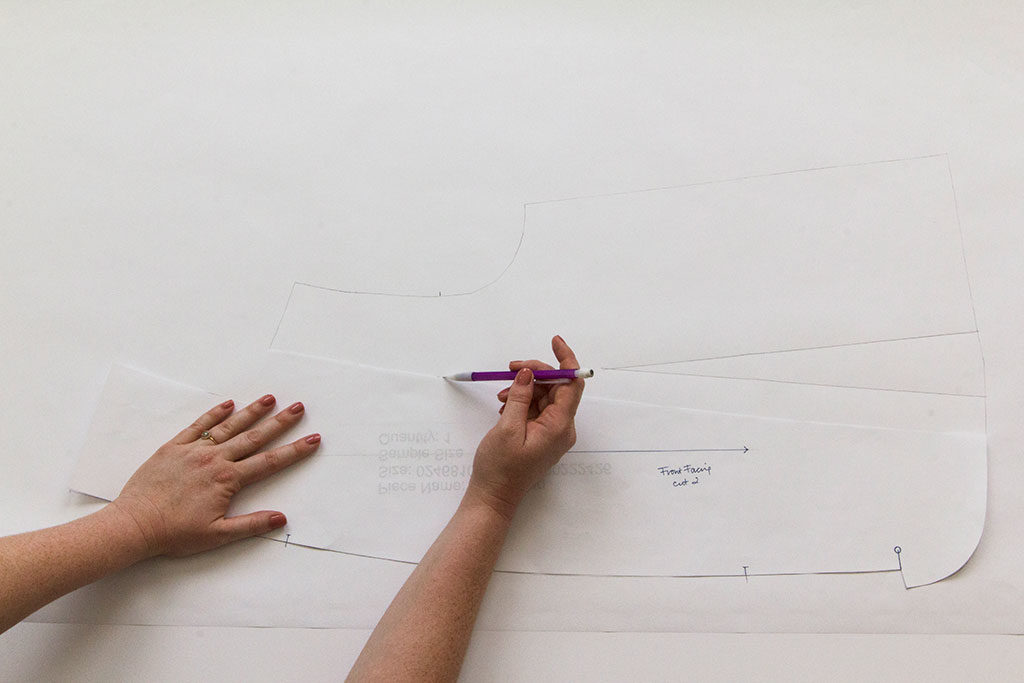
Step | 02
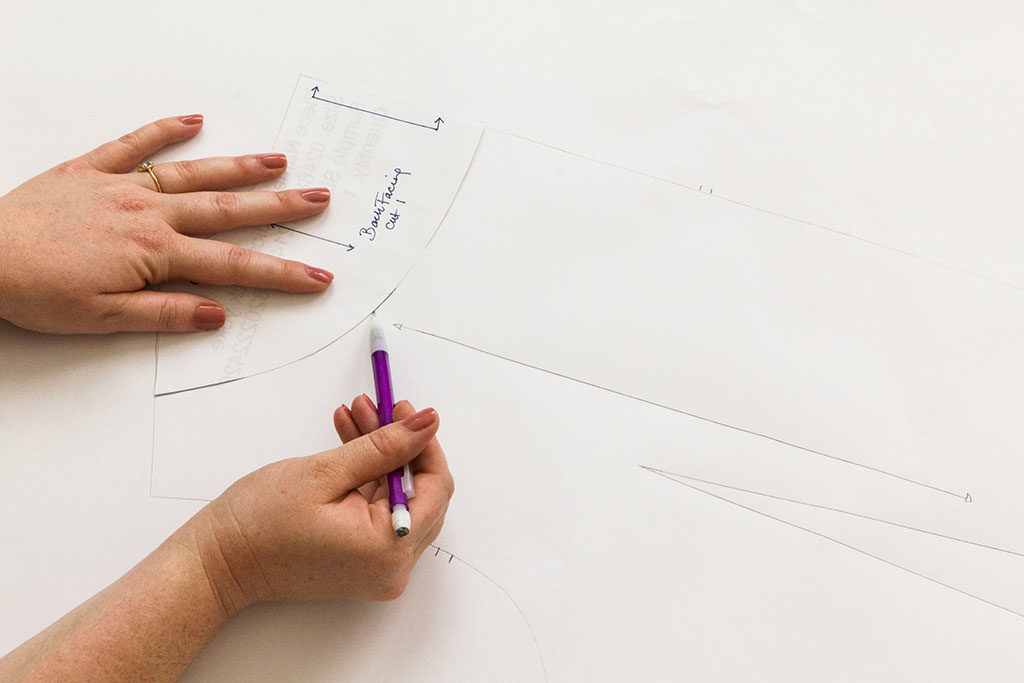
Lay the front facing pattern piece over the traced front jacket, then use a sharp pencil to draw in the facing lines.
Step | 03
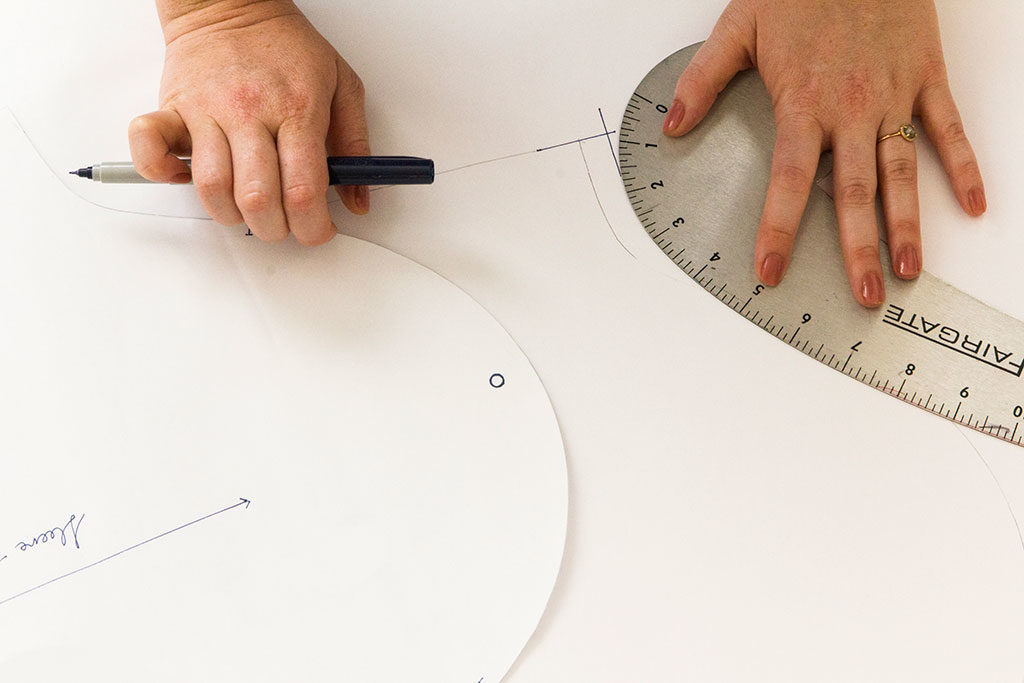
Raise the armhole ½". This allows for greater arm movement and ensures the lining does not affect the way the sleeve hangs on the outside.
NOTE: If you have a jacket with princess seams that come to the armhole, make sure you add height to the armhole on both pattern pieces, as shown in the example below.
Step | 04
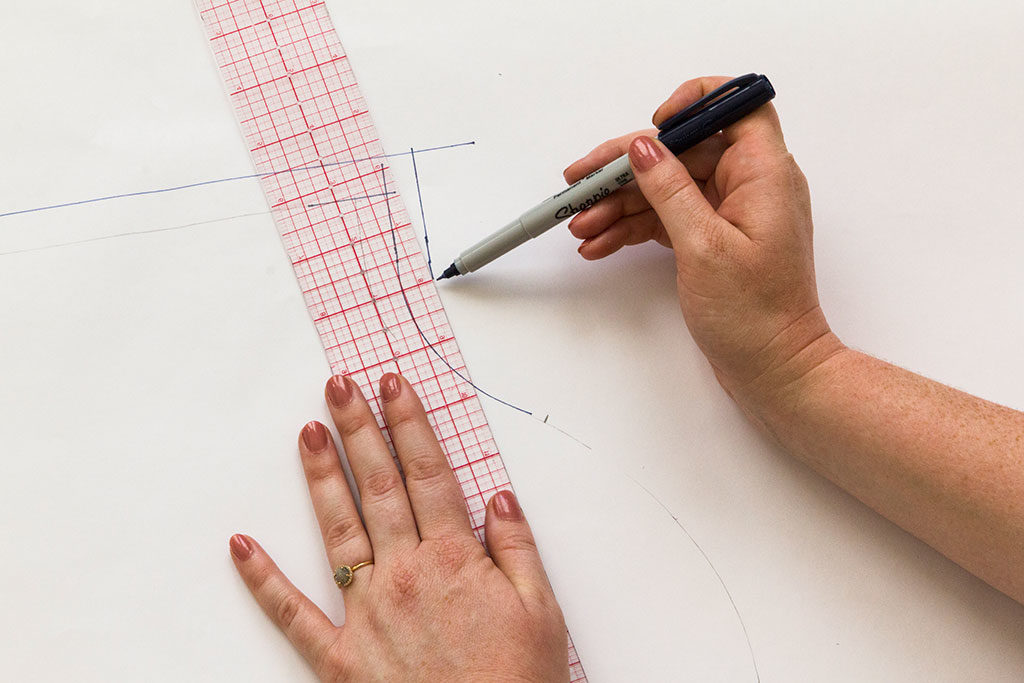
Remove 1" from the hem of the front lining, and add your desired seam allowance to the front lining piece (I used a seam allowance of 5/8"). Cut front lining piece.
Accommodating Shoulder Pads
Subtract half the thickness of the shoulder pad at the outer edge of the shoulder seam, tapering to the original shoulder seam at the neck seam on both the front and back lining. For example, if using a ½" thick shoulder pad, subtract ¼" from the outer edge of the shoulder seam.
On the sleeve, lower the sleeve cap by the full thickness of the shoulder pads. For example, if using a ½" thick shoulder pad, subtract ½" from the sleeve cap.
Back Lining
Step | 01
On a fresh piece of trace or pattern paper, trace the back jacket piece. Transfer all vital marks such as grainline, darts, and notches.
Step | 02
Lay the back facing pattern piece over the traced back jacket, then use a sharp pencil to draw in the facing lines.
Step | 03
Raise the armhole ½", allowing for better arm movement and drape.
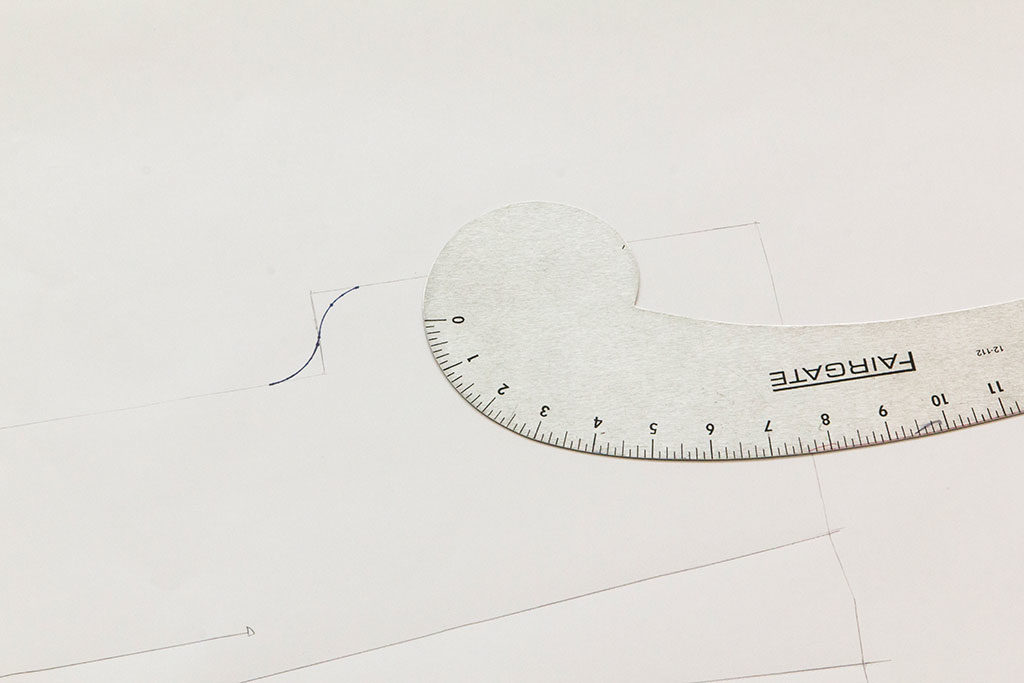
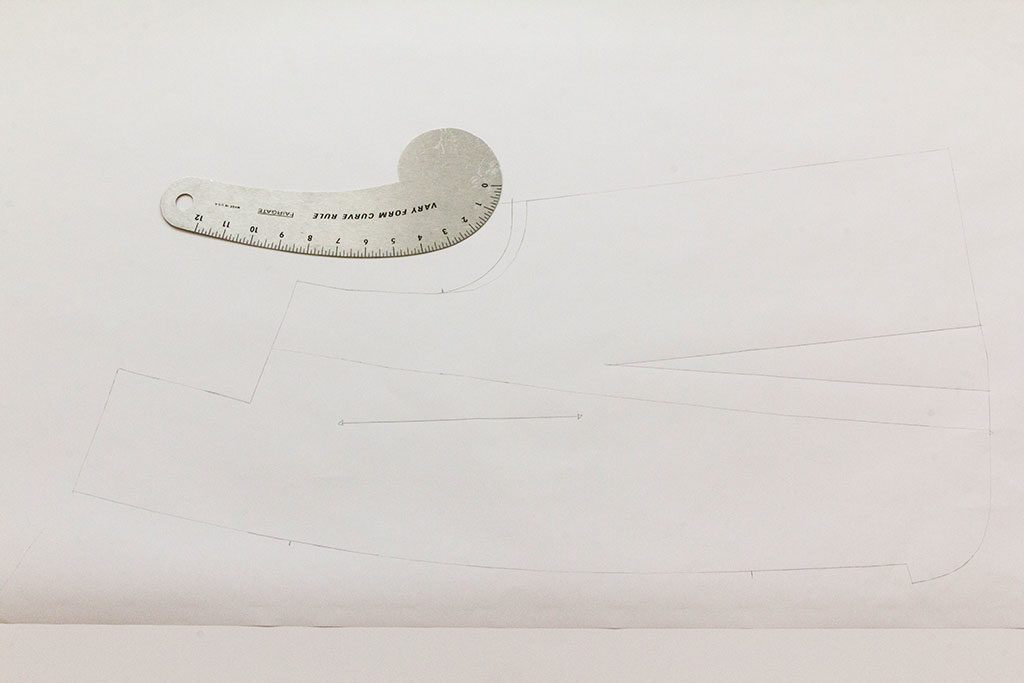
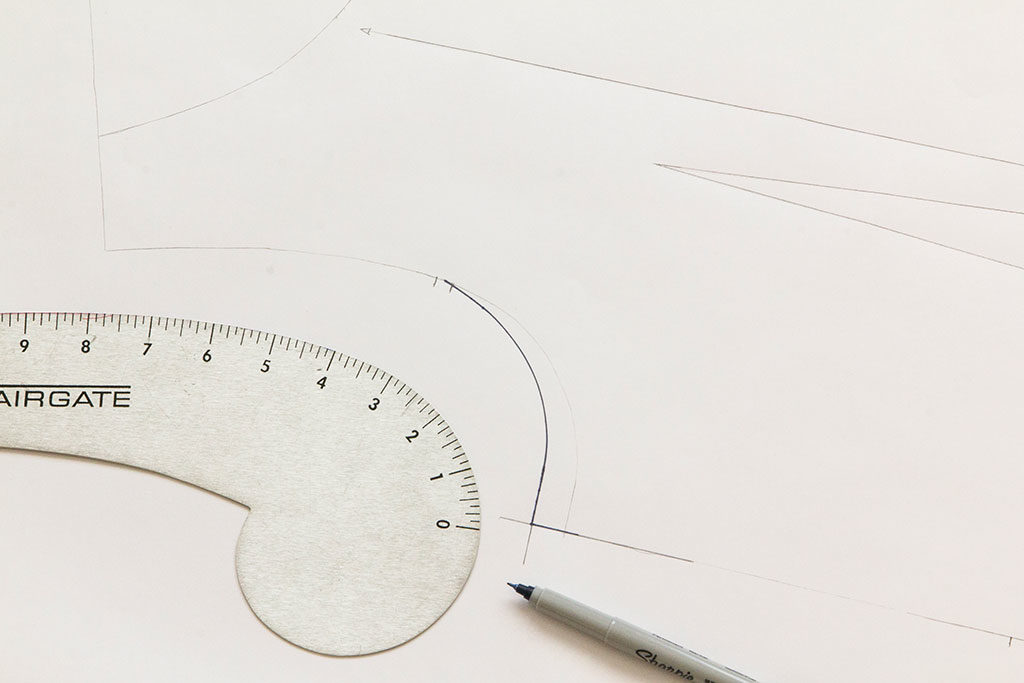
Step | 04
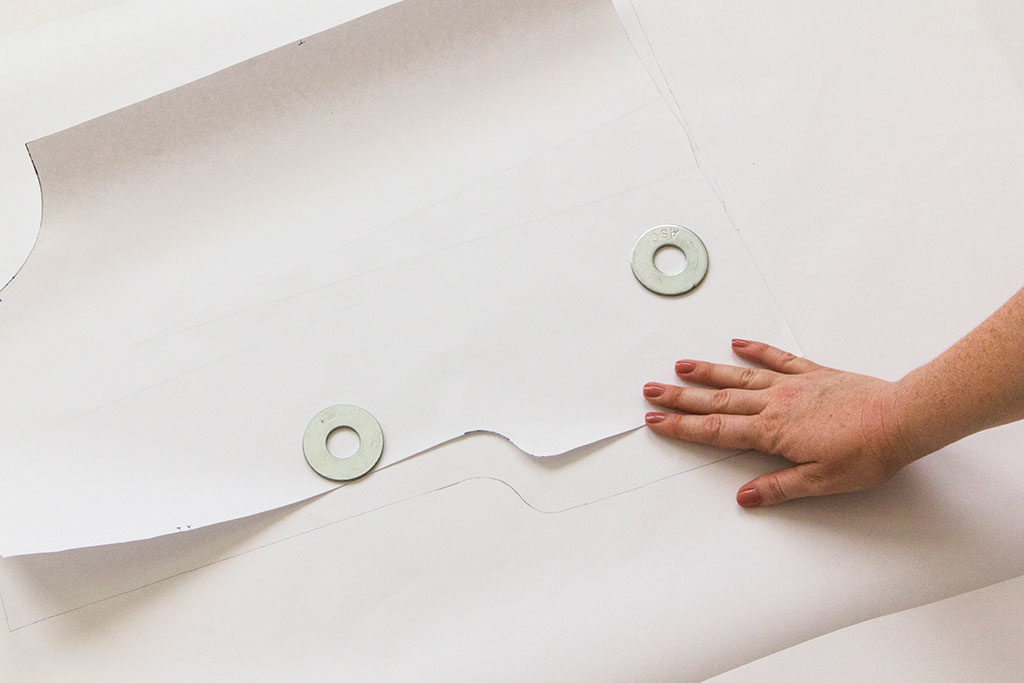
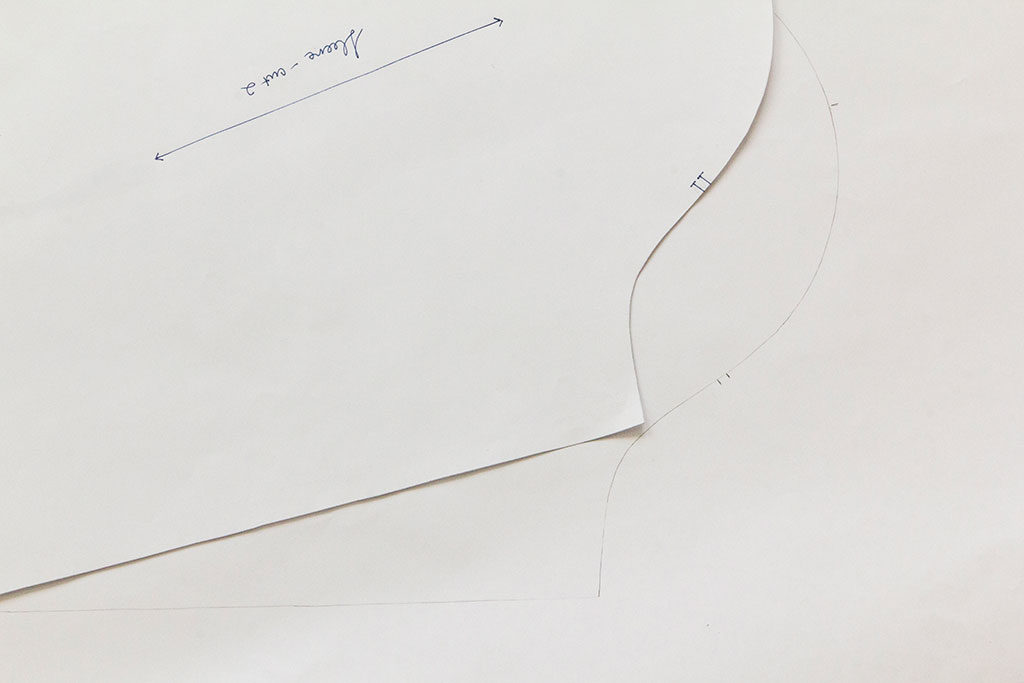
On the back vent extension, use a french curve to round off the two 90-degree angles that comprise the vent. This will be the lining for the underlap portion of the vent (right back jacket).
Step | 05
Cut out the back lining piece—sans seam allowance—and trace a mirrored image of this piece onto a separate piece of pattern paper, transferring all vital marks such as grainline, darts, and notches.
Step | 06
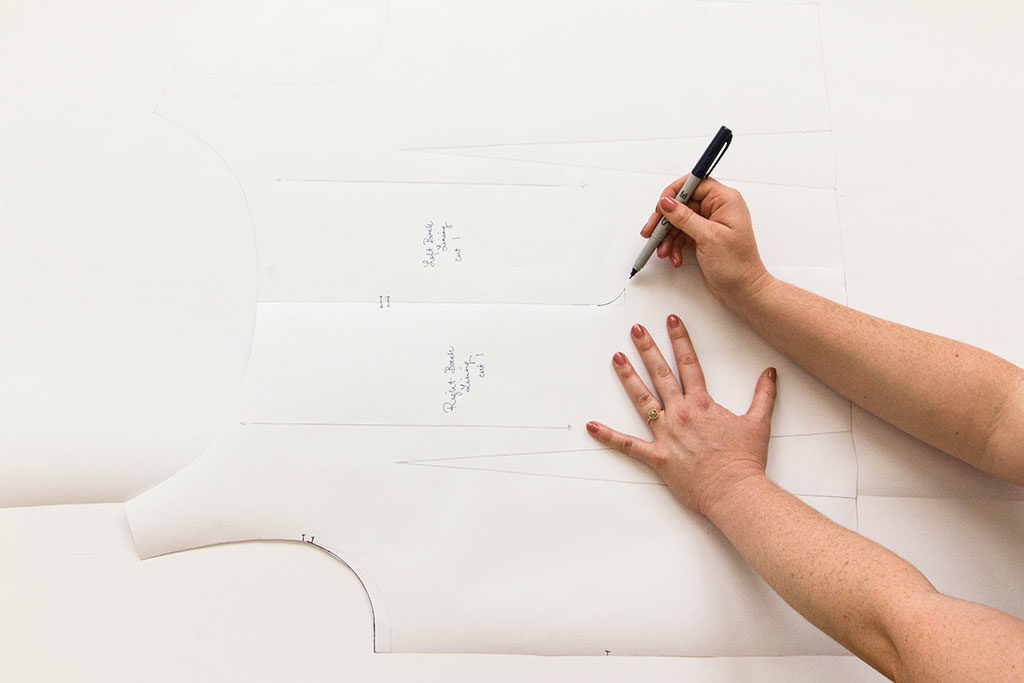
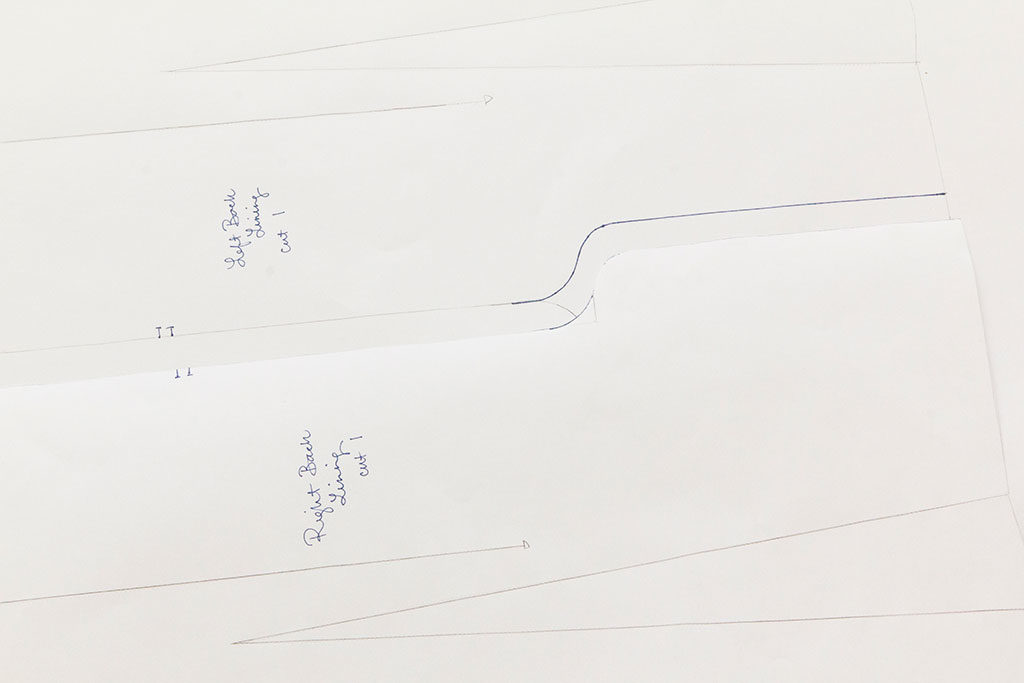
Align right back lining with that of the left back lining so that the center back seams are butted right against one another. To draft the overlap portion of the vent, trace the right back vent extension onto the left back lining.
Step | 07
Remove 1" from the hem of the back linings, and add your desired seam allowance to back lining pieces (I used a seam allowance of 5/8"). Cut back lining pieces.
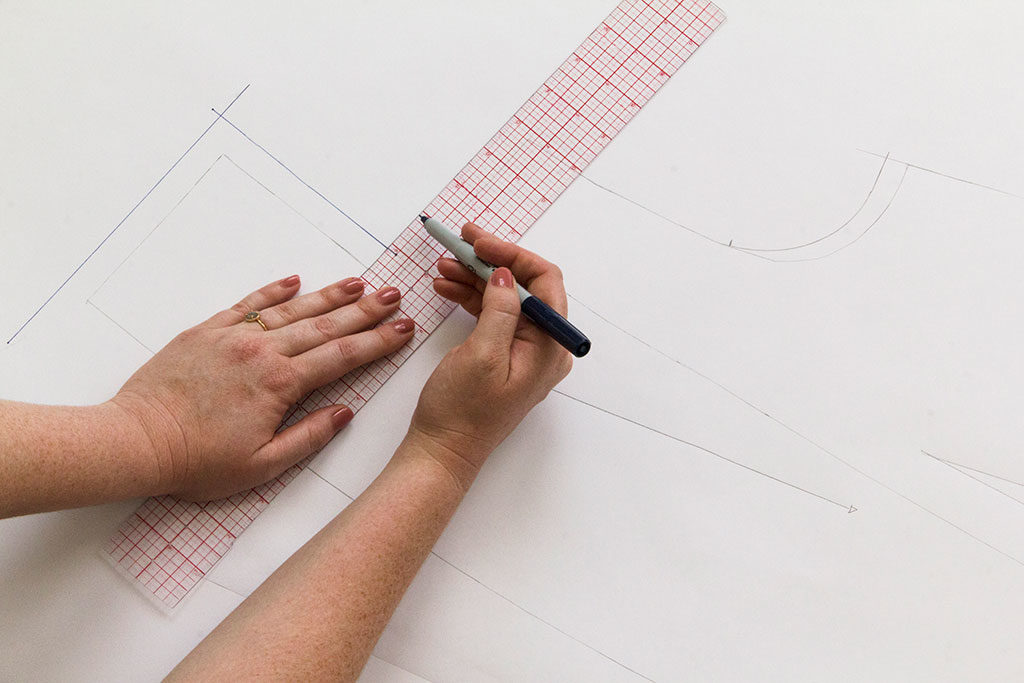
Adding a Pleat for Ease
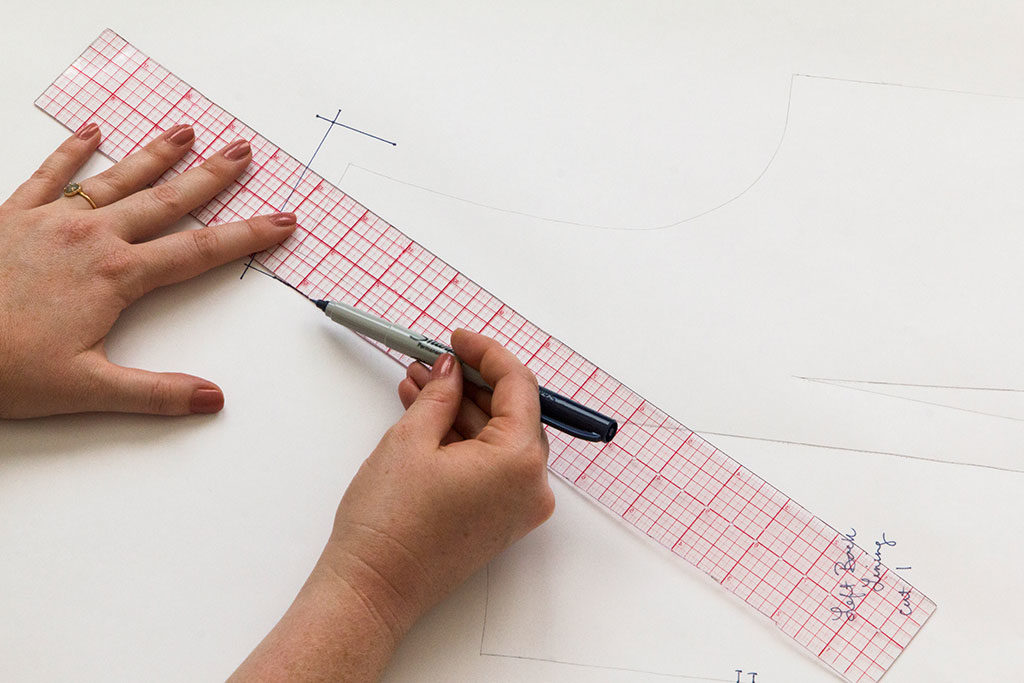
Create a back pleat to add ease and allow for greater mobility across the back. Add 1" to the center back seam to create a back pleat. If the center back seam is shaped, ignore the shaping and draw a straight line 1" from the upper part of the center back seam.
The back lining will be cut on the fold. When constructing, stitch the back lining at the seam line at the top, pivoting closer to the fold in the middle, and then back to the seam line from the waist down. Traditionally in English tailoring, the pleat is pressed to the left for a woman’s coat and to the right for a man’s coat.
Finishing The Shell
Step | 01
On a fresh piece of trace or pattern paper, trace the sleeve piece. Transfer all vital marks such as grainline, darts, and notches.
Step | 02
Add ease to the armholes to allow for greater movement in the arms. The amount of ease added depends on the lining construction method you are using. If machine bagging the lining: Raise the underarm portion of the armscye ½".
Step | 03
Remove 1" from the hem of the sleeve, and add desired seam allowance (I used a seam allowance of 5/8"). Cut sleeve lining piece.
Prepare Shell Pattern
After drafting your lining pieces, add seam allowances back to all shell pieces.
Add a hem allowance of 1 ½" to all shell hems.
Selecting the Lining Fabric
Now that the pattern drafting is complete, the next step is selecting the lining fabric. While a lot of thought is typically put into choosing the right fashion fabric for the garment, often little attention is paid to the lining, which is unfortunate because the right choice of lining fabric can make a big difference to the quality of the final product.
There is no one perfect lining that suits all garments and all wearers. The choice of lining fabric depends on the style of the coat or jacket and the wearer’s needs:
In general, it is preferable to use fabrics made of natural fibers to line a garment, as those fabrics will breathe, feel nice against the skin, and press beautifully.
Silk charmeuse or crepe de Chine makes a lovely lining for dressier jackets. Silk breathes and feels luxurious next to the skin, and its slippery finish allows the garment to slide on and off easily. Silk also comes in a variety of vibrant colors and prints, which can add a nice design detail to your garment.
Wool flannel can be used as an interlining (i.e., as an extra layer between the fashion fabric and the lining fabric, also known as an underlining to add extra warmth). Avoid using wool as the lining fabric itself, as it can lead to static and feel itchy against the skin. Teaming up a wool flannel interlining with a silk lining can marry the best of both worlds—the warmth of wool and the luxury of silk.
For maximum warmth, use something like thinsulate, a performance fabric that is often used to line sporty jackets. However, this will add quite a bit of bulk and should be avoided if the jacket or coat has a fitted silhouette.
A lightweight cotton lining can be nice for casual summer jackets, because it breathes and feels cool to wear.
One note of caution on lining pockets: regardless of the fabric used for lining the rest of the garment, it is worth using an extra durable fabric for the pocket bags because they get a lot of wear and are often the first part of the lining to tear. When I first started sewing, I was lazy and questioned whether it was really necessary to purchase yet another fabric to use in my garment, but I soon learned my lesson when holes would appear in the pockets after only a few months of wear! After that, I began using pocketing fabric (a densely woven and durable fabric such as cotton twill or cotton broadcloth) for any pockets that will likely be subject to a lot of wear (such as the waist and hip pockets in jackets and coats, where people often jam their hands). Using pocketing fabric also has the added benefit of keeping the pocket opening crisp, which is particularly important if they are welt, slanted, or in-seam pockets.
Lining Construction Methods
Once the lining pattern is drafted and the lining fabric selected, the only remaining step is to cut and sew the lining. There are a number of different construction methods that can be used to construct linings, and the choice of construction method depends on a number of factors, including the style of the garment, the fabric used in the outer garment, and your tolerance for hand sewing. An overview of four different construction methods is given below, along with links to online tutorials and books that have step-by-step instructions on how to execute each construction method.
Bagging the Lining
This is the fastest method and is used in ready-to-wear. In essence, the process involves three main steps: first, construct the entire lining using the machine the same way you would construct the outer garment. Second, stitch the lining to the outer garment, leaving an opening large enough to turn the garment right side out. Finally, turn the garment right side out and stitch the opening closed by hand.
Bagging the lining is quick and painless, and involves virtually no hand sewing. The only downside is that you have less control over the distribution of ease in the armhole and the placement of the hem, which can affect how the sleeve or hem hangs. Completely machine bagging the garment can also be a bit confusing for beginners, as the garment needs to be turned inside and right-side out a few times-it certainly boggled my mind the first few times I tried machine-bagging!
Check out:
Easy Guide to Sewing Linings by Connie Long, pp. 37-39.
Hand-Setting the Lining
This method is typically used in bespoke tailored jackets and is more time-consuming than the machine-bagging method. First, the body lining and the sleeve lining are constructed by machine (but the sleeve is not attached to the body). The body lining is then machine-stitched to the outer garment at the front and neck edges, then turned right side out. The lower edge of the sleeve lining is sewn to the garment sleeve, then the lining is pulled into the garment and stitched to the bodice at the armhole by hand, which gives the sewist extra control over the amount of ease in the armhole. Finally, the hem is set by hand.
Although more time consuming than machine bagging, this method can be easier for the beginning sewist to implement, as it does not require any confusing steps involving turning the garment inside out and then right side in. This method also gives greater control over setting the armhole lining and hems, which helps ensure that the sleeves and hem of the garment all fall correctly.
Check out:
The Anise jacket features a hand-set lining; all of the details are included in this sewalong post.
Tailoring: the Classic Guide to Sewing the Perfect Jacket, p. 109.
Chanel-Style Quilted Lining
This method involves quilting the lining to the fashion fabric and is, as its name suggests, used in Chanel jackets. Quilting is often done with boucle or other fabrics that fray easily because the quilting adds structure to the fabric, while also giving a lovely finish to the interior of the garment. It is most appropriate for cardigan-style jackets or other jackets with a slouchy silhouette, but not for tailored garments with interfaced lapels and collars.
This method is extremely time consuming and involves a ton of hand-sewing, and is not appropriate for beginners or those who lack patience. However, the effort is well worth it, as this construction method results in a lovely garment with some of the structure of a tailored jacket or coat and the comfort and feel of a sweater.
Check out:
Susan Khalje, "Inside a Chanel Jacket," Threads Magazine, Issue 121 is an excellent resource.
Frabjous Couture, Quilting Boucle à la Chanel tutorials:
parts one, two, and three.
Detachable Lining
This method involves making a detachable lining that is attached to the outer garment using buttons or zippers. Detachable linings are usually found in all-weather coats with a fair amount of ease, because the detachable lining adds quite a bit of bulk, making it inappropriate for fitted silhouettes. One famous example is the classic Burberry trench, which includes a detachable wool lining rendered in the famous Burberry plaid.
Check out:
Easy Guide to Sewing Linings by Connie Long, pp. 57-63.
Gorgeous Fabrics gives you an inside look at the detachable lining of a Burberry trench.

About the Author
Sabrina is a sewing enthusiast with a weakness for luxury fabrics. Browse photos of her projects and custom pieces on her website.