Sign In
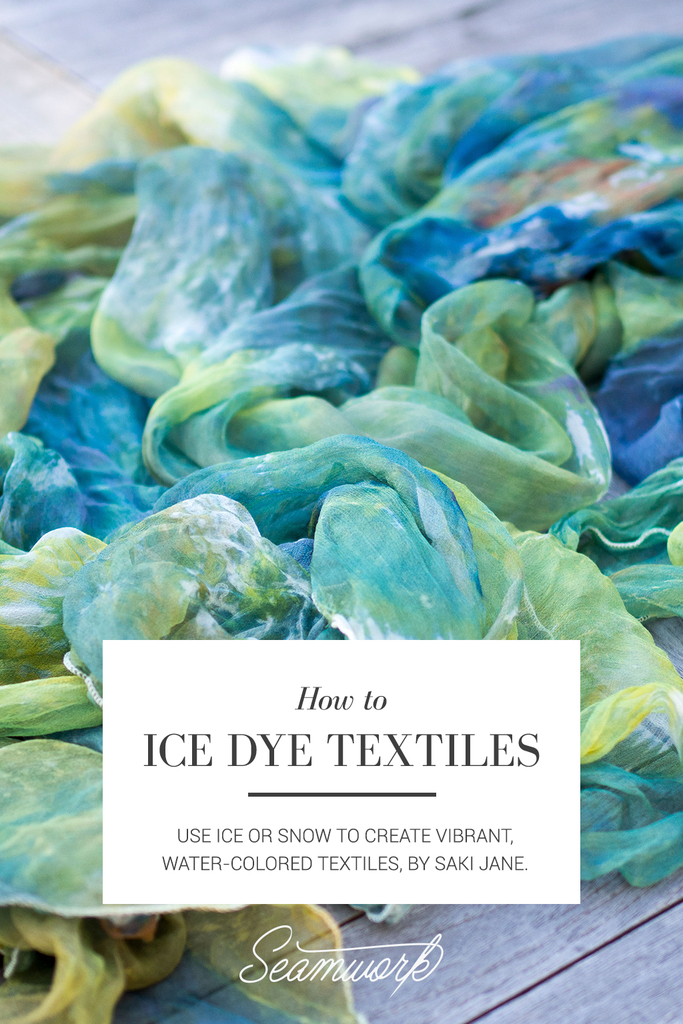
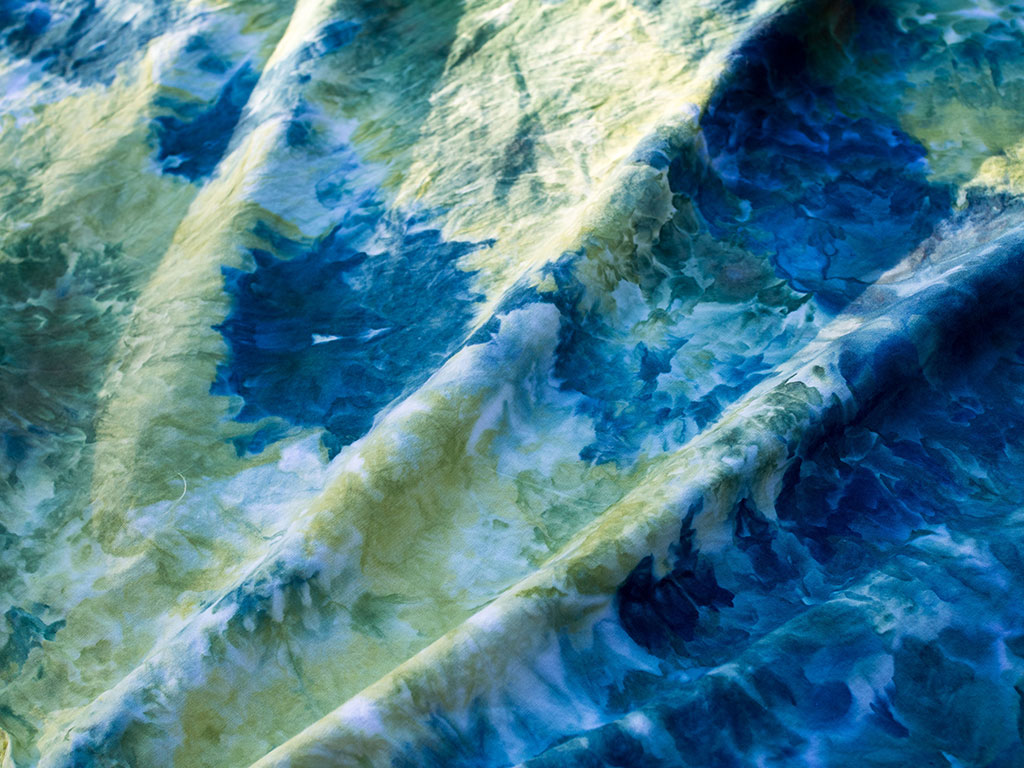
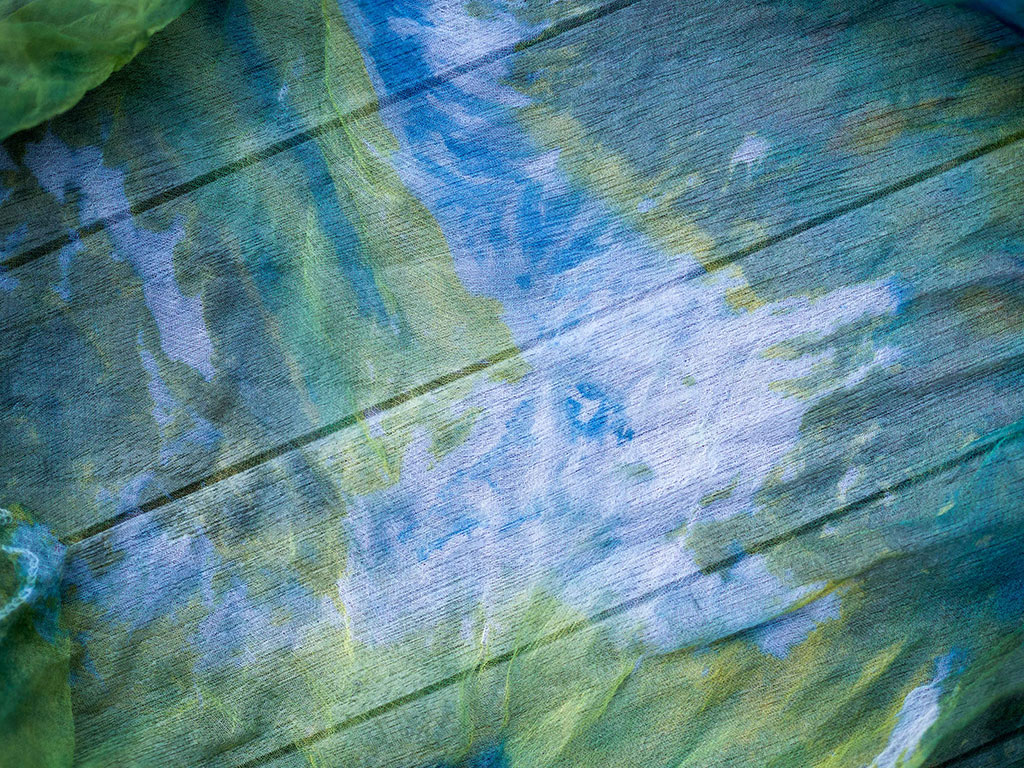
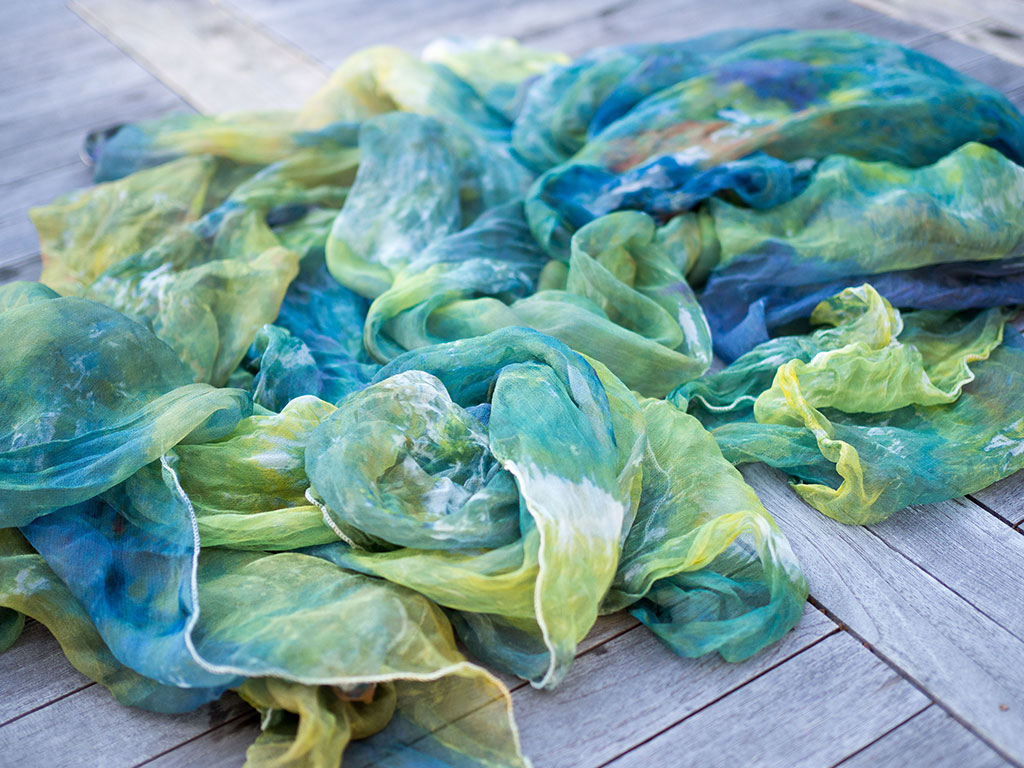
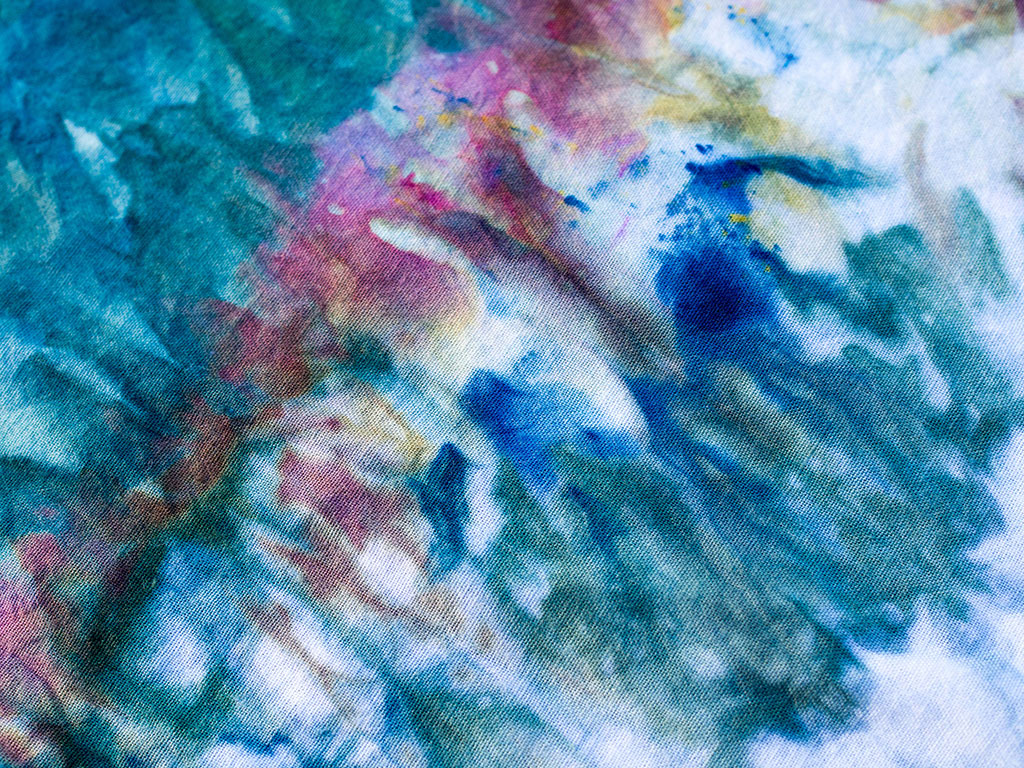
I discovered ice dyeing when a local artist in Portland started selling beautifully hand-dyed, vibrant robes and dresses. I didn’t even know what the technique was called at the time, but I was immediately impressed by the mottled watercolor look, almost cloud-like in the way the colors blended in and out of each other with bursts of contrasting colors here and there.
I felt like I needed to know how it was done and even got as far as asking for a part-time, unpaid internship because that was how desperate I was. I had always been intimidated by dyeing projects that used anything other than grocery store dye; there are so many unfamiliar ingredients and chemicals that it felt like a science rather than an art, and I just couldn’t feel confident that I wouldn’t end up with a sad brown puddle.
The internship didn’t pan out, and it would be years before I discovered that her technique had a name and it wasn’t as technically difficult as the finished product makes it look. So what is ice dyeing? Essentially, you cover your textile in ice—or since it's winter, grab some snow from outside—and sprinkle the dye on top. As it melts, it dyes.
I’m happy to report that after I started ice dyeing, my fear of dyeing projects has completely disappeared. I hope you won’t be intimidated by the specialty products needed for this project; it’s actually great for beginners and is nearly foolproof! Regardless of your experience level, you’re guaranteed to get a finished product that’s uniquely beautiful.
The Basics
The type of dye you’ll want to use is a fiber reactive dye. Fiber reactive dye is a colorfast, cold-water dye, which works perfectly for what we’re doing today. It’s called fiber reactive dye because it literally reacts to the fibers in fabric; when the dye hits pretreated fabric, it bonds to the fibers and the two become one on a molecular level, making it the most colorfast dye on the market. Pretty cool!
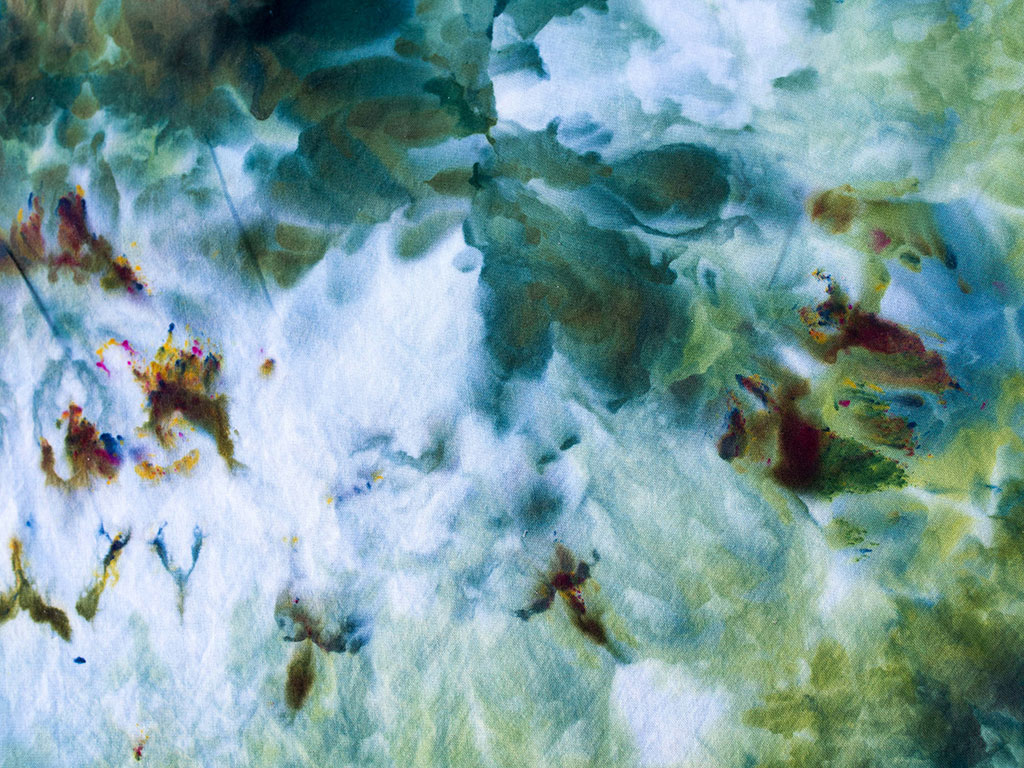
Another amazing thing about fiber reactive dye is that a little goes a long way. One two-ounce jar will last for many dye batches. It also comes in an array of colors, but one thing to consider is that there are both pure colors and mixed colors. In a jar of a pure color, each granule of dye is the same color. However, mixed colors are exactly what they sound like; they’re a mixture of pure colors, making it a collection of different-colored granules. This may not sound like it will affect your ice dye, but it likely will. You’ll either end up with more melded variations in color or with distinct speckles of pure colors sprinkled throughout, and neither is a bad thing.
Fiber reactive dye is also commonly called Procion MX. Procion MX started as a brand, but over time, other manufacturers started producing it, and now there are many different brands available worldwide with generally consistent color codes and chemical makeup. It’s similar to how we call bandages Bandaids or tissues Kleenex, so when searching for a fiber reactive dye online, it can be helpful to search for “Procion MX.”
Immediately before you start your ice dye, you’ll need to pretreat your fabric with a solution of 1 cup soda ash to 1 gallon of water. Mix the two together in a clean bucket until the solution is clear, then soak your prewashed fabric in the solution for 15 minutes before starting your ice dye. This is part of the process that makes the fiber reactive dye bond to your fabric, and the soda ash solution can be saved for reuse later.
Aside from the dye and soda ash, this project uses household items that you may already have lying around or are easily found secondhand. You’ll need a wire rack of some sort to keep your fabric above the discarded dye water, a tub for the dye to drip into, rubber gloves for handling the dye and soda ash, spoons or salt shakers for applying the dye, and a respiratory mask.
I’ve seen people get really creative with the wire rack; chicken wire, a BBQ grill, a cooling rack, balled-up aluminum, a roasting rack with its associated pan, or even a colander—anything that lets the excess dye water drip through and holds your fabric above it will work. For the tub, you can use a dish tub, a baking pan with raised sides, or in my case, an old storage bin.
Whatever you use for this project, just be careful to designate these items as no longer food safe; once you use them with chemical dyes, you’ll want to avoid using them for food again in the future.
You'll Need:
- Fiber Reactive Dye (Procion MX)
- Ice or snow
- A solution of 1 cup of soda ash with 1 gallon of water
- Respiratory mask
- Rubber gloves
- A wire rack
- A large tub
- Spoons or salt shakers
- Professional textile detergent (recommended but optional)
- Fabric (plant- or animal-based fibers)
As with most dyeing projects, you’ll need to use a natural fiber, but any plant-based or animal-based fabric will work. I used two lengths each of silk gauze and cotton to see how the different fibers reacted to the dye. And you don’t have to limit yourself to just fabric. You can also use T-shirts, tote bags, pillowcases, or scarves!
Finally, professional textile detergent is recommended but not necessary. The detergent is used both as a pre-wash and as a post-wash. In pre, it removes any sizing or finishing the textile manufacturer may have put on your fabric, as well as any accumulated dirt or grime. In post, it removes any excess dye particles from your fabric, so it won’t bleed in future washes. I went without it for my dye batch, but I’ll be careful for the first several washes to keep them with similar colors. The most common brand of PTD is Synthrapol, but there are other manufacturers out there and it’s almost always available alongside fiber reactive dye.
I recommend Dharma Trading Company as a source for dyeing equipment if you’re in the US.
How to Ice Dye
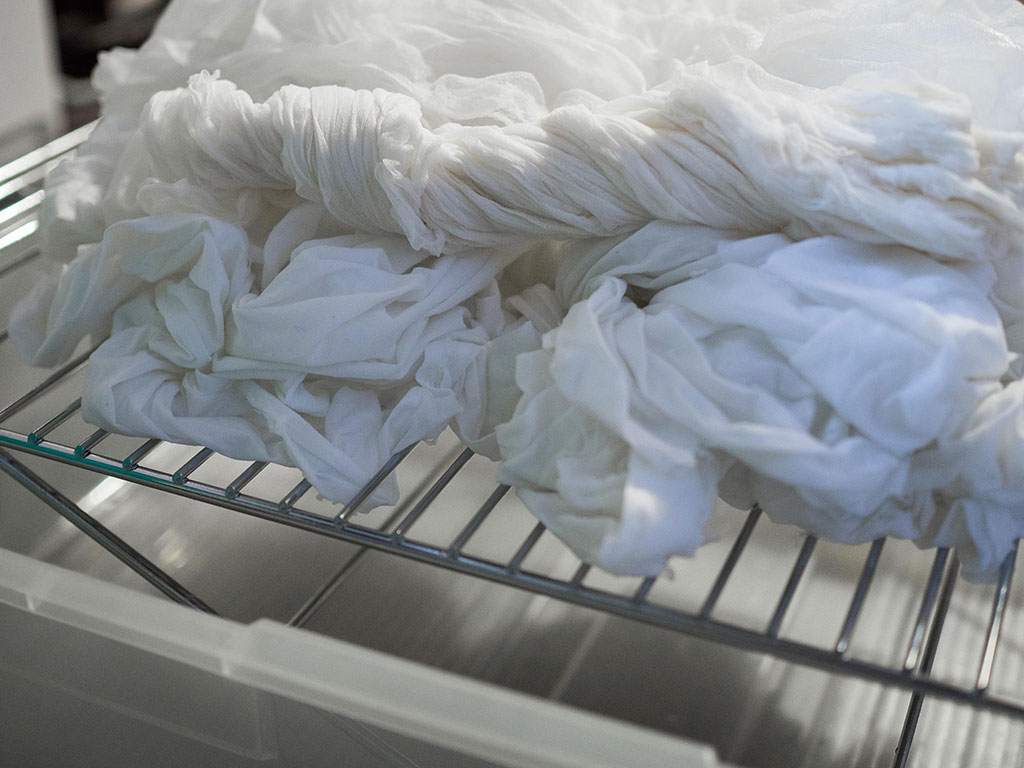
1) Pre-wash your fabrics using the professional textile detergent to get out any chemical treatments from the manufacturer. If you don’t have PTD, regular detergent will do.
2) Transfer your damp fabric in the soda ash solution and soak for around 15 minutes.
3) Meanwhile, set up your ice dyeing rack. Place a rack inside or over a tub so it’s raised off the bottom. You can either rest the rack on the sides of the tub or place something underneath it to keep it raised.
4) When the 15 minutes are up, squeeze the excess soda ash solution from your fabric using gloves so your fabric is damp but not wet. The remaining soda ash solution can be saved for another dyeing project.
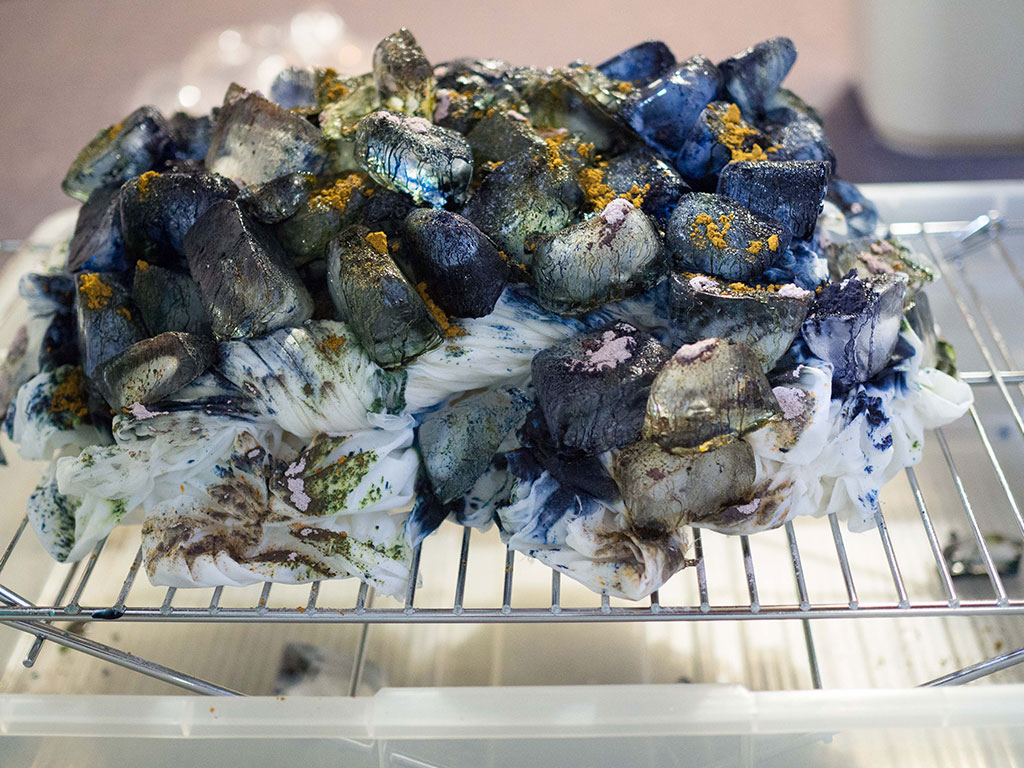
5) Place your fabric on the wire rack, in various ways: scrunching, folding, twisting, pleating, or crumpling. The more texture you give it, the more varied your design will turn out.
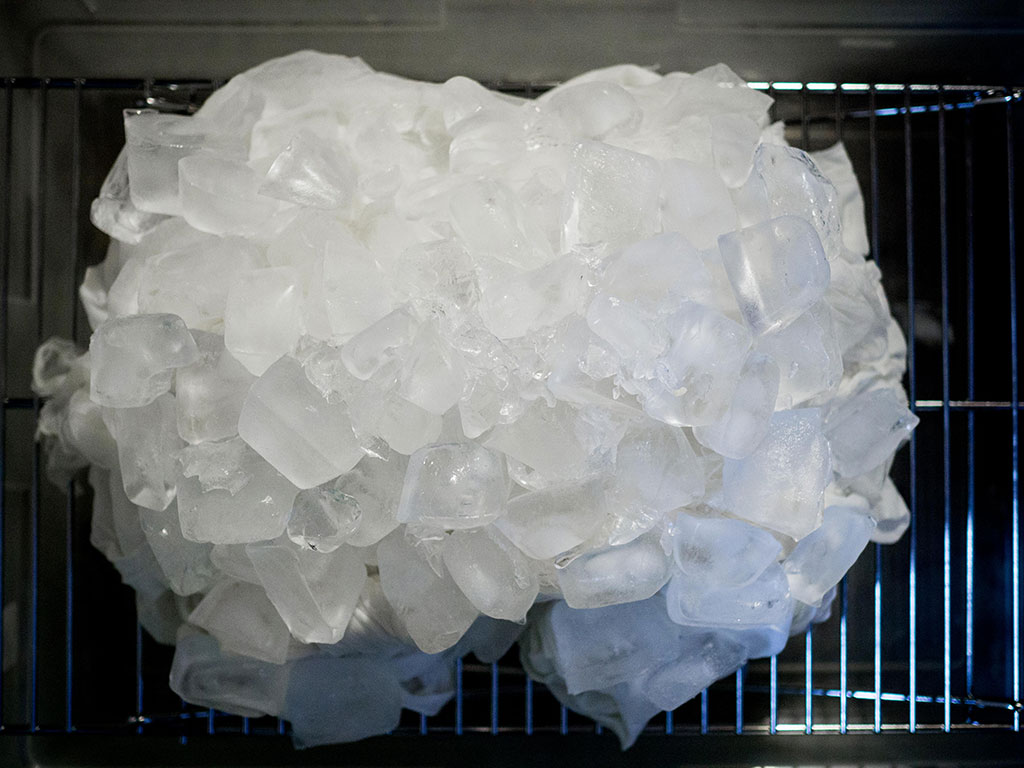
6) Cover all of your fabric in ice. Crushed ice or snow works best if you pack it on, while cubed will yield a different texture. Regardless, the more ice you use, the more surface area of the fabric will be touched by the dye. And if it’s not covered by ice, it’s possible it won’t get dyed at all.
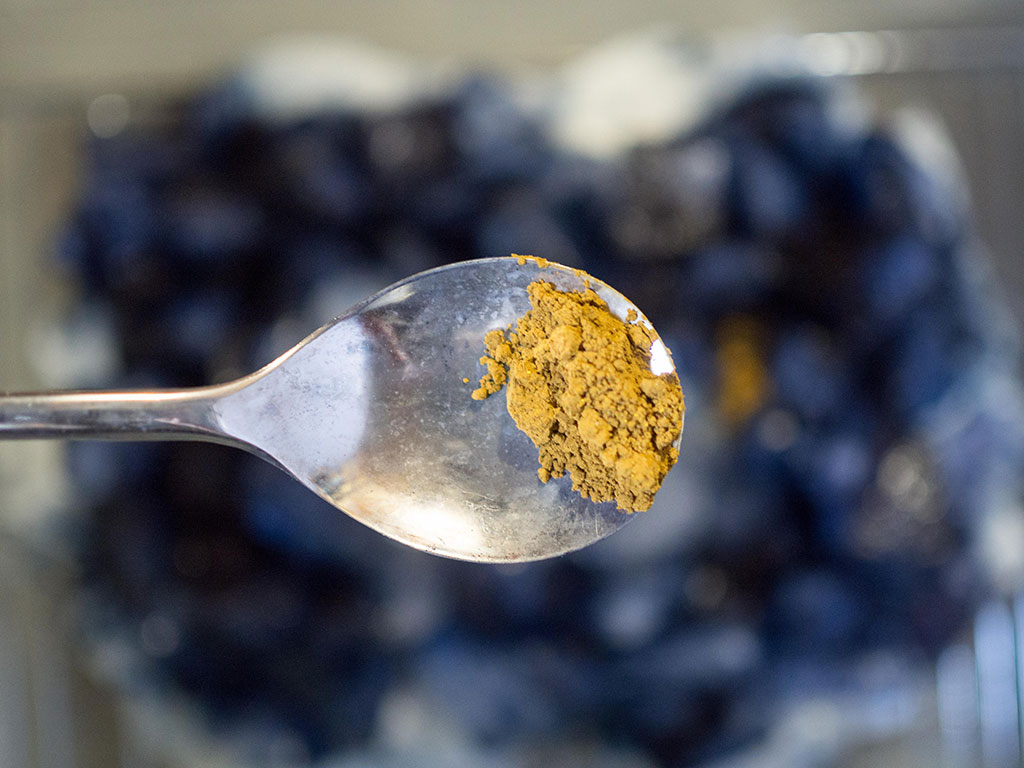
7) Now it’s time for your dust mask! While wearing your mask, use a spoon or salt shaker to sprinkle the dye powder onto the ice. Be as intentional or as random as you want. The more dye you use, the more vibrant the color, so if you’re going minimal, go easy on the dye. As the ice melts, the colors will blend before it hits the fabric.
If you’re using snow, move your tub to a warmer place such as a garage or shed. You’ll need it to be warm enough to melt the snow or ice. Let your tub sit for 24 hours.
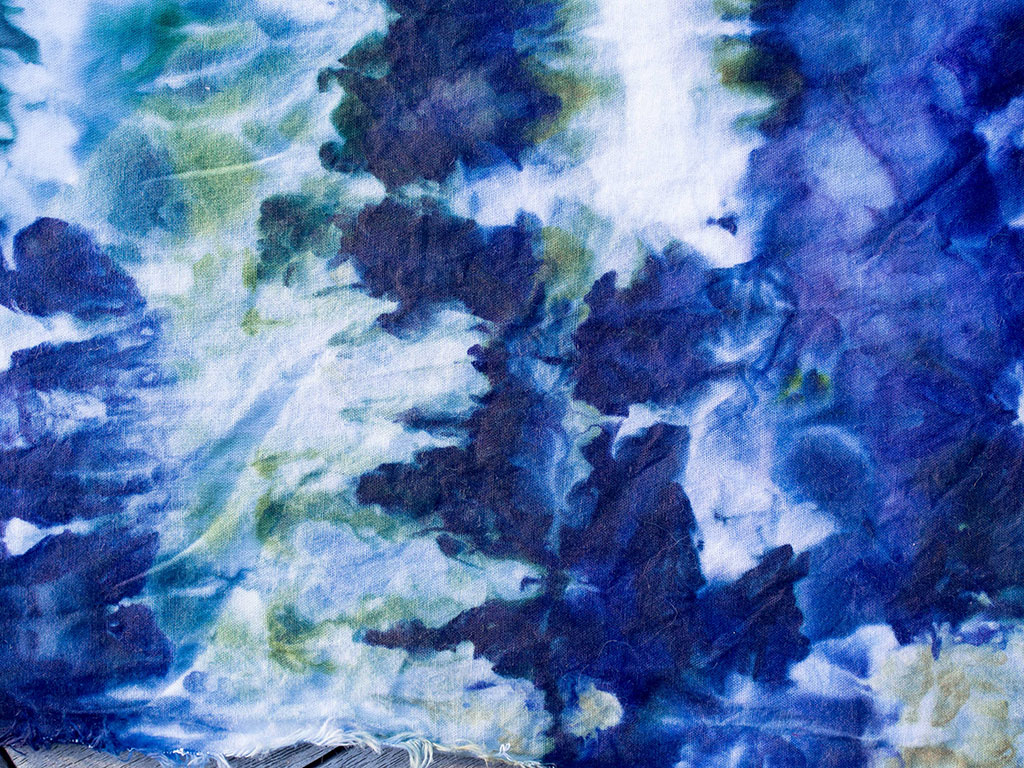
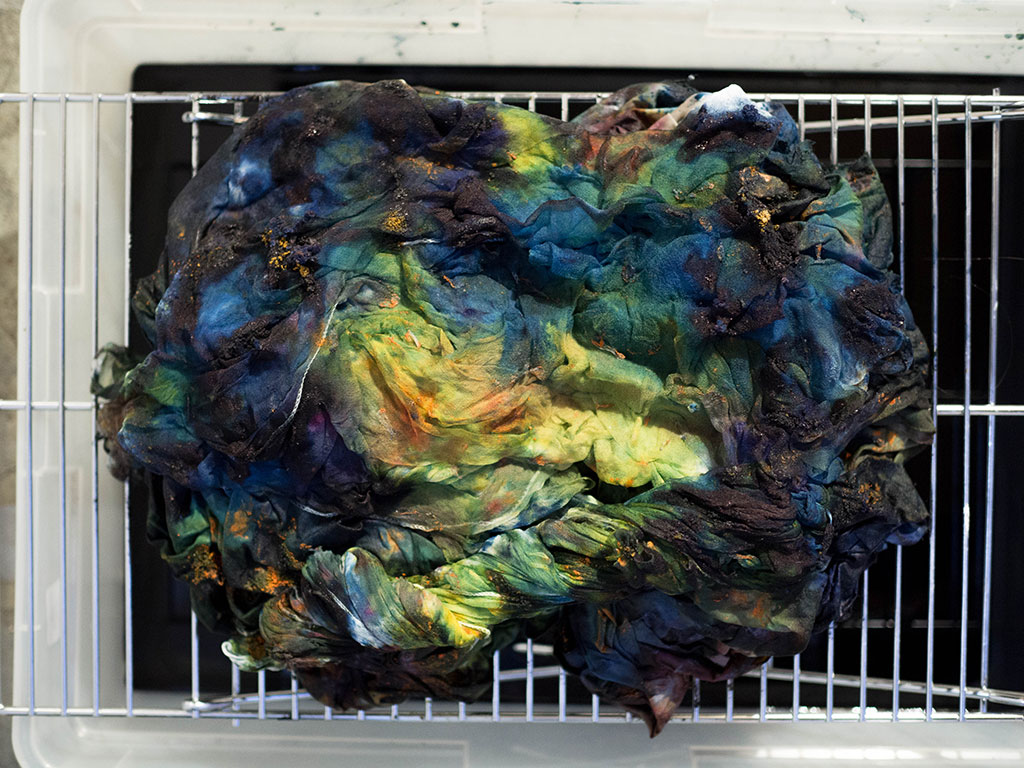
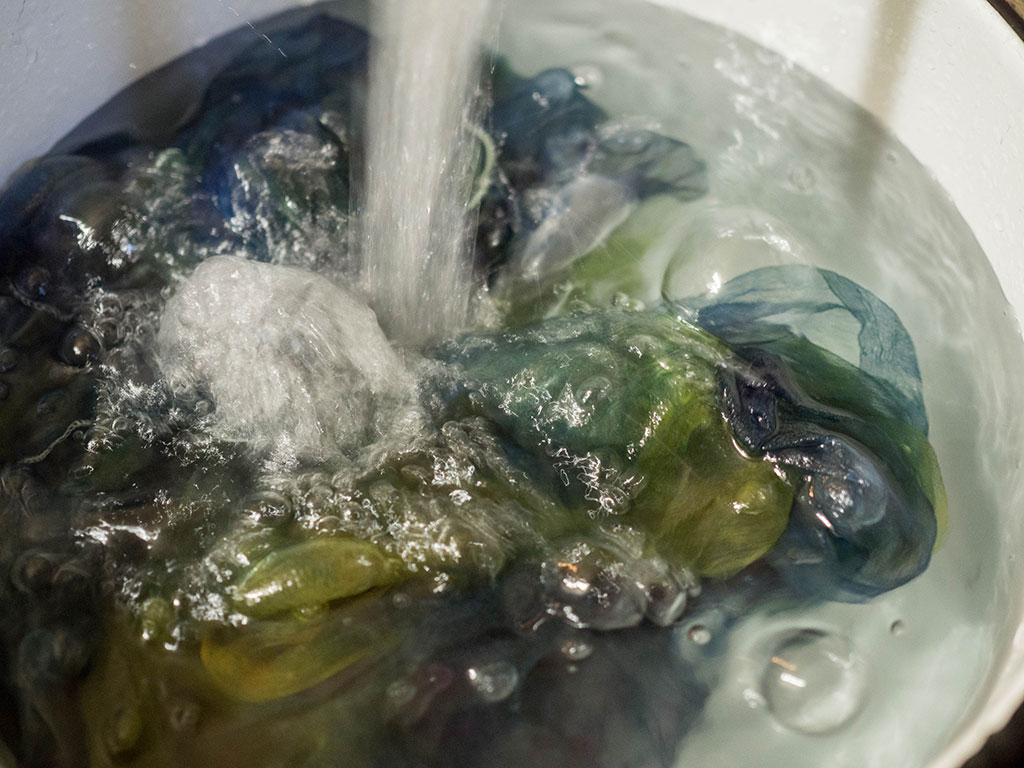
8) 24 hours later—after the ice has melted—retrieve your fabric. This part is actually a bit magical; at first glance, your fabric might look like a muddy, oversaturated mess. Rinse the fabric in cold running water until the water runs clear, and you’ll start to see beautiful vignettes of color.
9) Run the fabric through a hot water wash (with professional textile detergent) to remove any lingering dye particles in your fabric.
I was so surprised at how little mess and how little time this project took. As a notoriously messy person, I walked away with nary a stain, and from the pre-wash to the post-wash, it must have taken less than two hours of active time. Plus, if you’ve got snow on the ground, this makes for a fun snow-day project! Happy New Year!

About the Author
Saki Jane has been sewing for over two decades, with a background in fashion and bridal design. Now, she finds pleasure in crafting her own wardrobe and sharing the joy of sewing with others through workshops and tutorials. You can find her work on Instagram (@sakijane) and at her blog at sakijane.com.