Sign In
At the start of a new sewing project, I get really excited about the fabric I’m going to use and what pattern or style it’s going to be made into. After that initial excitement has worn off, I’ll then start to think about what notions it might require—will I need to buy any special zippers, buttons, or elastics? Do I already have a matching thread in my stash? It’s usually only when I sit down to start sewing that I look and see if I’ve got a suitable needle, and I only really notice my pins when I pull out a bent or dull one midway through sewing. Considering that all of us use either machine- or hand-sewing needles in every project, and the vast majority of us use pins to hold our fabric together too, perhaps we should start paying more attention to these unsung heroes of the sewing process.
What & Why
Sewing needles have existed for nearly as long as humans have. In prehistoric times, their earliest incarnations were carved from wood or bone with animal fibers or sinew used as the thread to hold hides together. Later, as metals were developed, copper, iron, and bronze needles also followed, allowing fine embroidery to be added to clothing, in addition to functional seams. Needles were also made from unexpected sources—the ancient Mesoamerican people of Teotihuacán cleverly used the central spike of the maguey cactus and its attached fibers as a ready-made needle and thread!
For modern sewists, however, the best reason to pay attention to your needles and pins is that using the right type and weight for each project can not only raise the quality of your sewing, but also prevent skipped stitches, ruined fabric, and ultimately lots of frustration. In the grand scheme of sewing, needles and pins are some of the cheapest consumables we use, so it makes sense to buy quality suited to the job at hand, and don’t hesitate to discard them when they’re past their best.
Sewing Machine Needles
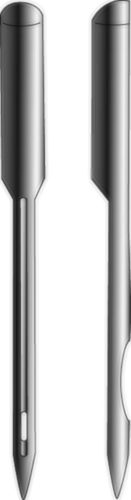
Standard domestic sewing machine needles are comprised of several standard parts. Starting at the “blunt” end is the shank, which usually has a flat side to help position it properly in your machine. This is usually the thickest part of the needle. It then narrows at the shoulder and into the blade (the long, thinner portion of the needle), which moves through the fabric. The elongated hole is called the eye, and finally, the sharp end of the needle is called the point or tip.
Each of these areas of the needle can vary based on the type you’re buying, so it’s important to know the differences in order to buy the perfect match for your fabric.
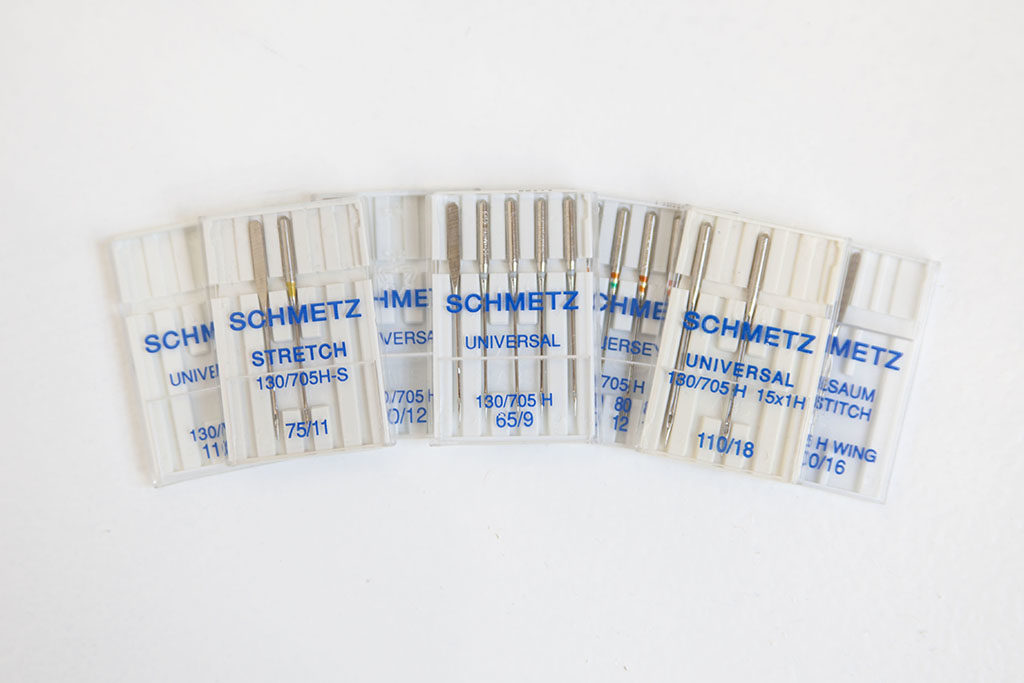
The blade of the needle mostly varies by thickness, as indicated by a number on the front of the needle package. In general, thicker, sturdier fabrics require a thicker, sturdier needle, indicated by a higher number. Likewise, thinner, lightweight fabrics need a thinner needle, indicated by a lower number. 80/12 tends to be the standard needle thickness, but you often see needles as thin as 60/8 or as thick as 120/19 for domestic machines (the two numbers are just the equivalent sizes in different measuring systems).
The tip of the needle has even more varieties than the blade, and the two are combined so that you can find most needle thicknesses across the different tip types. The most common needle is the universal, which has a tip that pierces most medium weight woven fabrics well, but can sometimes leave you feeling like it’s a “jack of all trades, master of none” tip. For general day-to-day sewing, however, it’s useful to have a stash of universal needles in a variety of sizes. Try running a test stitch with a universal needle, if your stitches are inconsistent you may need a more specialized needles.
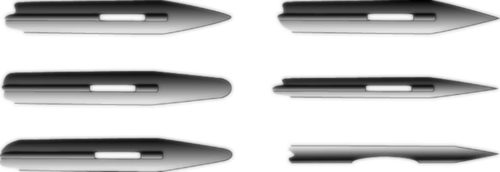
clockwise: universal, denim, microtex, stretch, ballpoint.
No needle threader?
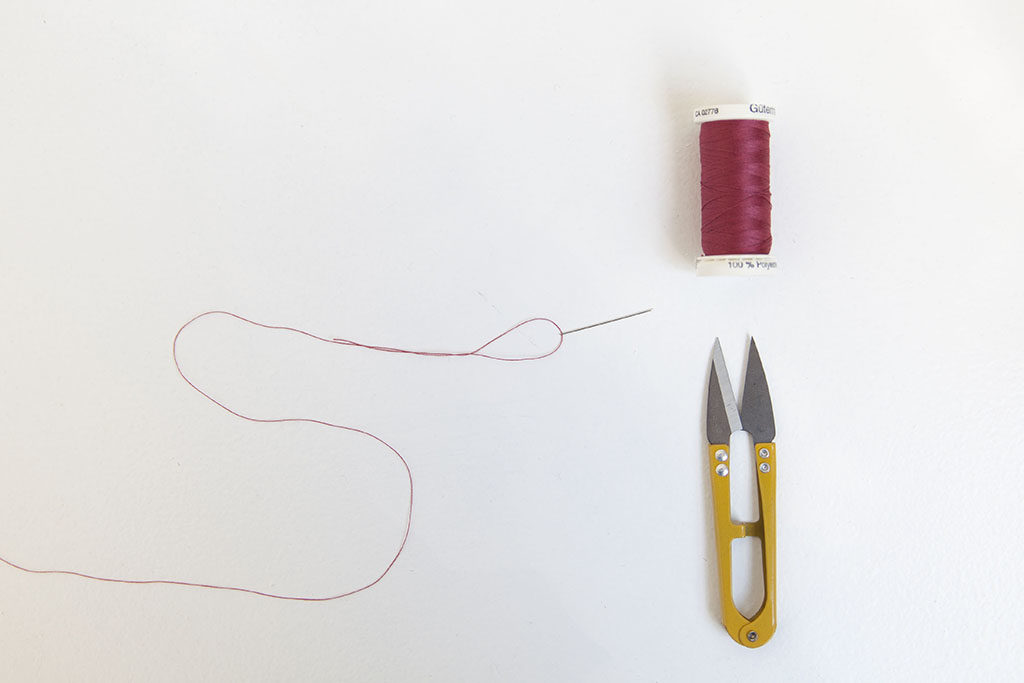
No problem! To use a standard needle threader, first insert the small, bent wire loop into the eye of your needle, then pass your thread through the wire loop. Pull the threader back out of the needle and the thread will follow right through the eye. But if you don’t have a threader and just can’t get it threaded on your own, you can try using a small piece of paper in a pinch. Cut a small strip of paper a few inches long and narrower than the eye of your needle. Fold it in half around your thread, and pass the two cut ends through the eye of the needle, pulling the thread along with it.
If you do a lot of sewing with jersey and knit fabrics (see Seamwork Magazine, June 2015), then you may be familiar with ballpoint needles. These have a rounded tip to push the knit fibers out of the way rather than piercing them, which might affect the stretch properties of the knit weave. Many sewists get great results with universal needles on some knit fabrics, but if you’re encountering skipped stitches, it’s a good sign that your fabric needs a different needle tip, and ballpoint needles (or its close sister, the stretch needle) are the natural next tip to try on stretch fabrics.
The most lightweight, densely woven fabrics like silk charmeuse, chiffon, and georgette require the sharpest possible needle tip called the microtex (sometimes just called “sharps”). These are the absolute sharpest needles, and if you’re sewing a large project with them, you may find that they dull more quickly than other needles types. If you see little “runs” next to each stitch in your fabric, then you need a sharper needle—either switch to a microtex, or replace the one you’re using.
On the other end of the spectrum, thick, heavyweight fabrics like denim or upholstery fabrics require denim (or “jeans”) needles with a specially reinforced blade, a sharp tip, and a larger eye to accommodate thicker thread used for topstitching. These are strong enough to penetrate through multiple layers of thick, densely woven denim where other thinner needles might bend or even snap! You can also find topstitching needles with the same elongated eye but without the reinforced blade for topstitching through less heavyweight fabrics, too.
Another specialty needle tip that some garment sewists are likely to encounter is the leather needle, which is actually a tiny blade rather than a point in order to better pierce animal hides or synthetic vinyl fabrics. If you’ve ever sewn with leather, you’ll know that the needle holes are permanent, and that each needle hole weakens the overall hide, so whenever working with leathers, it’s especially important to test your stitches on scrap pieces before moving onto the garment itself.
Keep you sewing kit stocked with a variety of needle types and sizes.
Twin needles?
Most sewing machines can use these two-headed varieties without any modifications beyond loosening the bobbin tension. Twin needles can have different tips just like single machine needles (jeans, stretch, ballpoint, etc.), so you should match the twin needle tip to your fabric type just as you would a single needle (see A Guide to Coverstitch Machines in Seamwork Magazine, June 2015)
This is by no means a comprehensive list of all the possible types of sewing machine needles available, but rather the main varieties that garment sewists are likely to use. When starting a new garment, first think about the type of needle tip your fabric will require, then consider the weight of fabric to choose a needle size. For example, if your fabric is a heavy, duchesse silk satin, then you may do well to choose a microtex needle tip in size 90 or 100. Sewing with a ponte knit? Then a size 80 ballpoint needle might be your best bet. It’s worth buying a pack of specialty needles when you buy a new type of fabric for the first time – that way you can be sure that when you sit down to sew, you’ll have everything you need to ensure the best results.
Hand-Sewing Needles
Just as with machine needles, there is a bewildering array of hand-sewing needles available for every niche purpose, everything from curved needles for projects where you can’t reach the other side of the fabric (like upholstery) to embroidery needles especially designed for threading ribbon through the eye! Unlike machine needles, however, those for hand sewing are primarily concerned with the type of stitching you’ll be doing rather than the fabric type. While hand-sewing needles can come in differing thickness and tips, much of the variety instead comes from the needle length, which is standard across all machine needles.
Longer needles mean you can “stack up” more stitches on the needle before pulling the thread through, which is a great time saver when basting, but makes accuracy difficult to achieve. In contrast, shorter needles give greater control, and are perfect for small, accurate stitches in quilting or fine details like prick stitching.
As with machine needles, hand-sewing needles also come in varying weights that you match to the weight of your fabric. Annoyingly, these numbers are reversed from what you may be used to—here the needle size is inverse to the thickness of fabric! Lower numbers are intended for thicker fabrics and larger numbered needles are for thinner, delicate fabrics.
If you don’t do much hand sewing and are interested in a good general needle type, then look for sharps. These come in varying thicknesses but have a small eye and medium length, making them good for general garment sewing tasks like attaching buttons or hook and eyes. If you’re often sewing repairs, then look for darners, which come in short or long lengths but feature a larger eye to accommodate thicker threads needed for repairing tears or holes.
For hand sewing blind hems where accuracy is paramount, you may want to try quilting needles, which are short and fine with a round eye. Conversely, milliner’s needles are very long, round-eyed needles traditionally used in hat-making (as you’d guess from the name!) but are brilliant for quickly tacking layers together or basting seams before machine stitching.
When thinking about which needle to use with your hand-sewing task, first think about what type of stitches you’ll be doing, and whether accuracy or speed is more important. Choose longer needles for speed and shorter needles for accuracy. Then think about the thread you’ll be using, and choose a larger eye for thicker or multiple strands, and a smaller eye for standard universal or fine threads. Finally, think about the fabric you’ll be sewing, and choose larger numbered needles for thin fabrics, and smaller numbers for heavy-duty fabrics where you might also use a thimble to protect your fingers.
Pins
I’m willing to bet that many of you only have one type of pin in your stash and use that no matter what the fabric or project. As sewists, we take so much care in choosing the right needle, stitch length, pre-treatment, and iron setting for each fabric, so why use the same pins on denim as we do for fine silk? There are easily as many varieties of pins on the market as there are needle types, and if nothing else, then it’s a good excuse to collect a few more pin cushions to keep your different pins separate!
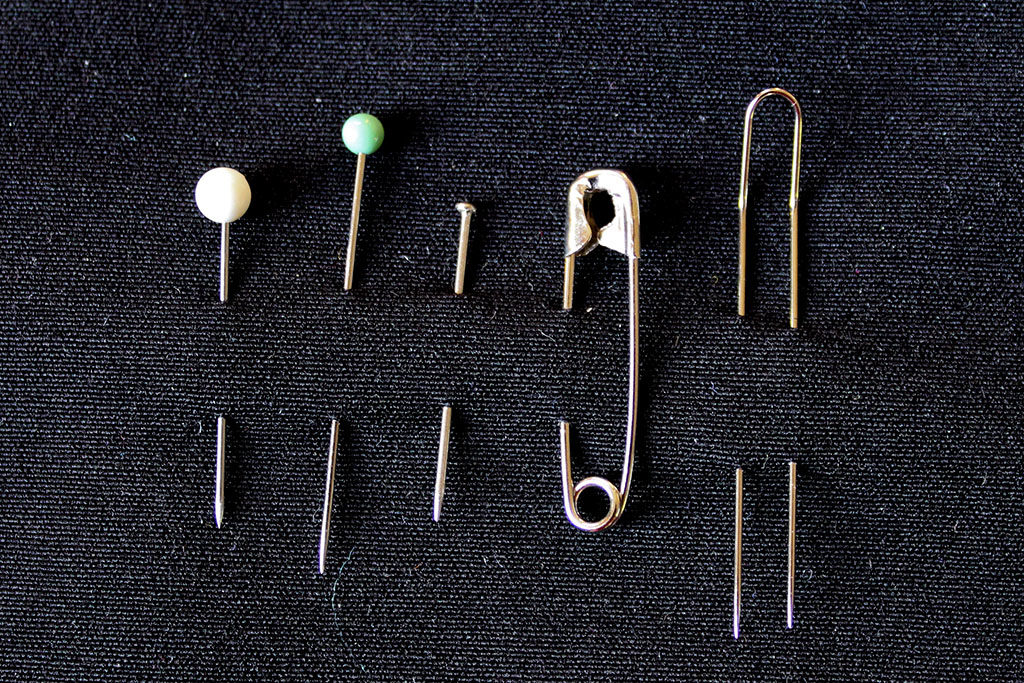
There are a wide variety of pins available, make sure you are using the right one for the project.
Just like hand-sewing needles, pins can vary in tip type and length, but the most easily distinguishable difference is in the head type. We’ve all likely seen pins with round plastic heads. These are usually the cheapest, but have the considerable downside of melting if you accidentally get too close with an iron! You can avoid this in future by substituting round glass head pins, which are only a little more expensive but have the advantage of being heat stable. The round-headed pins are also easily grabbed with fingernails when sewing at speed, unlike pins with flat, metal heads. These are also very cheap and heat stable, but can be easily lost or pulled through loosely-woven fabrics.
Thin the herd!
Always discard bent or dull pins as soon as you find them, lest they snag on expensive fabric at the very end of your next project. Likewise for sewing machine needles, discard your needle after every major project or risk it snagging or skipping on the next project and require unpicking (or worse!). Pins and needles are cheap—new fabric and hours of your time are not.
You may have seen pins with flat flower heads before and dismissed them as “just a pretty face,” but the large, flat heads mean you can sew very close to them without interference from your machine’s presser foot. Paper versions are also heat stable (plastic versions are not!), and the large head makes them perfect for loose fabrics like sweater knits or boucle where smaller headed pins could easily pull through.
Just like machine needles, pins come in a variety of different tips to match your fabric type. Sharps tend to be the standard variety suitable for most fabrics, but if you’re working with fine, lightweight silks, go for extra sharp pins to avoid creating snags or runs in the fabric. Ballpoint pins may not be the easiest to find, but their rounded, blunt tip helps to push aside knit fibers instead of piercing, which may create lasting holes.
Most of us are familiar with safety pins, where the pin itself is coiled around so that the sharp tip is contained inside. These are ideal for pinning to check the fit of a garment on a live model, as they’ll prevent accidental pricks and scratches. Fork pins are another novel pin shape designed to help keep very slippery fabrics from shifting as you stitch over them. These are like having two parallel pins in one (think of a giant, elongated staple, or angular U-shape with sharp points on both “legs”). Because they hold the fabric together along parallel lines, they’re also great for aligning stripes and plaids.
Why tomato pin cushions?
In folklore, tomatoes were said to ward off evil spirits, so people would keep them in their homes for good luck. But tomatoes are only in season for a few short months, so people started using a stuffed one instead when fresh tomatoes weren’t available. This translated over the years into a more functional object—the pin cushion we all know and love, with its commonly attached strawberry companion, filled with emery to help re-sharpen the tips of pins and needles.
Pins tend to come in three general lengths: appliqué, all purpose, and quilting. Appliqué (½ to ¾ inch) are the shortest pins, and are great for pinning around the edges of appliqué pieces where longer pins might overlap in the center. All purpose (1 1/16 to 1 ½ inch) are the standard pin length most of us use on a day-to-day basis and work well for most garment sewing. Quilting (1 ½ to 2 inch) pins are the longest variety, designed to hold multiple layers of fabric and batting together, but can be great for holding together thick layers of garment fabrics, too.
When deciding which pins to use for a project, a general rule is to use the thinnest you can find to avoid marking your fabric. Only if you start bending pins during use should you switch to a thicker variety. Also think about the way you use pins as you sew. If you’re a “cross pinner,” then you may prefer a flat head in order to get closer with the machine’s foot. Or if you’re a “parallel pinner,” you may instead value a round pinhead that you can quickly remove while the machine is in motion. Many sewists may still find that one main type of pin is necessary but it’s helpful to know the varieties on offer should problems arise.
For beginner sewists, the variety of needles and pins on offer may feel overwhelming, but as your skills increase and you begin to sew with more varieties of fabrics, you may find that the standard needles and pins that have served you well up until this point no longer give good results. It’s at this point that you should consider trying a new needle or pin type specifically designed for your fabric or stitch type and the results may pleasantly surprise you.

About the Author
Melissa Fehr designs activewear sewing patterns from her floating home in London, UK. She can usually be found running along the Thames in the wildest leggings imaginable.