Sign In
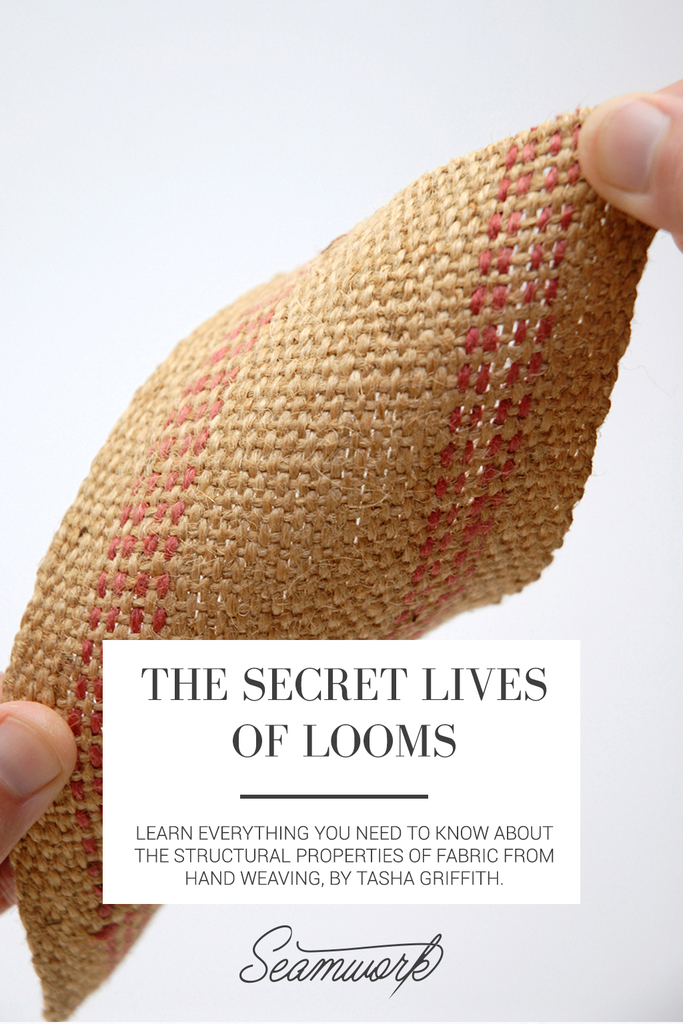
When my grandmother taught me how to weave, I had an epiphany about how grainlines and bias impact garment sewing. Suddenly, I understood why it’s so important to match grainlines, why you can get away with cutting some pieces cross-grain but not others, and why the same pattern, if made up in fabrics that are cut in different directions, will result in garments that behave so differently. My garments began to hang better, and I learned several tricks for compensating for fabrics that are off-grain.
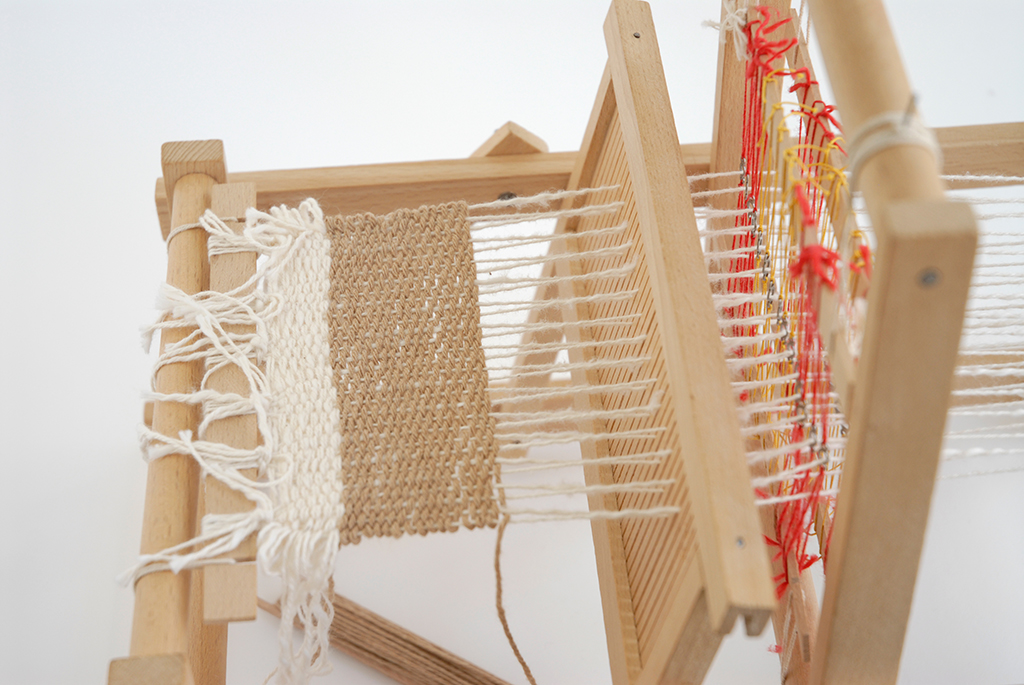
When I started teaching sewing, I took this little loom with me to help my students understand the importance of grainlines. Once you connect the weaving process with the final fabric, you will understand enough about woven fabrics to make better garments.
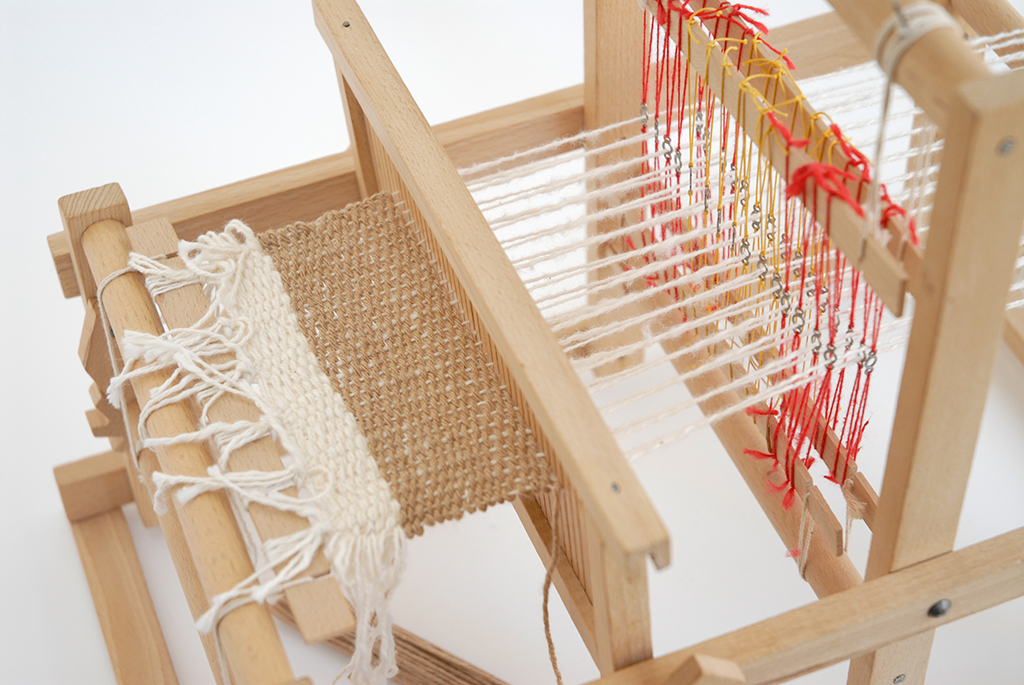
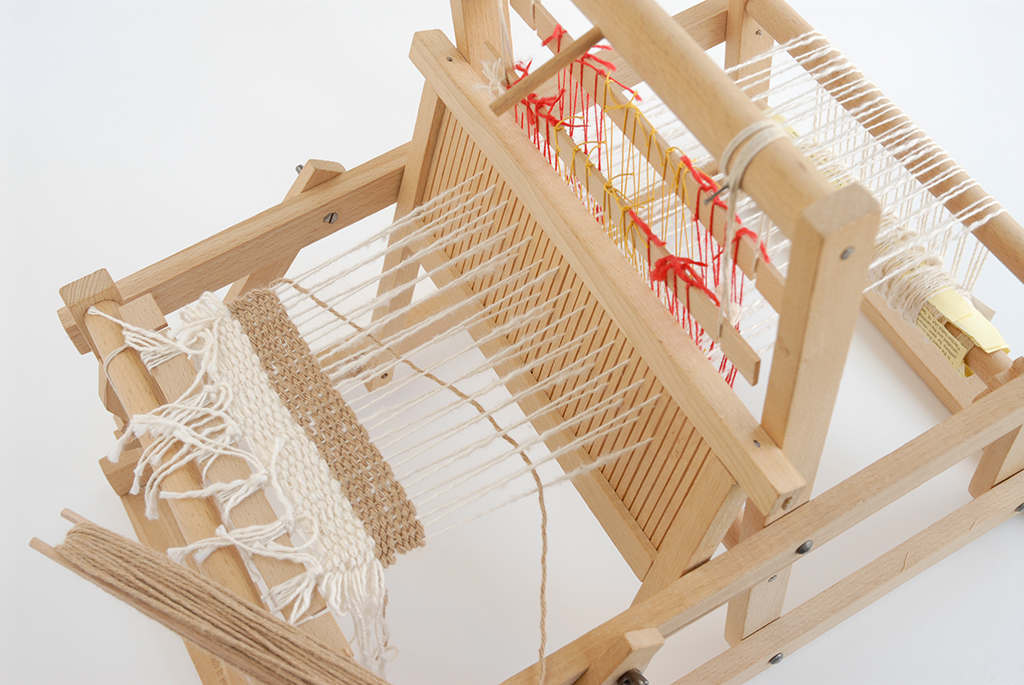
This tiny loom was sold as a toy in the 1950s and has miniature versions of all the working parts you need to see how weaving works.
The Weaving Process
Understanding the weaving process is the first step towards learning about fabric properties.
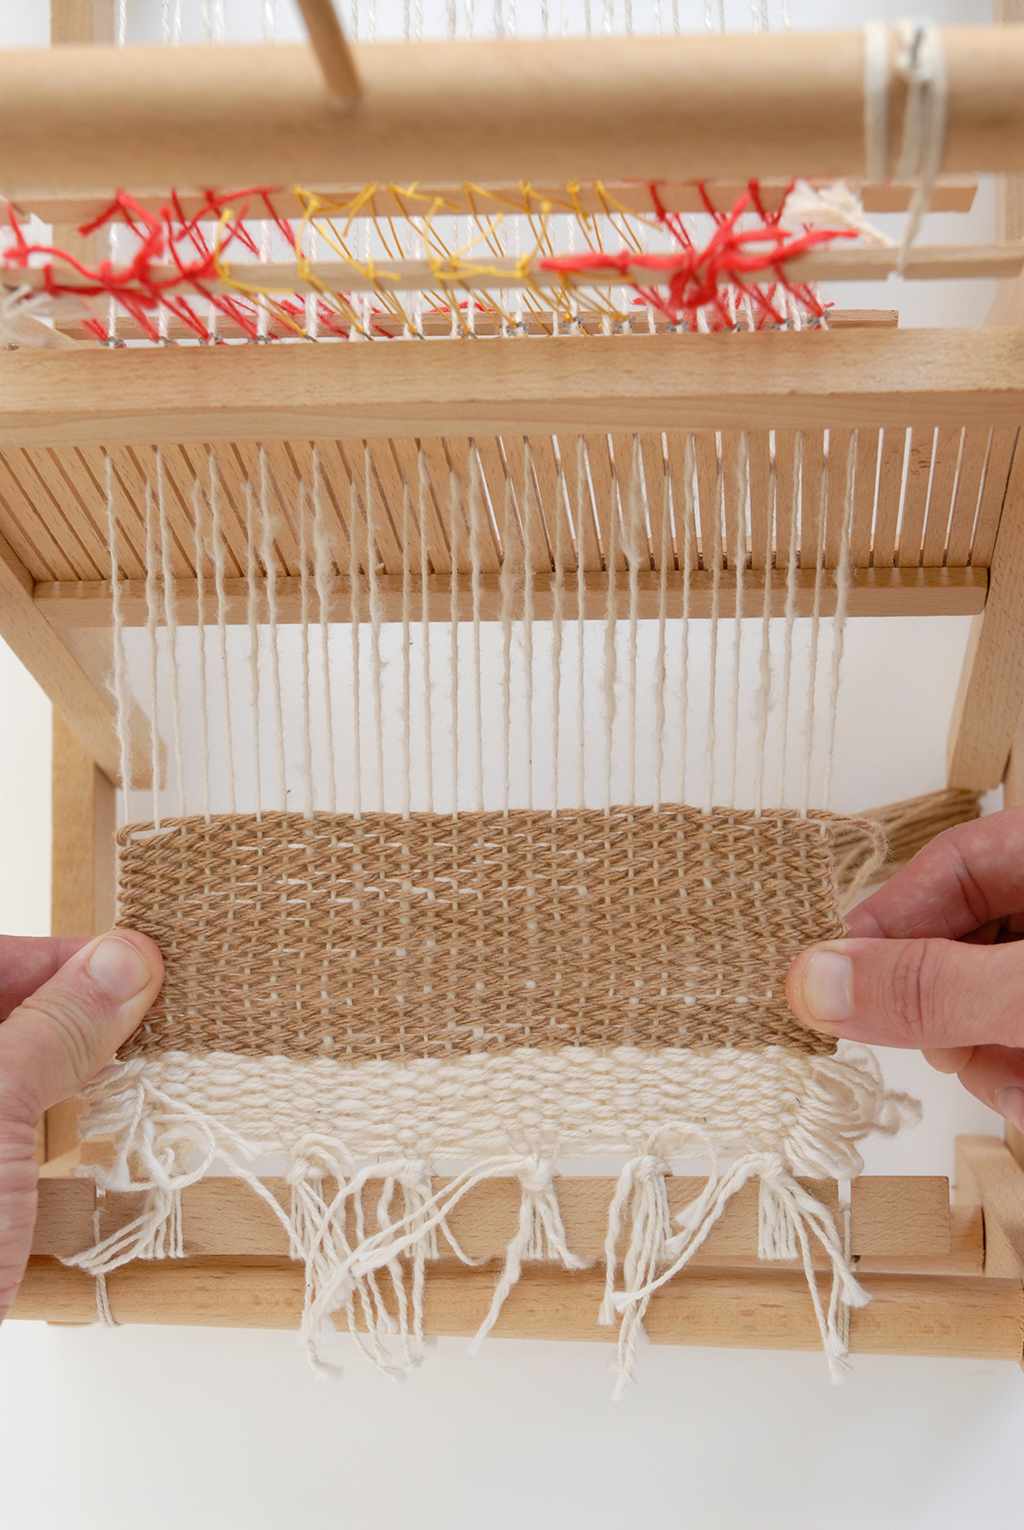
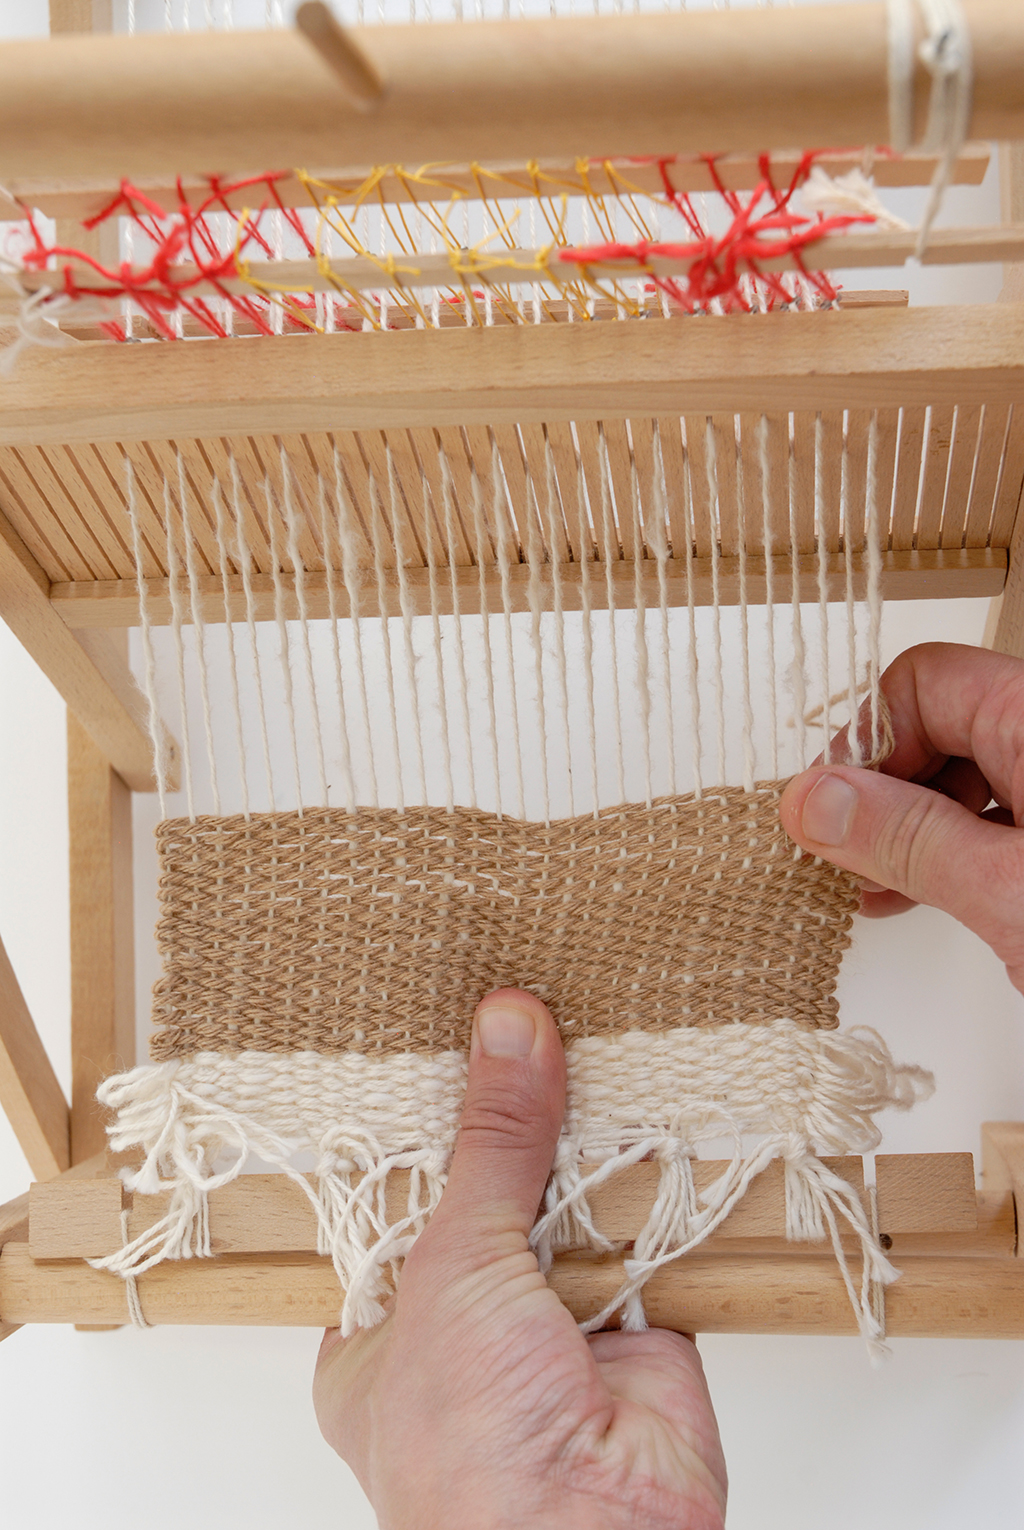
Fabric starts with the warp. The threads that form the lengthwise grain of the fabric are called the warp threads. These threads are tied onto the loom before weaving begins, and are held taut throughout the weaving process. The warp threads pass through heddles, which can lift specific threads as a group.
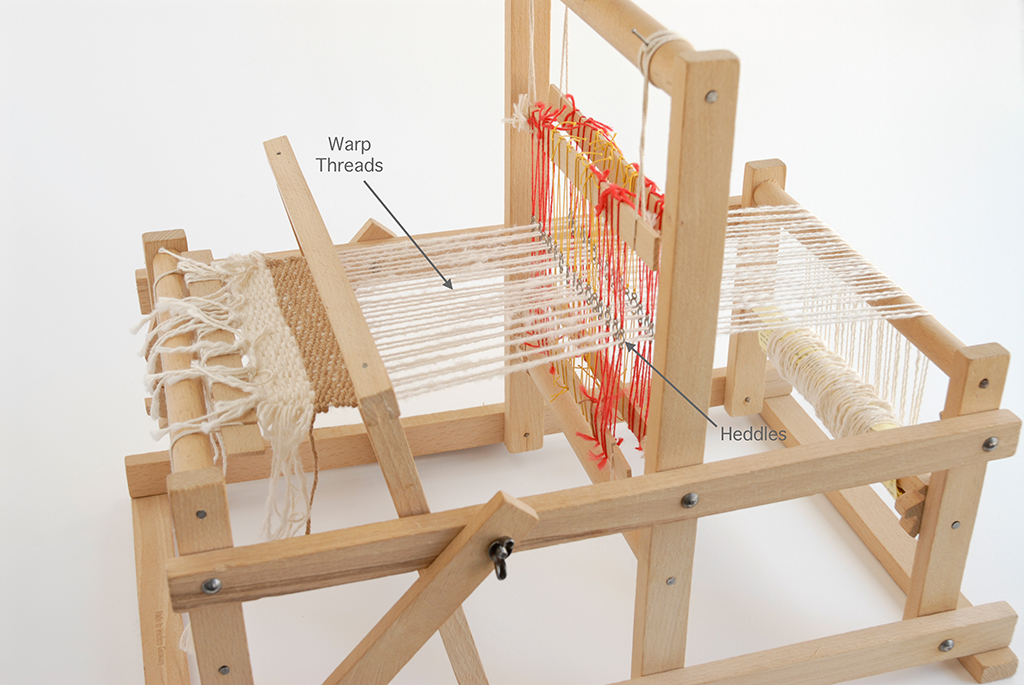
In weaving, the crosswise threads are called the weft (also called the woof, especially in older sources). Woven fabric forms as the warp and weft interlock to hold the threads in place. The weaver (or the machine in a modern factory) uses the heddles to raise certain warp threads so that there’s a path between them for the weft to pass through.
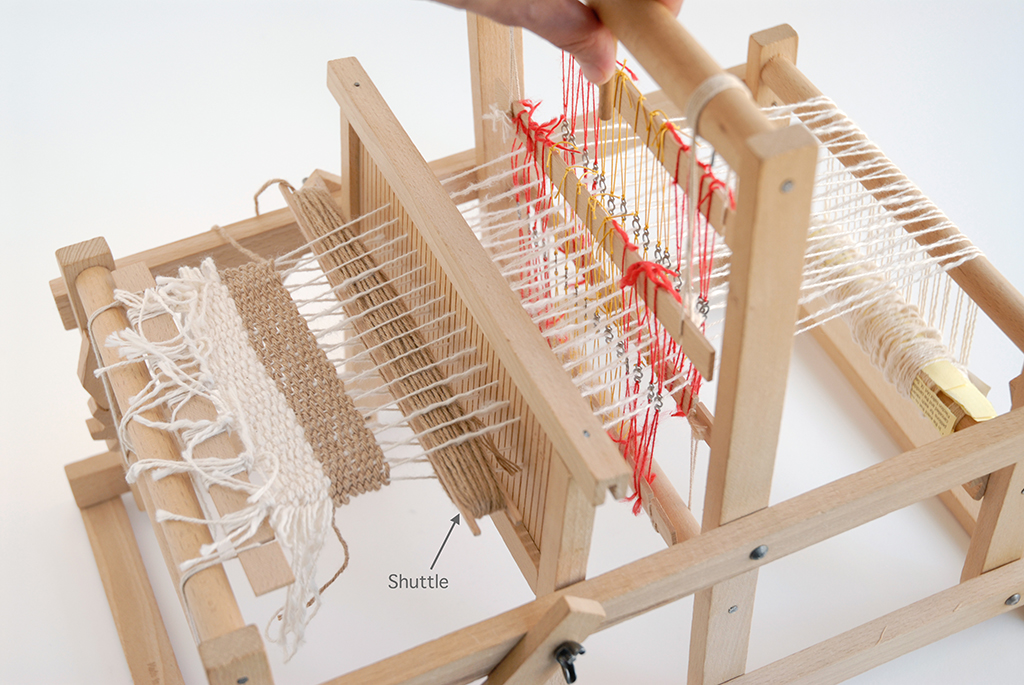
The weft threads are wound on a shuttle (the weaving equivalent of a bobbin) to make them easy to handle as they’re passed back and forth through the warp threads.
In this case, and for all plain-weave fabrics, every other thread is raised. When the weft passes through, it has the same effect as the weaving you may have done as a child where you used a needle to weave yarn over-under-over-under a warp, but this is much more efficient.
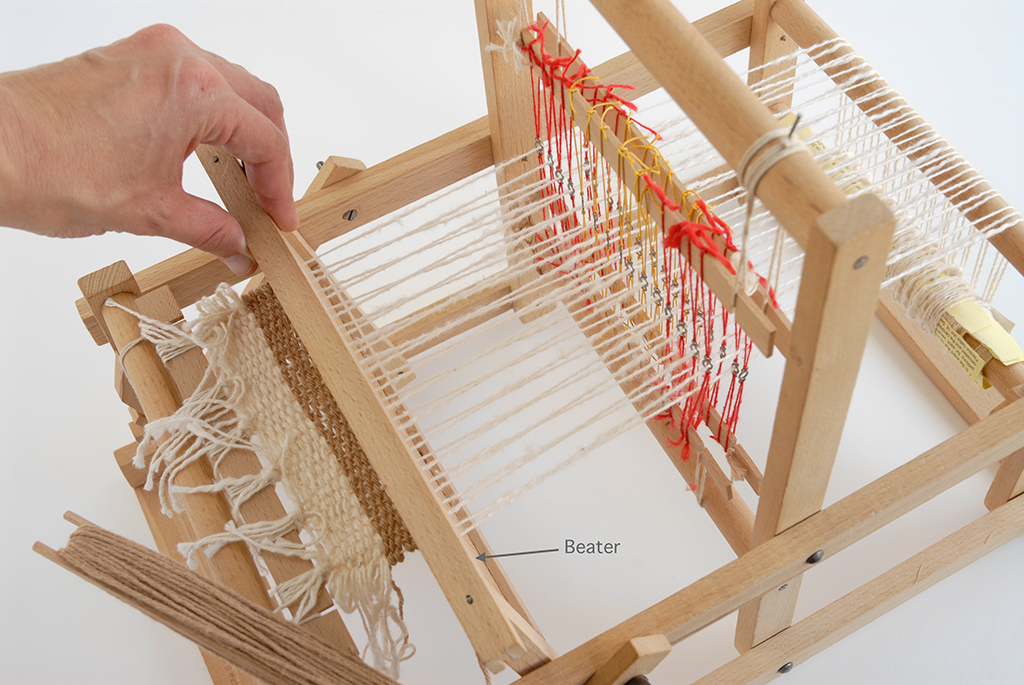
The beater tamps the new weft thread against the fabric-in-progress. By moving the heddles in the opposite direction before the weft passes back through, the opposite warp threads are raised, locking each pass of the weft in place and forming the structure of the fabric.
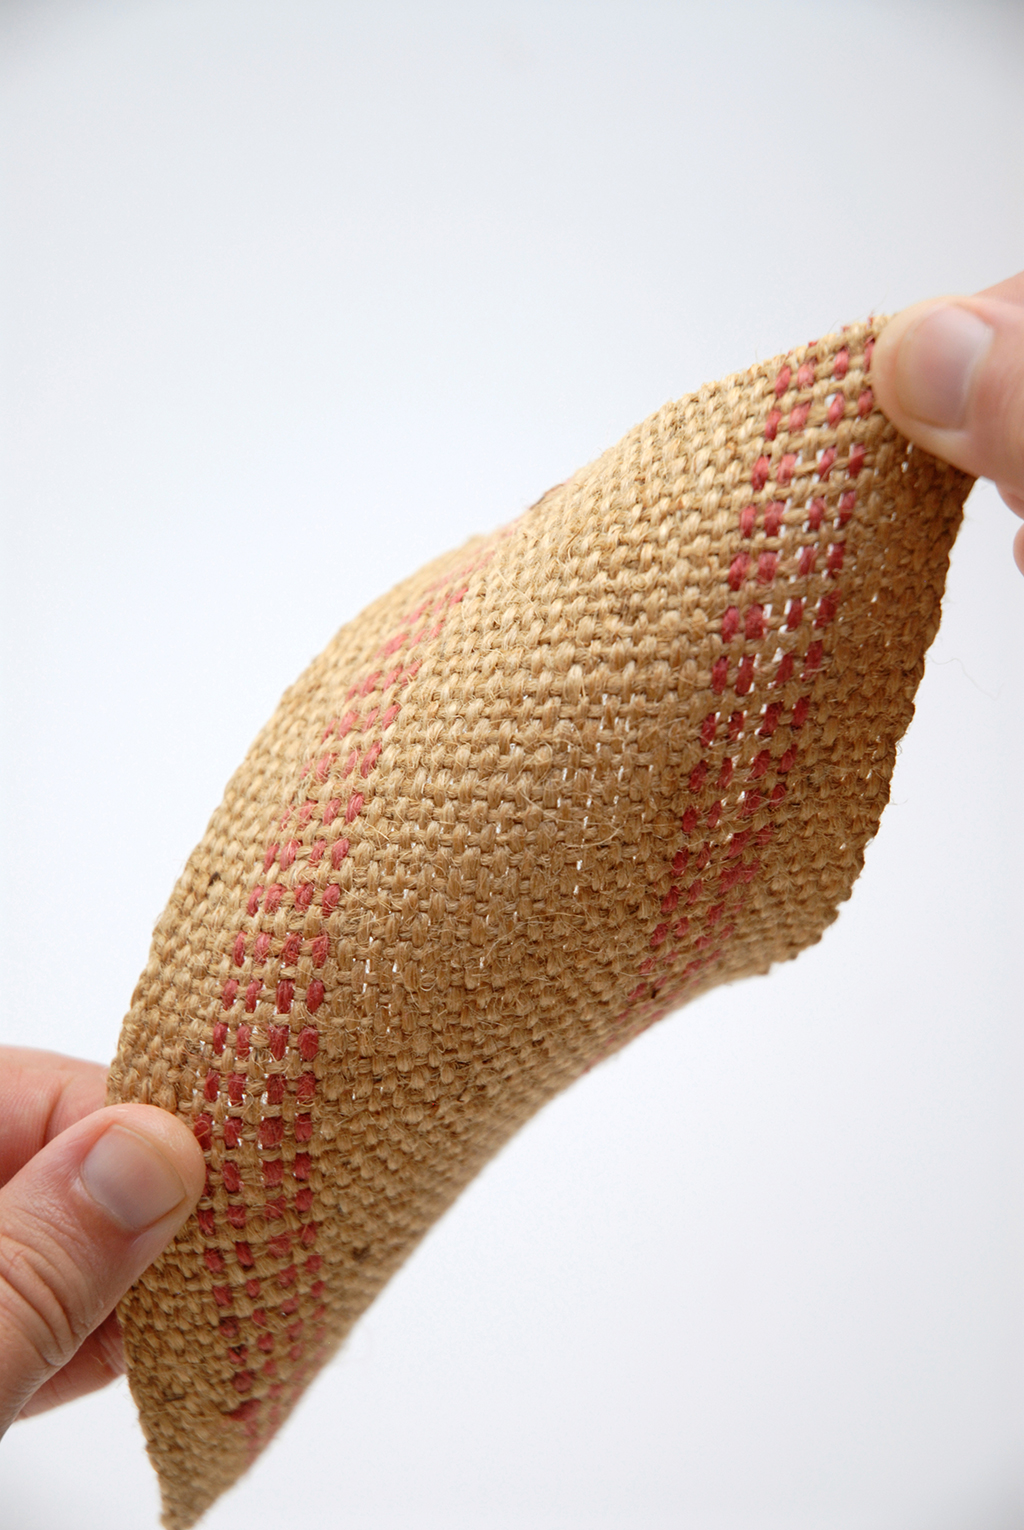
The selvedges are the lengthwise edges of the fabric. As the weft is passed back and forth, it encloses the threads on either side of the warp, forming an integrated edge that won’t unravel. In many commercial fabrics, slightly different threads are used for the selvedges, which can help keep the sides of the fabric taut as its woven.
Warp, Weft, and Bias in Finished Fabric
Learn how warp, weft, and bias can impact the drape of a garment.
The way a fabric is made on a loom gives it certain properties, and you want to take advantage of these properties in garment sewing. The warp threads become the lengthwise grain, which are the strongest and most stable threads in the fabric. Since these threads were always under tension during weaving, they won’t stretch after the fabric is cut. Gravity pulling on a garment over time won’t distort these threads, and they will hold the rest of the fabric structure in place. This is why most patterns have grainlines that align with the warp threads, so that the garment will hang well over the body and keep its shape over time.
What about patterns that are woven into fabrics?
A loom with two rows of heddles and can only divide the warp threads into two groups, so it can only make variations of plain-weave fabrics. A loom with more rows of heddles can make more varied weaves. Twill, for example, requires the weft to pass over three warp threads, under one, over three, etc., and the position of the three raised threads changes with each pass. By dividing the warp threads into four groups such that every fourth thread is in a group, it becomes fairly simple to weave a twill pattern.
Because the weft travels over and under the taut warp threads, it uses a little more thread over the same distance than the warp does, and so will always have just a little bit of play and stretch. Even if the warp and weft of a fabric are made from the same yarn, you can tell which is which by stretching along the grain in both directions. I’ve taken advantage of this slight stretchiness when making a pattern from an existing garment. Even if the fabric is a silk, which is often woven from threads that too fine to clearly see or mark, the direction of least stretch is the direction that aligns with the warp threads.
Because the weft can stretch a bit, it is usually used across the body rather than vertically, especially for large pieces. It is also fairly stable, so smaller sections of a garment can be cut with the weft running vertically for contrast, or to save fabric.
Bias refers to any angle on the fabric that is not in line with the warp or the weft. True bias is a 45° angle between the two. If you pull on a fabric across the bias, it stretches much more than it would along the weft. This is because the warp and weft threads can slip against each other when pulled at an angle, changing their orientation from perpendicular to diagonal.
A garment cut with the bias direction running vertically over the body doesn’t have any threads running straight down it, meaning that the fabric structure can shift and stretch as needed, which can be quite flattering. That’s also the reason why it’s important to give bias garments some time to hang before hemming them. The angle of the threads can be quite different over a wide hem cut on the bias, and so the threads may shift and stretch downward at different rates in different places.
It can be hard to sew hems over wide curved sections or on the bias without causing it to ripple, because once the hem is folded, the threads in the hem don’t hang at the same angle as those in the garment. Choose a very narrow hem, a faced hem, or one that is tacked down by hand rather than topstitched, so that the difference will be less noticeable.
Finding and Using the Grain
Finding the grain, checking of fabric is off-grain, and how to straighten skewed fabrics.
In a well-made fabric the warp and weft should be perpendicular to each other when the fabric comes off the loom, and when you are cutting and sewing it. However, many factors can cause the warp and weft to lose their perfect square shape, from uneven tension or beating during weaving, to being pulled off grain somewhere in the finishing process. Although it is not the end of the world, an uneven fabric can affect how your garment hangs, especially if you don’t realize that it’s skewed until after you cut into it. Sometimes you can straighten an uneven fabric, and even if you cannot it may change the way you cut, so it’s always worth checking.
To check whether the warp and weft of your fabric are square, first find the straight weft grain. If your fabric has a woven pattern across the weft (like a plaid or a check) this is easy. For solid color or printed fabrics it’s not as obvious, but there are a few methods you can use.
Most woven fabric rips easily, straight across the weft. To rip the fabric, cut a snip in the selvedge, and pull from either side of it. If you bought your fabric from an old-school shop, they may have done this for you instead of cutting the yardage! Ripping the fabric is quick and easy, but it may distort the edge, and it’s hard to rip very close to a cut edge.
If your fabric is delicate, or if you want to save every bit of it you can, try pulling out a thread from the weft and cutting along the line it leaves. If the edge was cut, it’s almost certainly uneven to the grain. Look for the point where the cut goes deepest into the fabric, and use a pin to lift a weft thread there and pull it. In some fabrics, you’ll be able to pull out a thread straight across the weft in one go. In others the thread will break every few inches, and you will have to do your best to find it and pull it out again. Sometimes, once the thread is out, it’s hard to see the gap it left. Try holding it up to the light, or cutting the fabric while the pulled thread gathers it just a little, so that you can see the line to cut in the puckers. Although this method is more tedious than ripping, it doesn’t distort the edge at all and it can be used anywhere, even to check the grain on scraps of fabric in your stash.
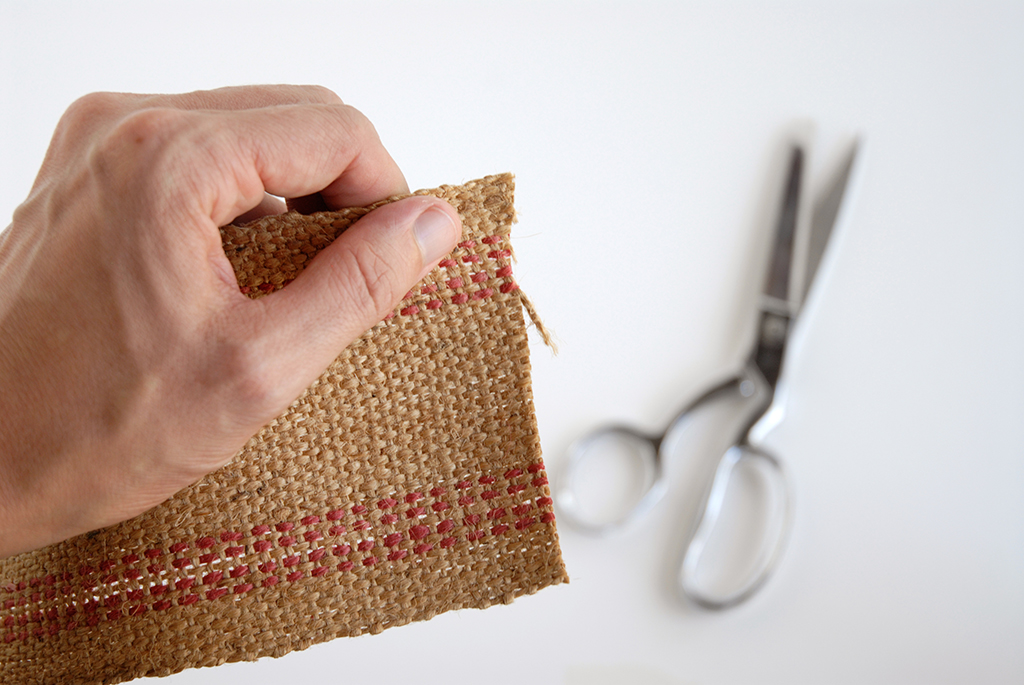
Once you have a straight line across the weft, fold the fabric in half from selvedge to selvedge. If the grain is square, the selvedges (which are parallel with the warp) and the weft at the ends should all line up and fold into a neat rectangle. If the grain is skewed, you’ll either be able to line up the warp or the weft sides, but not both at once.
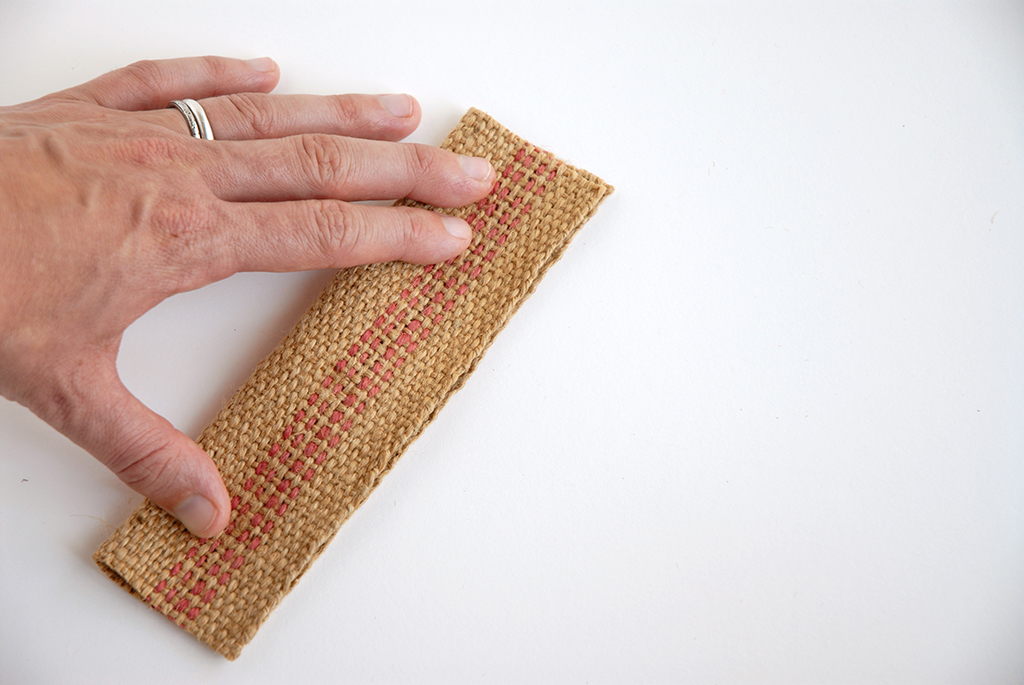
The warp and weft of this sample all line up when folded, so the lengthwise and widthwise grainlines are square to each other.
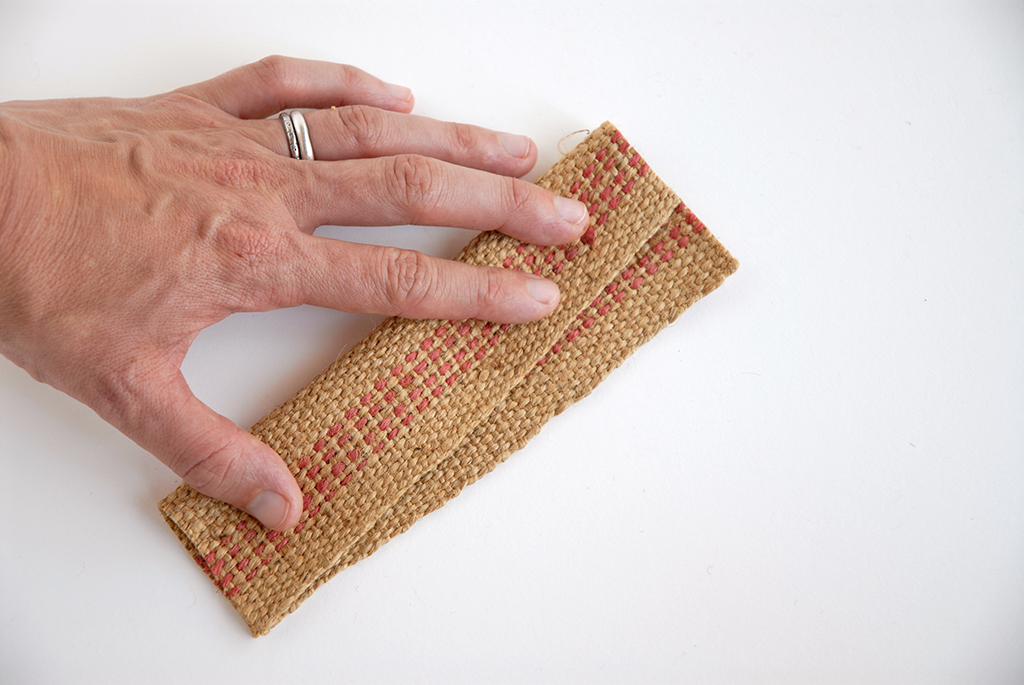
In this sample, when the weft grain lined up straight across the width the warp is at steep angles, meaning the grainlines are skewed.
Sometimes it’s possible to straighten a skewed fabric by taking advantage of the fact that the warp and weft threads can move against each other when pulled on the bias. To do this, determine which corner is at the sharper angle. Usually you can tell by comparing two sides of the fabric to see which corner is narrower. Grab both sides of the narrow corner, and pull across the bias. Move your hands down on each side by an even amount, and pull again. On this little sample, I’ll move down the width of my thumb. On a full-size piece of fabric, move down one hand-width at a time, so that each part of the fabric gets stretched.
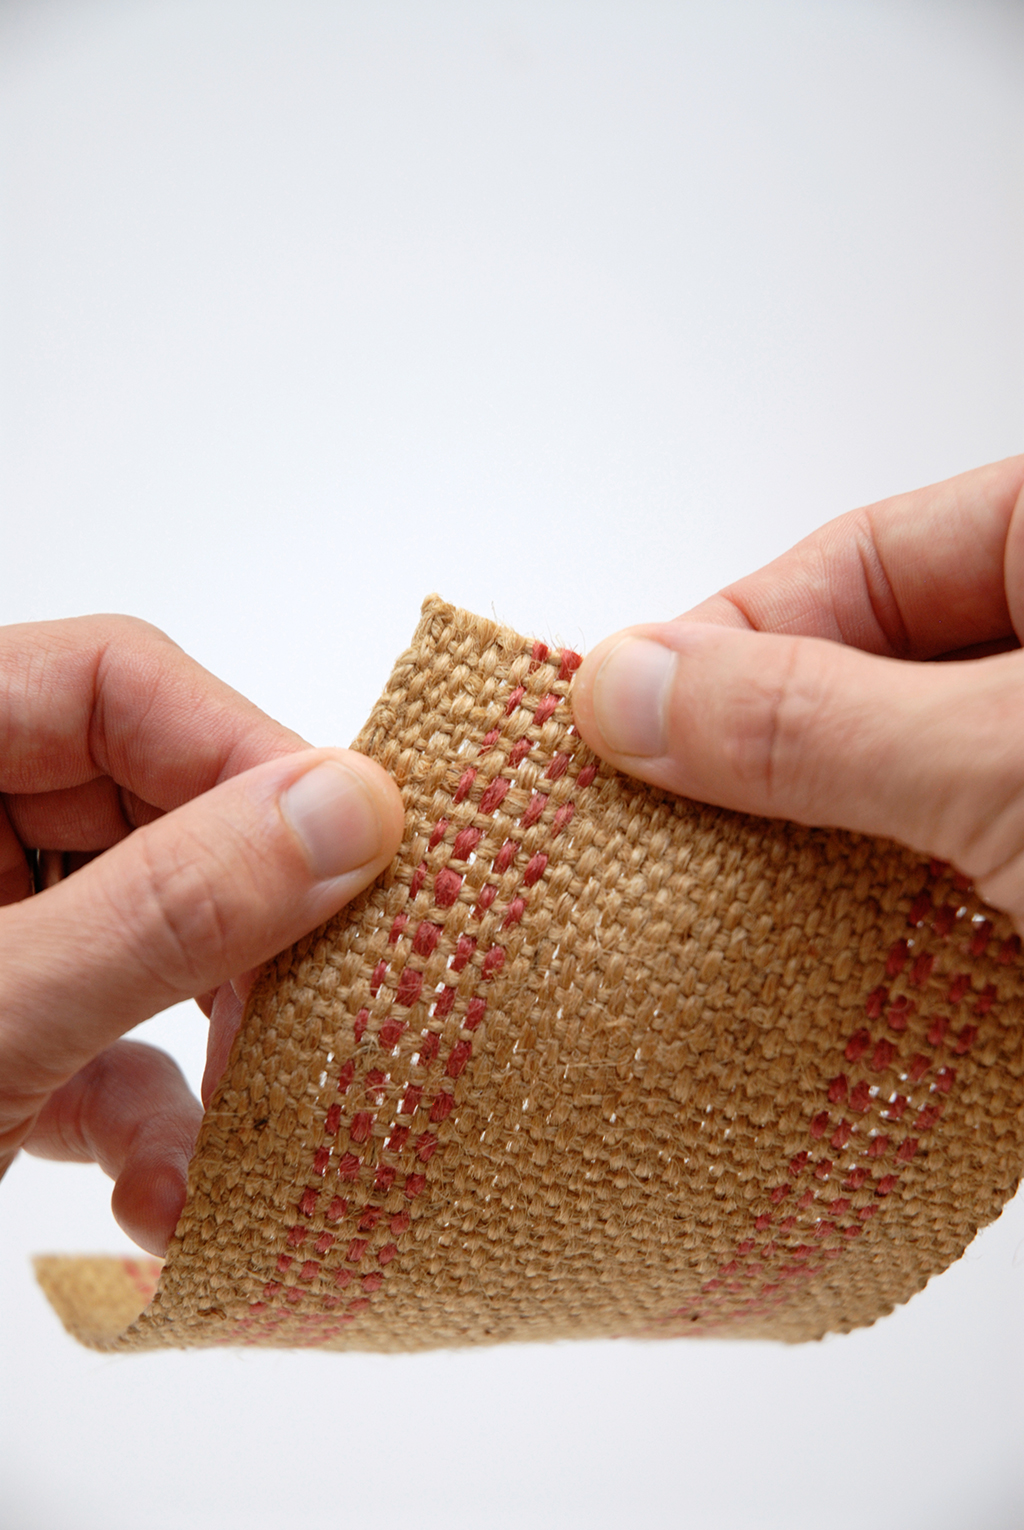
To move the grainlines towards square, pull straight across the bias, an even distance from the corner on both sides of the fabric.
On a wide fabric, you may need a friend to help you pull across the full width, since your arms won’t stretch that far apart. Continue until you’ve stretched all the fabric, all the way to the opposite corner.
Line the warp and weft up again, and see if they are closer to square. If stretching made a difference but the fabric still isn’t quite square, try pulling across the fabric again, starting from the same corner.
Sometimes, perhaps due to the finishing process the fabric went through or the tightness of the weave, no amount of stretching will pull the threads into right angles. If that’s the case, it’s most important to match the pattern’s grainlines to the warp threads, parallel to the selvedge. Do not use the weft edge as a reference if the grain is not square, because the lengthwise grainline will not be perpendicular to it, and your pieces will end up off grain from the warp. Knowing whether or not your fabric is square, understanding how to find the grain and why it’s important, will help you get the best possible results in your sewing.
Now that you know the properties that are built into fabric as it is woven, you can to create garments that take advantage of the strength of the grain, the slight stretch of the cross grain, or the fluid stretch of the bias. So grab that special fabric that’s been lingering in your stash! The perfect project is just around the corner.
Resources
If you’re curious about how more complex woven patterns are made, the Victoria & Albert museum has a fascinating video on Jacquard weaving that breaks down the process.
The best way to learn about weaving is to try it out for yourself! Check to see if there’s a weavers’ guild, yarn store, or individual weavers offering classes or demos in your area. Word to the wise: weaving is a creative, meditative process that also produces fabric - it can be addictive!

About the Author
Tasha Miller Griffith posts her tutorials, inspirations, and thoughts about being a maker in the modern world at Stale Bread into French Toast.