Sign In
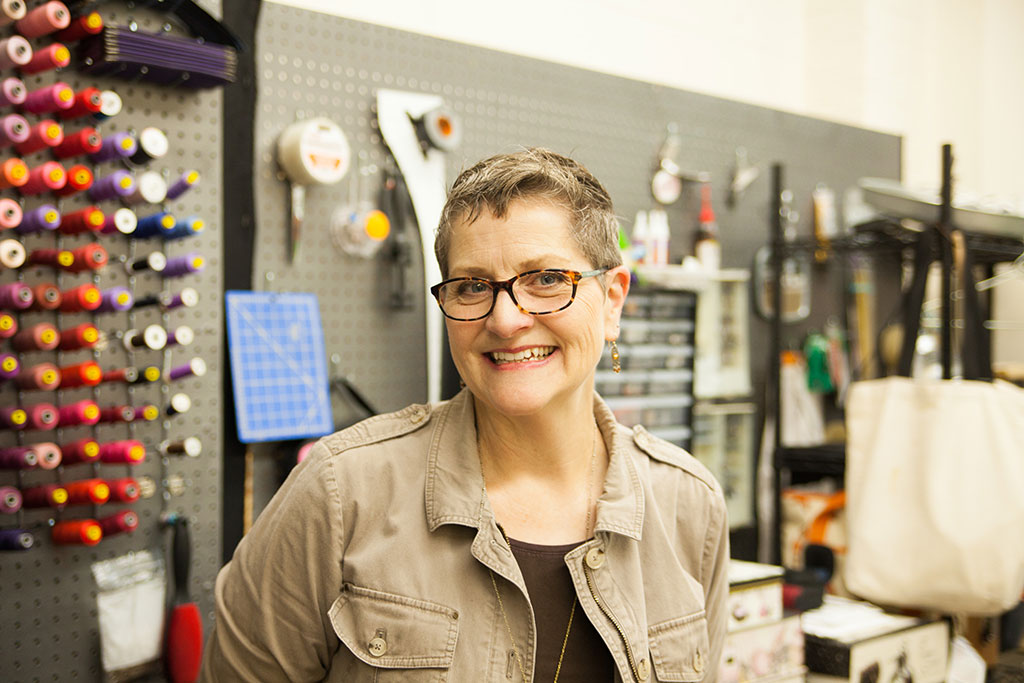
Claudia Echols plays an important yet little-known role in the fashion industry. As a Technical Apparel Designer, she works with fashion designers to actualize their vision through pattern drafting, fitting, and assembling a technical package for garment production. She is the middle-man that treads the line between vision and cost effectiveness, whose technical understanding of pattern making and fit can really make or break a design.
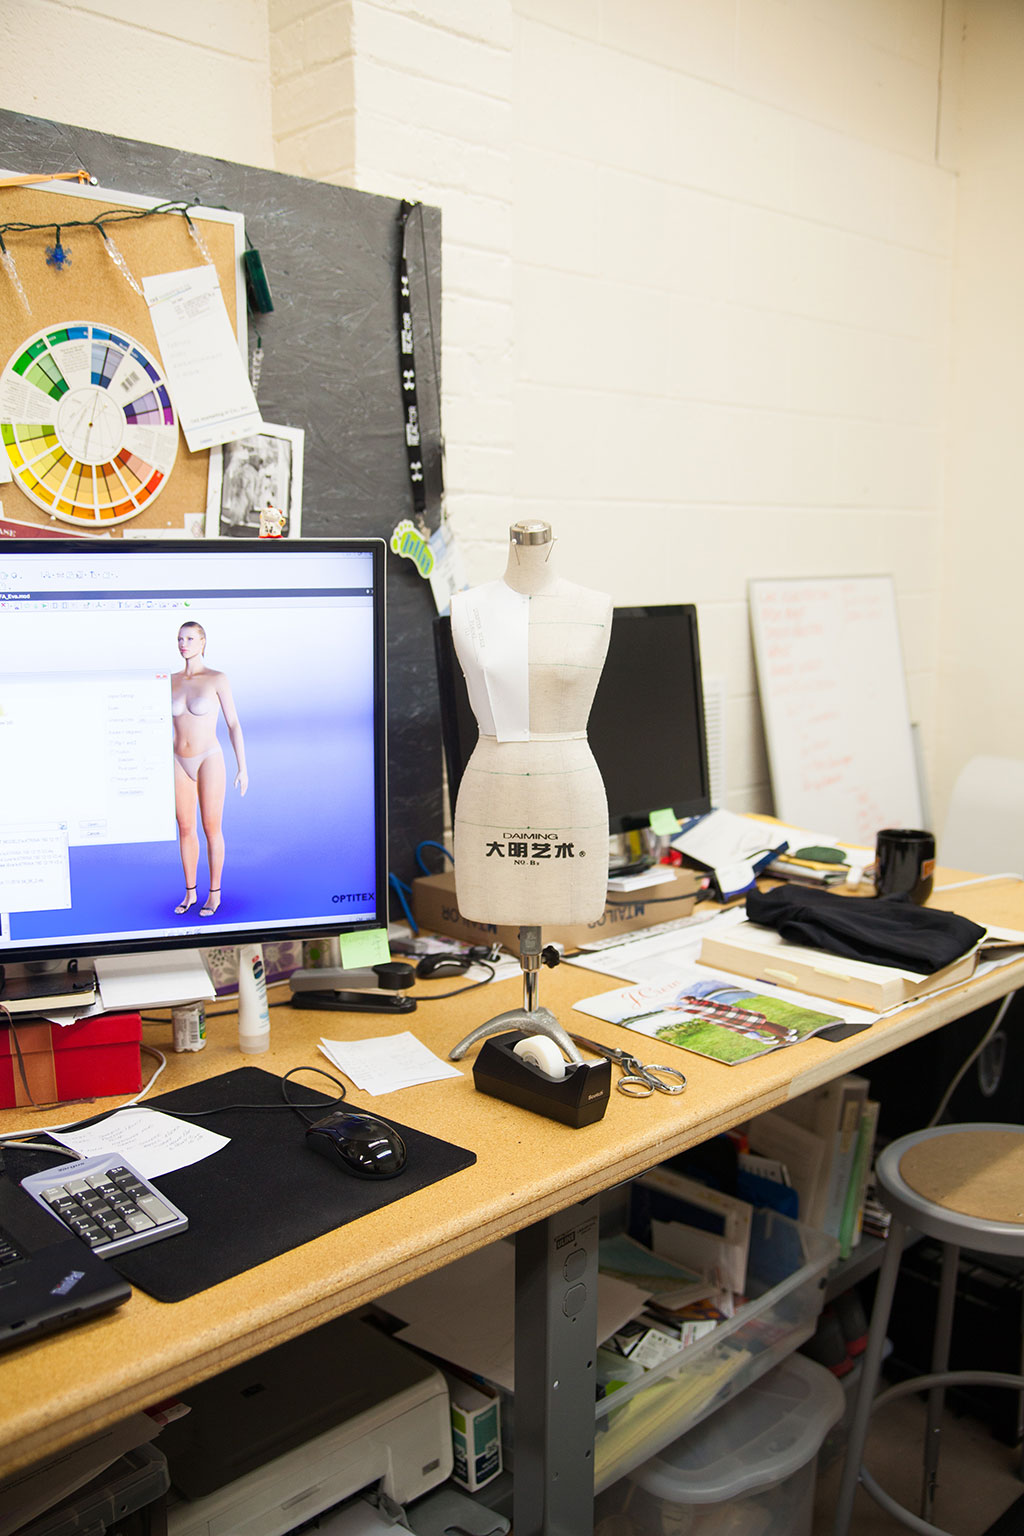
As a third-generation seamstress, Claudia has always been immersed in fashion and sewing. Even as a young girl, she would take her mother's scraps and drape on her Barbie dolls. After attending nursing school and raising a family, Claudia decided to do what makes her happy. At age 34, she enrolled in an Apparel Design program at Oregon State University. She struggled to find her place in the fashion industry and eventually purchased Optitex and opened her business, Not the Norm, where she is currently using 3D technology for apparel pattern development and fit.
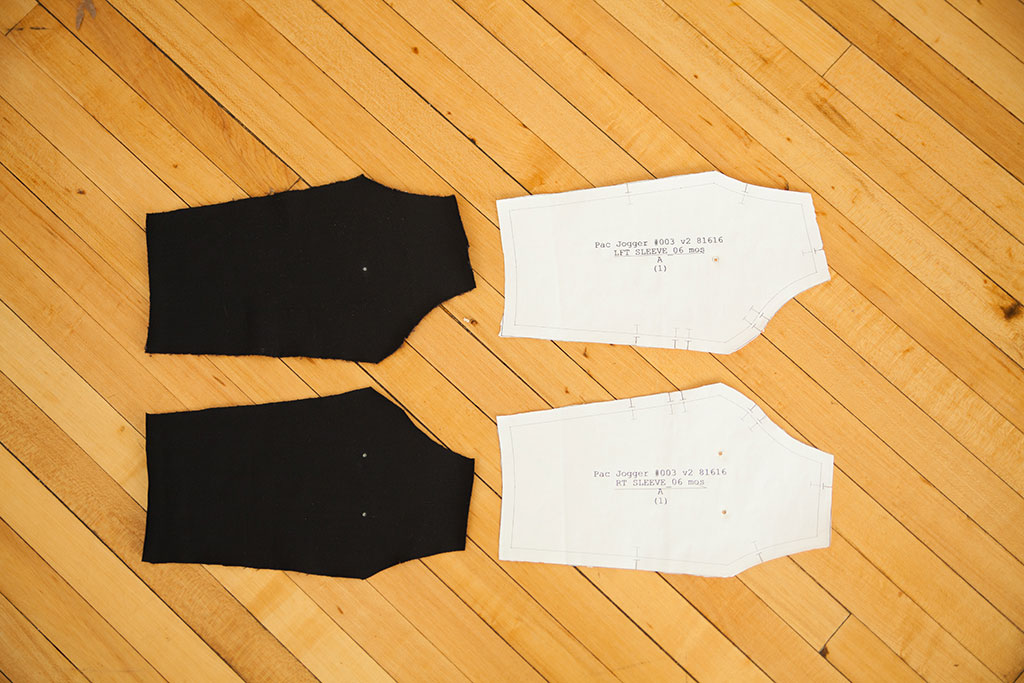
When sewing for production Claudia must sew fast, well, and every garment must turn out exactly the same. Production sewing is very different than our accustomed style of home sewing.
For instance, Claudia doesn't use pins! Instead, she constructs her garments utilizing thoughtfully placed notches. While sewing, these notches are matched to each other, one by one, throughout a seam, rather than pinned and then sewn. But even here, Claudia can sometimes experience push back. The more notches a garment has, the more expensive it is to produce. Often times garments are sewn in an assembly line, 100 at a time. When cutting a stack of 40 pieces of fabric, it can shift, and notches will turn out slightly too long and ruin a whole batch.
Also, garment production uses a different order of construction than your traditional home sewists. The longer the garment is able to lay flat, the less expensive it is to construct. For example, on a dress, production sewing would approach the back and front separately and sew every possible detail to each side before moving forward. Then, the shoulders and collars would be sewn. At this point, the garment gets a bit more round, but still lays flat. Finally, the side seams would be the last seams sewn. The key is to avoid sewing in the round, which takes time and sometimes special sewing machine arrangements.
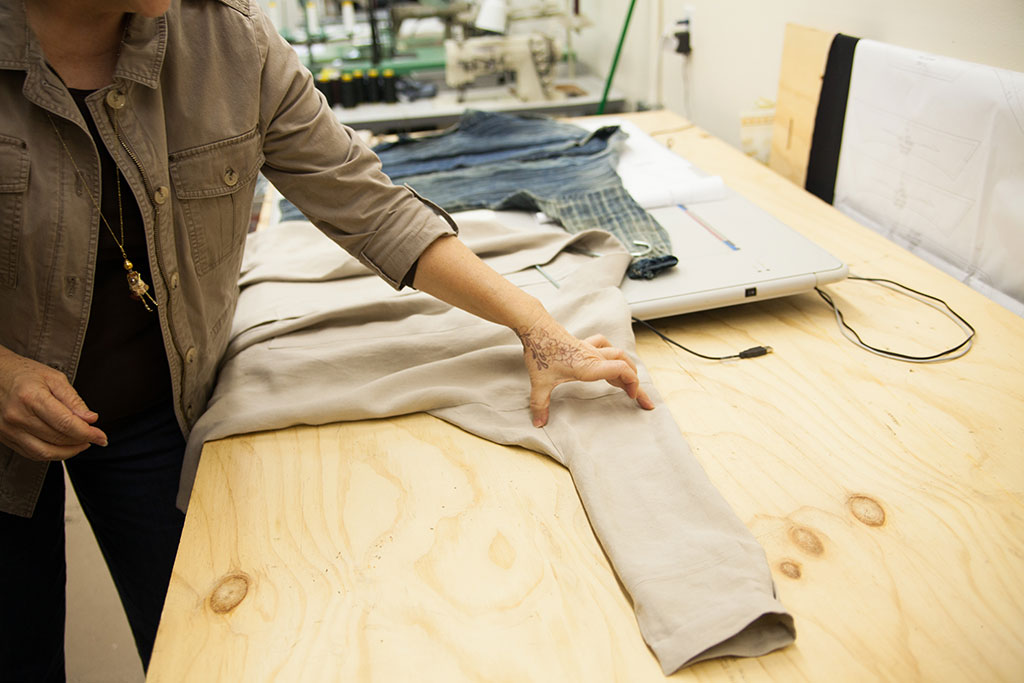
Claudia shows off a jacket mock-up, inspired by antique Japanese workwear.
After building the patterns and testing them, Claudia creates a technical package. These booklets include incredibly detailed illustrations, measurements, and construction order. The goal of the tech pack is to ensure precision and consistency between sizes. Claudia's biggest challenge is creating a tech pack that is accessible, as many of the garment production teams she works with speak a language other than English. She must communicate important details about the garment with little to no wording. These tech packs are essentially the fashion industry's version of home sewing's pattern instruction booklets, but are used to sew 100 garments in three colorways.
One thing that Claudia loves about her work is that she gets to work on a broad range of tasks, "I'm not the one person in the factory pushing one button all day, I'm the person who pushes eight buttons all at once" She is responsible for pattern work, grading, sample sewing, tech packs, and illustrations. The Technical Apparel Designer has the secret job that must be done in order for us to love our ready-to-wear clothing.
Claudia's Favorite Tools
Jigs
Claudia creates tag board templates of each of her pattern pieces. These jigs last through many cuttings and allow Claudia to cut multiple garments without fear of slight changes in shape and markings.
Screw Punch
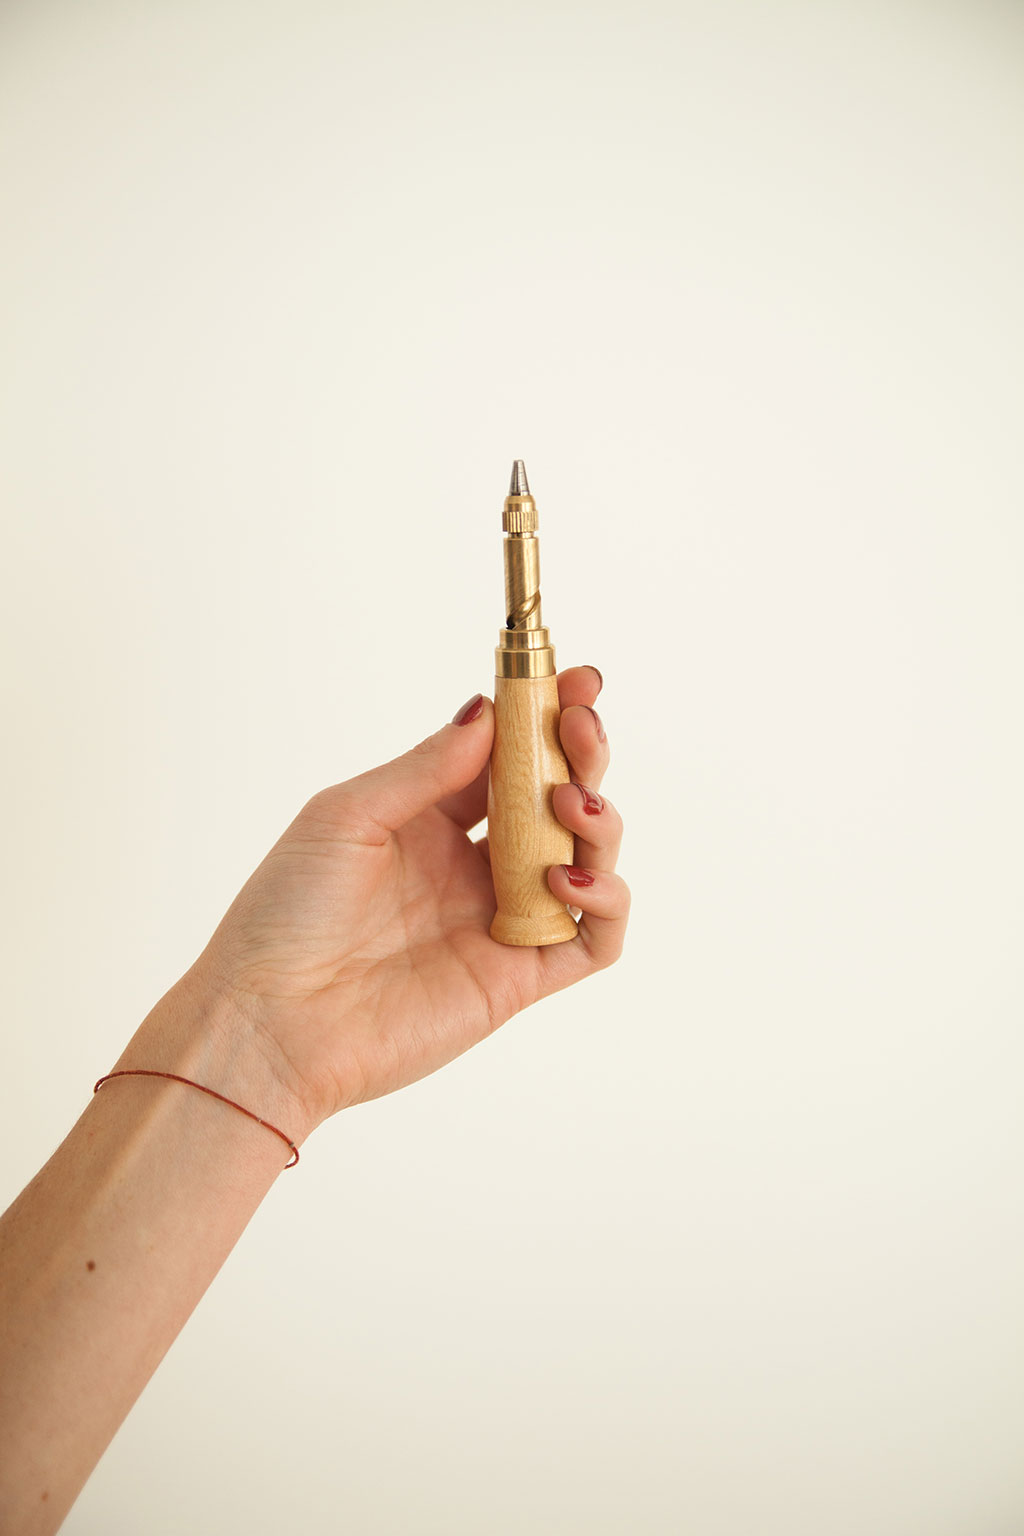
Claudia uses this screw punch to create small holes in her jigs for pocket, label, and dart markings. Her screw punch even has interchangeable points that create different sized holes.
Snips
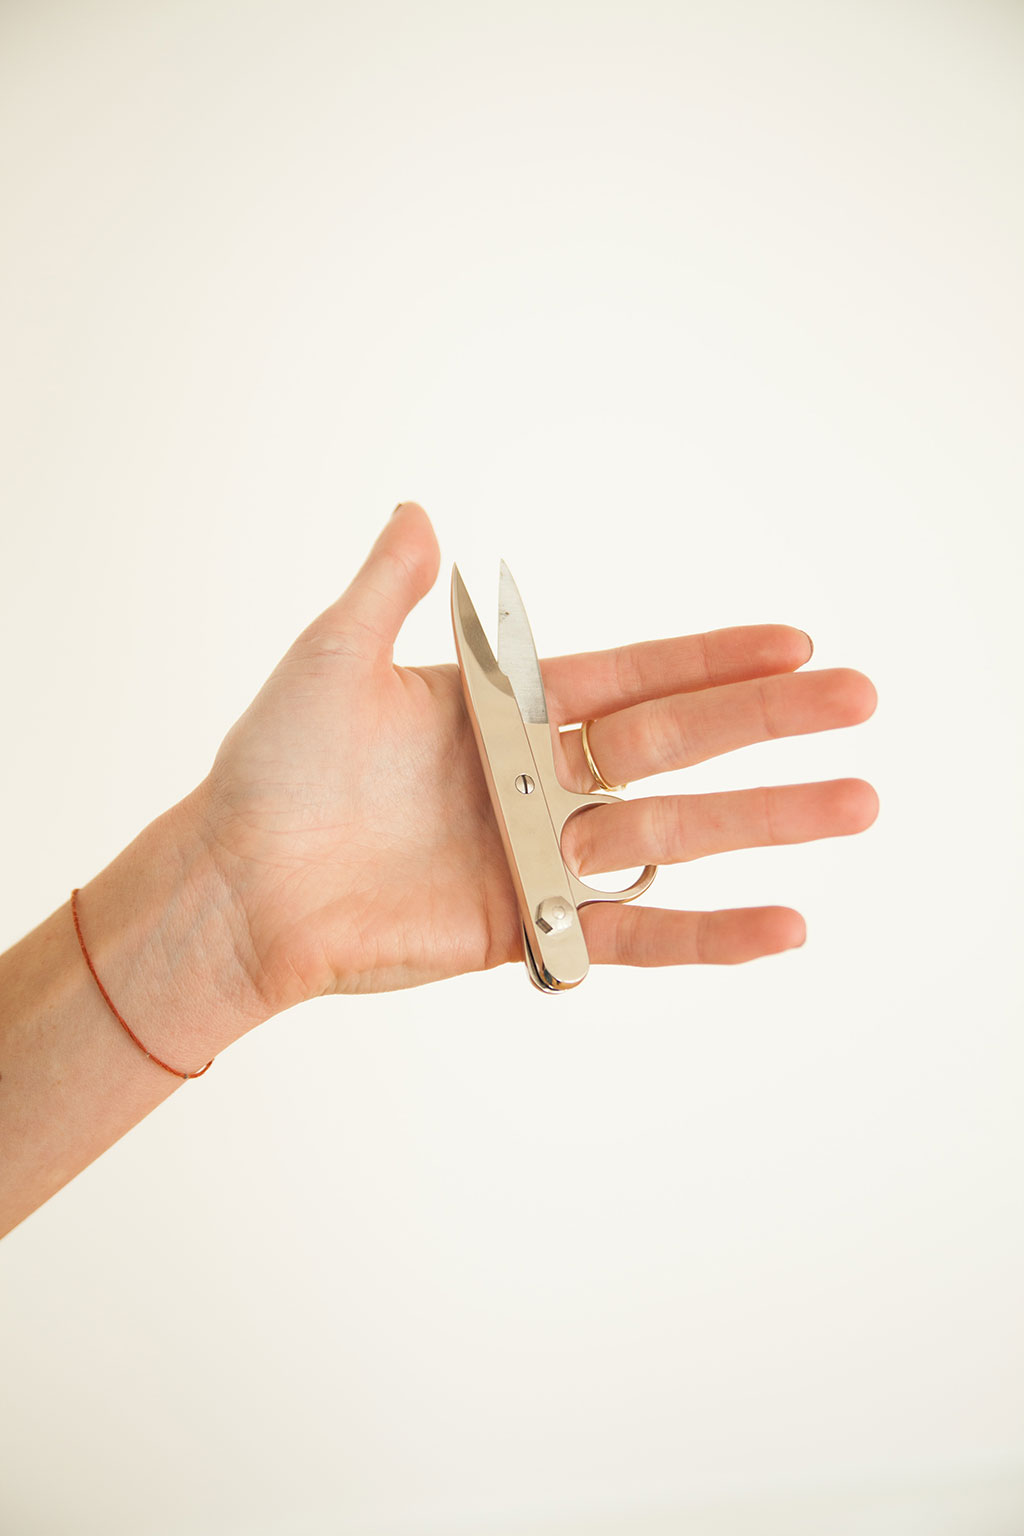
These scissors can be worn like a ring while sewing and are always available for a quick snip.
Sewing Apron
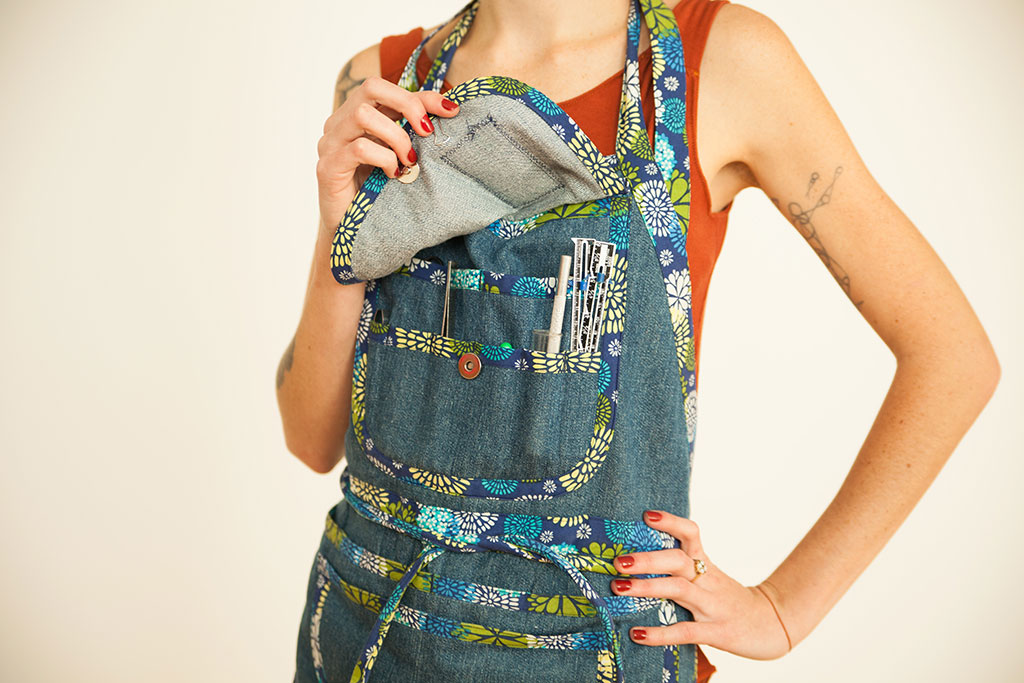
This apron is Claudia's pride and joy! Designed with a designated pocket for everything she needs, all her tools and notions are accessible and easy to find. It's her sewing tool belt!
Fitting A Gaping Armhole
Claudia's favorite technique eliminates what she calls, "armhole gaposis."
Armhole gaping can occur for a few reasons: the bust dart is the incorrect size or missing, the armhole design cuts into the bodice without the proper contouring, or the starting pattern is designed for a sleeve and is being converted to a sleeveless design. No matter the reason, armhole gape can be solved with a simple bust dart rotation. If your garment does not already have a dart, these instructions still apply.
Close-fitting garments, unless designed for stretch fabric, must have bust and/or waist darts to achieve the proper fit. The basic unbreakable rule for bodice darts is that they must be stitched, rotated, or converted; they cannot be ignored.
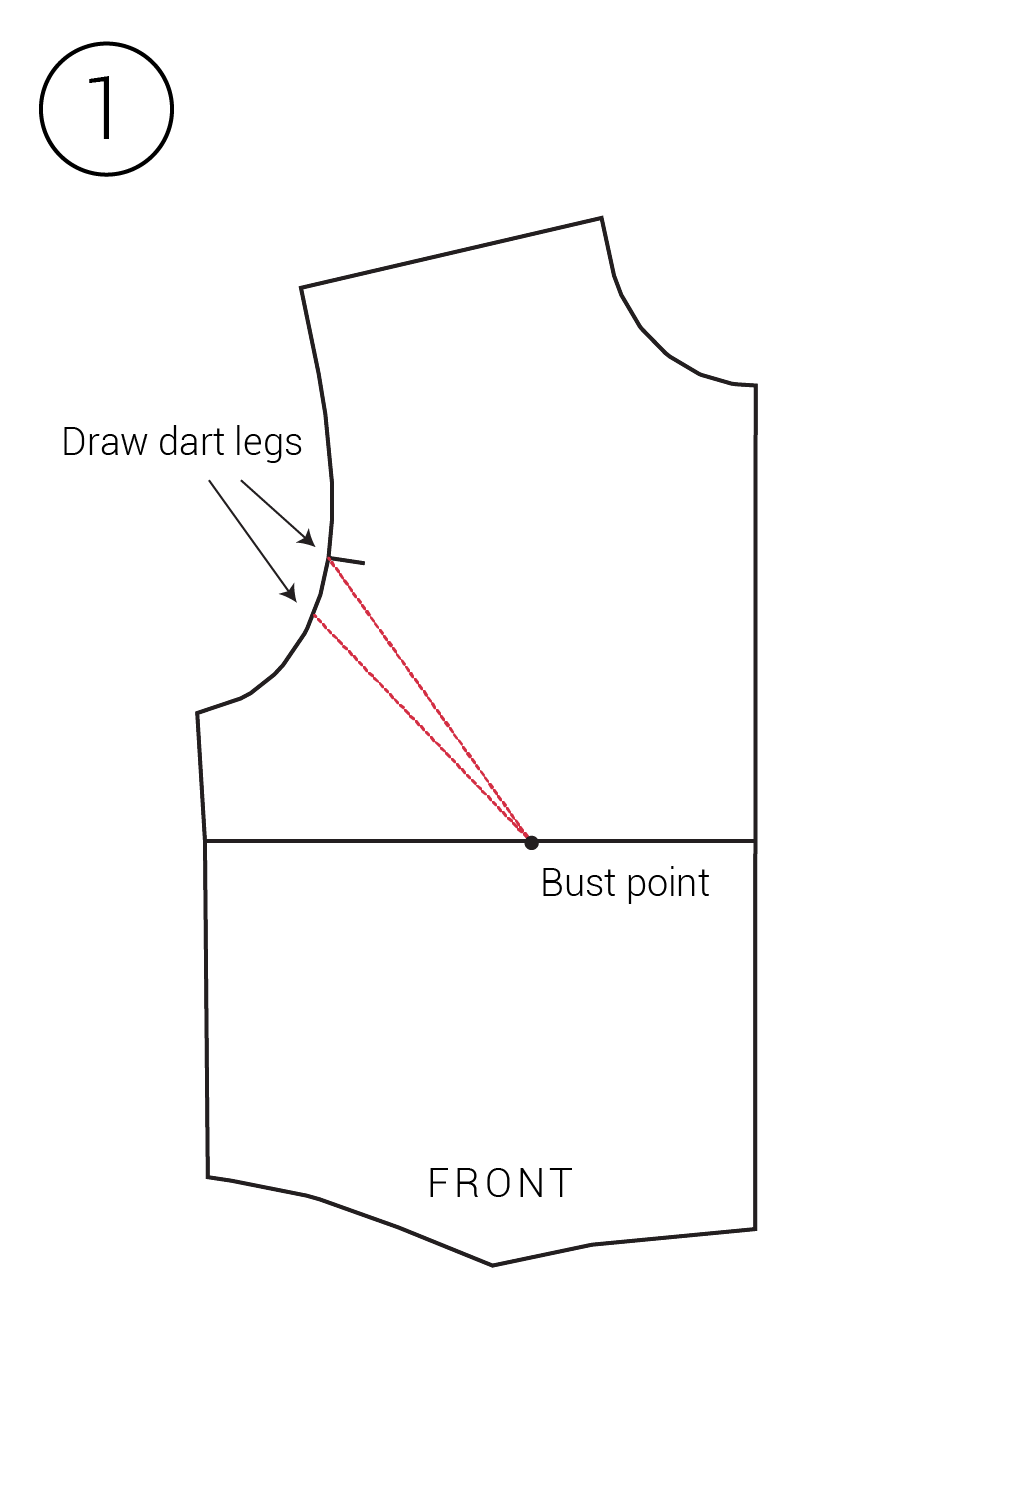
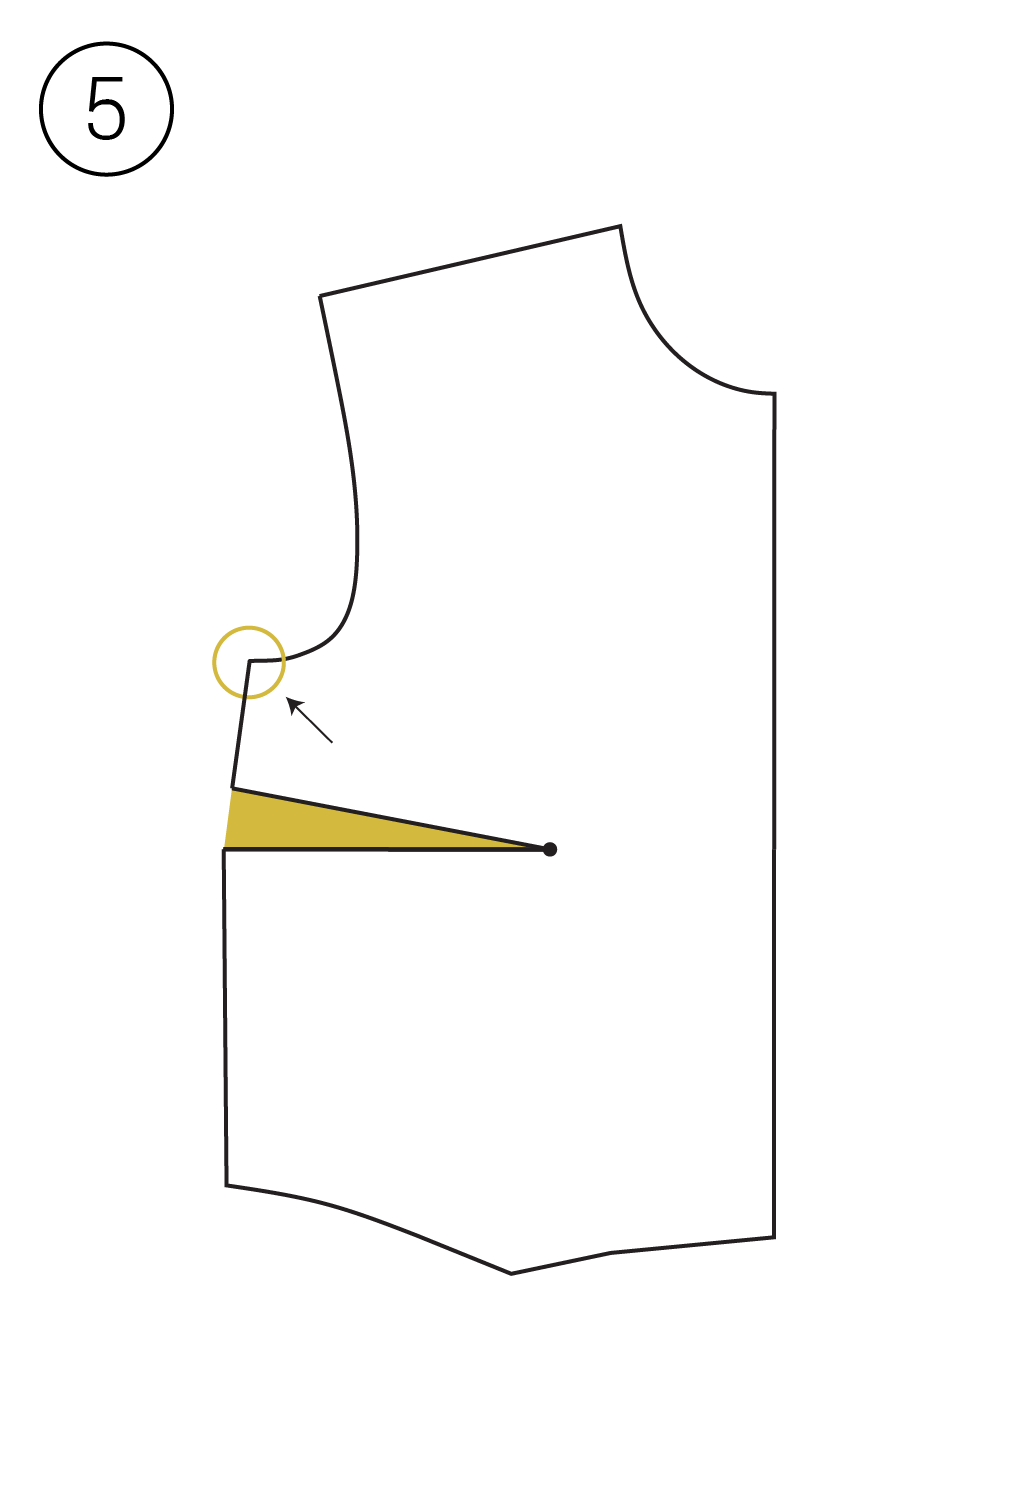
On the fit garment or muslin, pinch out the gap in the armscye and measure the width of the gap. On the pattern piece, draw a line from the bust point to the notch on the armscye. Draw an additional line from the bust point to the armscye, an equal distance away from the notch to the amount pinched on the muslin. These are your armhole dart legs.
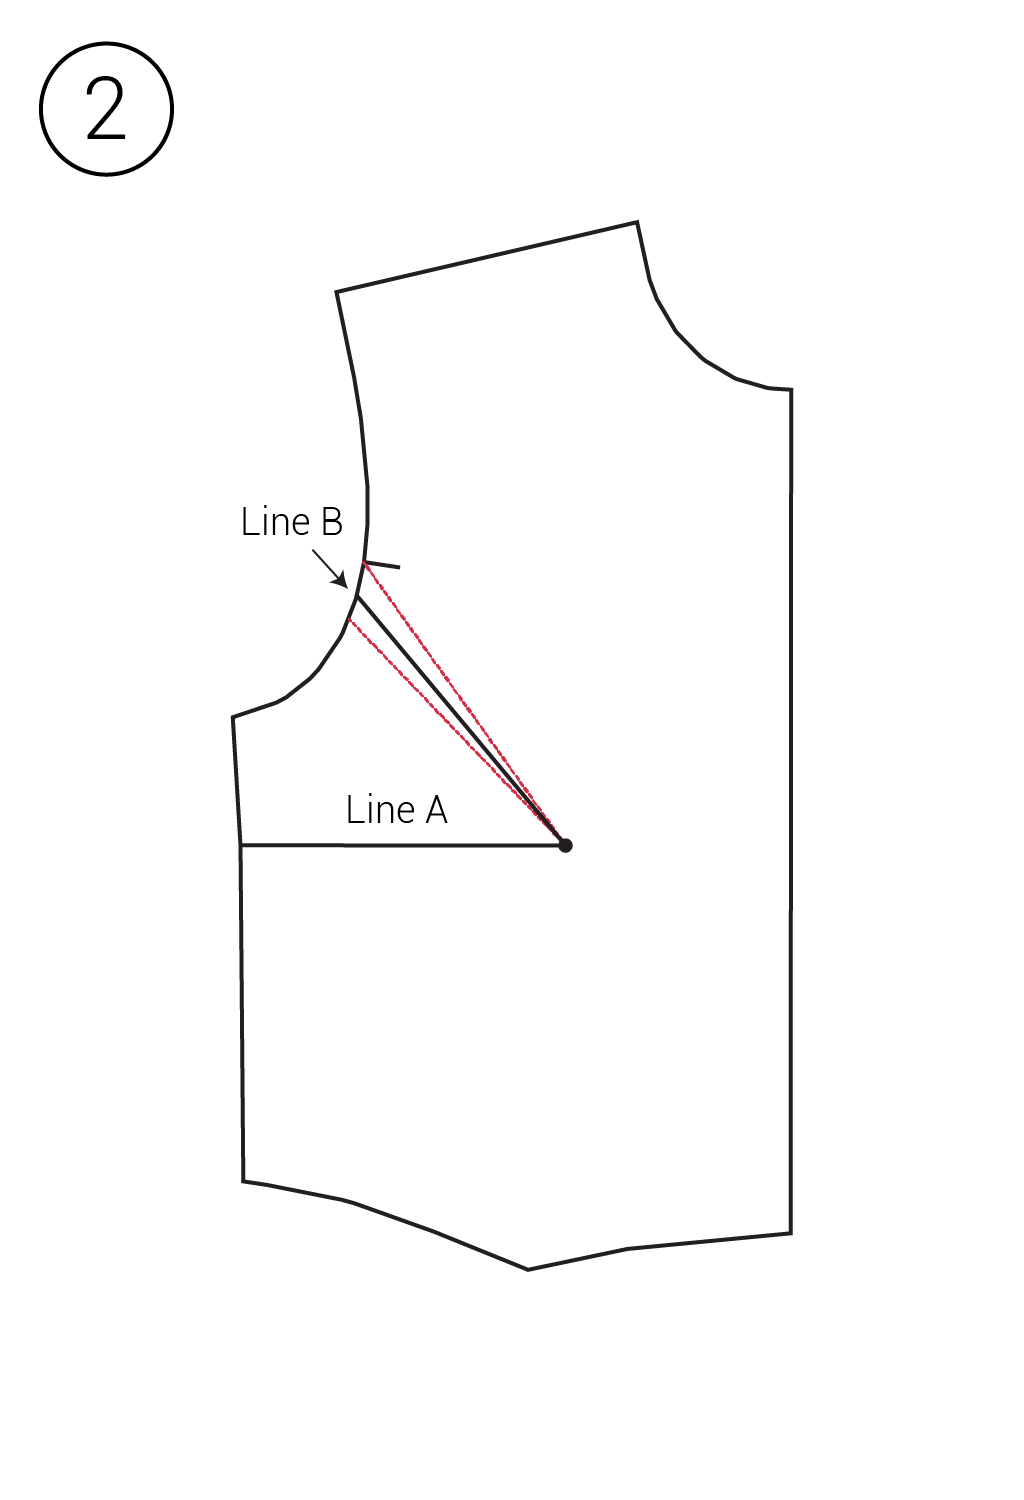
Draw a line perpendicular to the grainline, from bust point to the side seam, this is line A. Draw a line from the center of the dart legs on the armscye to the bust point, this is line B.
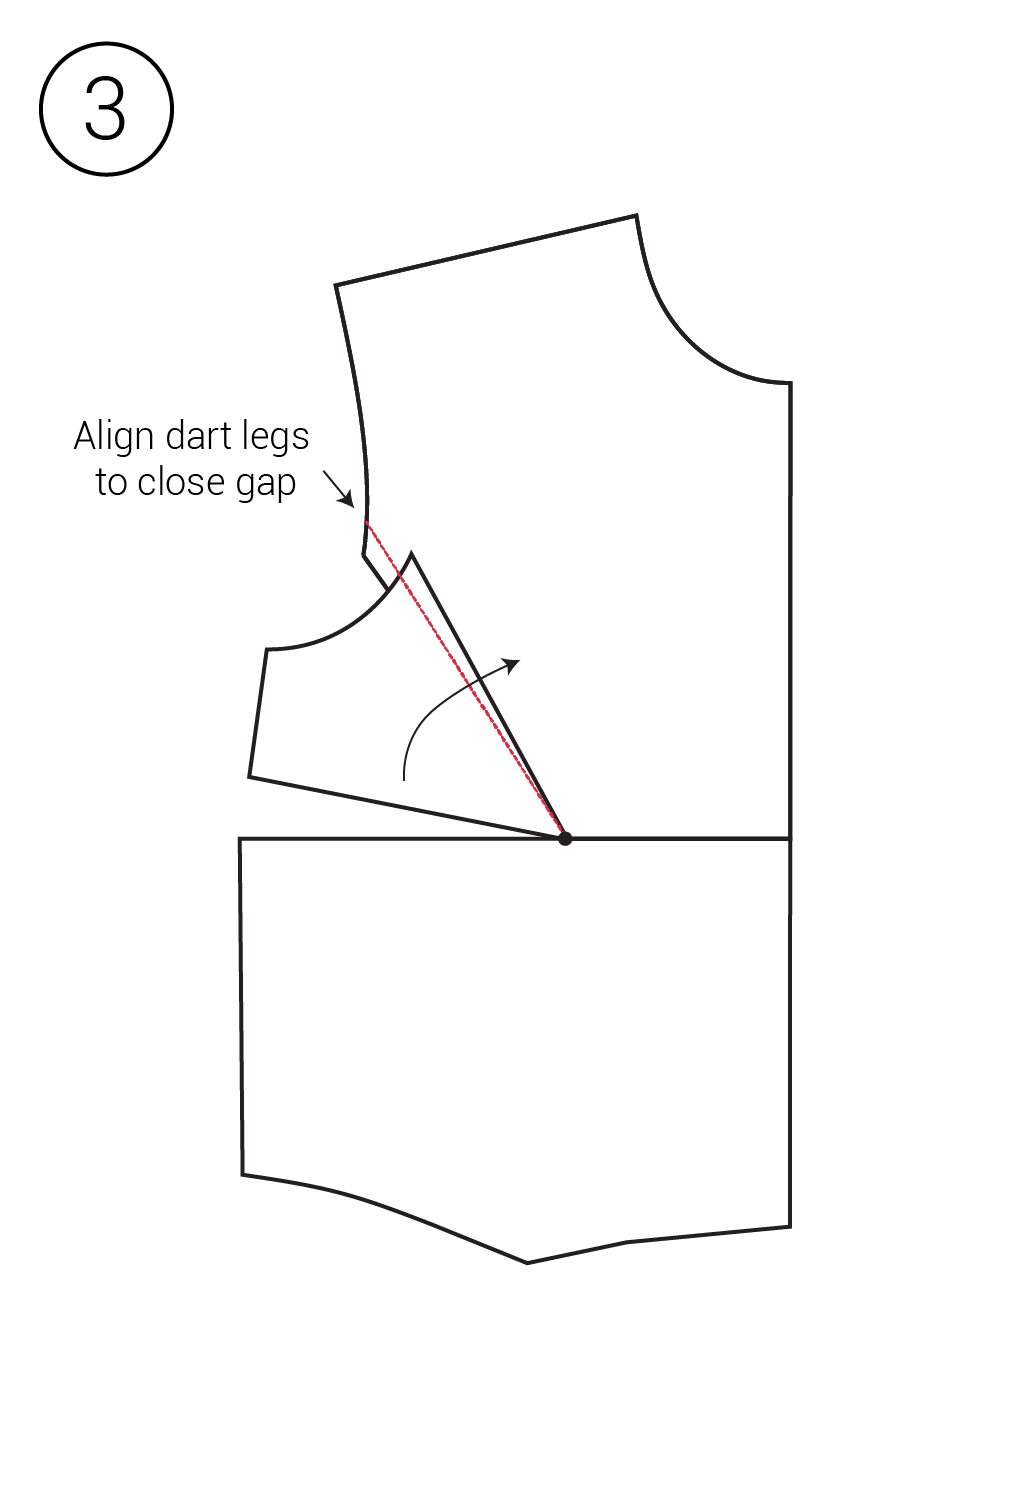
Cut along line A and B, to the bust point, but not through it. Rotate the lower armscye section up until the dart legs align, tape in place. The result will be a new dart space on the side seam.
True the new armhole by redrawing in a new armhole curve using a French curve.
You have now successfully shortened the armscye. If you previously had a side seam dart, this will have added width to your dart. If you did not previously have a side seam dart, a new dart has been created.
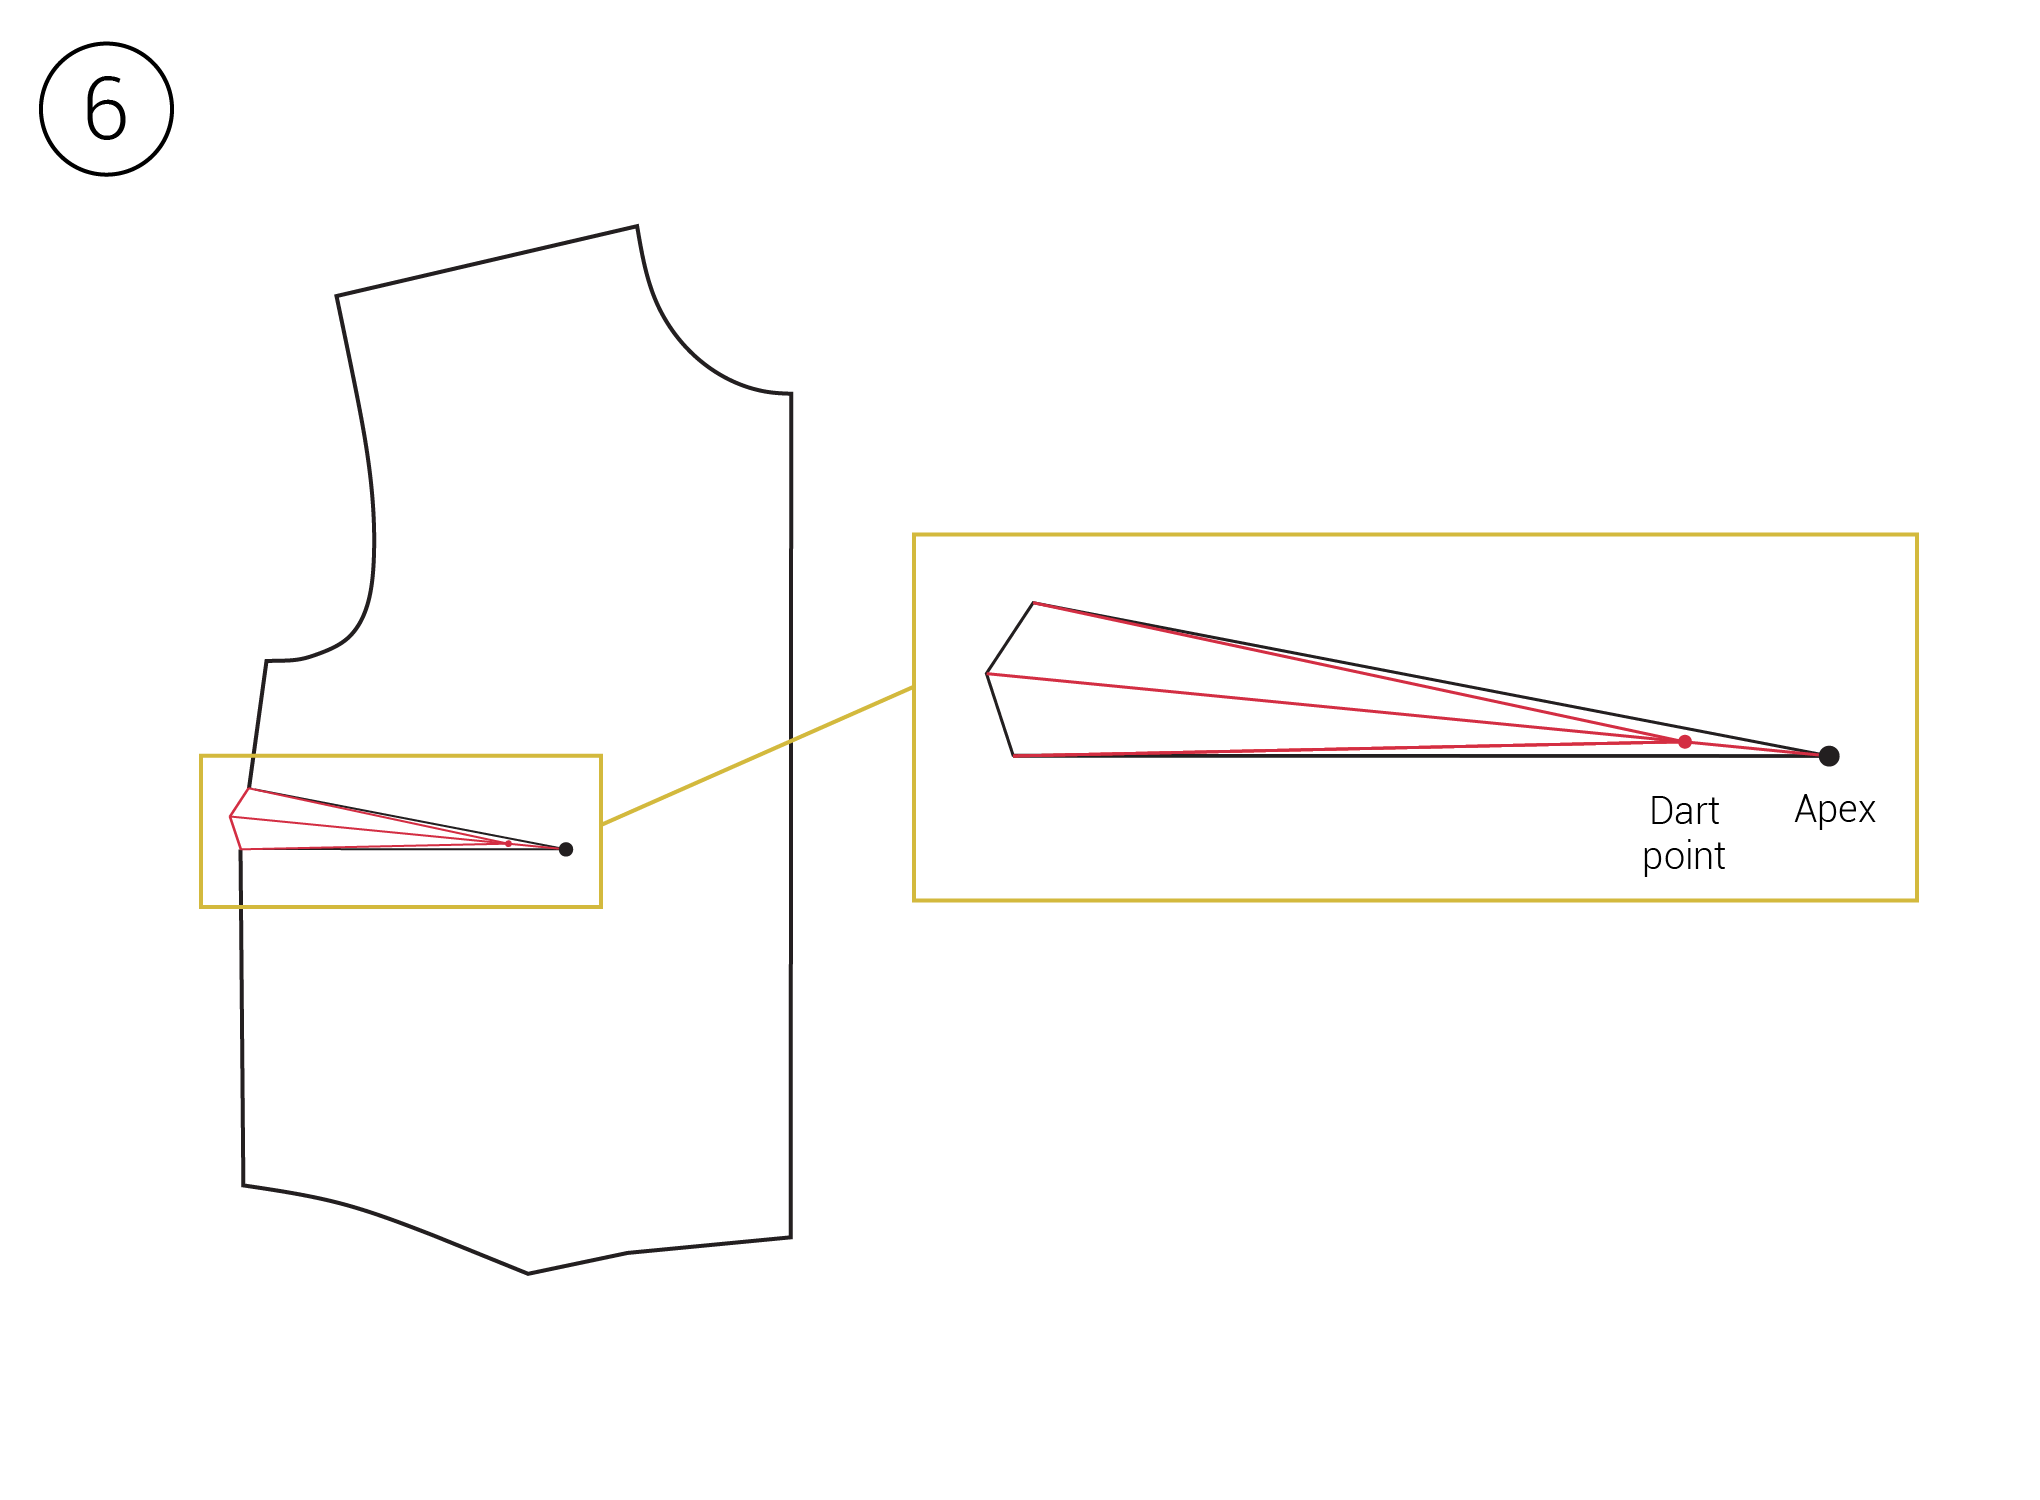
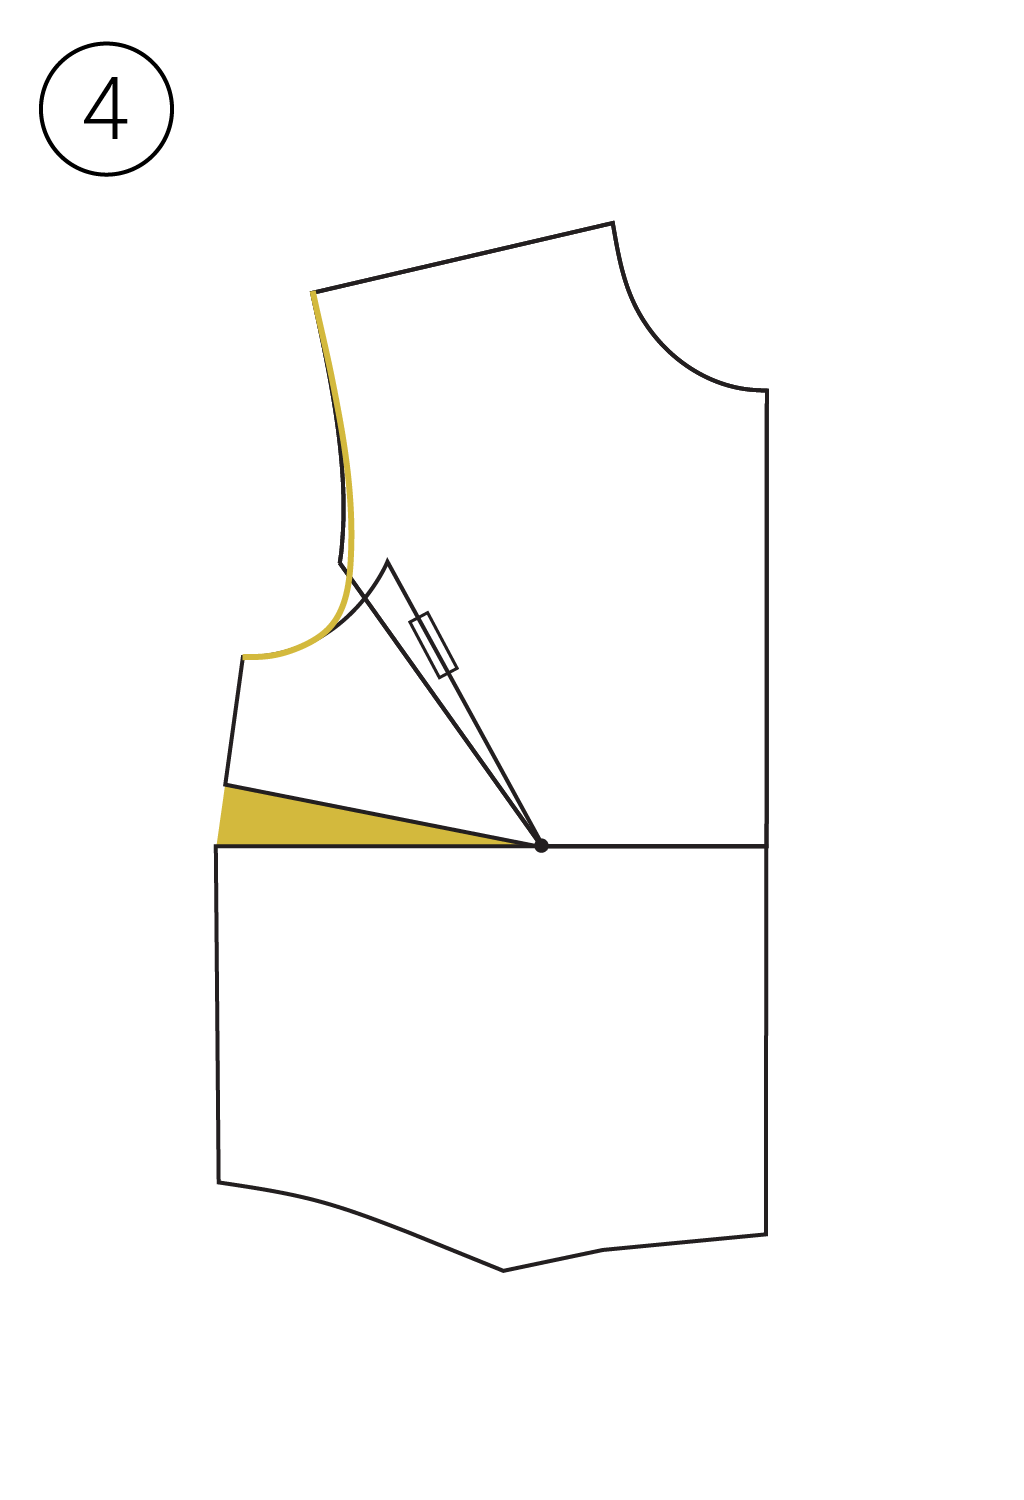
A dart should be "backed off" from the bust point to ensure a good fit and a gradual curve to the bust, rather than a stark point. Traditionally, dart points are backed off 1" to 1 1/2" from the bust point for fitted garments.
To do this, draw a line from the bust point to the center of your side seam dart. Measure approx. 1 1/2" down this line and mark, this is your dart point. Draw new dart legs from the dart point to the end of the original dart legs.
To finish, fold the paper to close the dart and true the side seam. This will create a nicely shaped side seam without jagged edges once the dart is sewn.

About the Author
Katie teaches new skills through in-depth tutorials, sewalongs, and articles for Seamwork Magazine and The Colette Blog. She’s all about encouraging sewers to try new techniques and create a personalized wardrobe that makes them feel great!