Sign In
Everyone knows that sewing gives you superpowers. First on that long list is the ability to break the rules and make garments that represent you and your taste. We want to encourage you to think of our patterns as a blank canvas that you can customize to truly suit your style.
Our pattern hacks are designed to teach you hacking basics that help you customize patterns so that you can become a confident pattern hacker. Each month, we will show you how to draft and sew one new pattern hack, and we’ll share links to two additional pattern hacks from our pattern hacks library.
These hacks help you give your Seamwork patterns a custom spin—all you need is paper, a ruler, and a pencil!
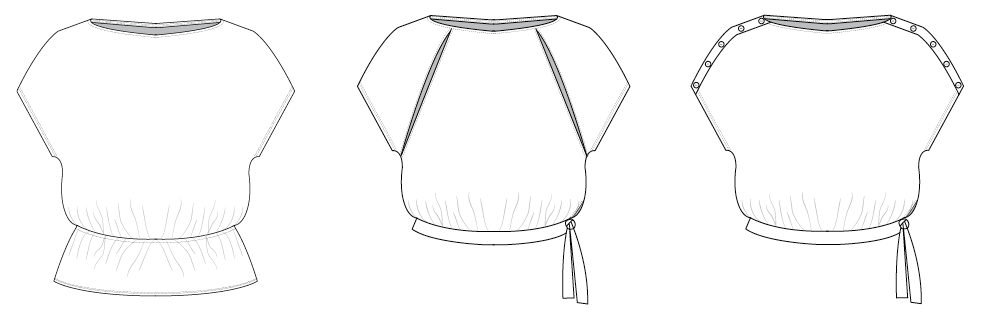
This month, we teach you how to create a peplum with an elasticized waist for the Rory top. You can also check out two additional hacks. One will help you create shoulder cut-outs, and the other adds a button closure at the shoulder seam.
Note: For best results, be sure to make any necessary fit adjustments before hacking your pattern.
You'll Need:
- The Rory top
- Paper
- Pencil
- Scissors
-
Clear ruler
HACK ONE: Peplum with Elasticized Waist
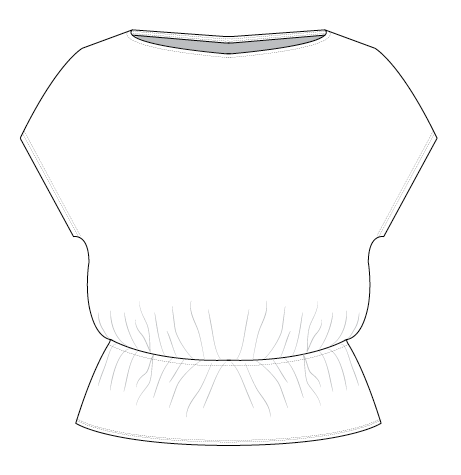
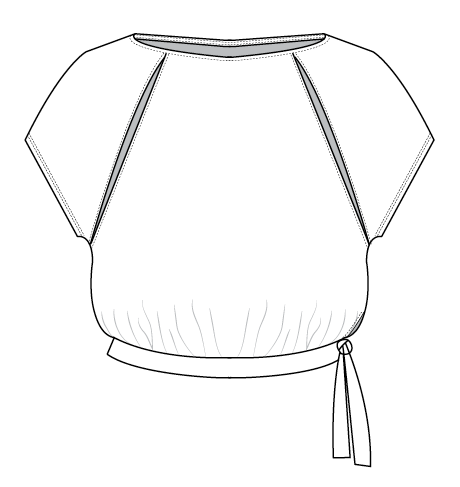
We get it, crop tops aren’t everyone’s jam, but the Rory top is really easy to adapt for those who prefer longer lengths. In this hack, we’ll walk you through adding a peplum with an elasticized waist.
DRAFTING INSTRUCTIONS
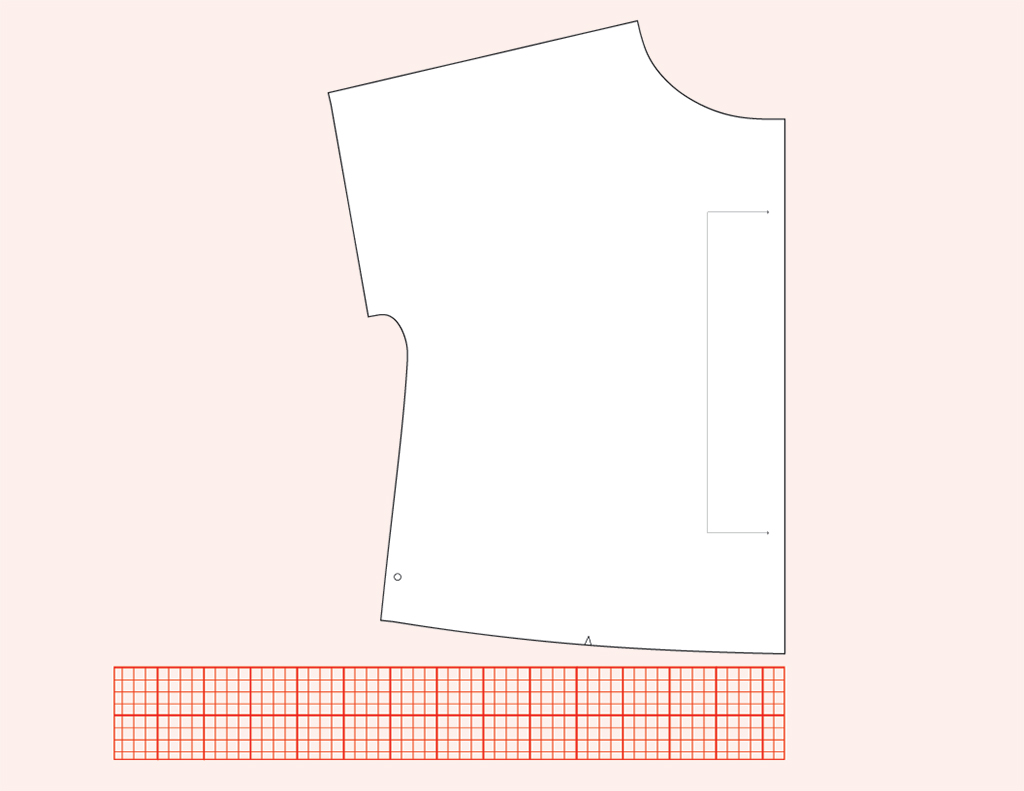
1. Measure the width of the front bodice piece.
2. Draw a rectangle that is the width of the front bodice piece by 8”.
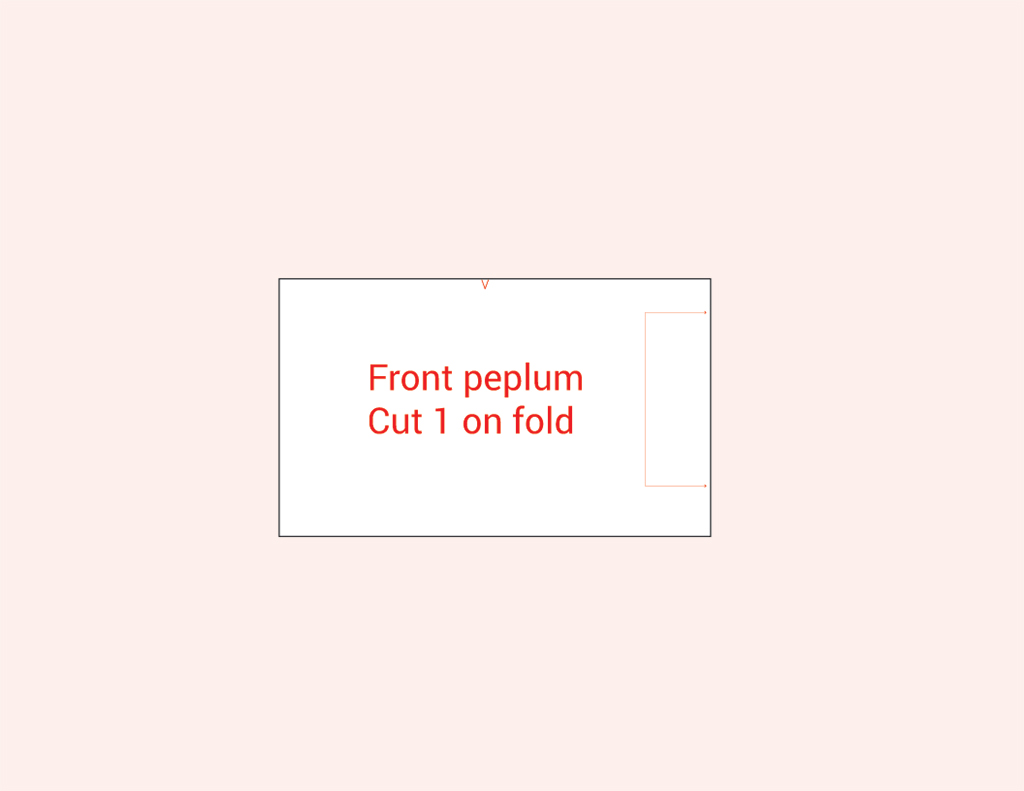
3. Draw a grainline, and transfer the notch marking to the waist seam. Label the pattern piece “front peplum, cut 1 on fold” and cut out the peplum pattern piece.
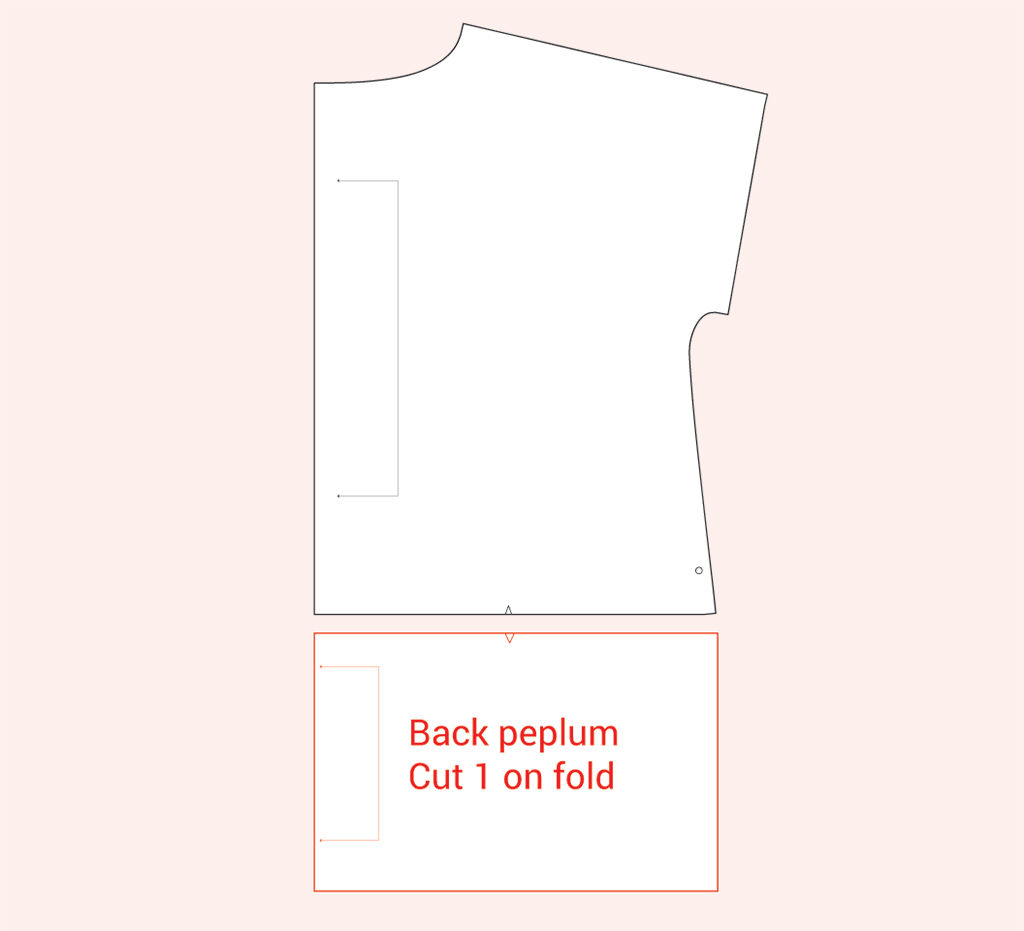
4. Repeat steps 1-3 to create the back peplum piece.
SEWING INSTRUCTIONS
1. Sew the shoulder seams and finish the neckline according to the pattern instructions.
2. With right sides together, sew the front bodice to the back bodice at the side seams.
3. With right sides together, sew the front peplum to the back peplum at the side seams.
4. With right sides together, sew the bodice unit to the peplum unit at the waist seam using a 5/8” seam allowance. Finish the seam allowances together and press down.
5. Topstitch on the right side of the garment, starting at one side seam 3/8” away from the waist seam, and catching the seam allowance. Leave a 2” gap to insert the elastic.
6. Measure your waist and cut a piece of 1/4” elastic to this length. Using a safety pin or bodkin, insert the elastic through the gap created in the previous step. Join the two ends of the elastic together, overlapping by 1/2” and stitching.
7. Topstitch the gap on the casing closed.
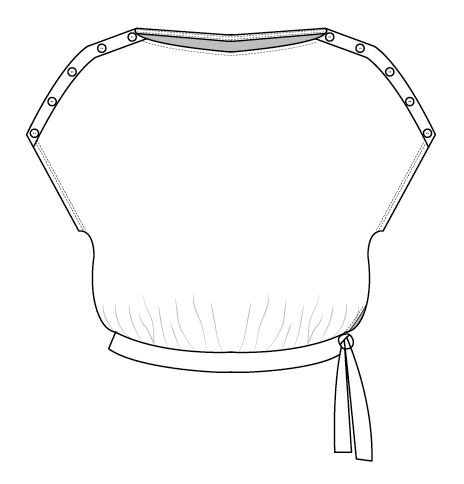
HACK TWO: Shoulder Cut-outs
Try adding shoulder cut-outs to the Rory top by using this hack from Seamwork issue 32.
HACK THREE: Shoulder Button Placket
Try adding a shoulder button placket to the Rory top by using this hack from Seamwork issue 46.

About the Author
Haley doesn’t just want to design clothing you’ll love to wear, but clothing you’ll love to sew. With a background in both design and teaching, she combines her talents to imagine patterns with thoughtful details that build your skills as you sew.