Sign In
Where does your machine spend most of its time? On a dedicated table? In a closet? On a shelf? Wherever it is, it needs protection from dust, pet dander, and maybe even from small, curious hands. Creating a custom block printed machine cover is the perfect way to keep your machine running smoothly while adding some personal flair to your sewing space.
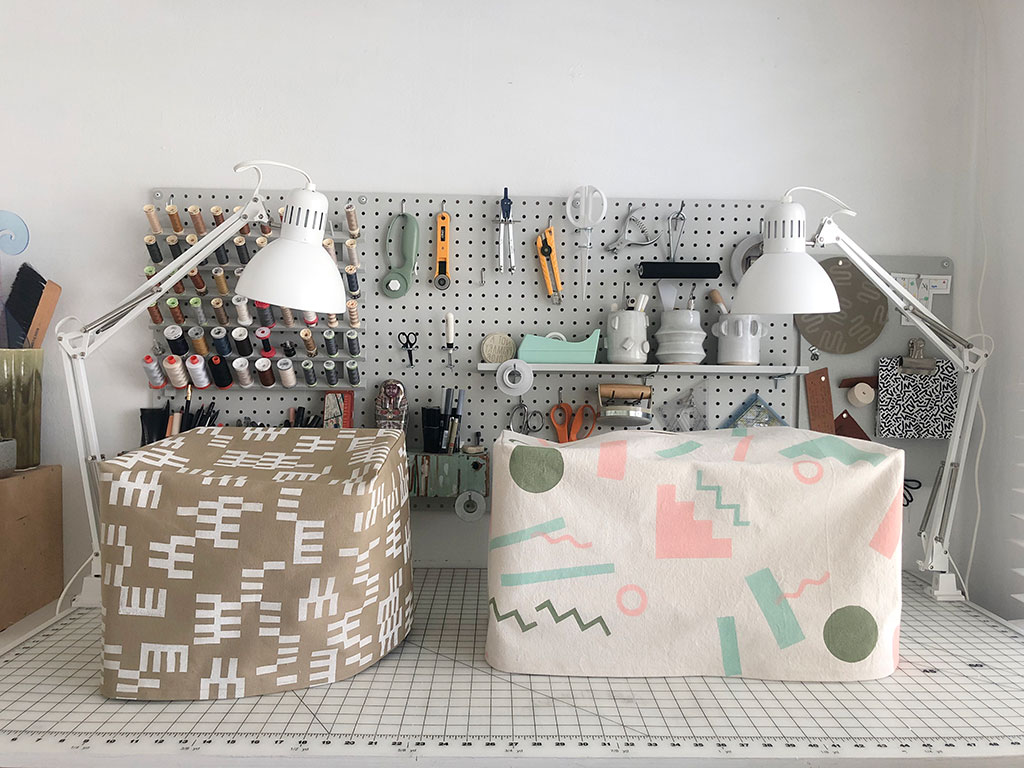
We’re going to explore pattern drafting and block printing basics that will result in a durable, custom machine cover. You have two sewing pattern options to choose from—a single-piece pattern that’s great for sergers, or a two-piece pattern with an opening for your sewing machine’s handle.
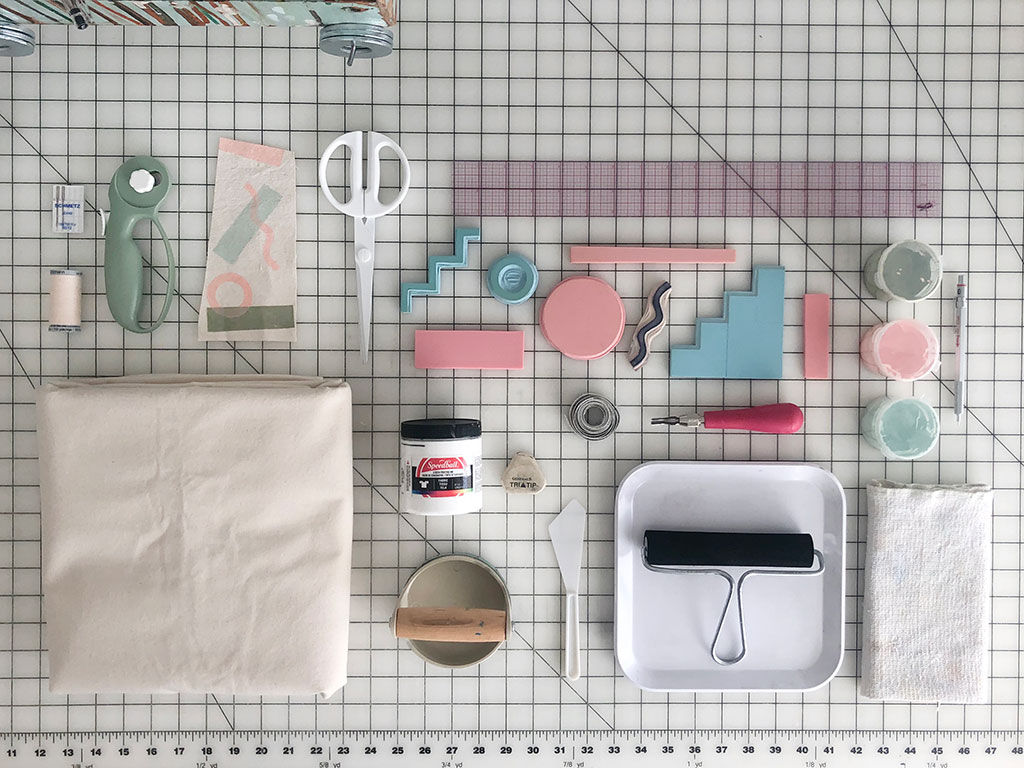
Gather Your Supplies
Drafting Supplies
- Clear ruler
- Measuring tape
- Large paper (or you can tape together pieces of printer paper)
- Pencil or pen
- Paper scissors
- Eraser for mistakes!
Just like sewing, printmaking has its own tools of the trade. You’ll save time and avoid frustration if you buy yourself the good stuff. I’m sharing what I’ve found to work best for me, but feel free to deviate from the list and discover what works best for you!
Block Printing Supplies
- Speedball Speedy-Carve blocks. I prefer using these rubber sheets because they are softer than linoleum mounted on wood. I find they print more evenly on fabric and don’t dull your blades as quickly.
- Linoleum cutter
- Block printing ink for fabric, or screen printing ink for fabric. I prefer to use screen printing ink because it tends to be water-based and thus less smelly. It has great coverage, and I’m pretty sure it dries faster and is less prone to smudging.
- Foam brayer, or brayer. Foam rollers apply a lot more ink to the blocks, which is great for printing on fabric.
- Reusable airtight cups (if you plan to mix your own colors)
- Palette knife, or craft stick for applying and mixing your ink
- A plate or surface for rolling out your ink. I like to use these Target plates.
- Barren (for applying even pressure)
- Damp rag
- Scrap fabric for test printing
Sewing Supplies
- Pre-washed canvas fabric. I’m using 10oz cotton duck, yardage determined by your self-drafted pattern.
- Matching thread
- Jeans needles
- Iron
Draft Your Pattern
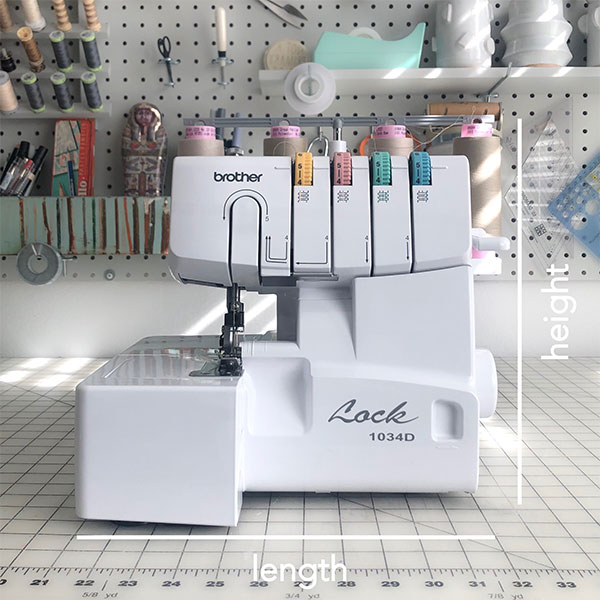
Step 01
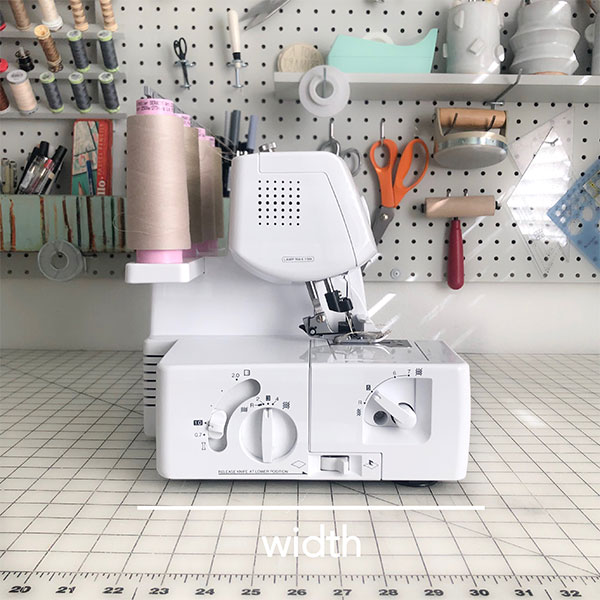
To create your custom sewing pattern, you will need to take three measurements of your machine. No machine is a perfect rectangular prism, so you will want to take the measurements at your machine’s widest part for the height, width, and length. Don’t worry about seam allowances yet—we will be drawing those in once all of the finished measurements are plotted.
Step 02
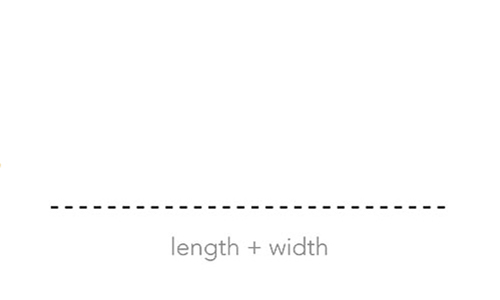
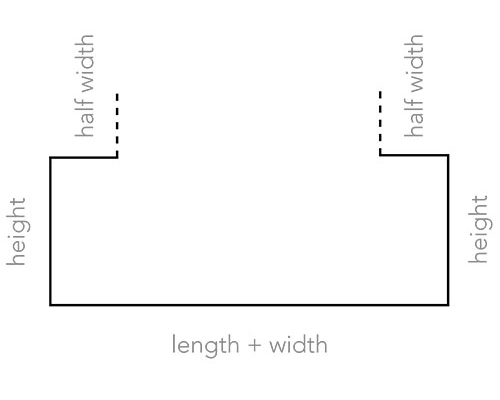
To the length measurement, add the width measurement. Draw a straight line equaling the total amount. This is the length + width line.
Step 03
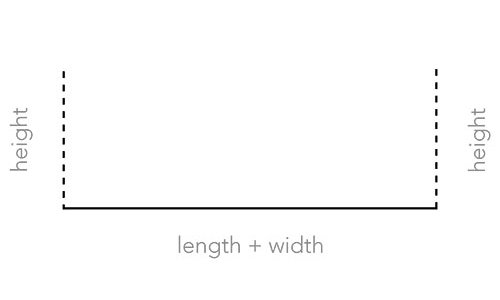
Squaring up from your length + width line, mark lines on each end that are equal to the height measurement.
Step 04
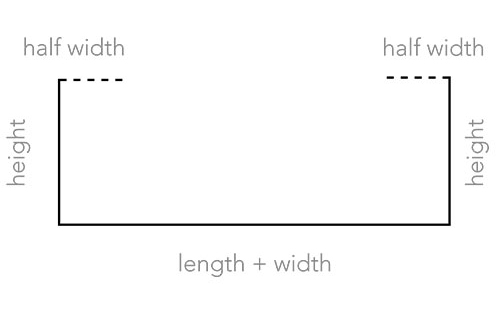
To create the first part of the boxed corners, divide the width measurement in half. From the height lines, square in and draw lines equal to the half width measurement on both sides.
Step 05
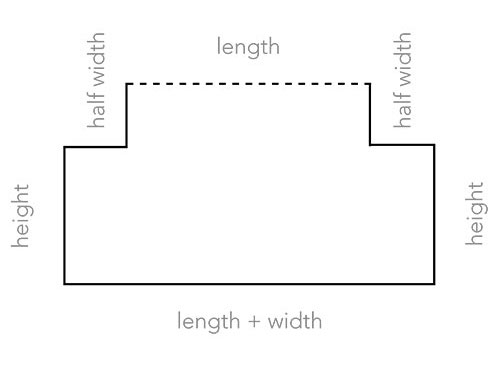
To create the last part of the boxed corners, square up and draw a line equal to the half width measurement.
Step 06
Draw a line to connect the end points. Take a moment to double check that this line equals the length measurement. If it doesn’t, that probably means you need to check your half width calculation.
Step 07
Using your clear ruler, add your desired seam allowance around the entire pattern. I used 3/4” inch for the hem, and 1/2” inch seam allowance everywhere else. I like to draw in seam allowances after plotting the finished measurements because it eliminates some math and preserves your pattern’s finished measurements, should you need to make any adjustments.

Step 08
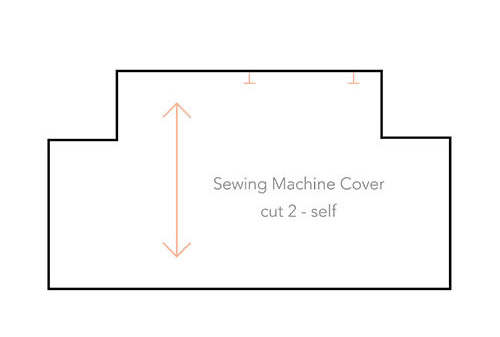
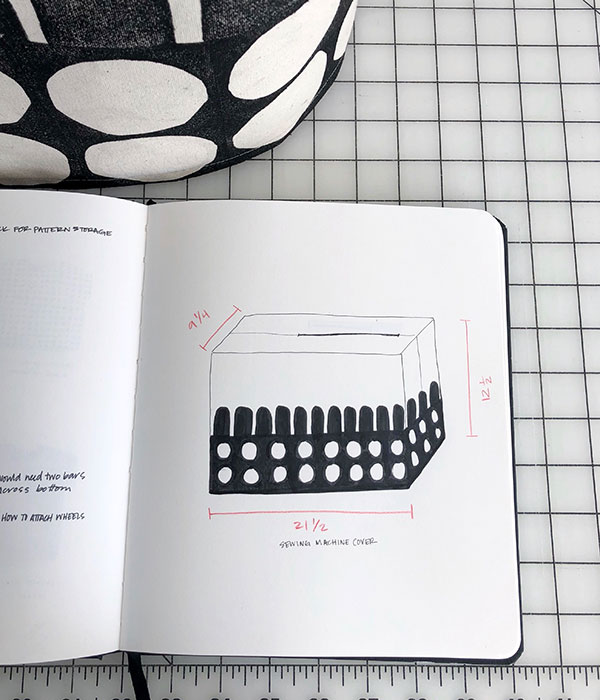
For the two-piece sewing machine pattern, measure the placement and length of your machine’s handle and mark with notches. For example, my handle is 9” long and 2 1/2” in from the right side. Give your pattern a grainline perpendicular to the hem (length + width line) and add any helpful labels. Note: This illustration does not include seam allowance lines.
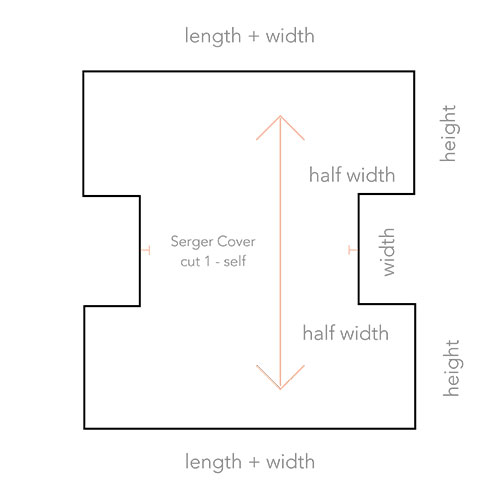
To create the one-piece serger cover pattern, follow the same steps, just twice! Reference the diagram below. Note: This illustration does not include seam allowance lines.
Cut out the pattern along the seam allowance lines. You’re ready to cut out your fabric and move on to block printing!
Block Print Your Fabric
Surface Patterns
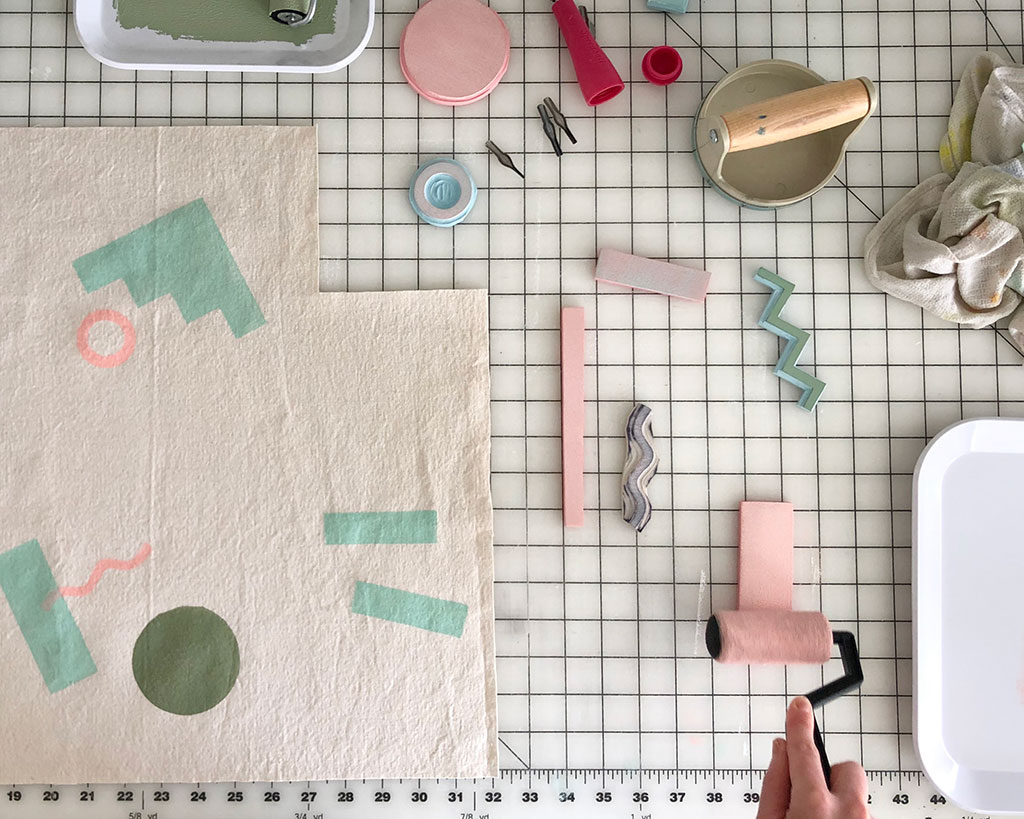
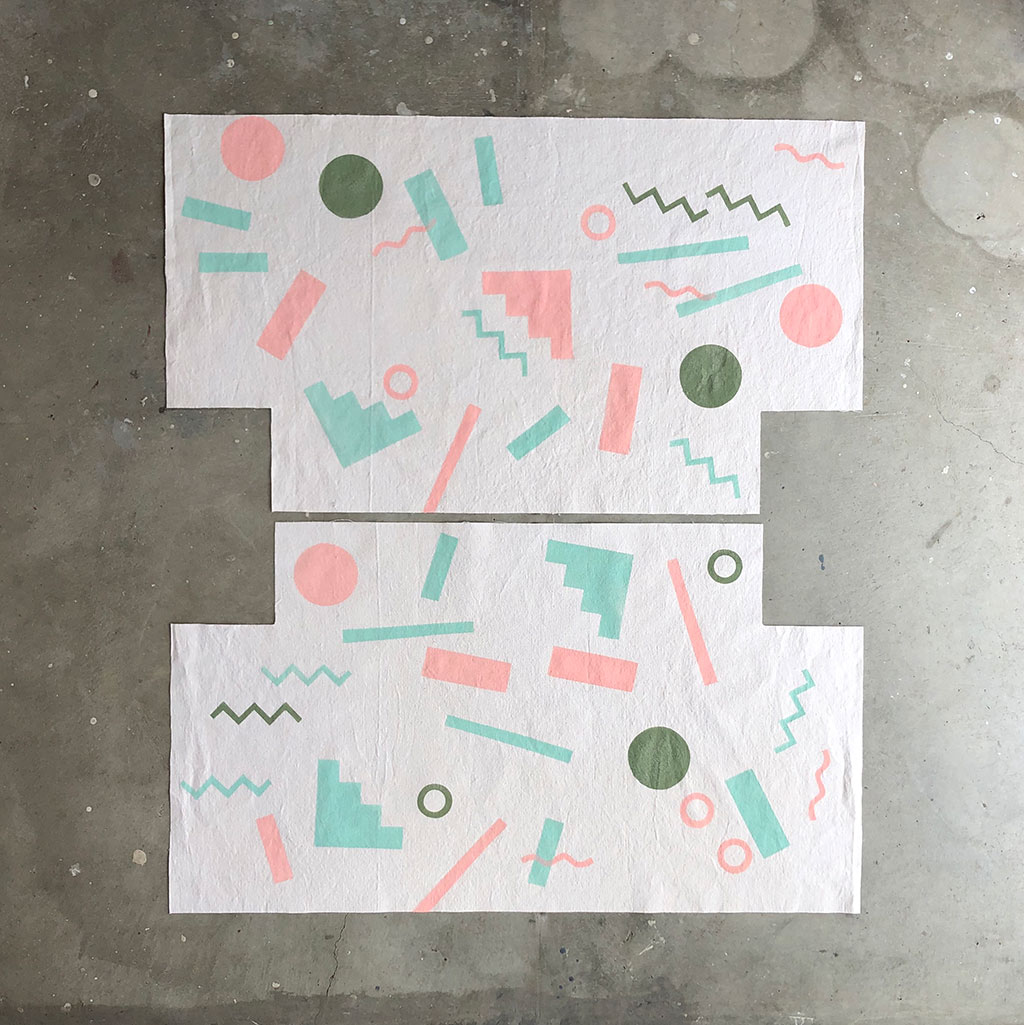
Repeating a shape, line, or color creates a surface pattern. I like to use basic geometric and organic shapes in various sizes when block printing on fabric. You can make a pretty fun pattern with just a single shape in a single color, but feel free to go wild! You can even experiment with overlapping prints once layers dry.
Basic Surface Patterns
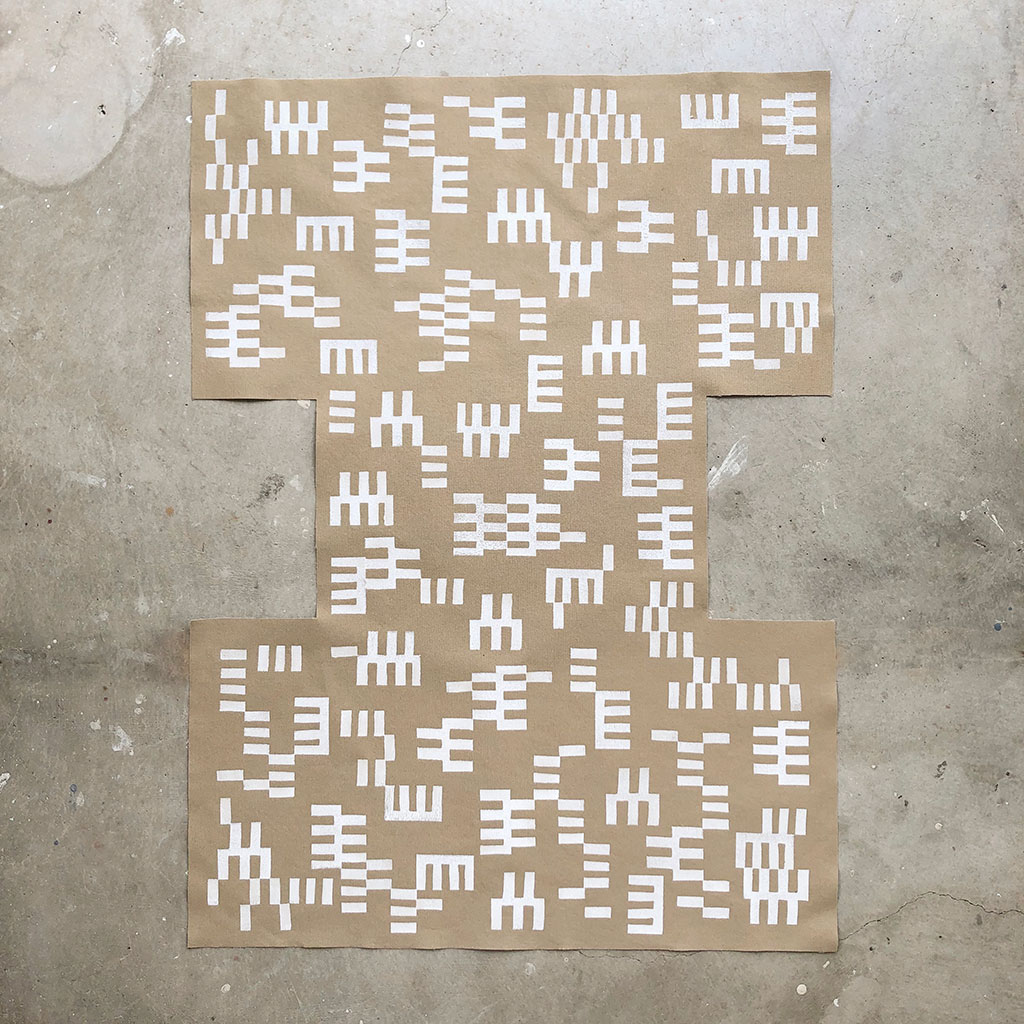
You can achieve a wide variety of patterns just by rotating a single block 90° or 180°, or a combination of the two.
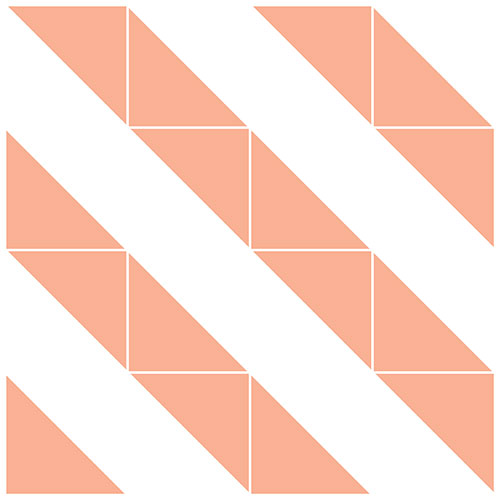
Rotation Repeat: When a block is rotated around a single point.
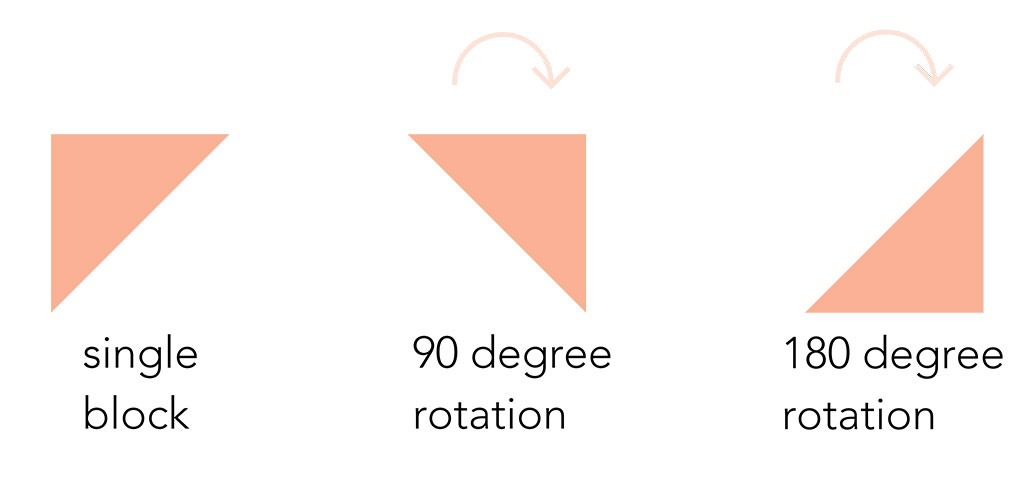
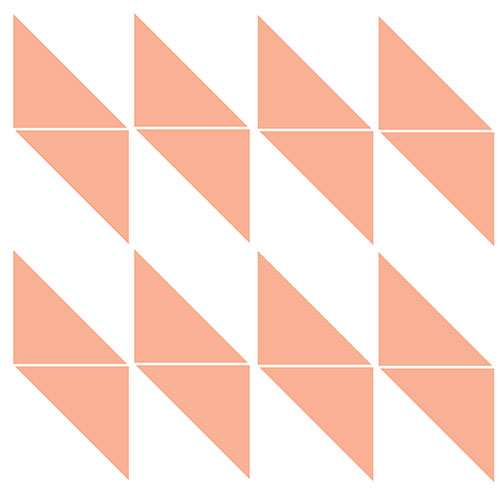
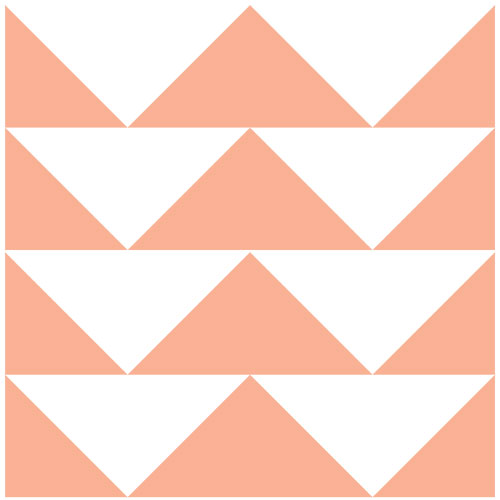
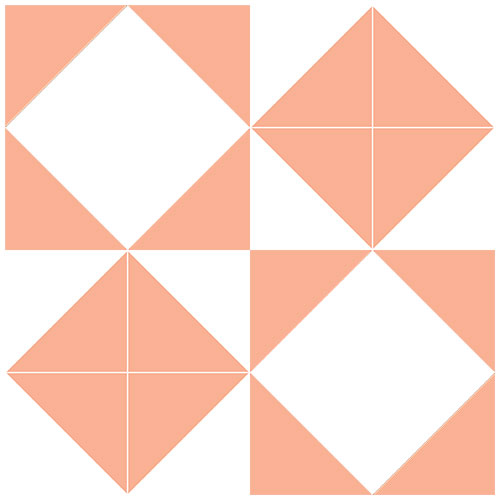
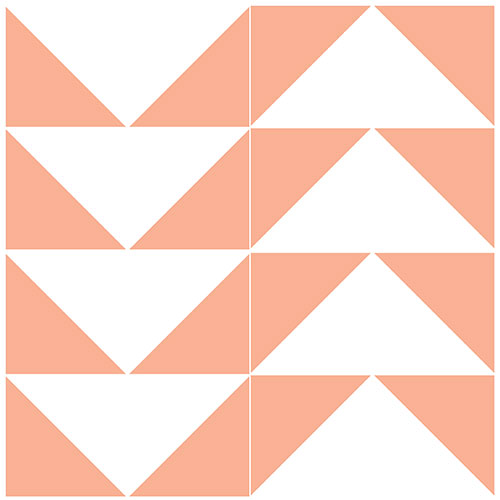


Half Drop Repeat: When a block is repeated along vertical or horizontal lines, but staggered every other row or column.
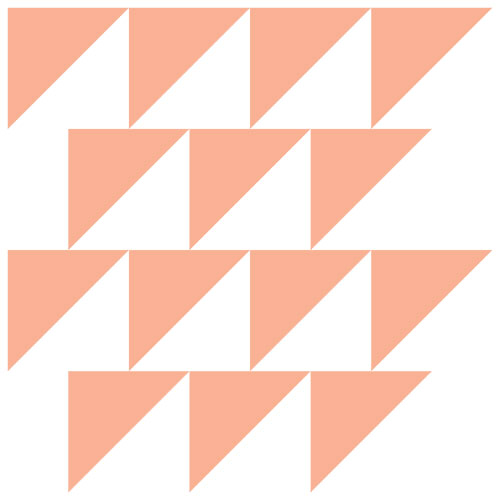

Random Repeat: When a block is printed with no obvious order. This is my favorite to use because it’s next to impossible to mess up!
The possibilities are endless! You can also achieve really delicate lines with practice. Play around and have fun
coming up with your surface design.
Capture Your Ideas in a Sketchbook
I’ve found it immensely helpful to try out surface pattern ideas in a sketchbook. When you’re ready to carve out your blocks, it’s really handy to have this record of ideas. Plus playing around with the blocks in your sketchbook is low risk and can lead to you discovering patterns you might not have thought of.
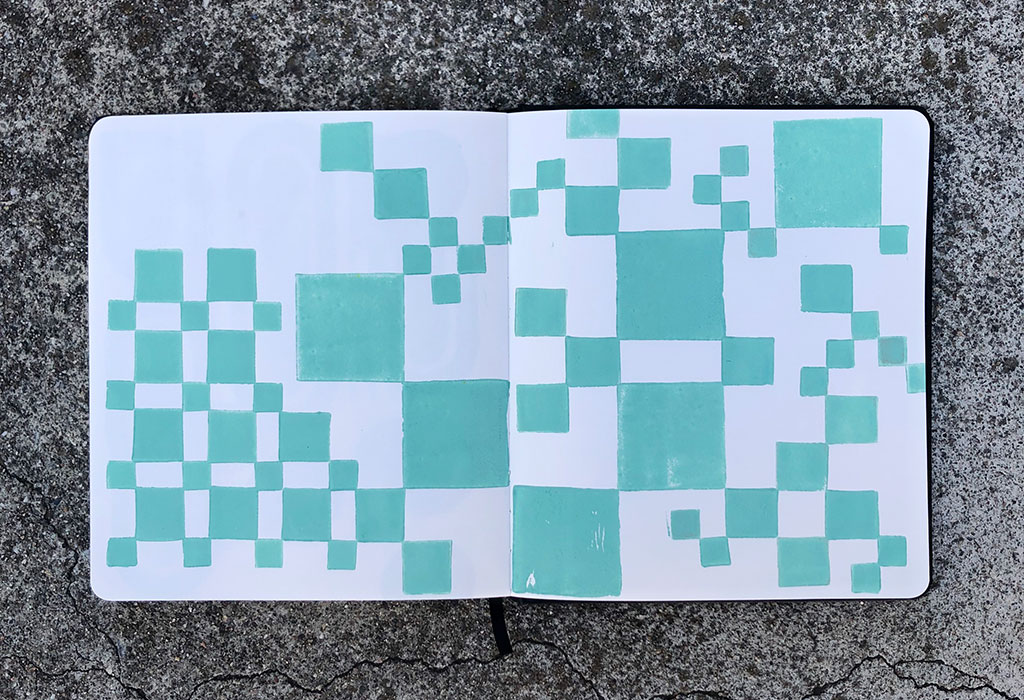
It’s also helpful to draw out your surface design onto a sketch of the machine cover. It’ll help you figure out the size of your blocks and spacing of your prints.
Mixing Colors
First, make sure you’ve pre-washed your fabric to remove any sizing that could impact how the ink takes to the fabric. Cut out your fabric before you block print. It will take less time and space, and you will have more control over the placement of your surface design. Give it a good press to avoid printing on folds and wrinkles.
You can create an endless variety of colors from a simple set of primaries—blue, red, yellow—plus white and black. One thing to keep in mind if you’re mixing your own colors is to add color in small increments. You can always add more, but you can’t take it away. Be especially careful with darker hues as they’re very powerful! I recommend using resealable plastic containers to store your premixed colors. If you’re feeling nervous about color mixing, try printing black or white on a colored canvas.
Step 01
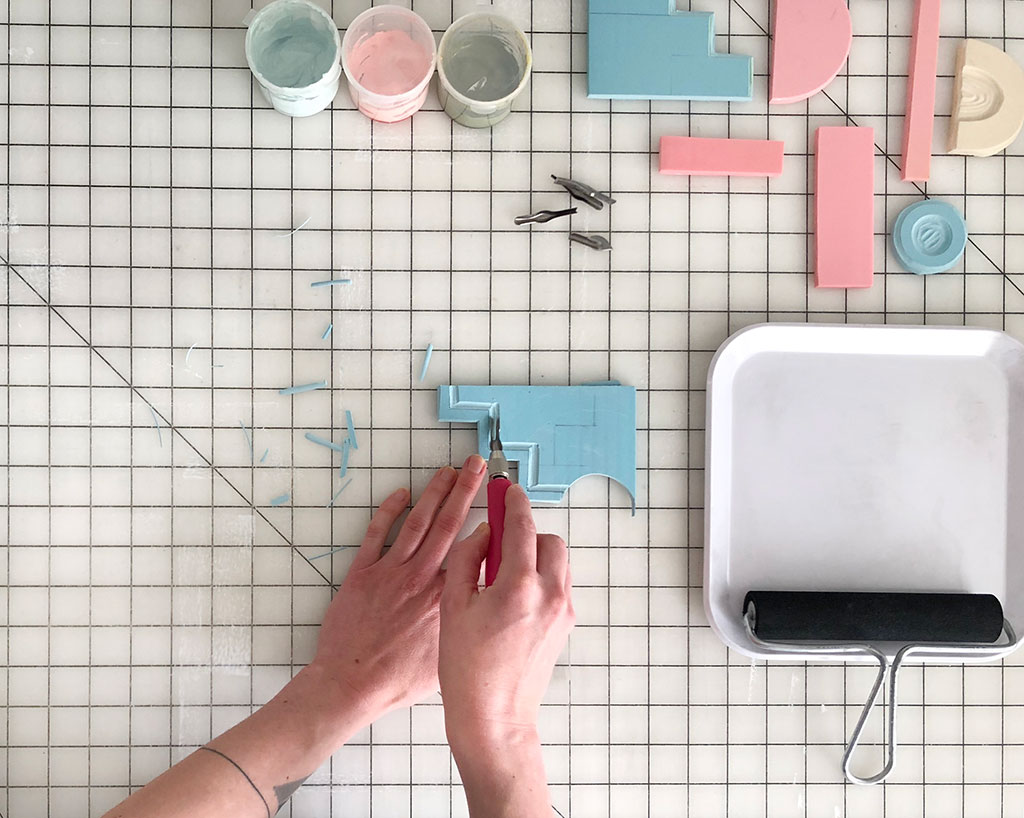
Cover your printing space with paper for easy clean-up. Draw your design onto the rubber block using a pencil or permanent marker, and carve out the negative space around your design. Linoleum cutters are relatively cheap tools that come with interchangeable, disposable blades. On a small piece of rubber, test out the blades.
To use, hold the blade at a 45° angle to the block and apply even pressure. The rubber sheets are quite soft, so be sure to not dip the blade too far below the surface. Always push the tool AWAY from your body and the hand holding the block.
Step 02
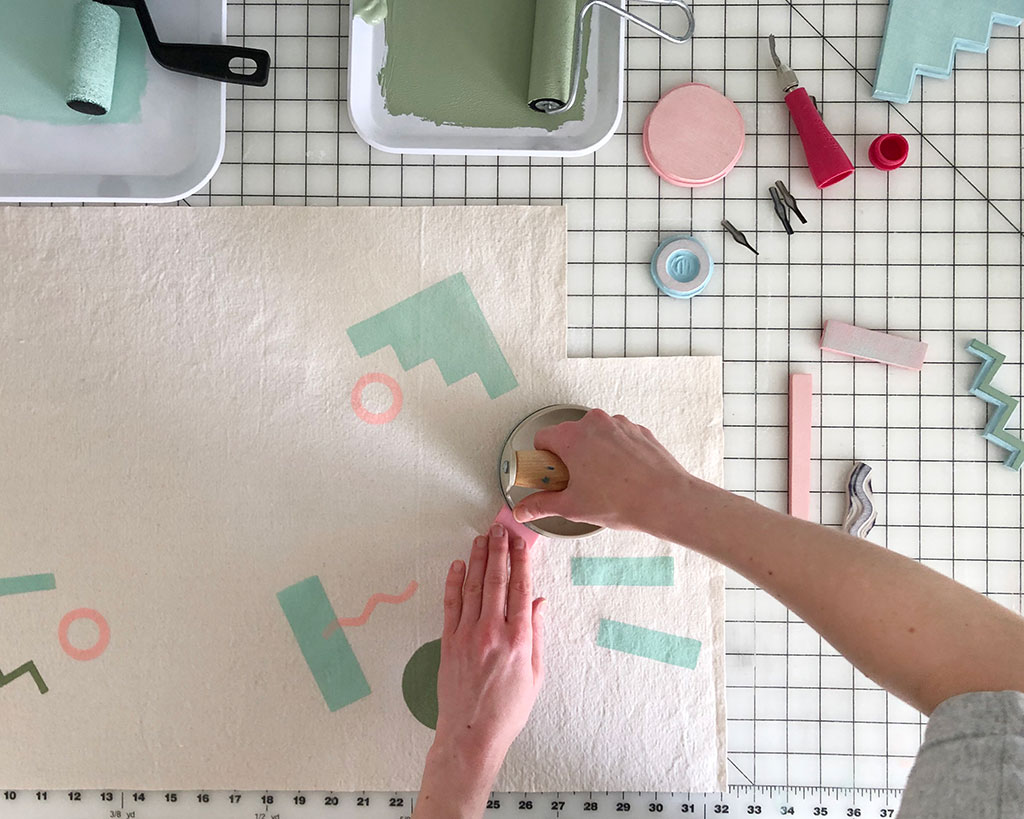
I always recommend doing a few test prints on scrap fabric before printing. Using your brayer, evenly spread the ink out on the plate and roll the ink onto the block. Use the damp rag to remove any ink if it gets where it shouldn’t be.
Step 03
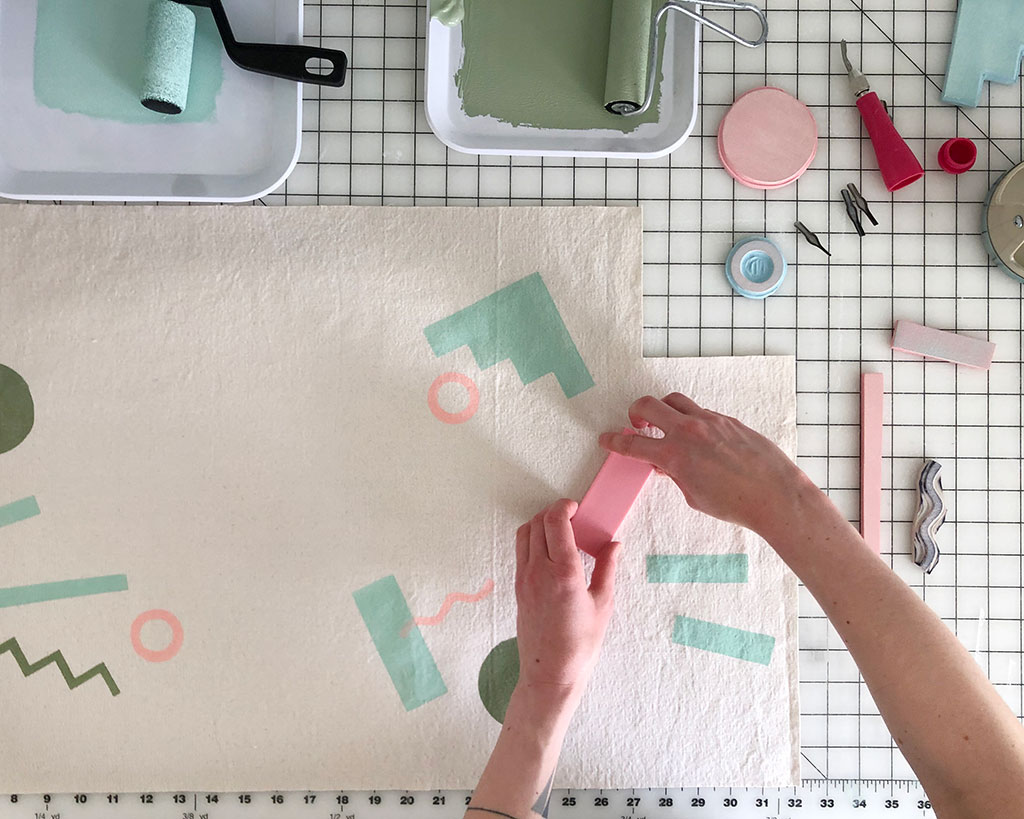
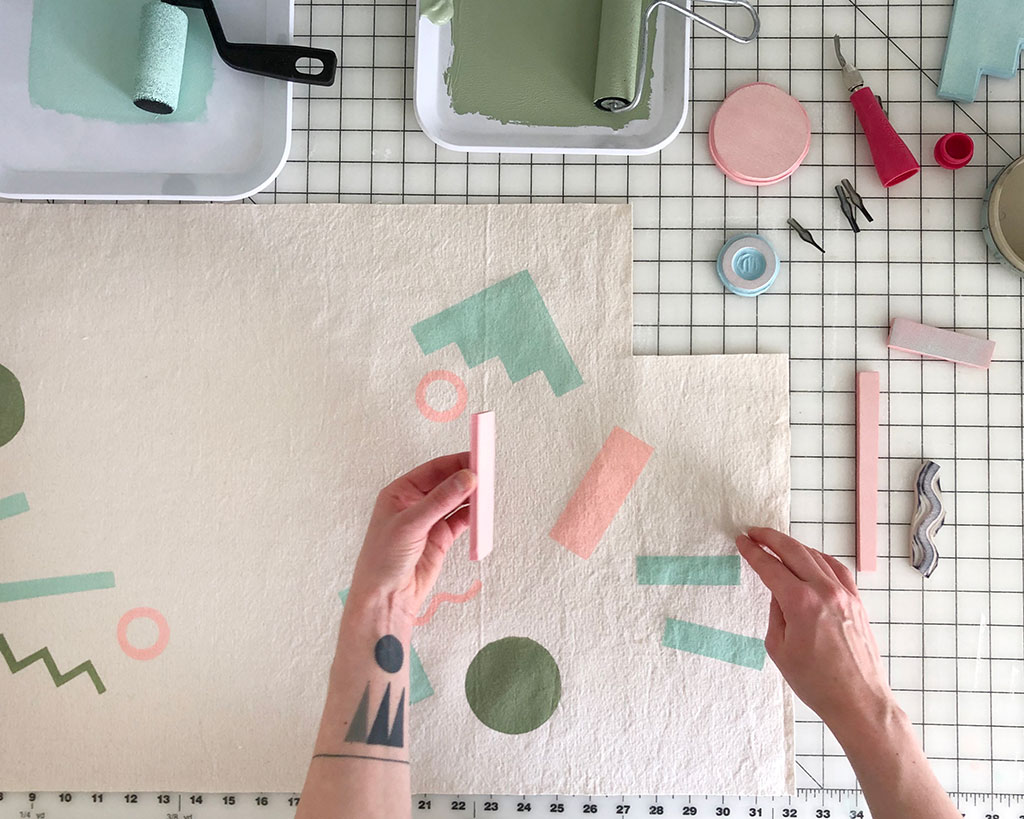
Carefully place your block on your fabric. Be focused as there’s nothing worse than accidentally dropping an inked block onto your work.
Step 04
Use the barren to evenly apply pressure. If you don’t have one, make sure you press the entire block firmly with your fingers.
Step 04
Remove the block and admire your work! If you’re unsure, peel up one corner and check that your print is even. With a steady hand, you can sometimes place the block back down and press it again. Embrace mistakes—it’s all part of the learning process and block printing is wonky by nature.
Repeat steps 1-5 until you’re satisfied with the overall design. Thoroughly wash your inked tools and blocks so they last a long time.
Sew It All Up
Step 01
Allow your printed fabric to dry for at least 24 hours and then heat set the ink with a hot iron. Iron from the wrong side to avoid getting any ink on the faceplate of the iron. You can also use a press cloth. Don’t skip this step! Smudges are likely if the ink doesn’t set properly.
Step 02
This step is for the two-piece cover, for the one-piece, skip to Step 03.
Place pieces right sides together, matching handle notches, and sew, leaving the space between the notches open. This will be your handle opening. Press seam open. Turn raw edges under 1/4” and edgestitch. Optional: Add bar tacks to handle openings.
Step 03
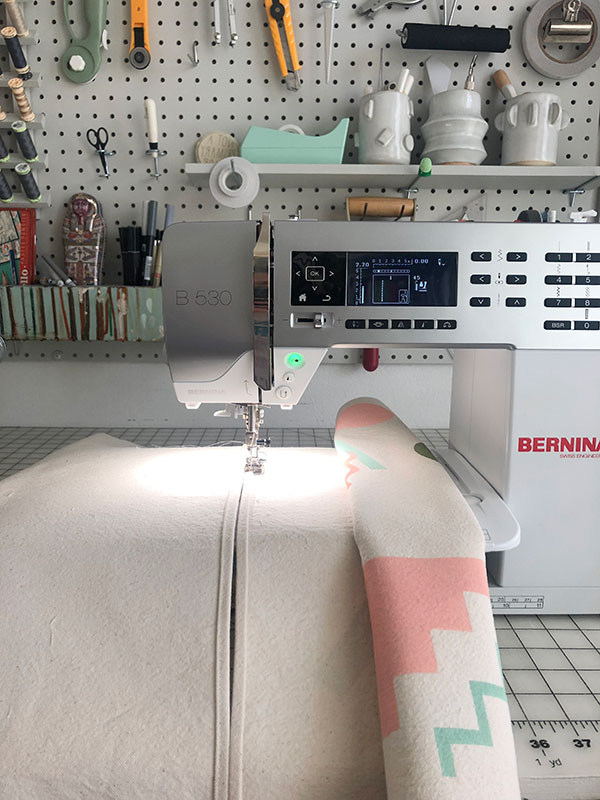
With right sides together, sew the sides together (height length). Finish seams as desired—I chose to press open and serge mine.
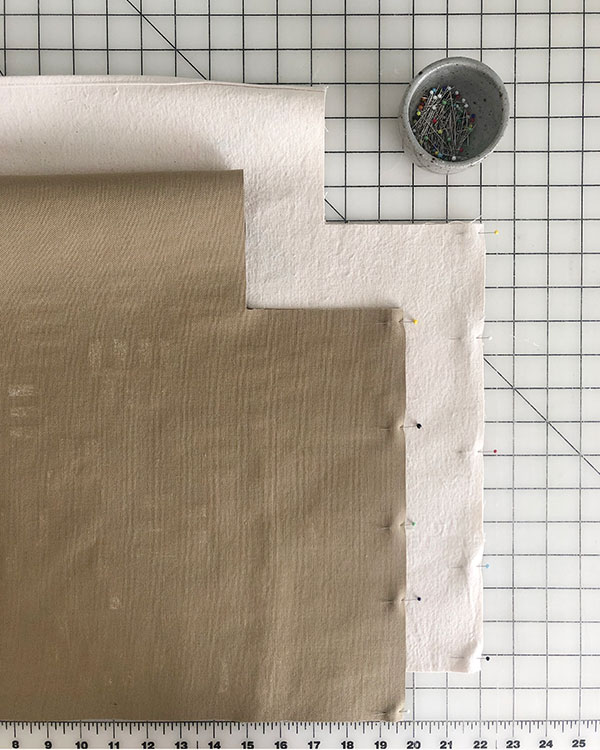
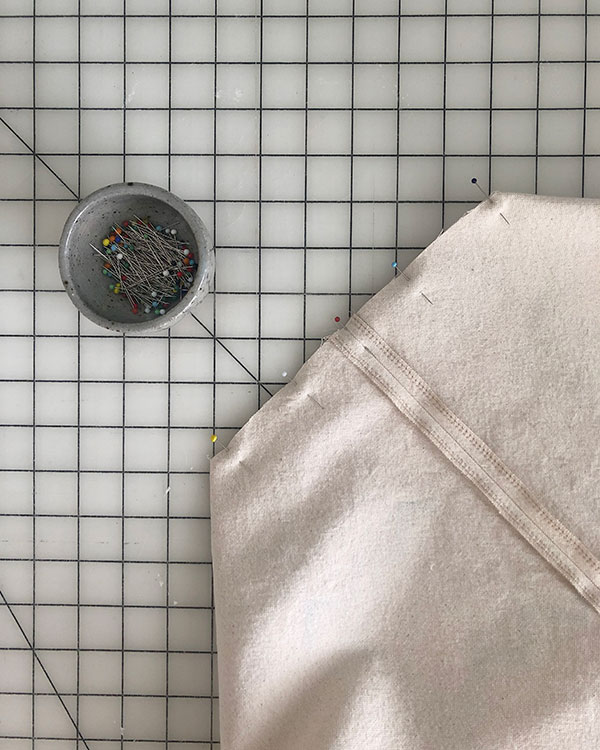
Step 04
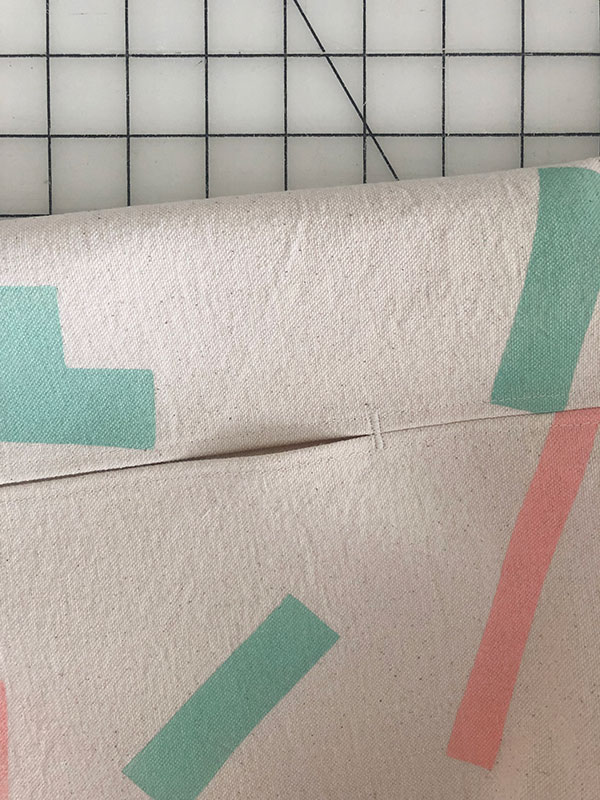
Sew the boxed corners. Pinch the opening between the top and side together. Match seams on the two-piece, and match the side seam with the top notch on the one-piece. Sew and finish seams as desired—I chose to serge. Repeat for the other side.
Step 05
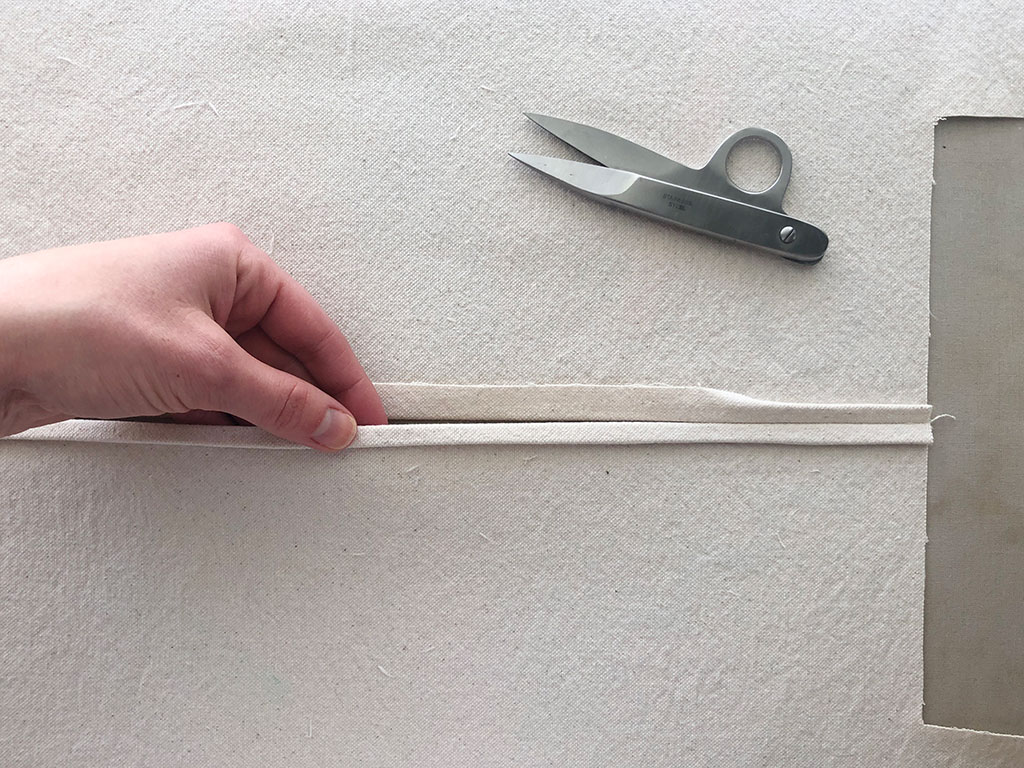
Hem! If you also drafted a 3/4” hem, first press hem 1/4”, then fold again 1/2”. Turn it right sides out and admire your work.
That’s it! You’ve made one good-looking block printed sewing machine cover. Your machine will thank you for its snazzy new cover.

About the Author
Sienna taught herself to sew in late 2014 using thrifted bed sheets and indie patterns, and she’s been obsessed ever since. You can find her work on Instagram @notaprimarycolor and on her blog notaprimarycolor.com,