Sign In
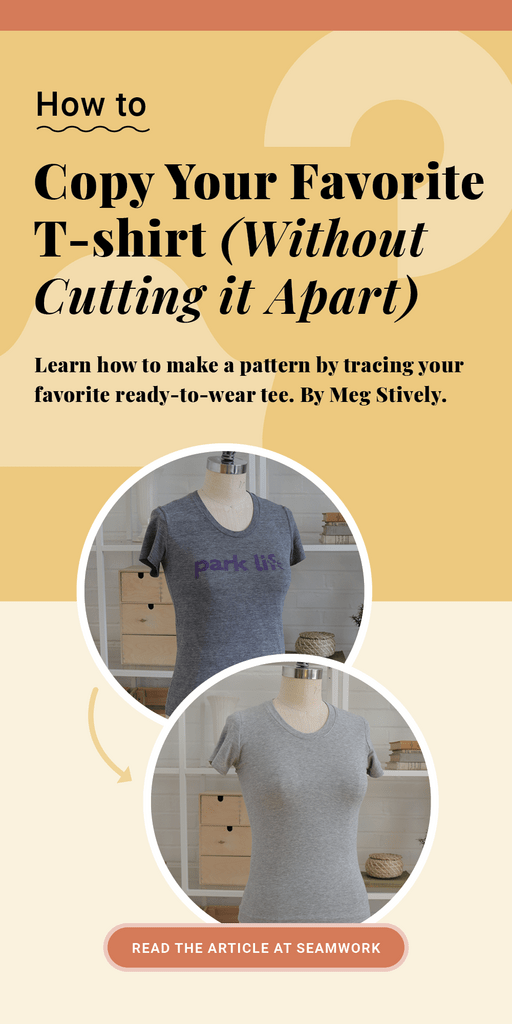
When I first learned how to sew, one of my goals was to trace my favorite T-shirt and make a pattern so I could sew it up in a dozen different colors. The first time I traced a T-shirt, it was awkward. I tried to trace the tee precisely, which resulted in wobbly lines that looked nothing like a sewing pattern. I decided to roll with it, straightened my lines out with a ruler, and sewed it up. When I tried it on, it wasn’t that bad—in fact, it looked just like the one from the store! Since then, I have replicated almost all of my favorite knit tops.
If you’ve found your T-shirt soulmate in a store, use your sewing skills to trace it and make a pattern. Then you can make one in every color. I'll show you how I do this.

Before we begin, just a quick note: This is not professional patternmaking. I am not a patternmaker, but I love sewing with knits, and I like to figure out how garments come together. Consider this a DIY approach to rubbing off your favorite tee for all of us non-patternmakers. If you enjoy this project, enroll in a patternmaking class, get a book, and practice some official techniques—you know, the techniques with all the accurate math.
Three Secrets of Ready-to-wear T-shirts
Everyone always says that “knits are forgiving,” which means that knits usually have negative ease. A knit garment can be smaller than your body’s measurements because the fabric will stretch to fit you. Think about wearing a pair of Spanx—a magically comfortable pair of Spanx—it conforms to your body because it’s smaller than your body. That’s negative ease, and that's why knits are perfect for this copycat project (they hide any little sewing flaws as they stretch over our bodies).
Three things will affect your attempt to recreate your favorite store-bought tee. Combine all of these things, and you will have a super-satisfying duplicate.
-
The pattern: Learn how to trace a tee to create your pattern below. -
The fabric: Ready-to-wear companies often have access to dreamy fabrics that you can’t necessarily find in the store. Look at the garment tag on your shirt to identify the fabric contents and search for something similar online or at your favorite local fabric store. Calculate the stretch percentage of the fabric on your RTW shirt and look for fabric with the same amount of stretch. Be prepared to accept that you might not be able to find an exact match, which can affect the fit and drape of the T-shirt. -
The machine: The good news is that you don’t need a coverstitch machine to sew a T-shirt, but keep in mind that RTW companies have access to machinery that you might not have in your home. Use a twin needle to best replicate this finish for your neckline and hems. If you are interested in a coverstitch machine, we have a great video tutorial about using one in the Seamwork Classroom, so check that out.
Note: Please don’t be tempted to use this tutorial to steal a garment's design for profit. This is for your own personal use.
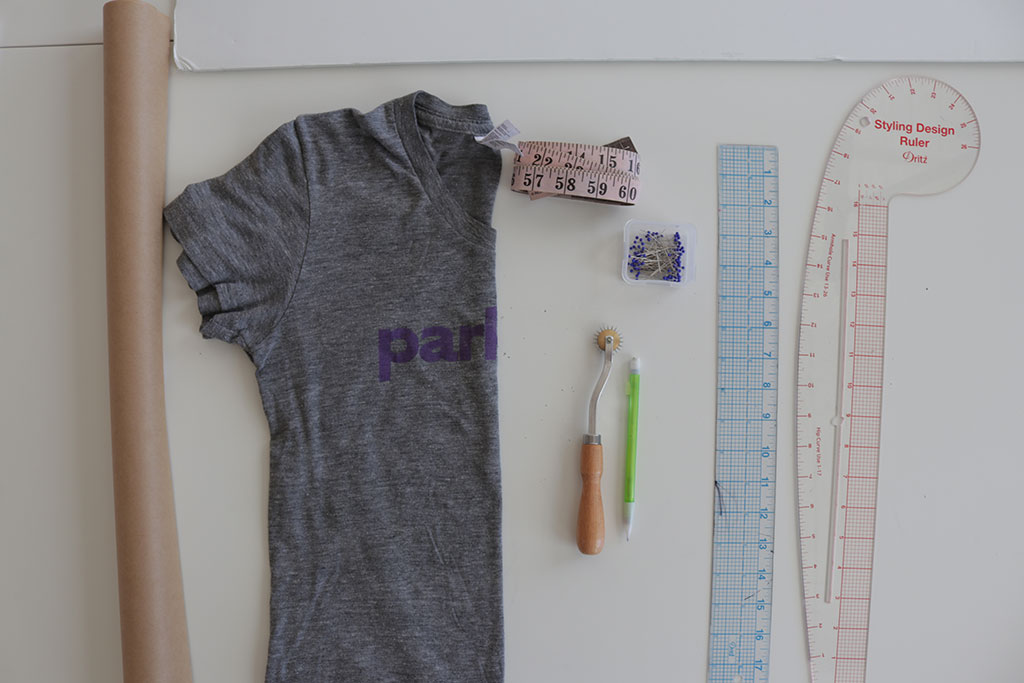
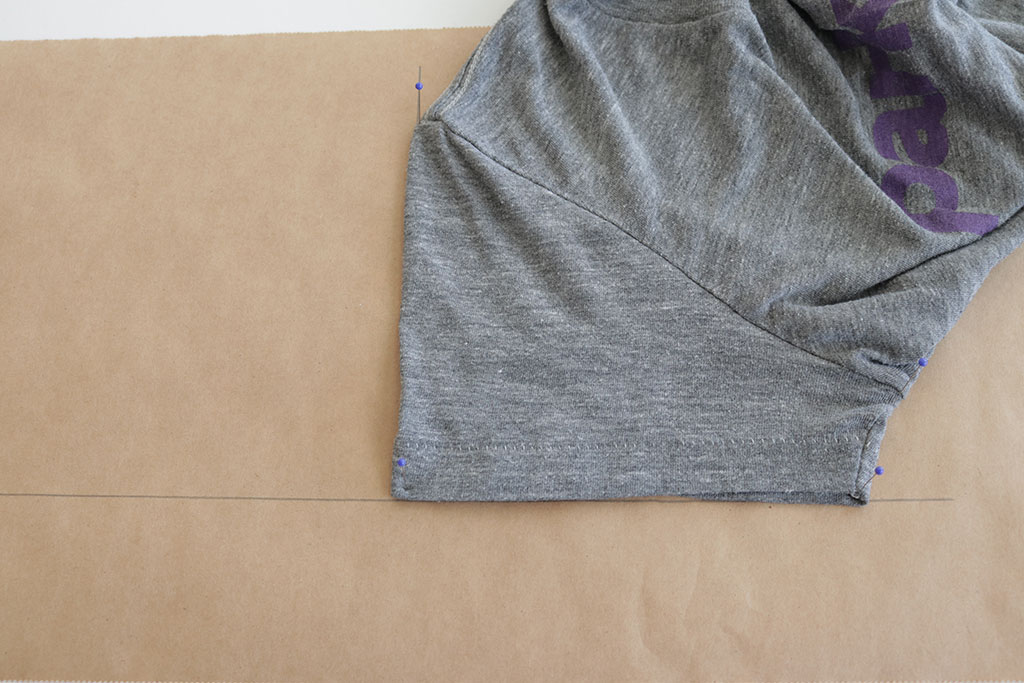
Get Set Up
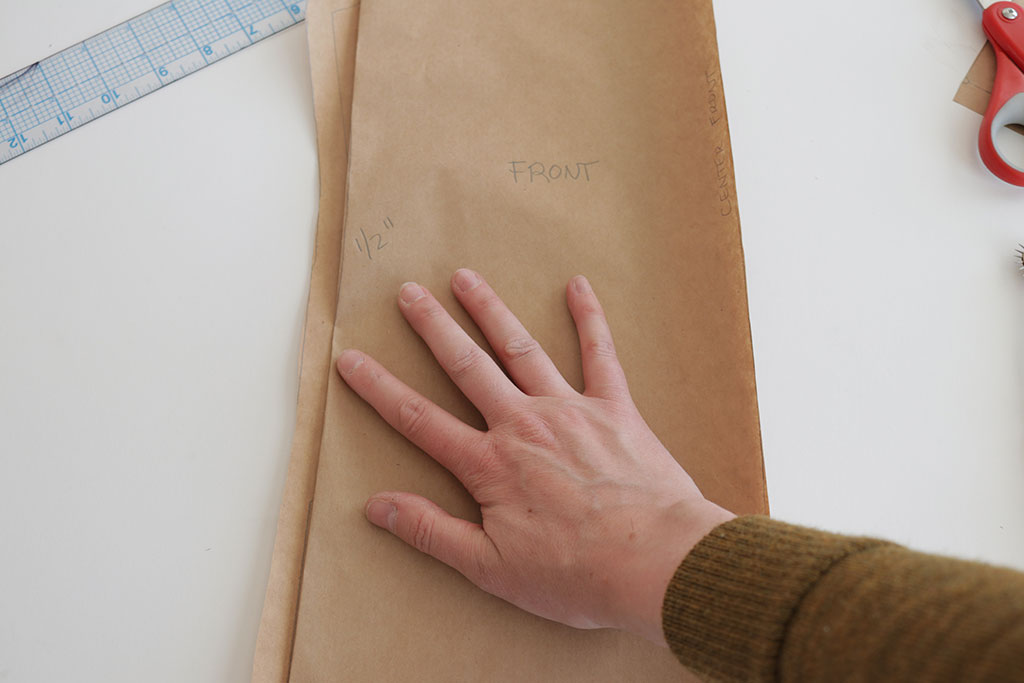
On your paper, use a ruler to draw a straight line as long as your T-shirt. Label this line center front.
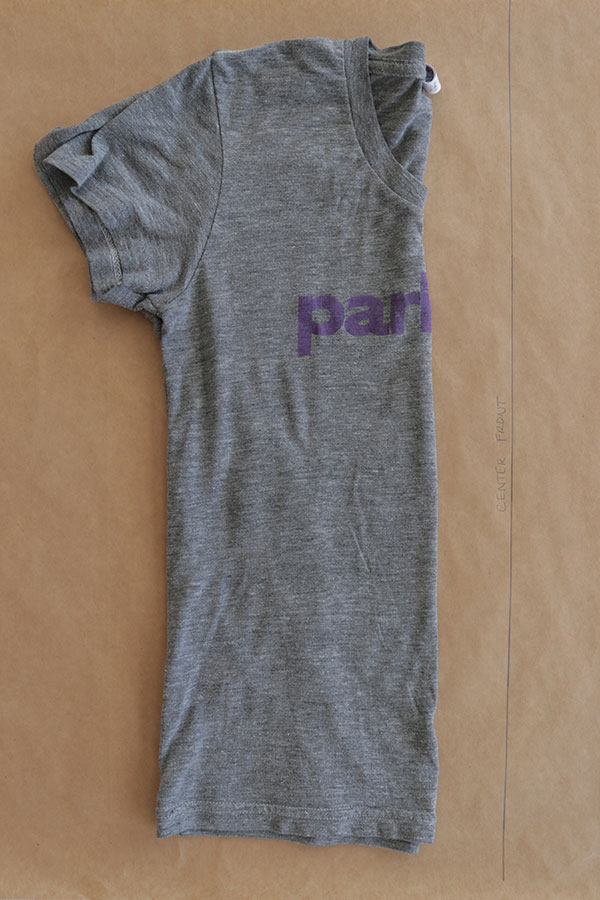
Fold your T-shirt in half and press it firmly to mark a crease down the center.
Align the crease on your T-shirt with the center front line on your paper. The goal is to get the front of your shirt as flat as possible without stretching.
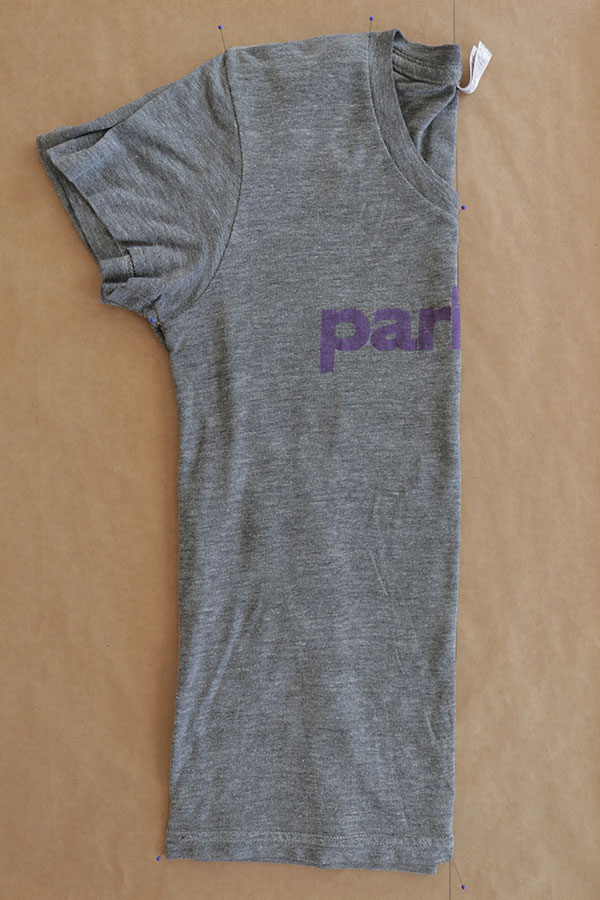
Use pins to create anchor points at the center front below the neckband, the center front hem, the top and bottom of the side seam, and at each end of the shoulder seam.
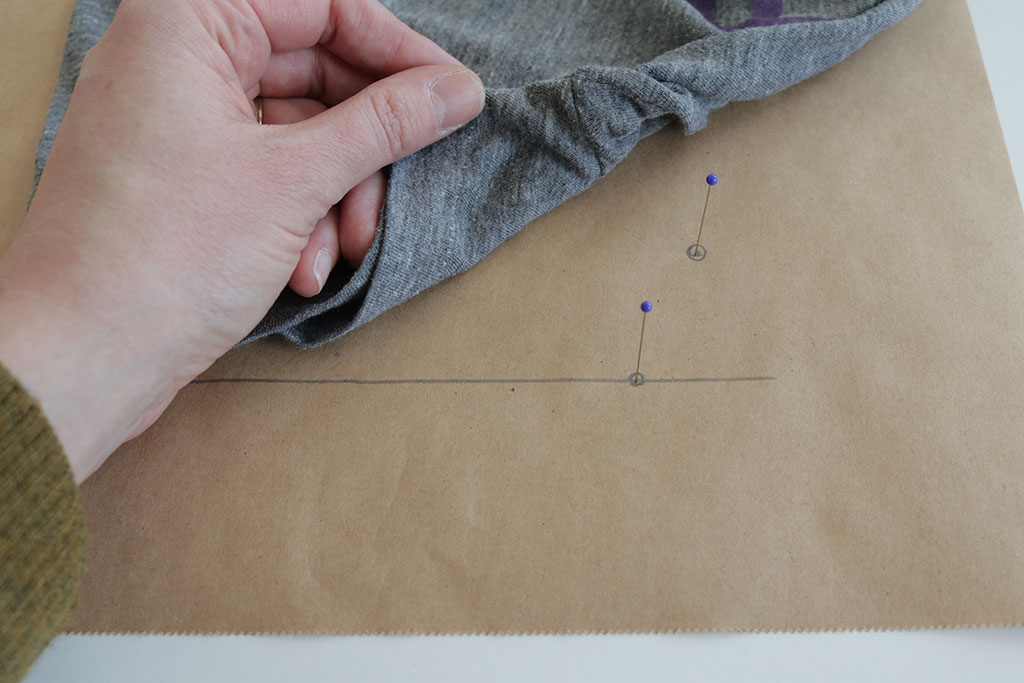
Lift up your shirt at each of these anchor points and circle them on the paper to reference later.
If you look at the part of your shirt that is pinned down, it looks like a front bodice pattern piece, doesn’t it? The next step is to trace.
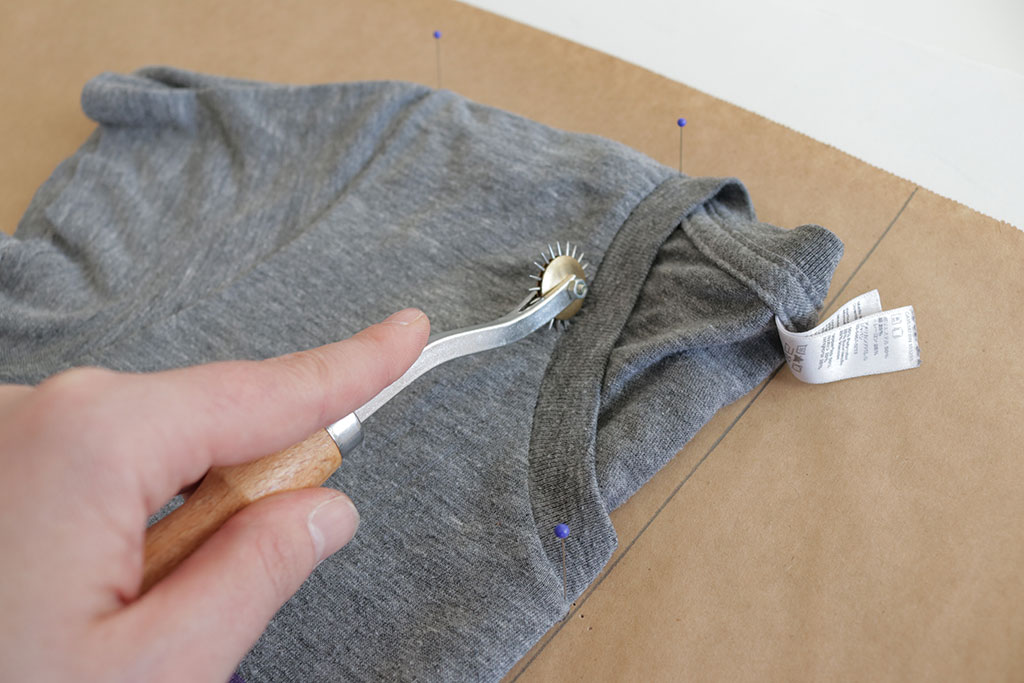
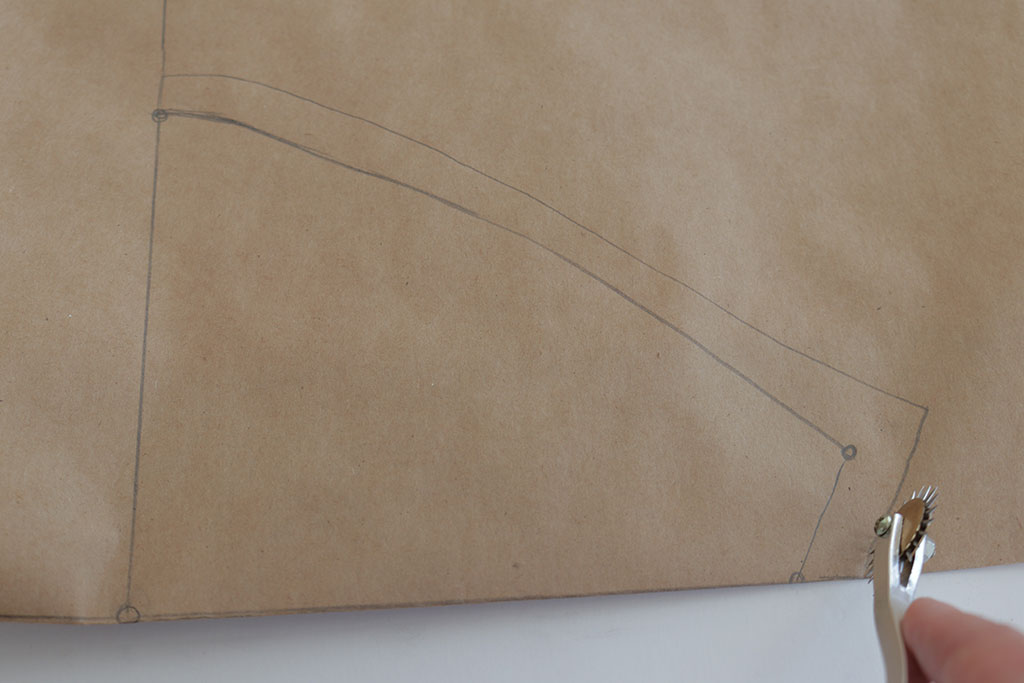
Trace the Front
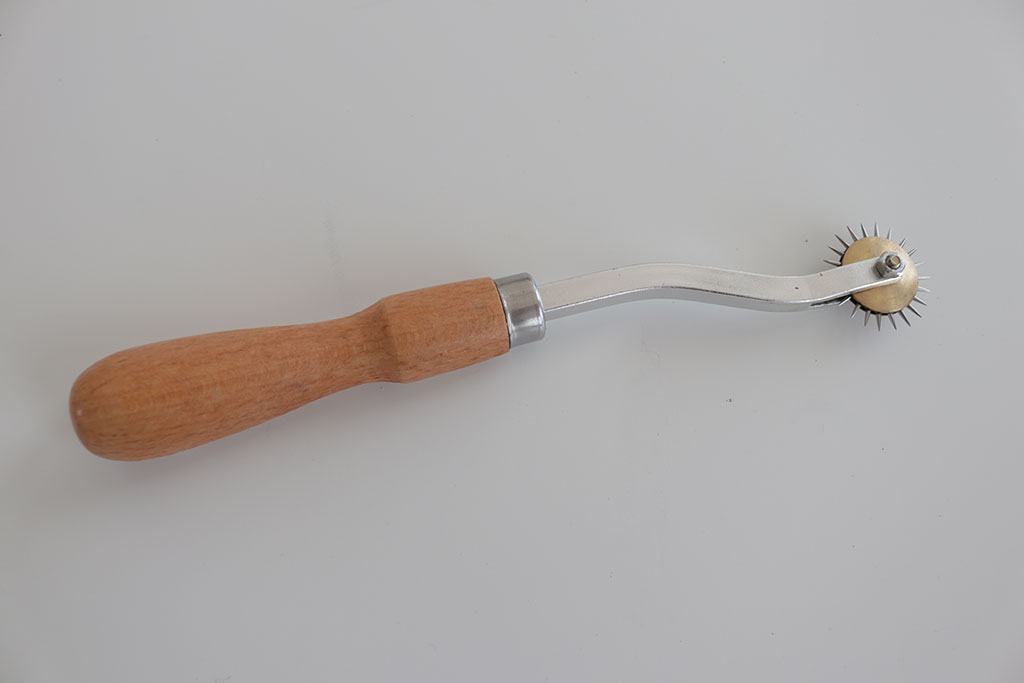
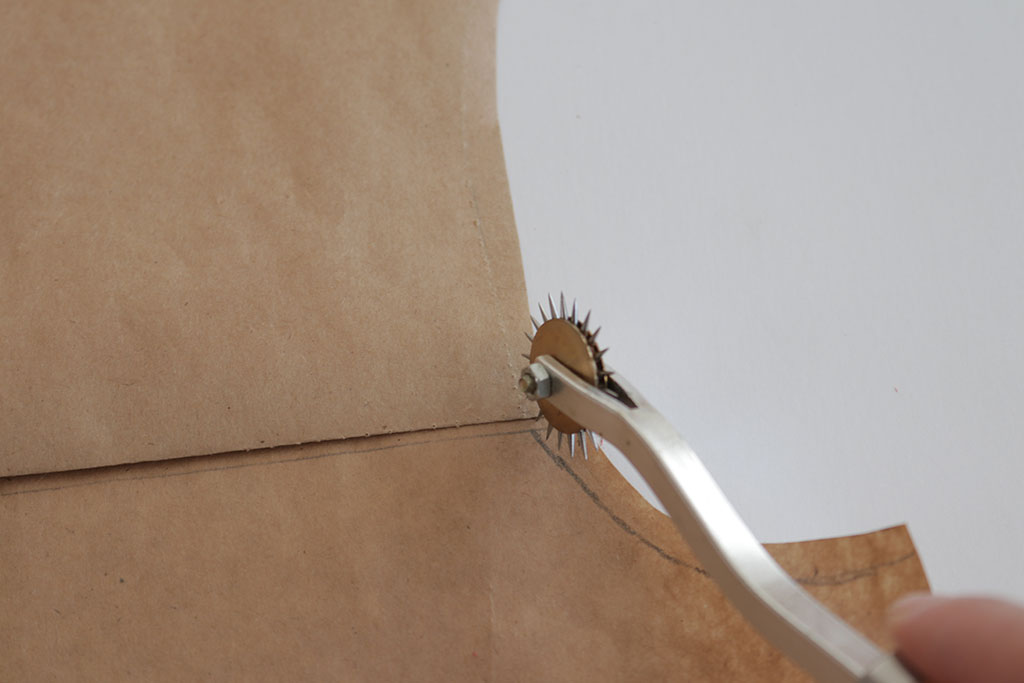
Your needle-point tracing wheel will create little holes in the paper, and later you will connect the dots with a pencil to draw your seam lines. Using a wheel helps you trace your shirt really quickly, but you can also use a pin to poke holes in the paper, one by one.
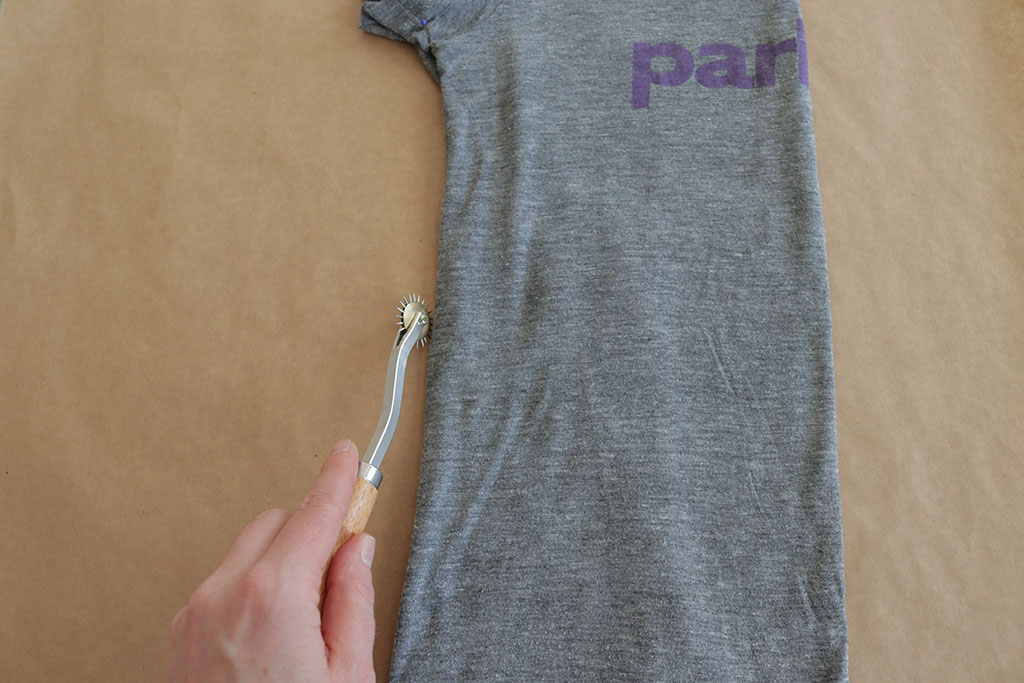
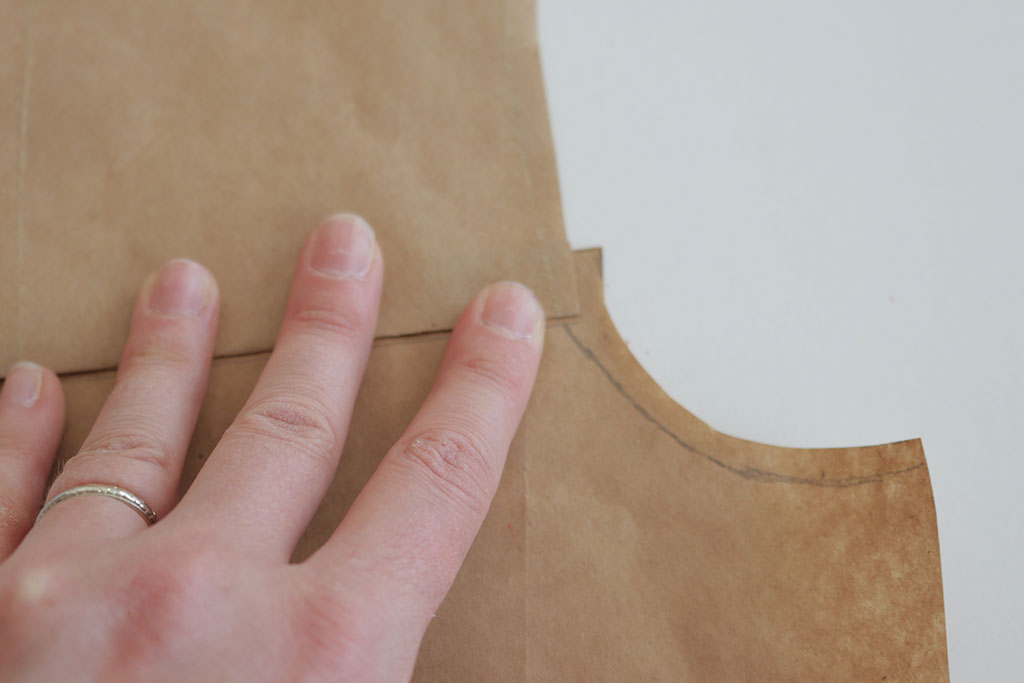
Use your wheel to trace along the hem, side seam, and shoulder seam.
For the neckline, trace below the neckband (the neckband will become a separate pattern piece). If you don’t want to poke holes in your neckline, fold the neckband back and trace the curve with a pencil.
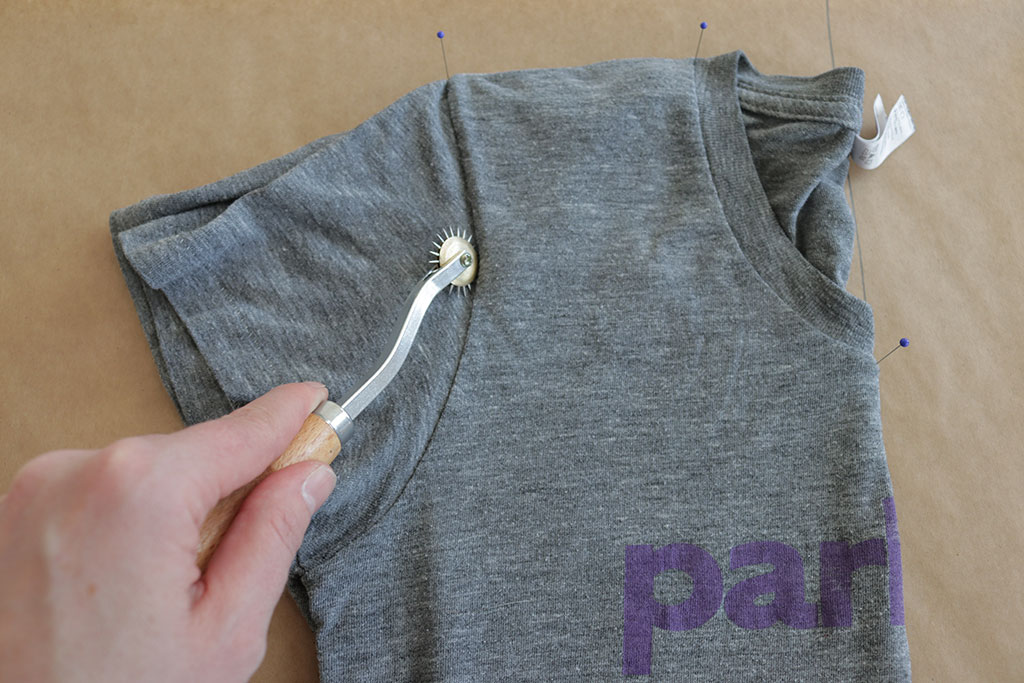
For the armscye, use your wheel to trace along the seamline. If you don’t want to poke holes, fold the sleeve back and trace the curve with a pencil.
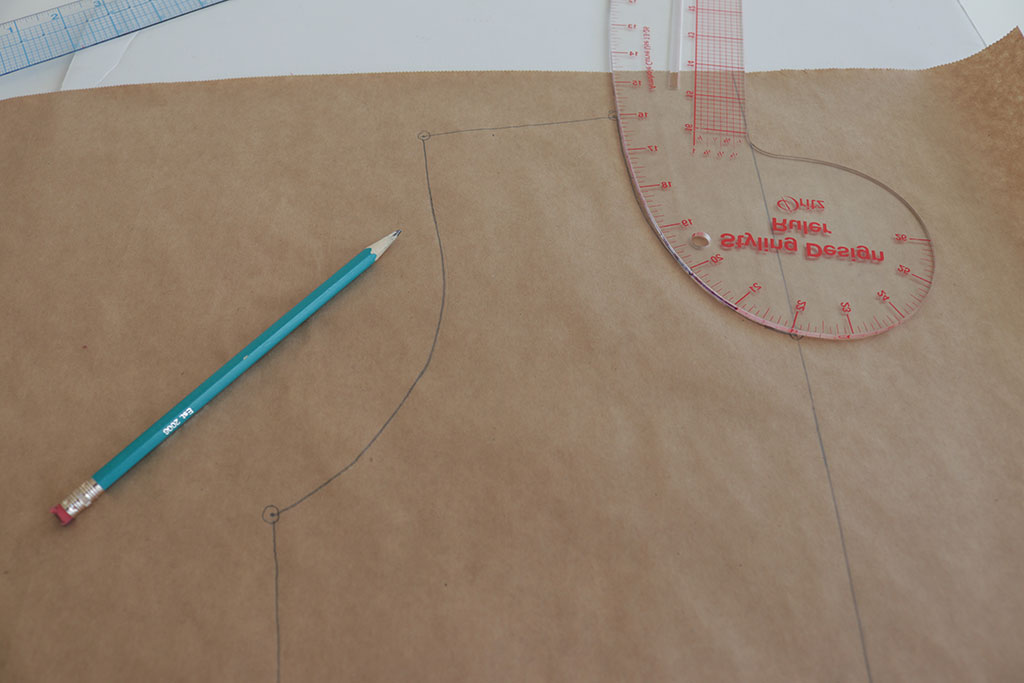
Remove all the anchor pins and your T-shirt, and you’ll see tiny holes in the shape of your pattern! Label your piece as soon as you finish tracing.
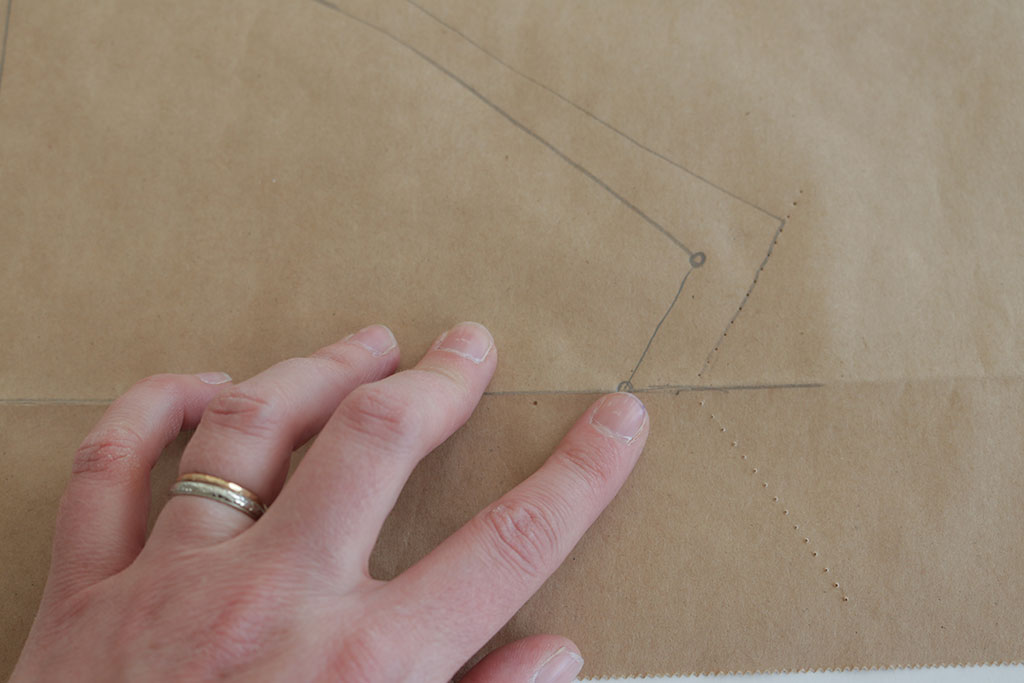
Connect the dots and make the pattern piece
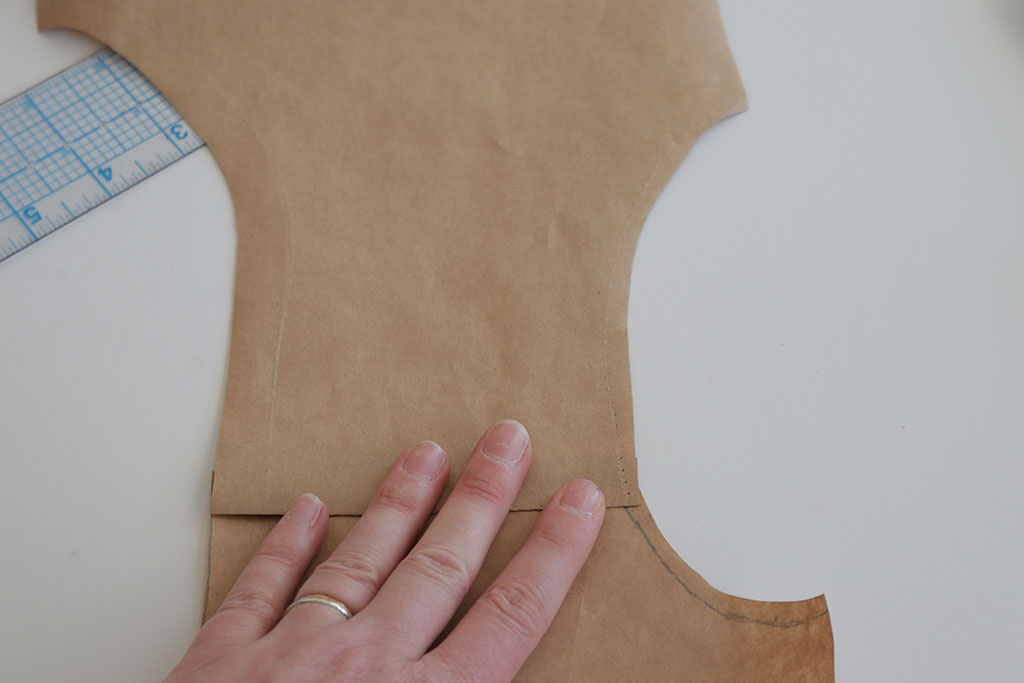
Use your ruler to connect the holes with smooth lines between the anchor points. If you look at any T-shirt pattern, you’ll notice that most lines are pretty straight and curves are gradual—you want yours to look like this. But you’re a human, not digital patternmaking software, so this pattern will look hand-drawn. Use curved rulers at the armscye and neckline if it helps.
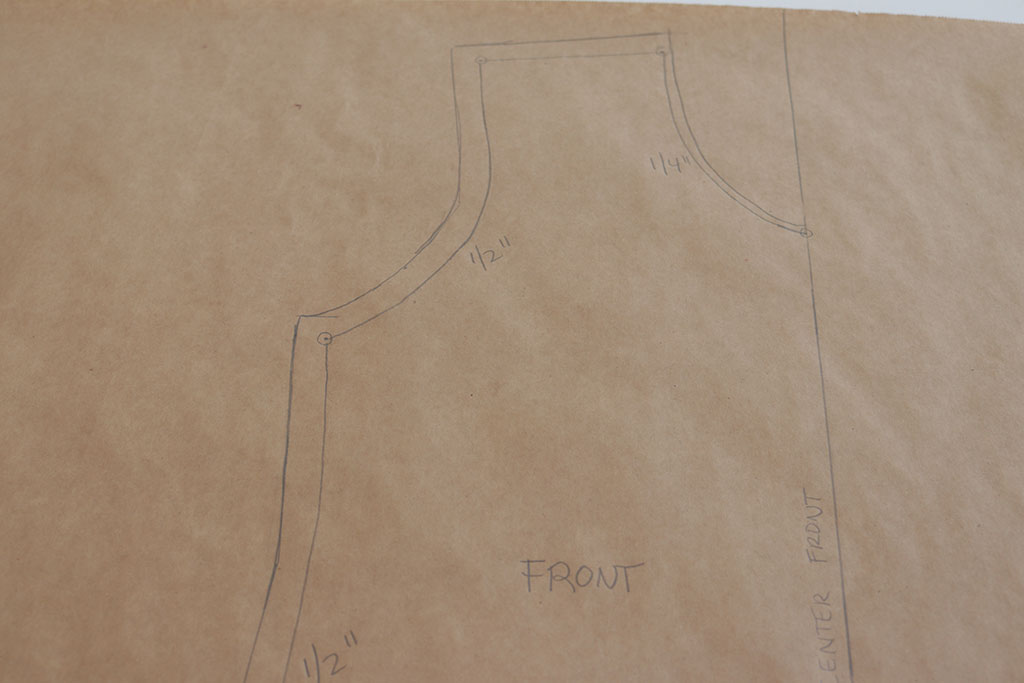
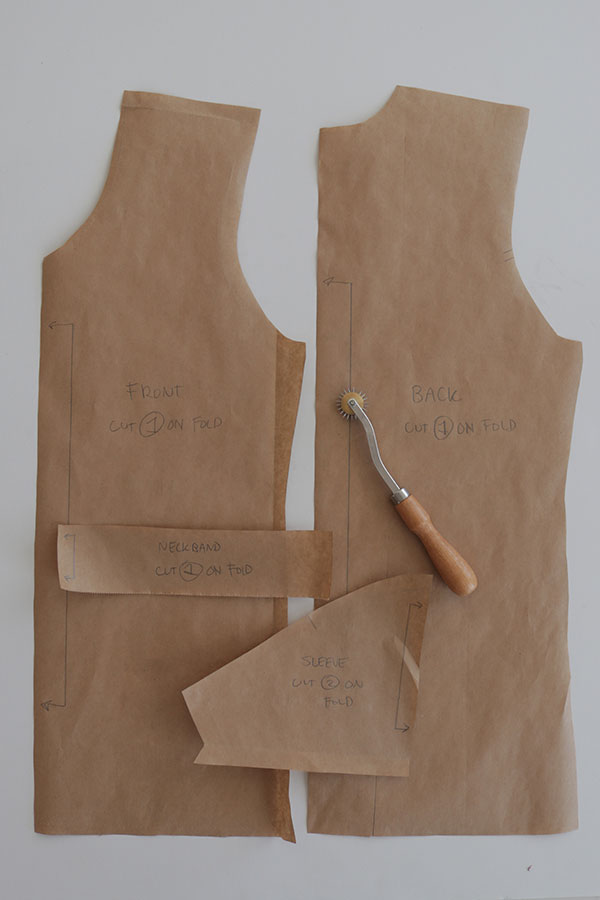
Add your desired seam allowance to the side seam, armscye, shoulder seam, neckline, and hem. Do not add seam allowance to the center front because you will cut on the fold. I added 1/2 inch at all seams except for the neckline at 1/4 inch. It helps to note the seam allowance on your pattern paper, so you don’t forget.
Create the Back
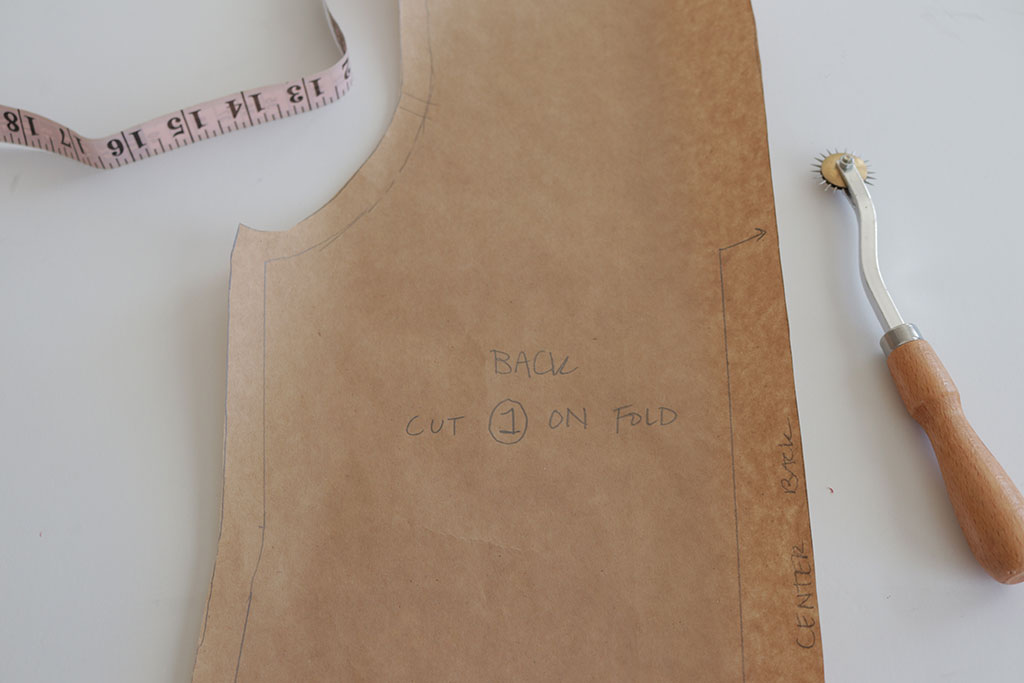
If the front and back are symmetrical except for the neckline, you can just trace the front pattern piece and retrace the back neckline, which is often higher than the front.
If the front and back are almost symmetrical, you can trace the front piece and make small adjustments according to the back. For example, you could carve out the back armscye more. The back hemline is sometimes shorter or shaped differently from the front to account for fitting over the chest.
If the front and back are not symmetrical, repeat all the same steps as the front, and don't forget to add seam allowance and label your piece.
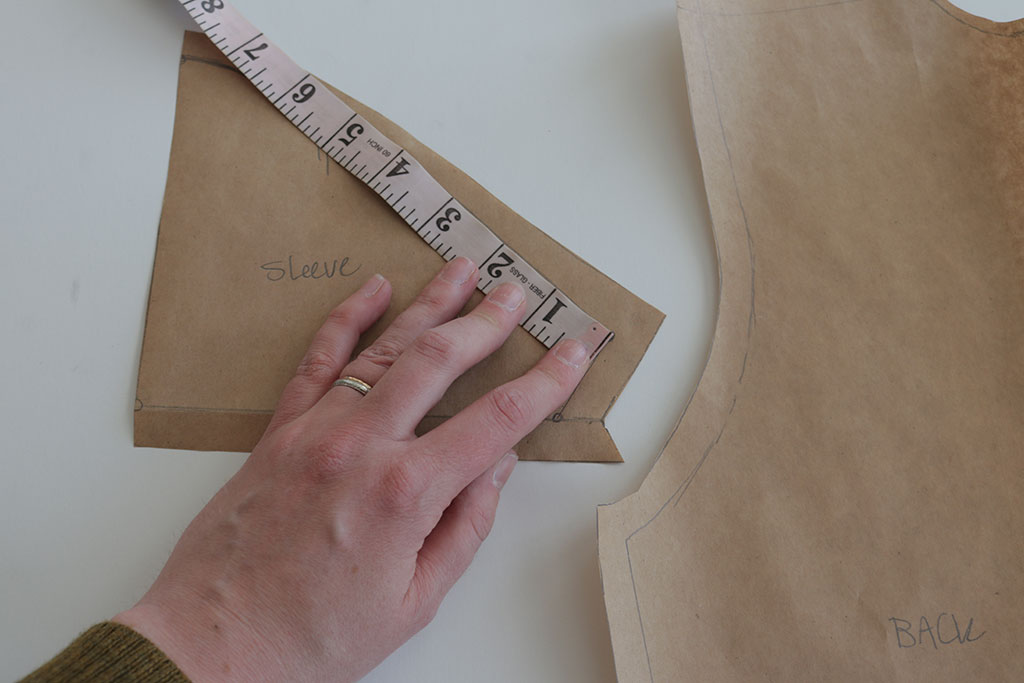
Create the Sleeve
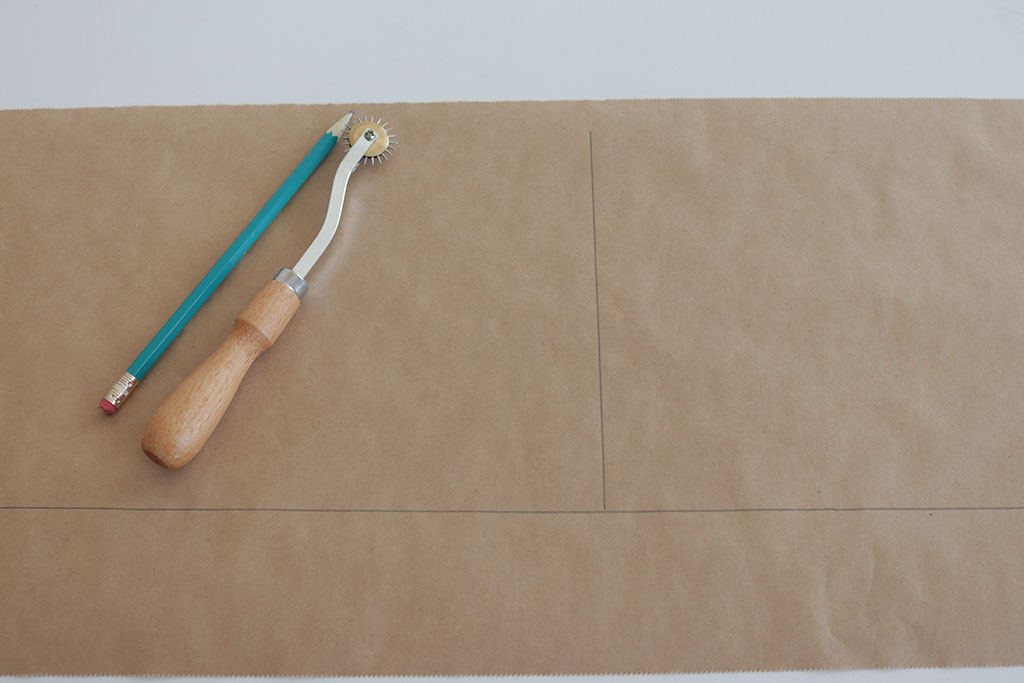
Use a ruler to draw a straight horizontal line—this will become your sleeve hemline. Draw another line perpendicular to the hemline.
Fold your sleeve in half at the shoulder seam. Lay it flat on the paper with the front of the sleeve facing up, matching the hem to the hemline and the fold to the perpendicular line. Secure with anchor pins at the ends of all seams and circle your anchor points on the paper. Trace your sleeve.
If the front and back of your sleeve cap are symmetrical, cut this pattern piece on the fold. If the front and back of your sleeve cap are not symmetrical, label this half of the sleeve as the front. Then, flip your shirt over, so the back of the sleeve is facing up, aligned with the hemline and perpendicular line. Trace the back of the sleeve cap.
Add seam allowance to the hem. To true your sleeve hem, fold the seam allowance up and trace the sides of the hem with your wheel.
Then, finish drawing the hem and label your pattern piece.
Draft a Neckband
It’s easiest to draft a neckband from scratch rather than try to trace your neckband on your T-shirt.
- Measure the front and back neckline of your pattern pieces and add them together.
- Take this neckline measurement and subtract 20% to get the length of your neckband. 1 1/2 or 2 inches is a good place to start for the width, but that is your choice.
- Label your piece.
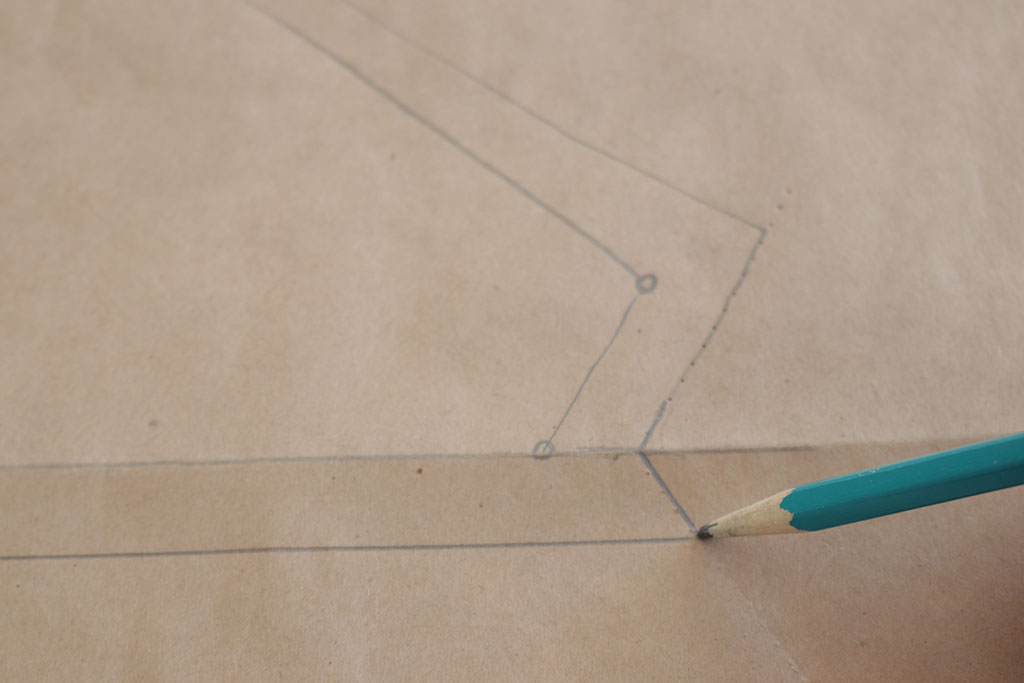
Important: True Your Seams
After you have added seam allowance to your pieces, you need to true all of your seams to ensure they match up. To do this, fold over your seam allowance and match up your seam lines (where you will be stitching) to ensure that they are the same length and don’t create funny points or curves. Use your ruler to blend seam lines across the pieces.
Match the stitch lines on the front pattern piece to the stitch lines on the back pattern piece, along the shoulder seams and side seams. Make sure they are even and adjust your pieces if necessary.
Ensure that the neckline makes sense. Line up your front and back shoulder seams.
Does the neckline look like a weird shape, kind of like a figure-eight? Get your curved ruler and blend your stitch lines if necessary to create the neckline shape you want. Repeat this step for the armscye.
True the sleeve. Measure the length of the sleeve cap and compare it to the measurement of your armhole. If they do not match, add or subtract from the side seam and blend. If the sleeve cap is slightly shorter than the armscye, that is ok as long as you can slightly stretch it to fit the armscye as you sew.
Make it Official with Pattern Markings
When everything is traced and trued, add official pattern markings and cutting instructions.
Draw corresponding grainlines. For the front and back pattern pieces, write cut on fold. For the sleeve, the vertical line you drew becomes the grainline. Your bands can either be cut on the fold or draw a grainline parallel to the short ends.
Add notches. Mark a notch on the sleeve cap and shoulder seam. Mark one notch at the front bodice and sleeve and two notches at the back bodice and sleeve. Use these notches to tell front from back. You can line up the sleeve cap along the armscye and mark both pattern pieces at once, so the notches are in the same place and match them when you sew.
Feel free to make adjustments as you go! This is a great time to hack your pattern to make it exactly what you want. Do you like the neckline on another pattern or another shirt better? Trace that one instead. Want your shirt a little longer or shorter? Now you can make it the perfect length. Want different sleeves? Just hack them!
Sew a Muslin
Did you think we’d help you create a pattern and not suggest making a muslin? Remember, fabrication matters. If you don’t use the exact same fabric, you might not get the exact same fit. If your T-shirt is not very fitted, this probably won’t make a huge difference. No matter what, sew up a quick test before you cut into your best knits.
Want to see me copy this shirt in action? Watch this step-by-step video!
Did you find this article inspiring? If so, check out our pattern hack archives here. Each month, we help you experiment with patternmaking principles to transform your patterns into the clothes you love to wear.

Meg Stively
Managing Editor
Meg is here to help you get excited about sewing. As the managing editor for Seamwork and the smiling face behind emails and social media, she loves seeing what you're making with our patterns.
Related Articles
How to Color-block Sewing Patterns
How to color-block and customize knitwear by designing and drafting your own style lines, by Haley Glenn.
A Guide to Coverstitch Machines
A comprehensive guide to using and purchasing a coverstitch machine. By Melissa Fehr.
Design Your Own In-seam Pockets
Learn 3 different pocket variations that can be added to any side seam, by Katie Whittle.