
 Sign In
There's something magical about slipping on a beautifully tailored coat—the way it hugs your shoulders just right, the satisfying weight of quality fabric, the knowledge that you created something truly exceptional with your own hands. After years of teaching sewists how to tackle their first coat projects, I can tell you that the difference between a good coat and an absolutely stunning one comes down to mastering a handful of expert techniques.
I know what you're thinking—coat construction sounds intimidating, maybe even impossible if you're not already an advanced sewist. But here's what I've learned: these tailoring techniques aren't just about creating one beautiful coat. They're skills that will transform every single garment you make from here on out. And while coat-making does require patience and precision, I'm going to show you exactly how to approach each step so you can create something you'll treasure for decades.
Today, we'll walk through these ten game-changing techniques using our Maple peacoat pattern, breaking down each step so you can confidently tackle your first (or next) coat project.
Why Fabric Selection Makes or Breaks Your Coat
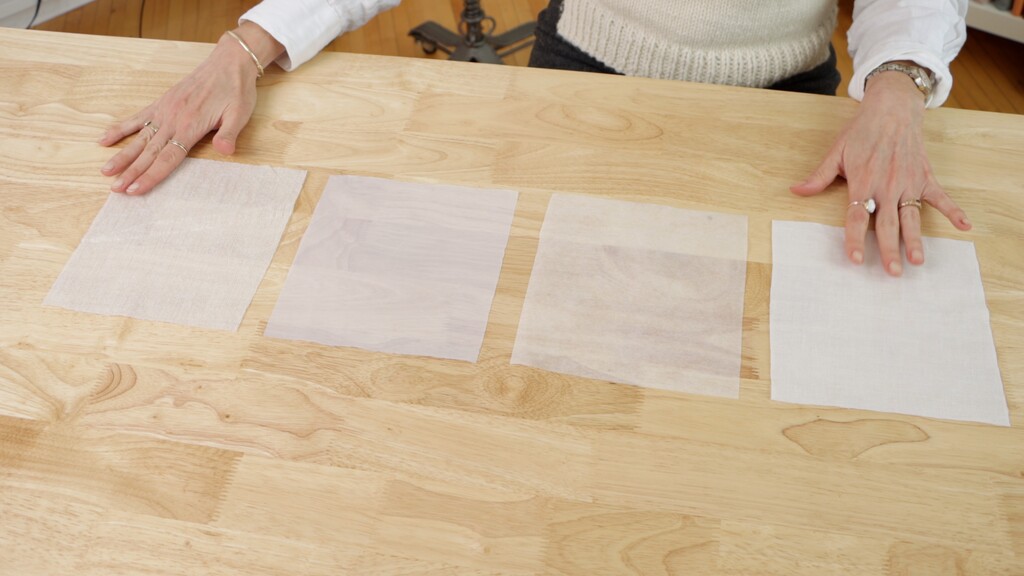
Let's start with the foundation—literally. I've watched too many sewists pour weeks of careful work into a coat only to feel disappointed with the results, and honestly, nine times out of ten it comes back to the fabric they chose.
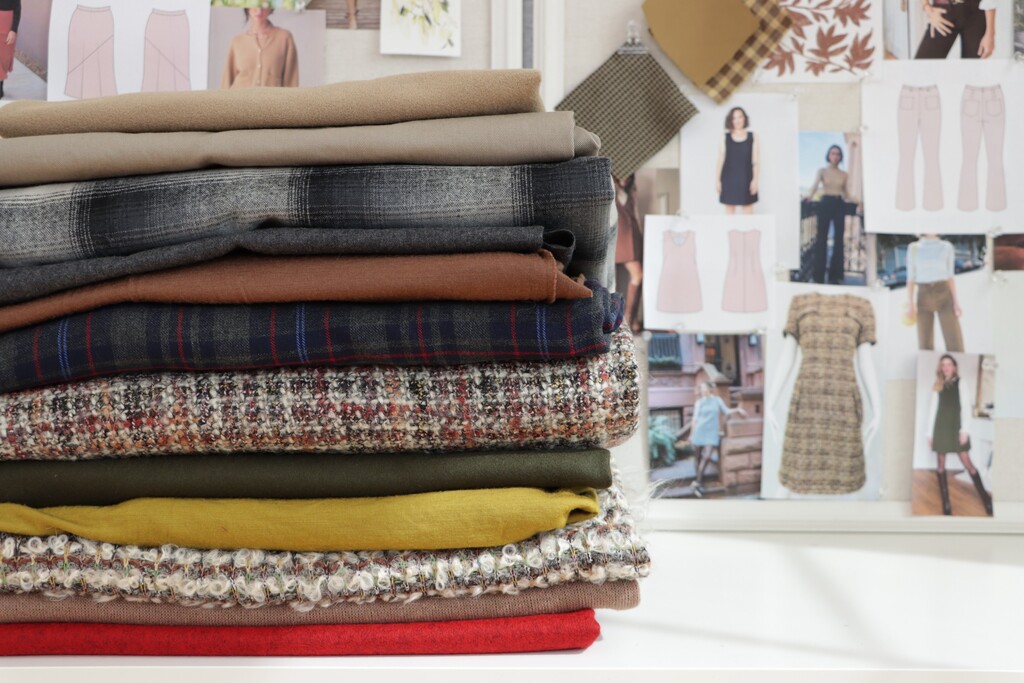

Here's the thing about coating fabrics: this is where you really need to invest in quality. I know it feels like a big expense upfront, but higher-quality fabrics are not only easier to handle during construction—they'll give you a coat that lasts for decades. For a peacoat like Maple, you'll want heavyweight coating fabrics like Melton wool, cashmere, boucle, or boiled wool.
Before you fall in love with a fabric based on looks alone, put it through my three essential tests:
The crush test: Squeeze the fabric in your hand and release it. If creases or wrinkles stay, you're going to struggle to get that crisp, tailored look we're after.
The push test: Push the fabric with your thumbs to check durability. If the yarns separate or the fabric doesn't recover its shape, your coat will stretch out during construction and wearing.
The drape test: Hold the fabric over your bust line. Does it fall in flattering folds? If not, tailoring this garment is going to be an uphill battle.
Here's something most people don't consider—color matters more than you think. Darker colors hide inner construction details better, while lighter colors can show seams, hems, and interfacing through to the right side. And fabrics with surface texture? They're actually your friend because they hide stitch imperfections, making them perfect for your first coat project.
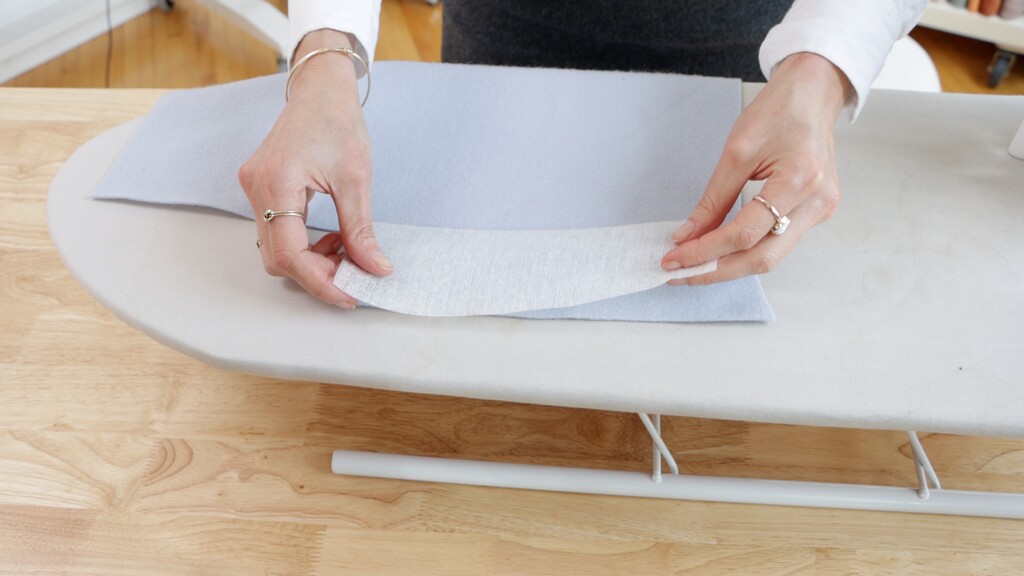
Building the Perfect Foundation with Interfacing
Think of interfacing as the skeleton of your coat—it's what creates that structured shape that separates a well-made coat from something that looks limp and unfinished. This is where a lot of people either skip steps entirely or get completely overwhelmed, but I promise it's more straightforward than it seems.
You've got two main options: sew-in or fusible interfacing. While traditional tailoring methods call for sew-in interfacings, let's be honest—most of us want beautiful results without spending months on a single project. That's why I recommend fusible interfacing for this approach. When applied correctly, fusibles provide the same structure with a fraction of the work.
Here are your four main fusible interfacing options:
-
Woven interfacing: Stable both crosswise and lengthwise but stretches on the bias -
Nonwoven: Has crosswise stretch but no lengthwise stretch, generally less flexible -
Knit interfacing: Crosswise stretch with no lengthwise stretch, but more flexible for softer shaping -
Weft-insertion: Stable in both directions, stretches on the bias, gives firm yet pliable shaping
For a wool peacoat, you'll want heavier interfacing, but here's the crucial part—test it first. Cut some swatches and test different weights to see how your fabric responds, because fusible interfacing will change how your fabric drapes and moves.
For the Maple pattern, you'll be applying interfacing to the facing, upper collar, bottom and sleeve hems, pocket welts, and buttonhole tabs. Remember, less is often more with interfacing—you want structure where you need it without creating unnecessary bulk.
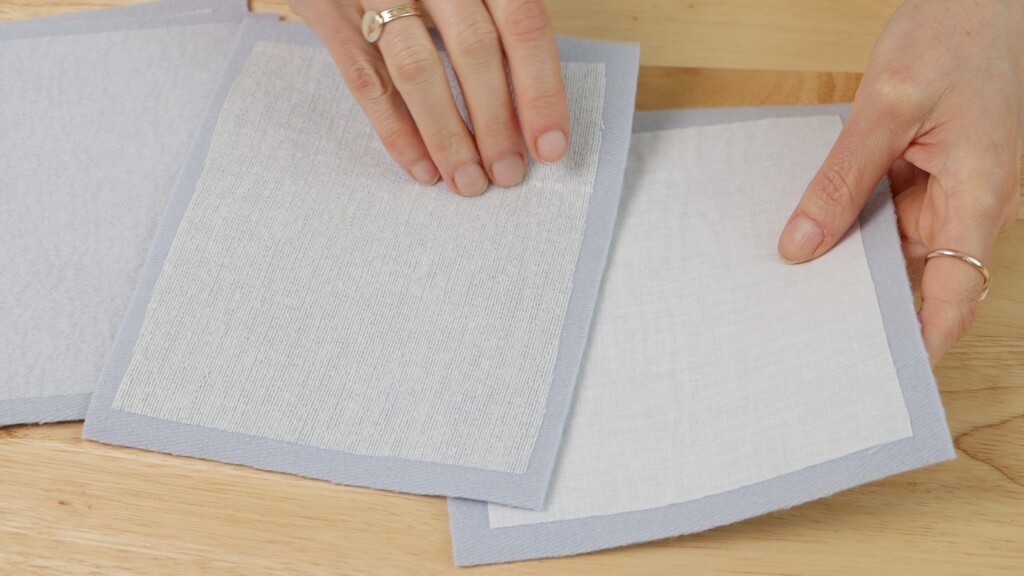
Choose Your Lining Like a Pro
Your lining selection is just as important as choosing your outer fabric. The lining protects the garment from wear and prevents stretching, but it needs specific characteristics to work properly.
You want something lighter weight with a softer hand, and the surface needs to be smooth so you can slip your arms in and out easily. Synthetic fabrics like polyester and acetate are popular for coat linings because they're durable and hold up to years of wear. But if you prefer natural fibers, cotton lawn, rayon, or silk work beautifully too.
Here's a simple test I always use: run your lining fabric across your outer coat fabric. If it feels sticky or gets caught, it's going to bunch up when you're wearing the finished coat instead of laying smoothly. You want something that glides across the surface without friction.
This is also your chance to add personality to your coat. While you might choose a neutral outer fabric, the lining is the perfect place for a subtle pop of color or even a fun print. Just keep in mind that your lining is often visible when you move.
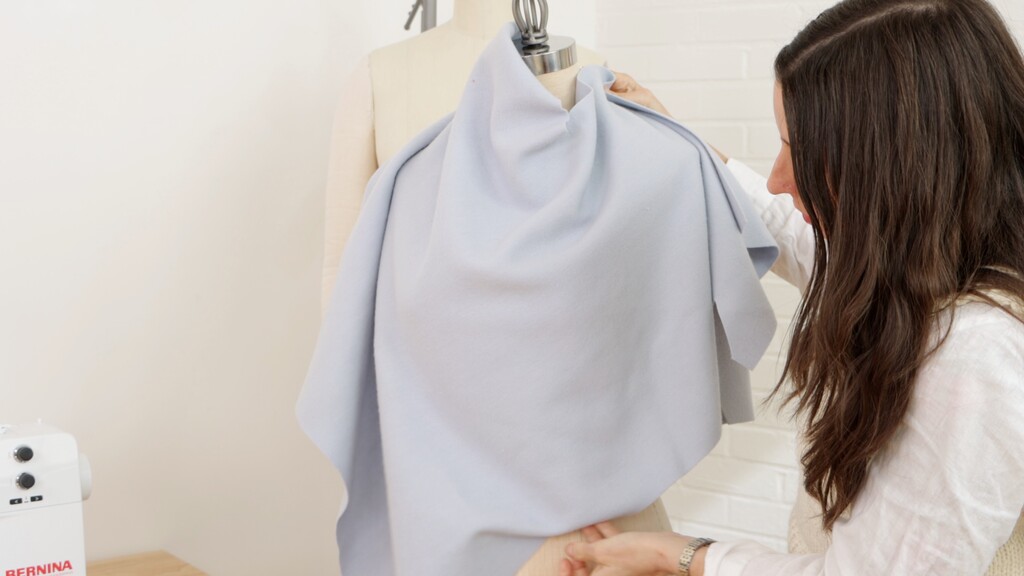
Why You Should Always Make a Test Garment
I know this might sound like overkill, but creating a test garment first will save you so much heartache later. This muslin lets you visualize how the coat will hang, perfect the fit, and troubleshoot construction challenges before you touch your expensive fabric.
Personally, I have a rule: I always, always make a test garment whenever I'm sewing either outerwear or pants. These are the projects where fit is crucial, and if I'm going to invest time in making them, I want them to be exactly the way I want.
When sewing your test garment, use an inexpensive fabric in a similar weight to your final garment. Try on your muslin at different points—after major seams, after sleeve attachment, and before final adjustments. Include one-inch seam allowances on the shoulders and lengthwise seams to allow for fit adjustments, and fit this test garment to be slightly larger than your final coat to account for the bulk that interfacing and lining will add.
You can also use this opportunity to practice techniques like welt pockets or buttonhole placement. Mark all your alterations clearly on both the muslin and pattern pieces, then transfer these changes to your final fabric with confidence.
The Critical Step Most People Skip: Preshrinking
Let's talk about fabric prep, because skipping this step has broken more hearts than I can count. Preshrinking your fabrics will save you from the devastation of a finished coat that's suddenly too snug after its first encounter with steam or cleaning.
Preshrink both your main fabric and lining using the same method you'll use to care for the finished coat—steam pressing for dry-clean-only fabrics or gentle washing for washable materials. Let the fabrics rest overnight after preshrinking to allow the fibers to settle naturally.
This is especially crucial for natural fibers since they tend to shrink when steamed, and remember, fusible interfacing requires a lot of steam during application. You should even preshrink your fusible interfacing by holding your iron just above the pieces and steaming gently for a few seconds with the resin side down. The edges might draw up slightly, but this won't impact your finished product.
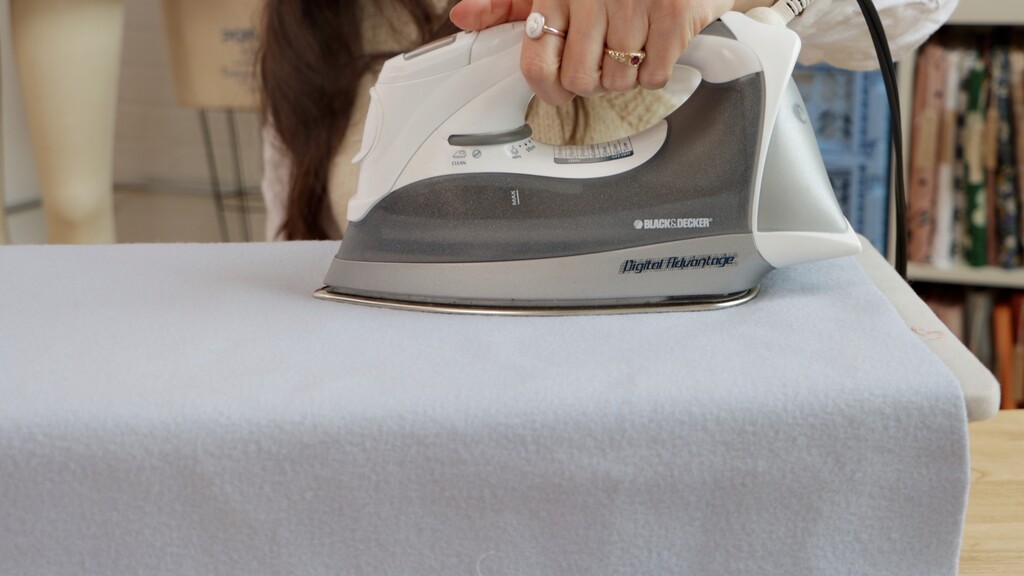
Master Professional Pressing Techniques
Here's where the magic really happens. Without proper pressing tools and techniques, even the best construction will look mediocre. You'll need some specialized tools here, but they're investments that will transform every garment you make.
Essential pressing tools include:
-
Tailor's ham: For pressing shaped areas like darts, curved seams, collar, and sleeve cap -
Sleeve board: Like a mini ironing board for pressing small details and narrow openings -
Clapper: The rounded wooden block used to flatten seams and set the press -
Point presser: Perfect for pressing open lapel and collar points -
Seam roll: Helps you press seams open without imprinting seam allowances
Before pressing your pattern pieces, test iron and steam settings on scrap fabric to avoid any surprises that could damage your outer garment fabric.
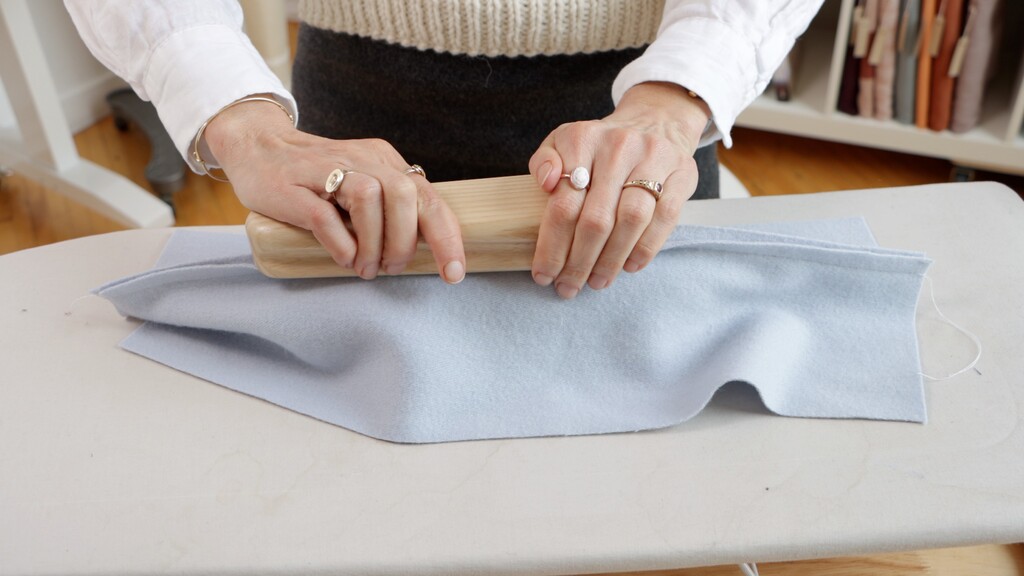
To press a straight seam properly: Press it flat first to smooth the stitching line, then place the seam over your seam roll. Open the seam with your fingers, hit it with steam as you glide the point of the iron along the seamline, then place your clapper on the steamed area and hold until cool.
For curved seams, notch the curves first to remove excess fabric, then position the seam on your tailor's ham and press open along the curve. This prevents distortion and stretching that would ruin your coat's shape.
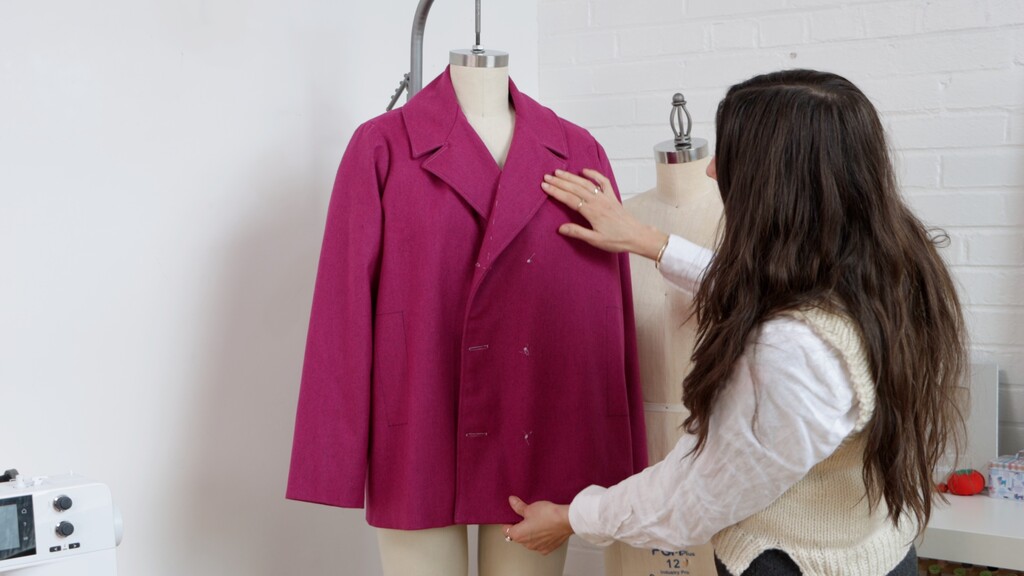
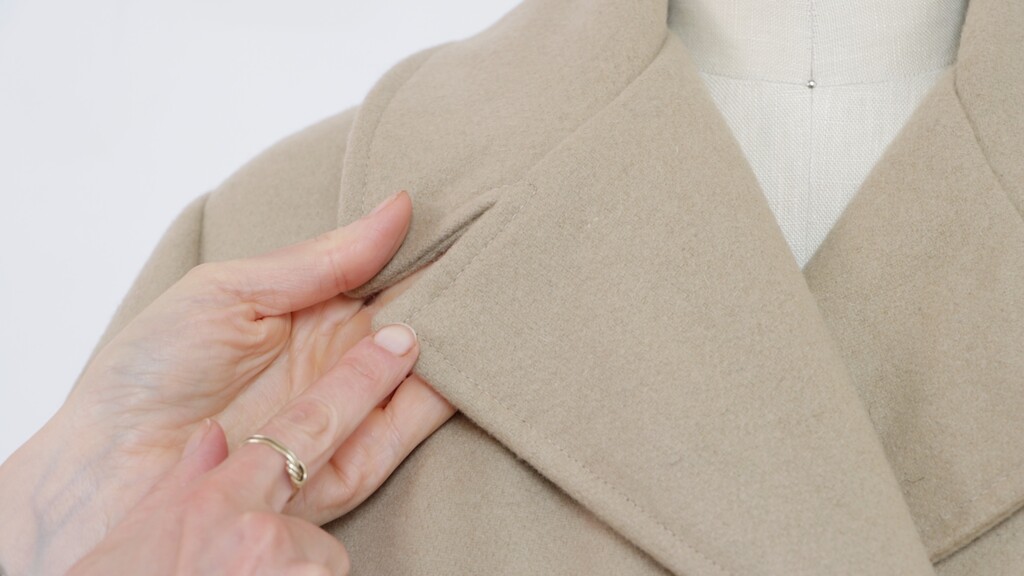
Perfect Your Welt Pocket Technique
Welt pockets are a hallmark of quality tailoring, and while the Maple pattern includes single welt pockets that require precision, they're absolutely achievable with the right approach.
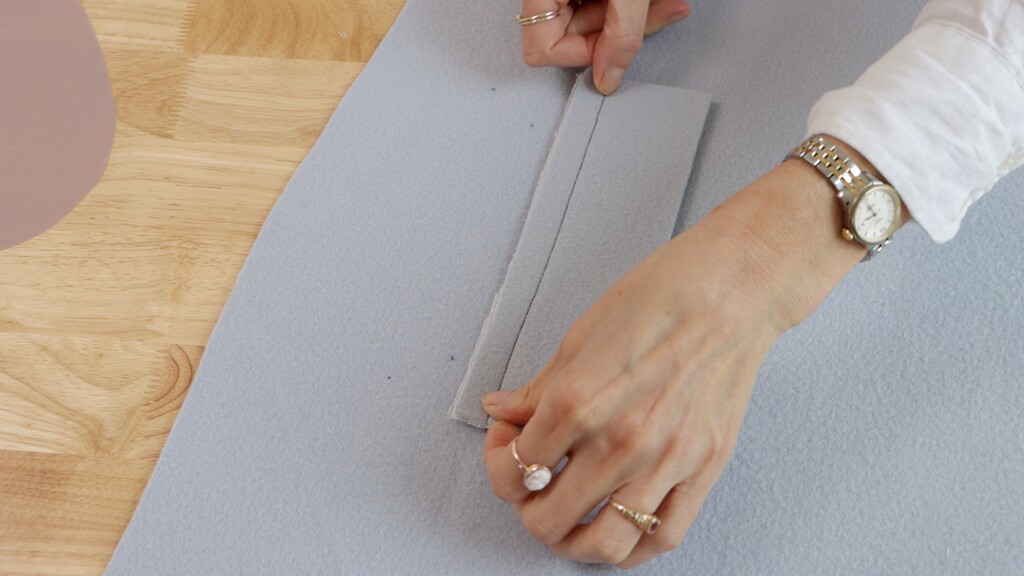
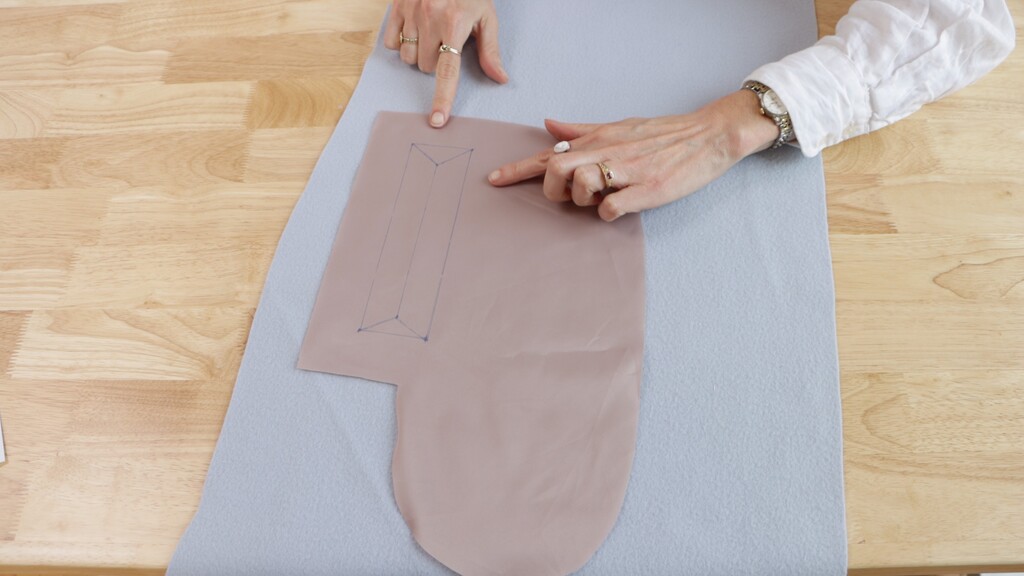
Cut your pocket pieces precisely and mark the placement lines accurately on both the coat front and pocket lining pieces. Take time to baste the welt in position before final stitching—adjustments are nearly impossible once you've sewn them. Practice this technique on scraps first because poorly executed welt pockets can make or break the polished finish of your entire coat.
If you're feeling intimidated by welt pockets, you're not alone. For detailed guidance on mastering this technique, read this article:
Conquering the Welt.
Add Structure with Interfaced Hems
Adding weight to your hems gives your coat that substantial feel of expensive ready-to-wear. The Maple pattern includes interfacing pieces for both the front and back hems and the sleeve hems.
This interfacing adds body, provides support for the weight of the hem, and prevents stretching at hem edges, which are prone to wear. To hem with fusible interfacing, press a light crease at the hem fold line first, then fuse the interfacing strips to the hem allowance. This creates that substantial, well-finished edge that makes all the difference in how your coat hangs and wears.
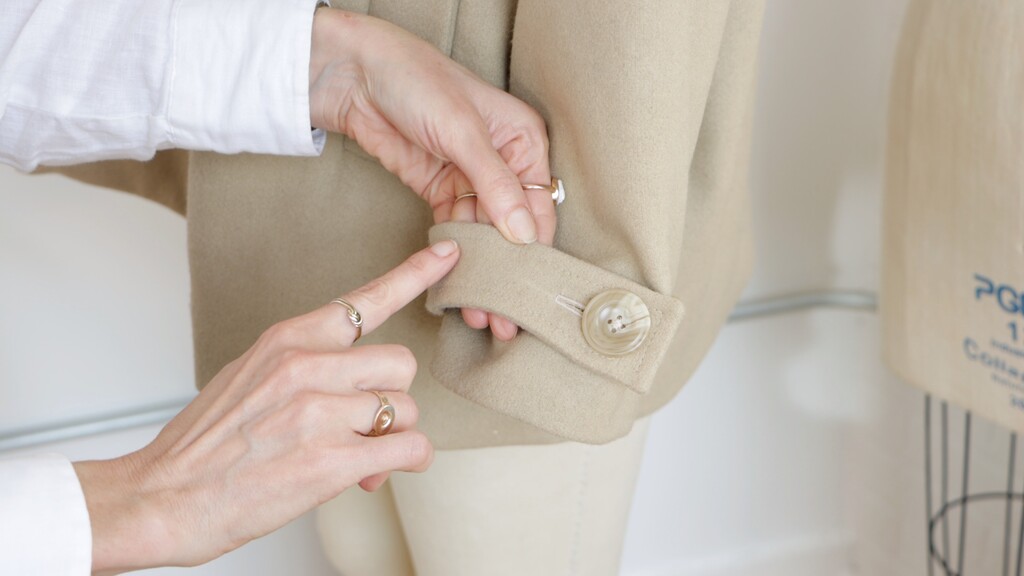
Achieve Perfect Topstitching Every Time
Here's where your coat really comes together—topstitching adds that final layer of polish and reinforces all the important structural areas. I know you might be tempted to rush through this part because you're so close to finishing, but taking your time here is what gives your coat a professional finish.
Start by using your clapper to flatten all the edges you'll be topstitching—this step alone will make a huge difference in how clean your lines look. Switch to a topstitch needle and increase your stitch length slightly from what you used for construction. Then take your time and maintain a steady, consistent speed.
The Maple has topstitching around the collar, lapels, front edges, and on those beautiful welt pockets and button tabs. This is the detail that gives you that tailored, expensive look that makes the whole project worthwhile.
Make Your Final Details Count
Your buttonholes and button choice are the final details that separate a good coat from an exceptional one. Always test your buttonhole settings on fabric scraps first—your test scraps should include two layers of your coating fabric, with one layer having interfacing fused to it.
Take extra time marking those buttonhole positions and double-check that everything aligns properly. On a double-breasted coat like Maple, precise placement and execution are absolutely critical—any misalignment will be glaringly obvious when you're wearing it.
And here's where you get to make this coat truly yours—those special buttons you've been saving? This is their moment. The right button choice transforms your well-made garment into something that feels completely bespoke and uniquely you.
These ten techniques might seem like a lot to master, but each one builds on the others to create something truly special. The skills you develop making your first coat will elevate every garment you create from here on out. Take your time, enjoy the process, and remember—every expert was once a beginner who decided to try something new.
For more detailed guidance on coat construction, watch this video: Complete Guide to Sewing Your First Coat.

