
 Sign In
If your knit seams are breaking, your hems look wavy, or your garments just don't feel comfortable against your skin, you're probably making one of these five common mistakes. I see these issues constantly in the sewing community, and they're exactly the problems that make handmade knits look unfinished instead of beautifully crafted.
The good news? Each of these problems has a simple solution that will instantly upgrade your knit sewing. You don't need expensive equipment or years of experience, just the right techniques and a few specific tools that most sewists don't know about.
Let's dive into each problem and I'll show you exactly how to fix them so your knits look polished and feel amazing to wear.
Problem #1: Your Hems Look Wavy and Unprofessional
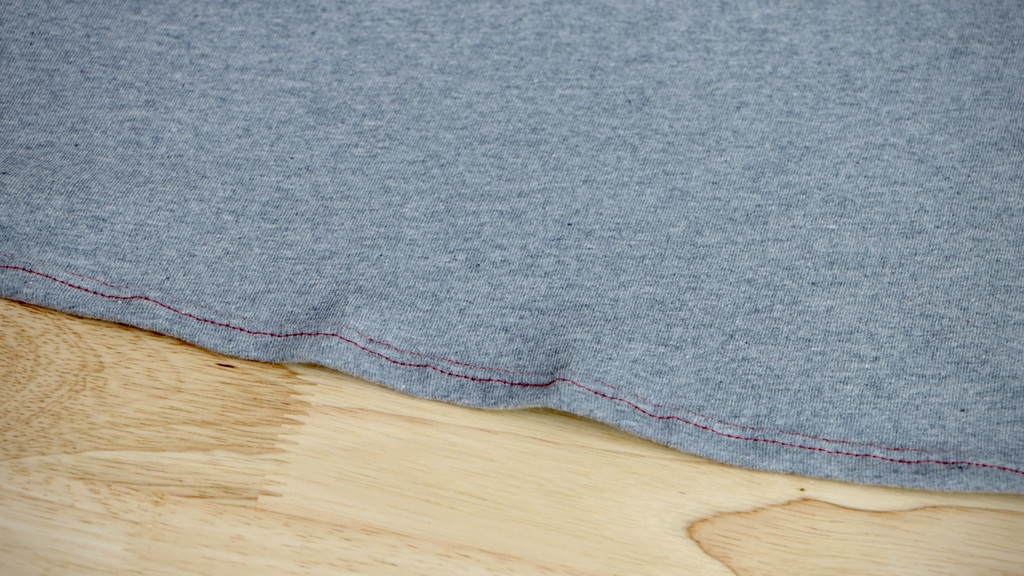
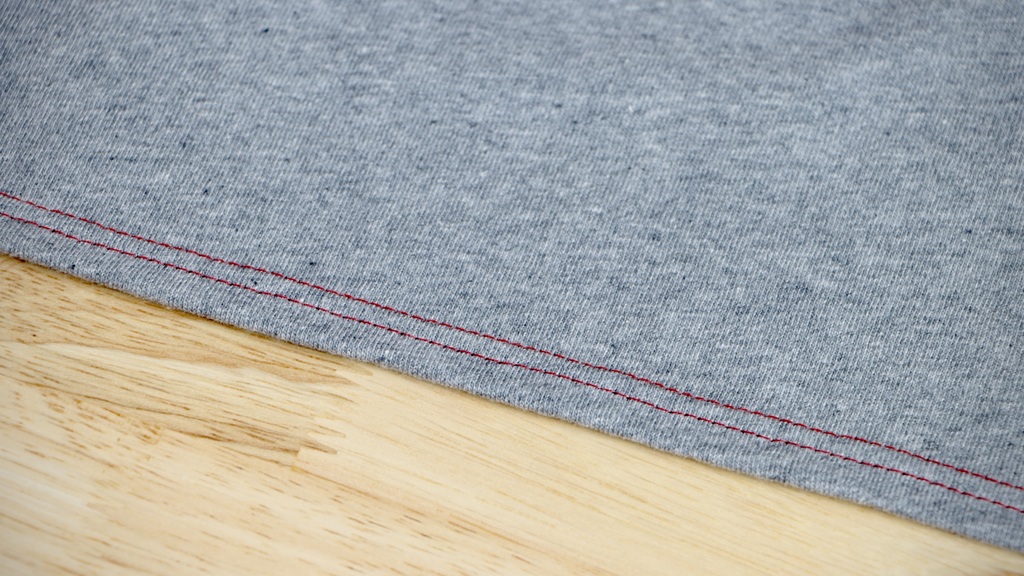
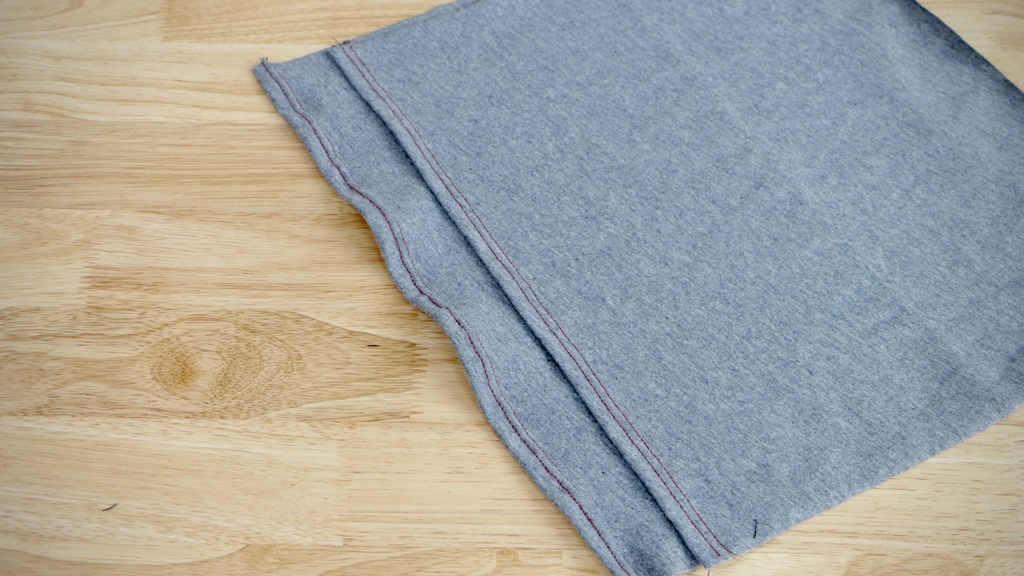
You know that perfect double-needle hem you see on ready-to-wear t-shirts? The one with two parallel rows of stitching that stretches beautifully and lies completely flat? You can absolutely achieve that same look at home, and you don't need to invest in an expensive coverstitch machine to do it.
The Twin Needle Solution
Here's the secret: get yourself a twin needle. This simple tool creates two parallel rows of stitching while the bobbin thread zigzags underneath, giving your fabric the stretch it needs.
Thread your machine exactly as you normally would, then add that second spool of thread. If your machine doesn't have a second spool pin, don't worry. Just place your extra spool in a cup or mug next to your machine.
My Favorite Hem Stabilizing Trick
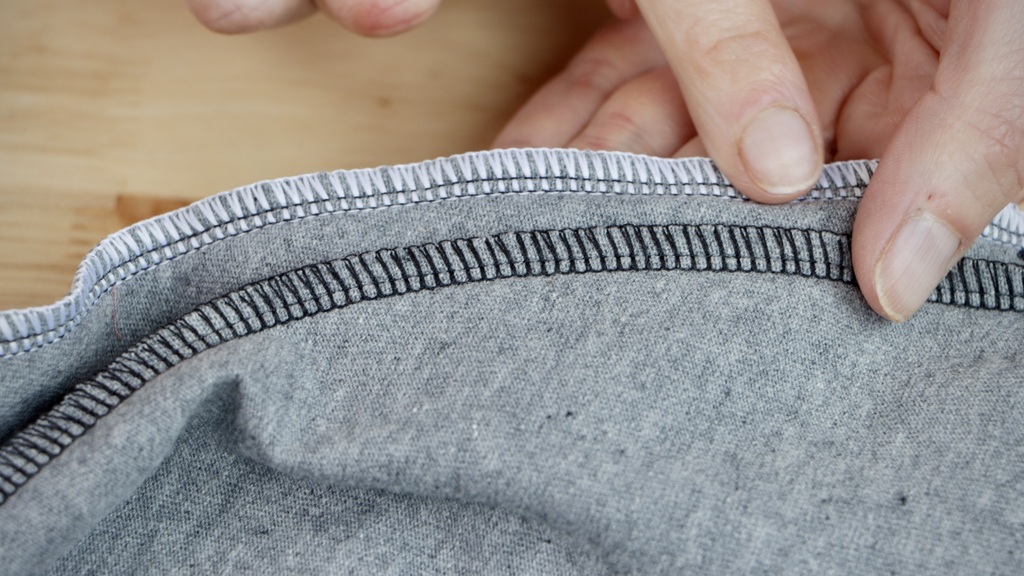
Before you start sewing, finish that raw edge first. I like to serge mine, but you can also use a zigzag stitch or even pinking shears. Turn your hem under and here's where I'll share one of my favorite tricks—secure it with Wonder Tape.
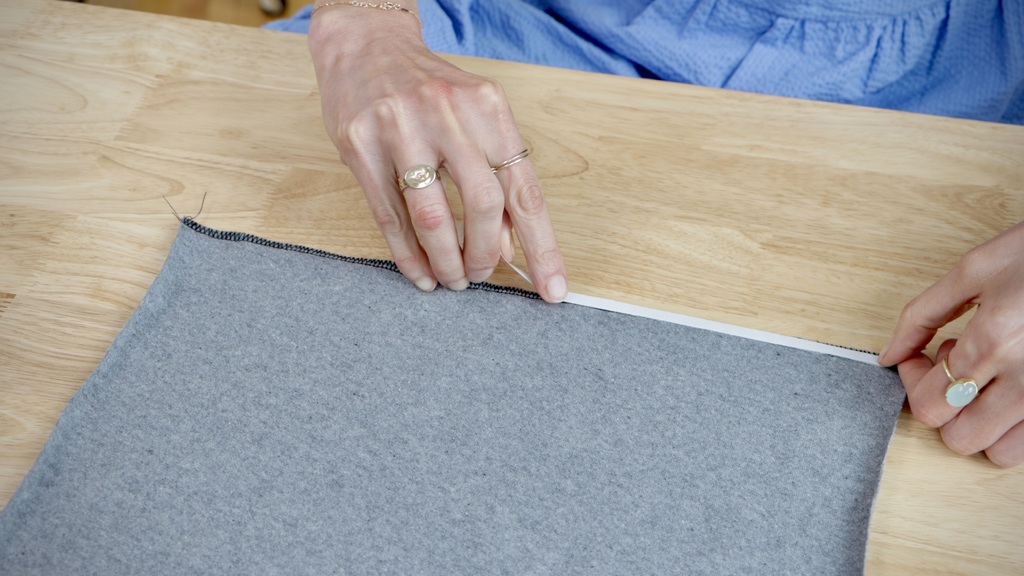
This double-sided tape not only holds your hem perfectly in place, it also stabilizes the fabric so it won't stretch out as you sew. If you have a walking foot, this is a perfect time to use it. The walking foot will prevent your fabric from dragging and stretching while you sew.
When you stitch with your twin needle, you'll get that beautiful double row of topstitching that moves with your fabric. No more broken threads when you stretch your garment, and no more of that wavy, amateur-looking hem that immediately gives away handmade construction.
Problem #2: Your Knit Seams Feel Scratchy and Uncomfortable
This is especially frustrating when you've spent hours making a beautiful fitted dress, only to find the seams irritate your skin every time you wear it. The culprit? Regular polyester thread.
Switch to Wooly Nylon Thread
Switch to wooly nylon thread and you'll instantly solve this problem. This thread has a completely different texture—it's soft and cushiony instead of stiff and wiry. This is especially important if you're sewing a close-fitting knit dress, like our Citron pattern. When those long vertical seams lie against your body, wooly nylon feels comfortable instead of scratchy.
One more thing I love about wooly nylon thread—it actually has natural stretch built right into the thread itself. Your stitches will move with your fabric instead of fighting against it.
How to Use Wooly Nylon Thread
You have two ways to use this thread. If you're sewing on a serger, thread it through your loopers. If you're using a regular sewing machine, use wooly nylon in your bobbin only and keep regular thread in your needle. Your seams will feel softer against your skin and have that extra bit of stretch that makes all the difference in how your garment moves with you.
Problem #3: Your Zigzag Stitches Keep Breaking or Tunneling
I see this constantly. Sewists struggling with regular zigzag stitches that either break under stress or create that awful tunneling effect where the fabric puckers between the stitches. There's a simple solution that most people don't even know exists on their machine.
The 3-Step Zigzag Stitch
Look for the 3-step zigzag stitch on your machine. While a regular zigzag makes one stitch per swing of the needle, the 3-step creates three stitches for each peak. This makes it incredibly strong and stretchy—exactly what knits need.
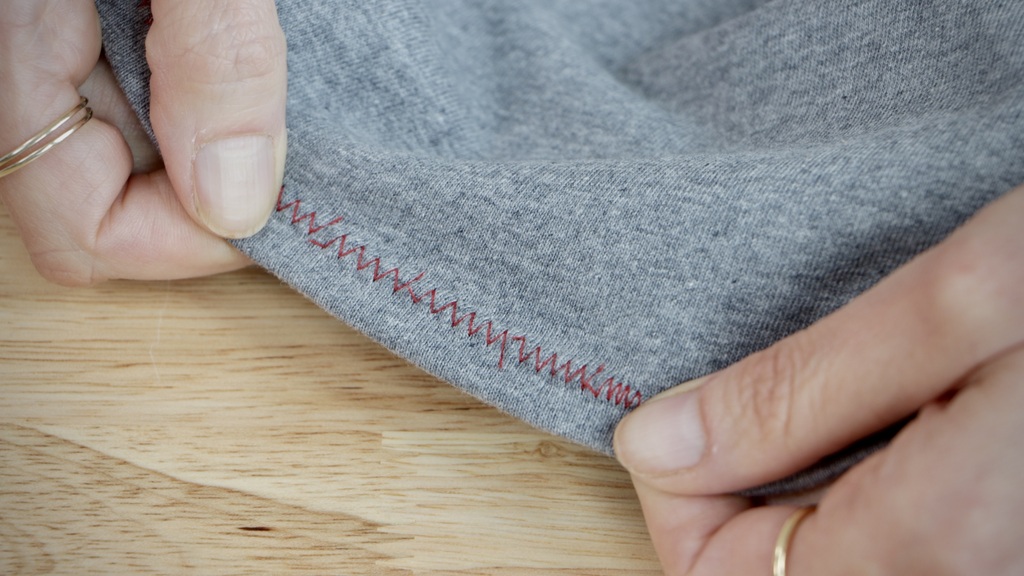
Not only does this stitch eliminate tunneling completely, but you can also make it wider than a regular zigzag since it's built from multiple stitches. It's perfect for topstitching, elastic applications, or anywhere you need extra stretch and strength.
I use this stitch almost everywhere I'd normally use a regular zigzag, but it really shines for attaching elastic or creating beautiful decorative hems.
Problem #4: Your Elastic Digs In and Feels Uncomfortable
If you've ever had red marks on your shoulders from bra straps or felt like elastic was cutting into your skin, you know how uncomfortable regular elastic can be. This is especially problematic when you're adding shelf bras or any elastic that touches your body directly.
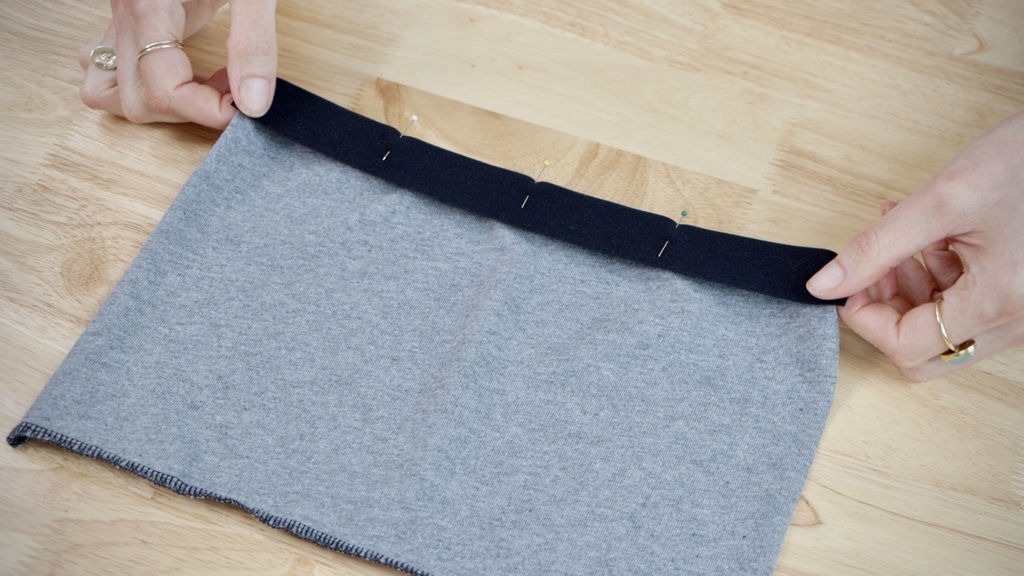
Discover Plush-Back Elastic
The solution is plush-back elastic. This brilliant notion has a soft, velvety side that sits against your skin and a smooth side that attaches to your fabric. It stays put without digging in, making it perfect for any intimate garment applications.
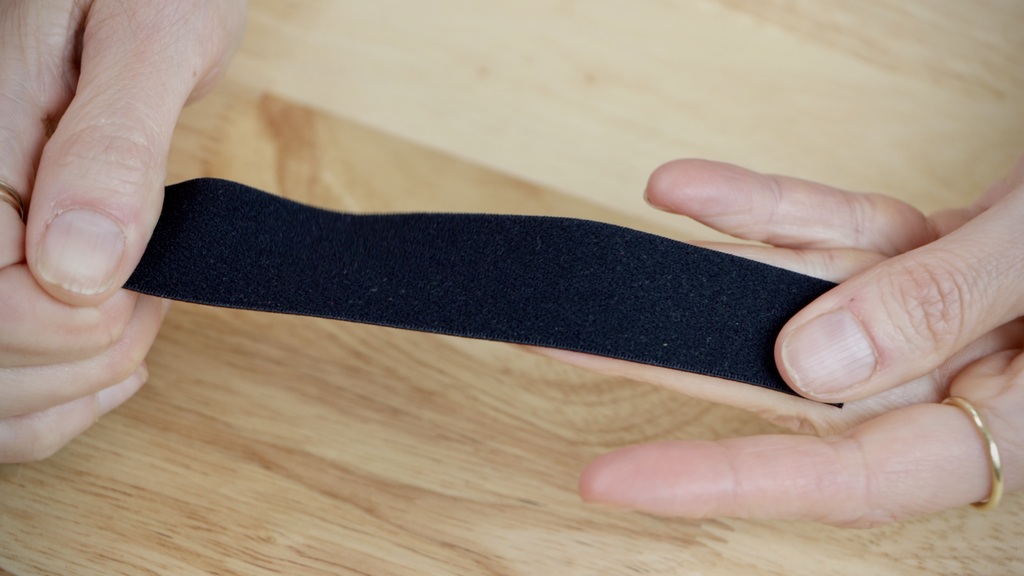
It's perfect for shelf bras, like the one in the Citron dress, because it stays in place without digging in.
How to Apply Plush-Back Elastic
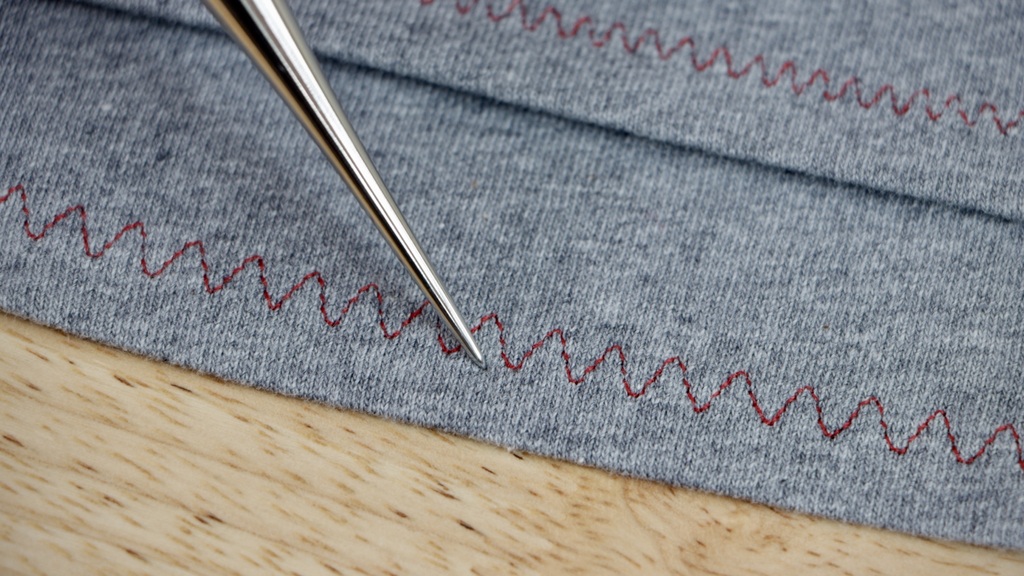
To apply it correctly, make sure that soft, plush side faces your skin. Pin it in place with right sides together, then sew with a zigzag stitch, stretching slightly as you go. Flip the elastic to the inside and topstitch using that 3-step zigzag I mentioned earlier.
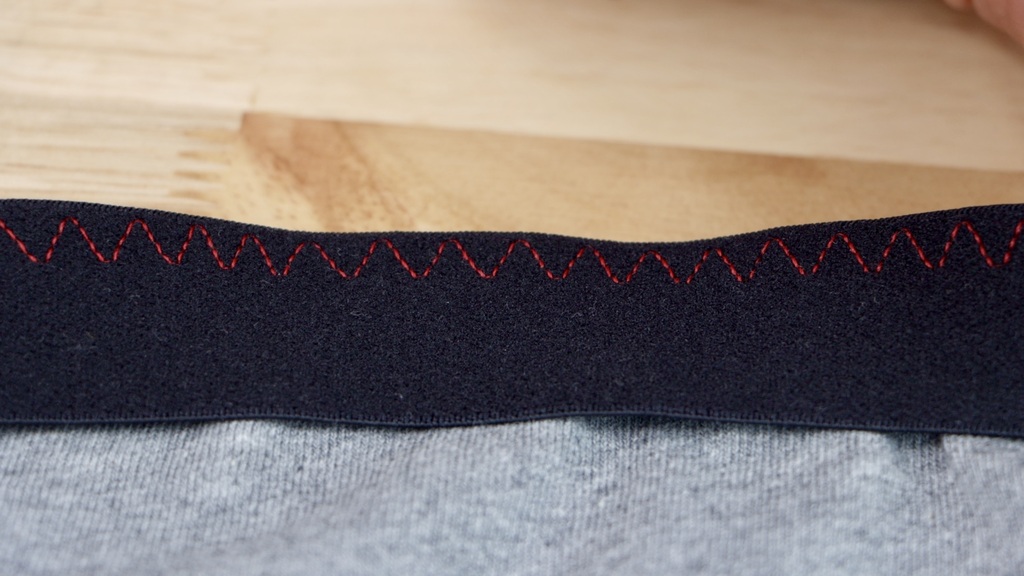
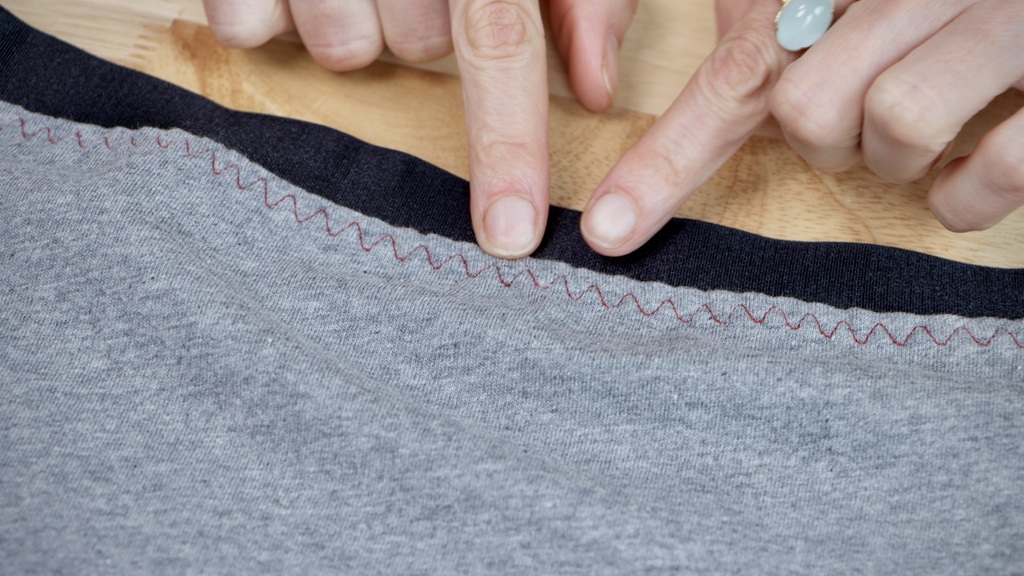
Look at how beautiful and flat that 3-step zigzag creates on the right side. It's strong enough to hold your elastic securely while still stretching with your body's movement.
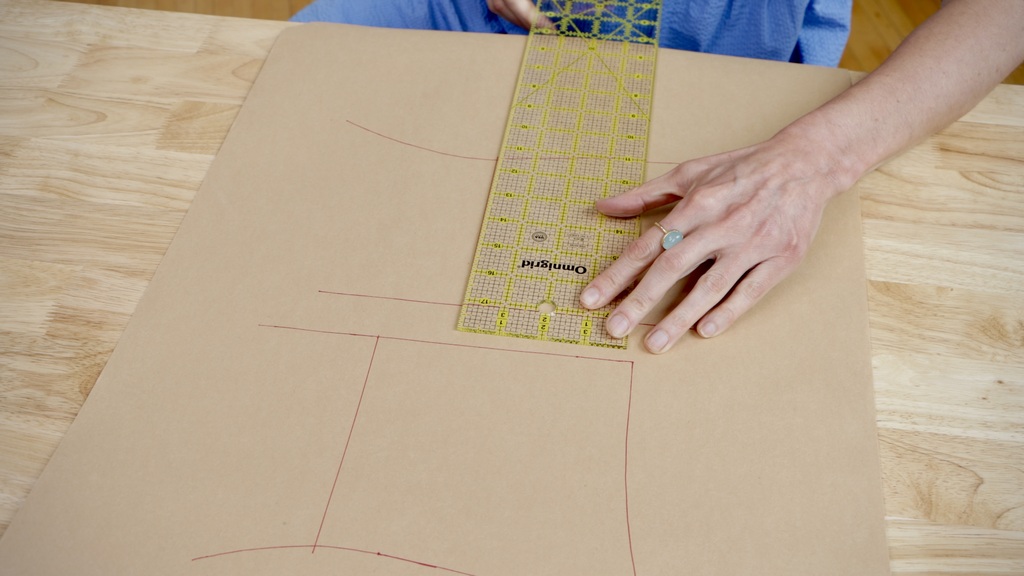
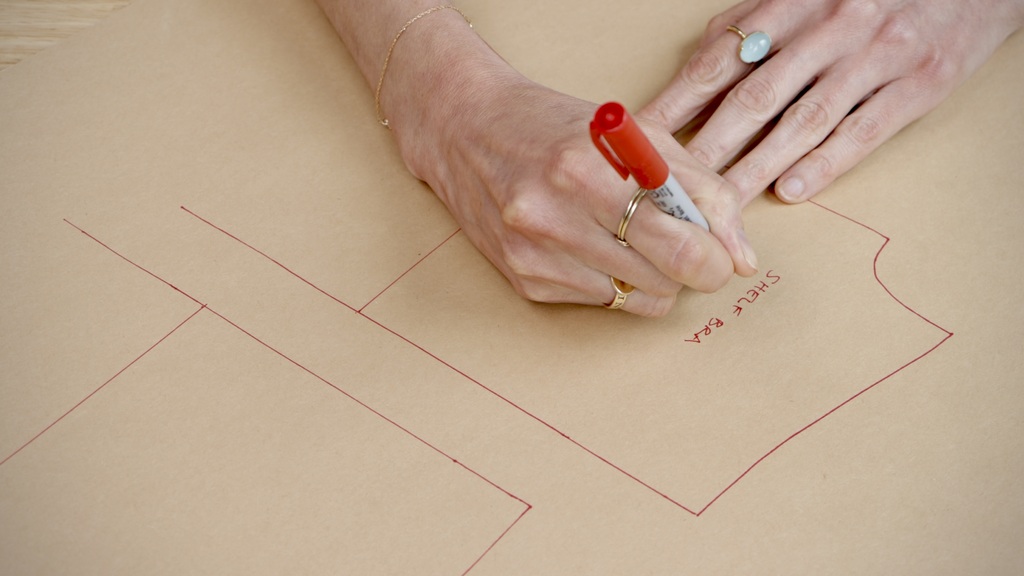
Problem #5: You Can't Find the Right Bra for Your Handmade Garments
This might be the most frustrating problem of all. You make a gorgeous strappy dress or tank top, then spend forever trying to find a bra that won't show. And don't even get me started on how uncomfortable strapless bras can be for an entire day.
Build Support Right Into Your Garment
Instead of fighting with undergarments that don't work, just build support right into your garment with a shelf bra. It's easier than you might think.
Cut a partial lining for your bodice that ends just under your bust. You can use the same fabric if it has good stretch and recovery, or choose a firm knit or powermesh for extra support. Sew this lining to the inside of your bodice.
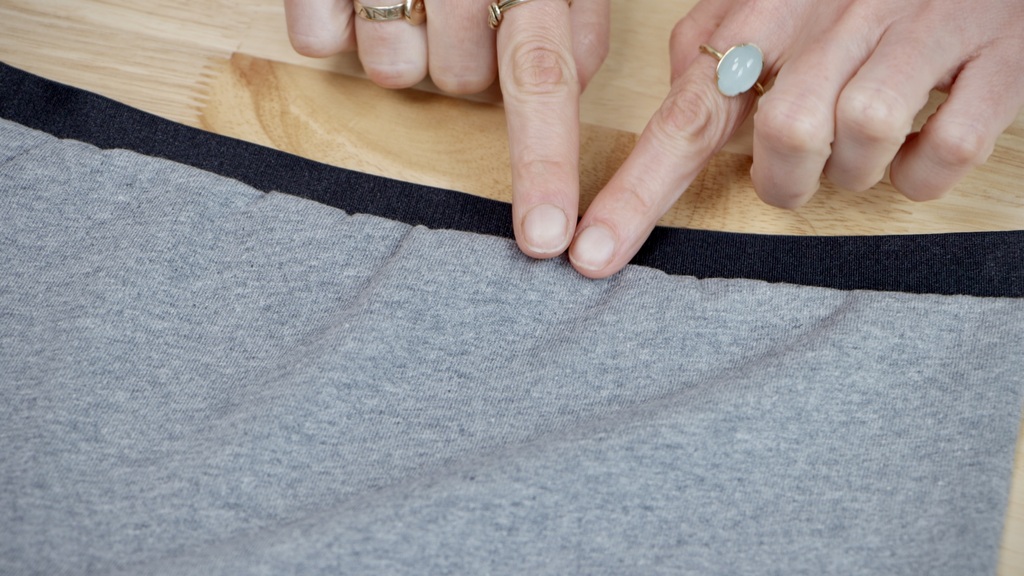
Now add a band of that plush-back elastic all the way around the bottom edge. Measure this carefully—wrap the elastic around your body and stretch it gently to find a comfortable fit, then cut it slightly smaller than that measurement. The elastic needs to be snug enough to provide support but not so tight it's uncomfortable.
Attach the elastic using the same method I showed you earlier—zigzag stitch with right sides together, flip it out, and topstitch with the 3-step zigzag.
Adding Extra Support When Needed
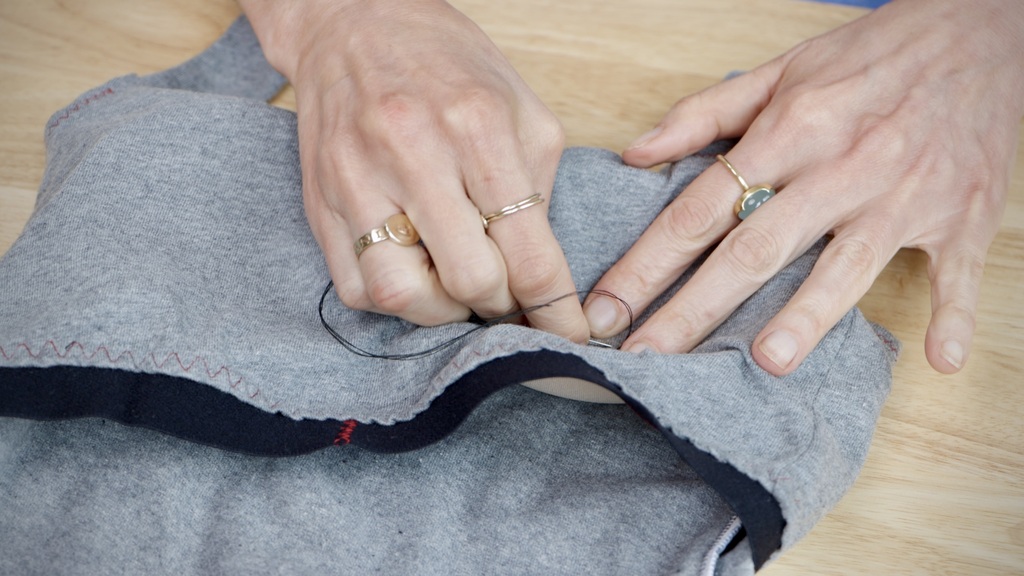
For even more support, you can add foam cups. Just slip them between the layers and tack them in place with a few hand stitches. Now you have a garment that provides exactly the support you need without any visible bra lines or uncomfortable straps shifting around all day.
The beauty of a built-in shelf bra is that you never have to think about it. No adjusting, no slipping straps, no wondering if your undergarments are showing. You just put on your dress and go.
If you want to try sewing a shelf bra but don't want to draft one yourself, the Citron pattern actually has a shelf bra built right in. Once you've sewn it once, you'll see how easy it is to incorporate shelf bras into lots of other projects too.
Transform Your Knit Sewing Today
These five solutions will completely change how your knit garments look and feel. Start with the twin needle for professional hems—it's the quickest way to instantly upgrade your finished projects. Then experiment with wooly nylon thread and the 3-step zigzag stitch. Once you're comfortable with those techniques, try incorporating plush-back elastic and shelf bras into your garments.
The difference these techniques make is dramatic. Your knits will look more polished, feel more comfortable, and last longer. Plus, you'll gain the confidence that comes from knowing your handmade garments can compete with anything you'd find in stores.
Ready to put these techniques to work? The Citron dress is a perfect pattern to practice several of these methods—it includes a built-in shelf bra and gives you plenty of opportunities to practice professional finishing techniques.

