
 Sign In
Home goods make the best scrap-busting projects. They look great in patchwork and often require smaller cuts of fabric, so you can use leftover yardage from sewing clothes.
I will show you how to make 3 different scrap-friendly sewing projects for your home. In the tutorial, I show you how to quilt a placemat, but you’ll get the dimensions you need for coasters or potholders.
Measurements
Common dimensions for making a placemat are 12” by 18” or 30 cm by 40 cm.
For making potholders, standard dimensions are 7” by 9” or 23 cm by 18 cm.
The standard dimensions for coasters are 4” by 4” or 10 cm by 10 cm.
Cutting
Cut 2 rectangles. They can be the same fabric or two different fabrics. If you want to make patchwork yardage, watch this video.
The first rectangle is the top of your placemat, and it will be about 12” by 18” or 30 cm by 40 cm.
The second rectangle is the back of your placemat. Since this project is quilted, you’ll want to cut this about 1” (2.5 cm) bigger than the top of your placemat, so you have 1/2” (12 mm) hanging over on each side.
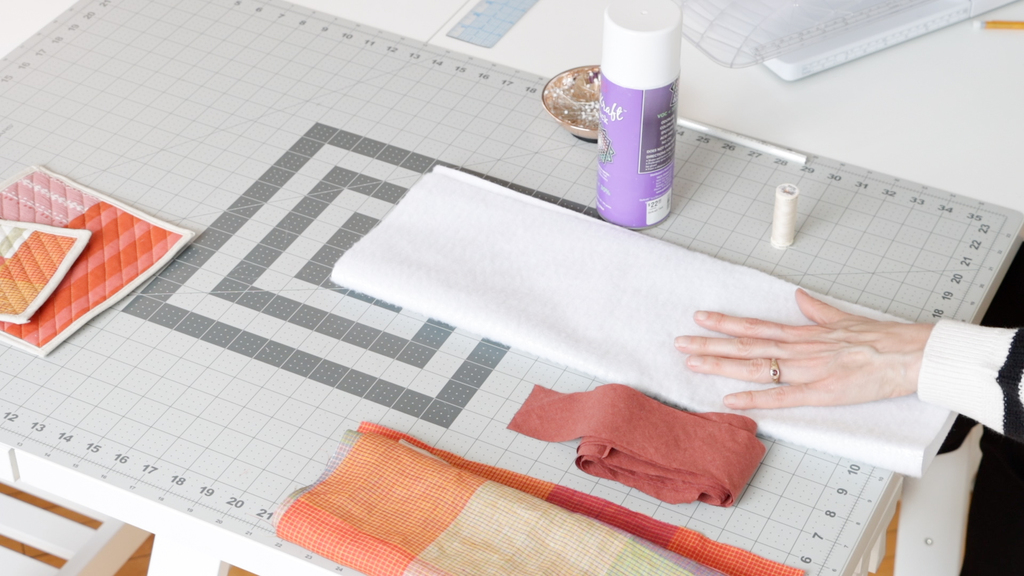
Next, cut your batting to be the same size as the back of your placemat.
Cut a length of bias tape big enough to go around the perimeter of your placement, and add 6” (15 cm) to give you overlap.
Make a quilt sandwich
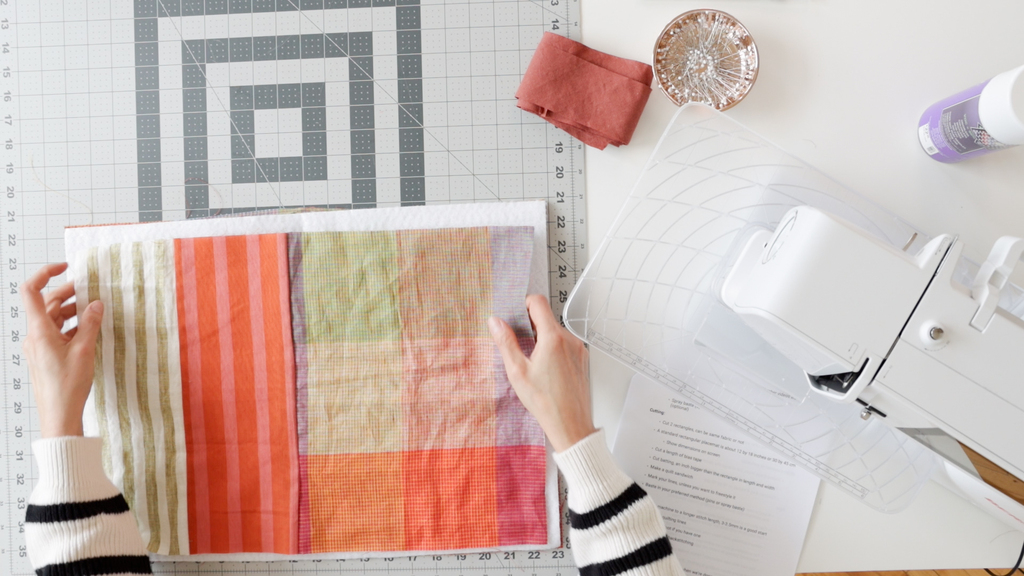
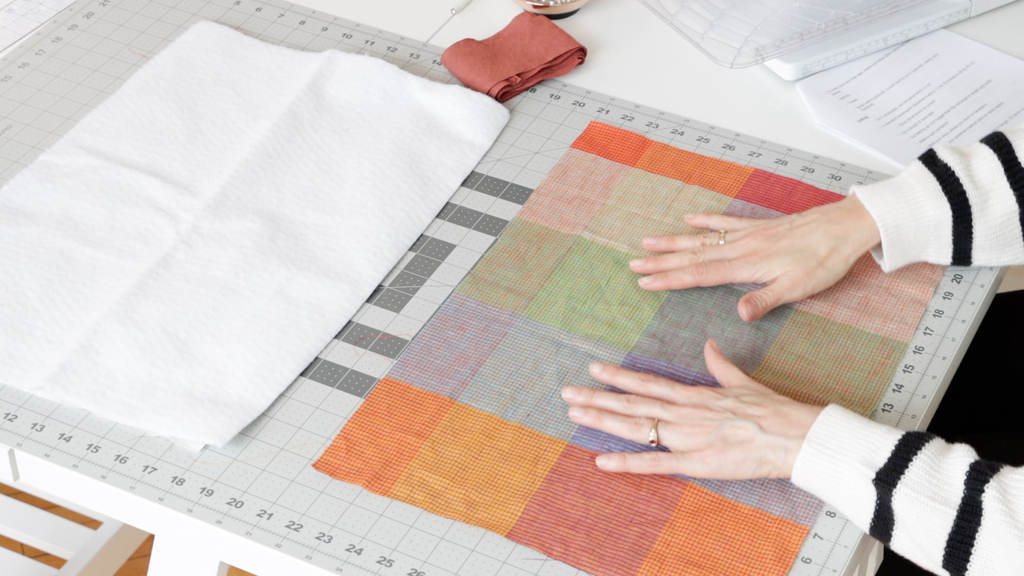
Now it’s time to make a quilt sandwich. Lay the back of your placemat with the right side facing down. Take your batting and place that on top, on the wrong side of your backing. With the right side facing up, place your top fabric on the batting, leaving about 1/2” on all sides.
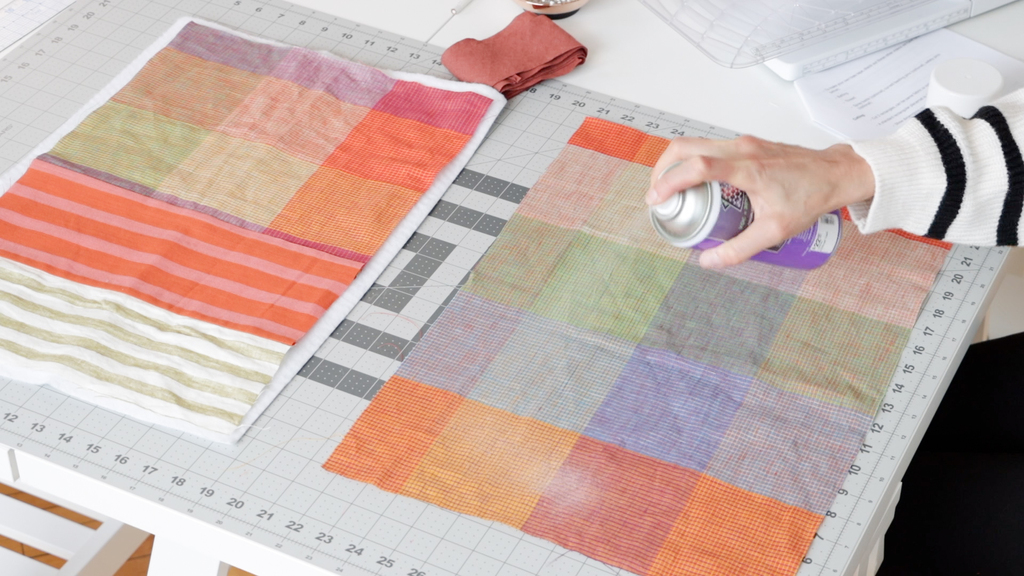
After layering your fabrics, you need to secure them to prepare for quilting. Use safety pins or curved quilting safety pins and pin all layers together every few inches. Or, you can use spray baste to fuse all the layers.
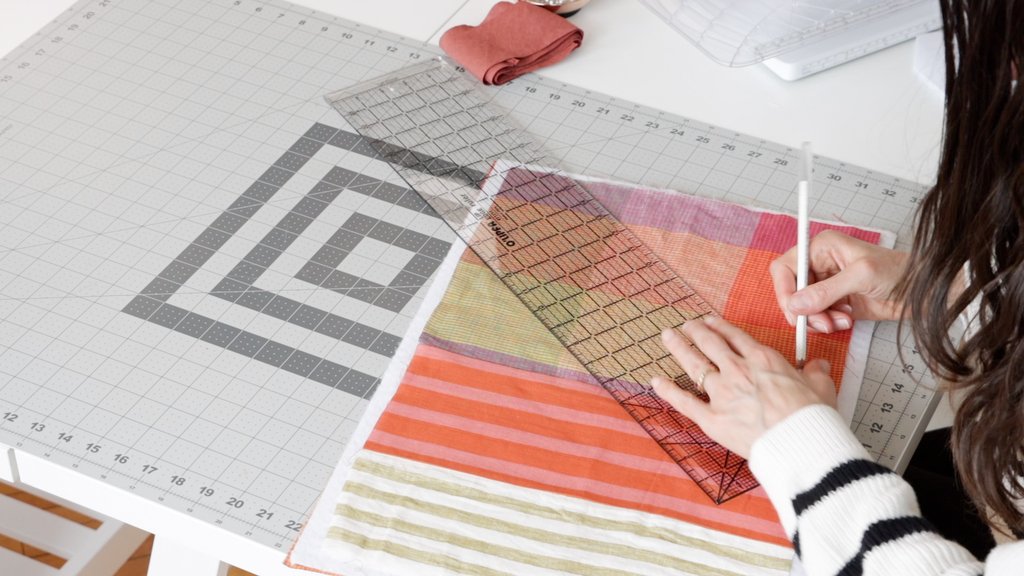
Using a clear ruler and a water-soluble marking tool, mark your quilting lines. You can also free quilt if you prefer.
Quilt
Set your machine to a longer stitch length, 3-3.5mm is a good start.
Stitch along the quilting lines, using a walking foot if you have one.
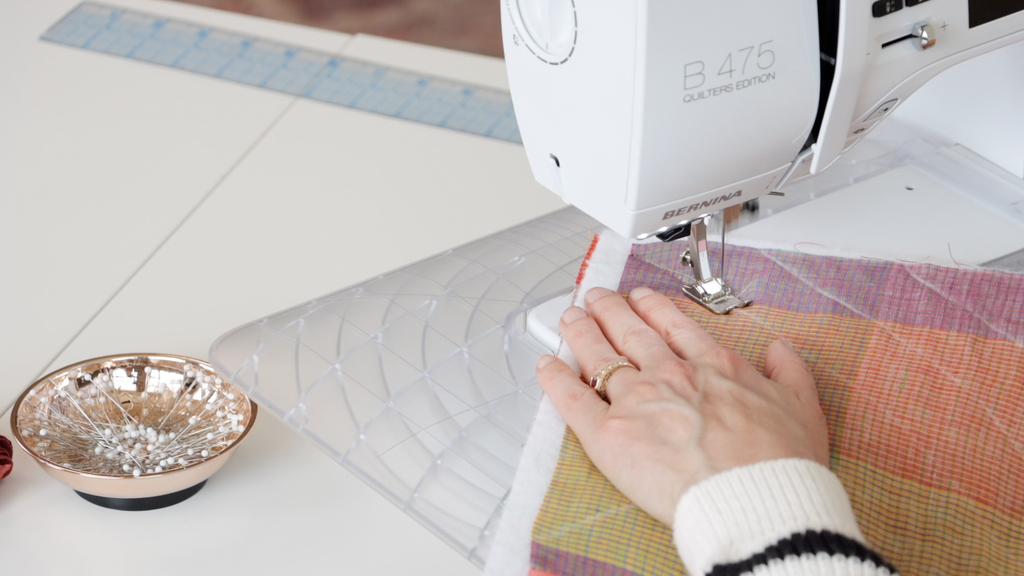
It’s easiest to start quilting in the middle of your placemat and work out from there. Don't worry about backstitching with each row.
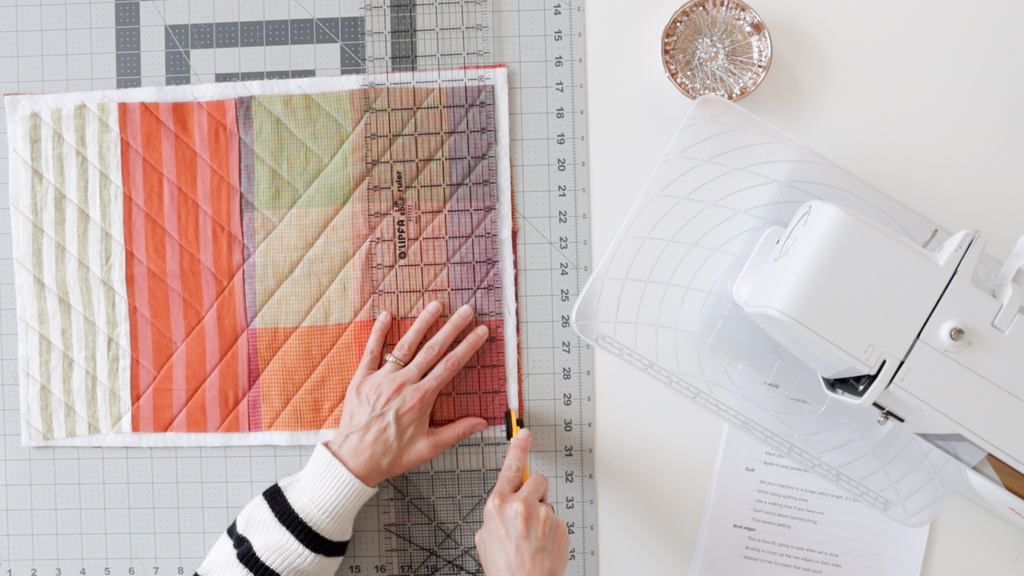
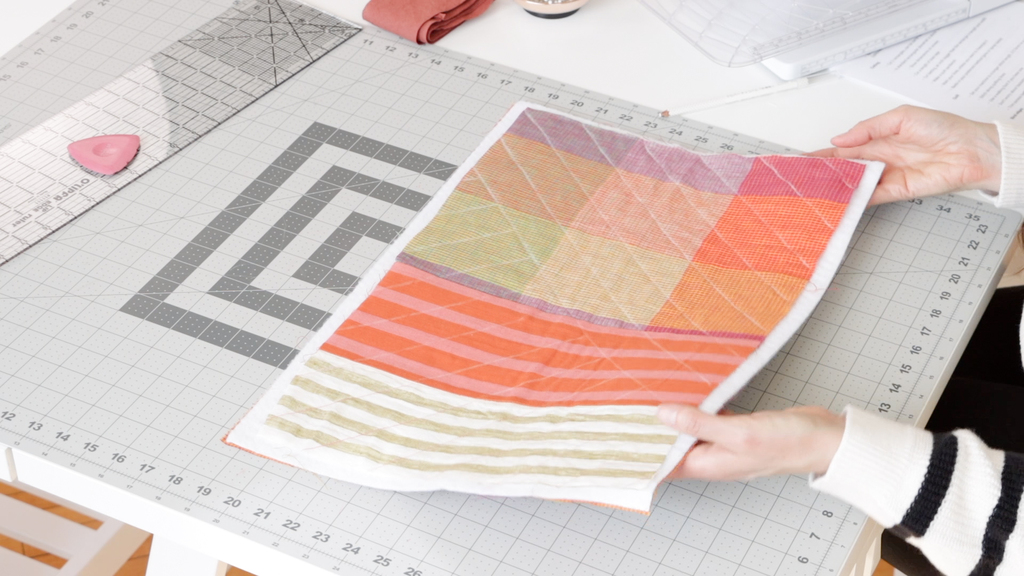
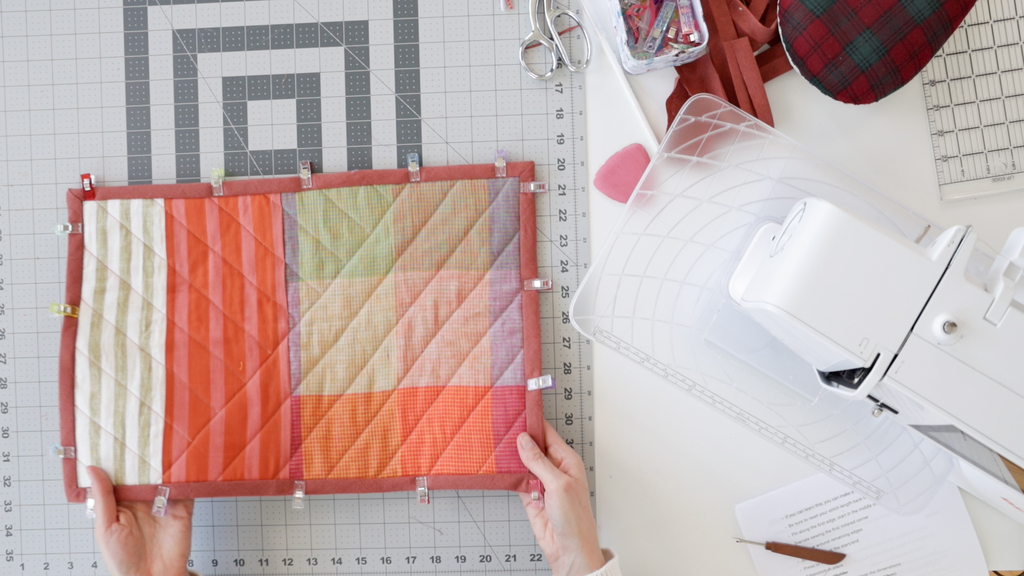
When you are done quilting, trim the excess batting and backing fabric, squaring the corners. Fabric can shift as you are quilting, which is why you added this extra length and width.
Binding the edges
The binding will cover up the raw edges on both sides, and the mitered corner will give a crisp point at each corner. If you can learn this technique, you can make a full-sized quilt!
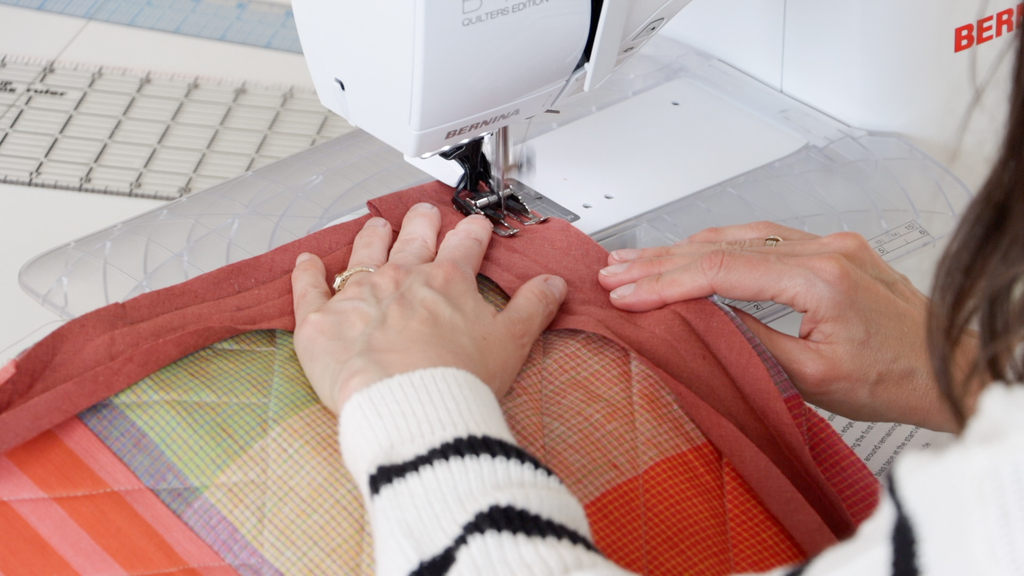
First, be sure to reset your stitch length back to normal length (about 2.5).
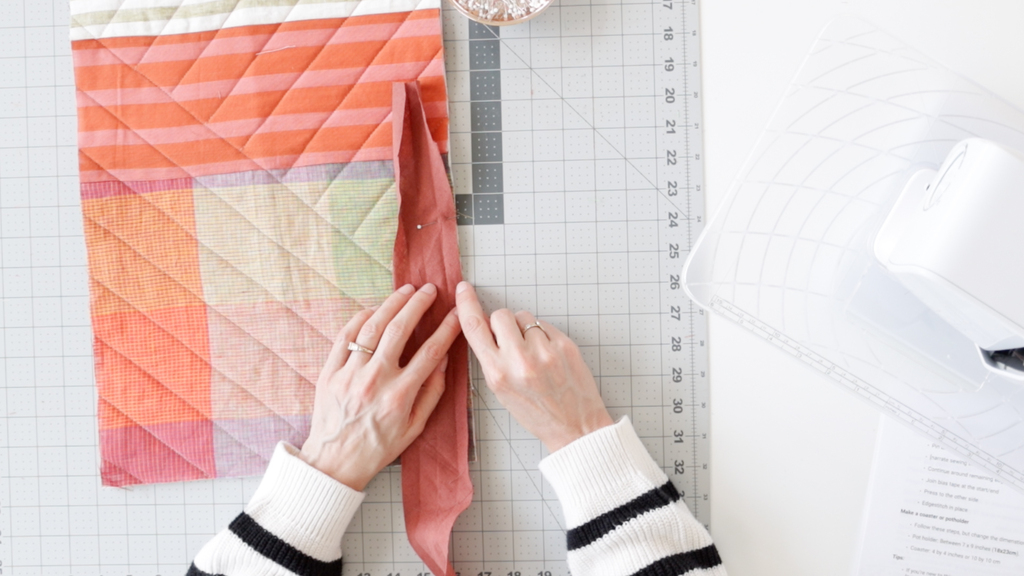
Unfold your bias tape and pin along the first edge, starting in the middle of the edge, leaving a little tail to join at the end.
Stitch from the pin to the first edge. Stop a little short of the edge. How short? Measure the width of the first fold of your bias tape. For example, if the first fold of your bias tape is at 1/2”, you’ll make a mark 1/2” from the edge of the corner and stop sewing there.
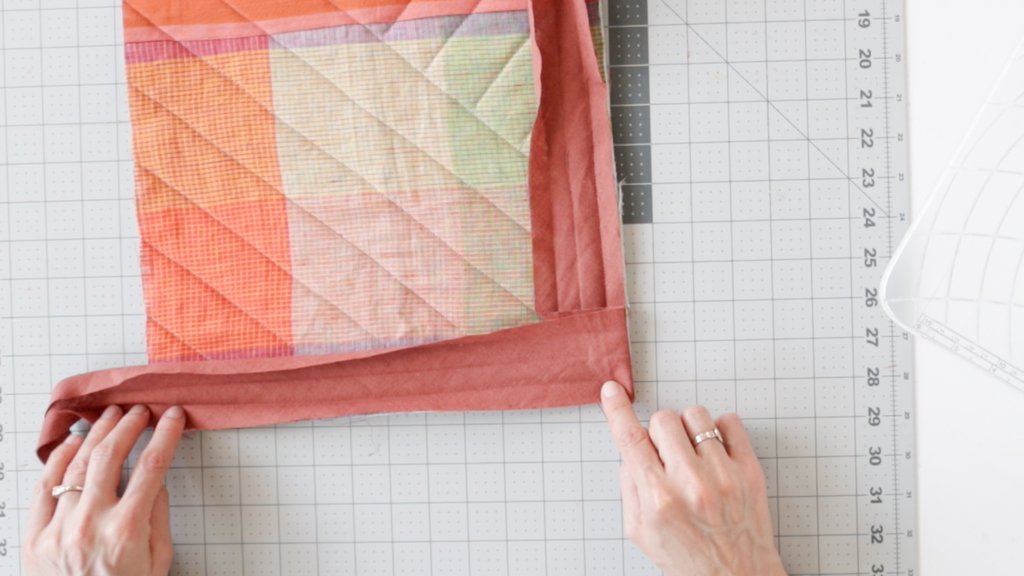
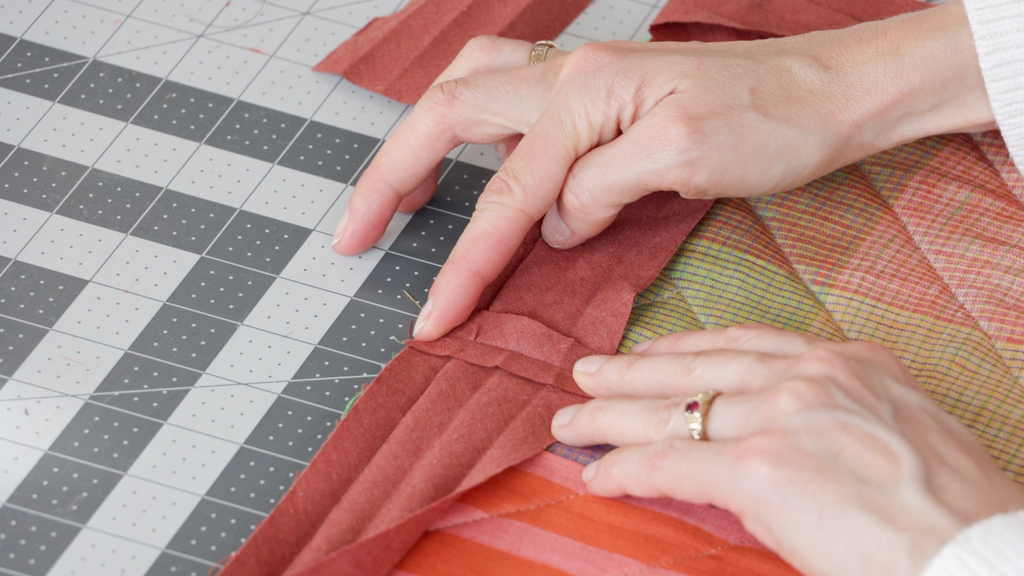
Next, fold the bias tape on a diagonal so that it points right to the corner at 45 degrees. Finger press in place.
Fold the bias tape back toward the next corner. Finger press.
Start stitching again 1/2” (or your fold measurement) from the corner and continue until you are 1/2” from the next corner. Repeat this for all remaining corners, stopping a few inches before you get to where you started.
Now it’s time to join the two ends of your bias tape. Lay them down so they meet along the edge, mark where they meet, or finger press where they meet. Sew the two ends together with right sides together.
Trim off any excess seam allowance and press the seam open. Stitch across the gap to secure the bias tape.
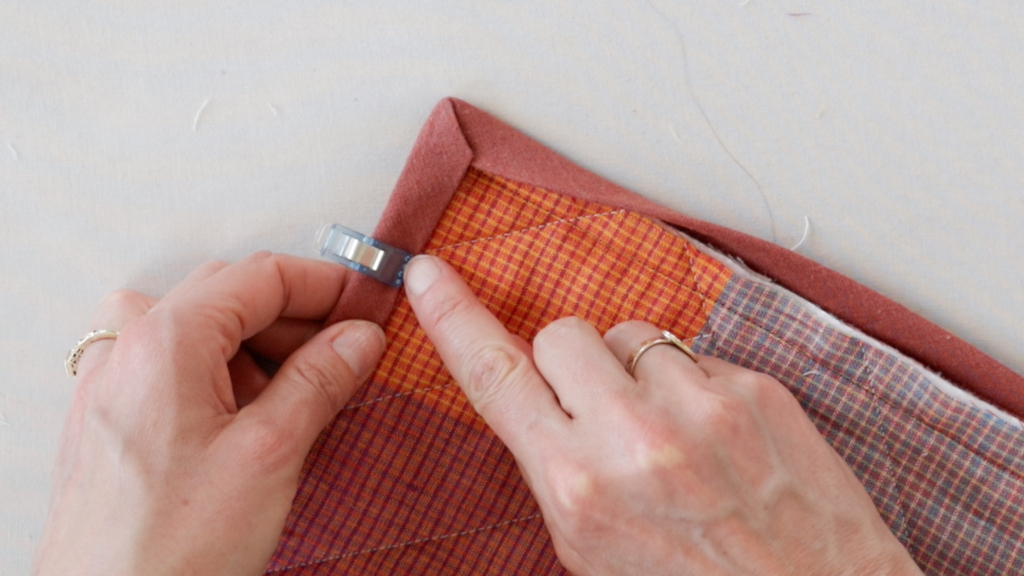
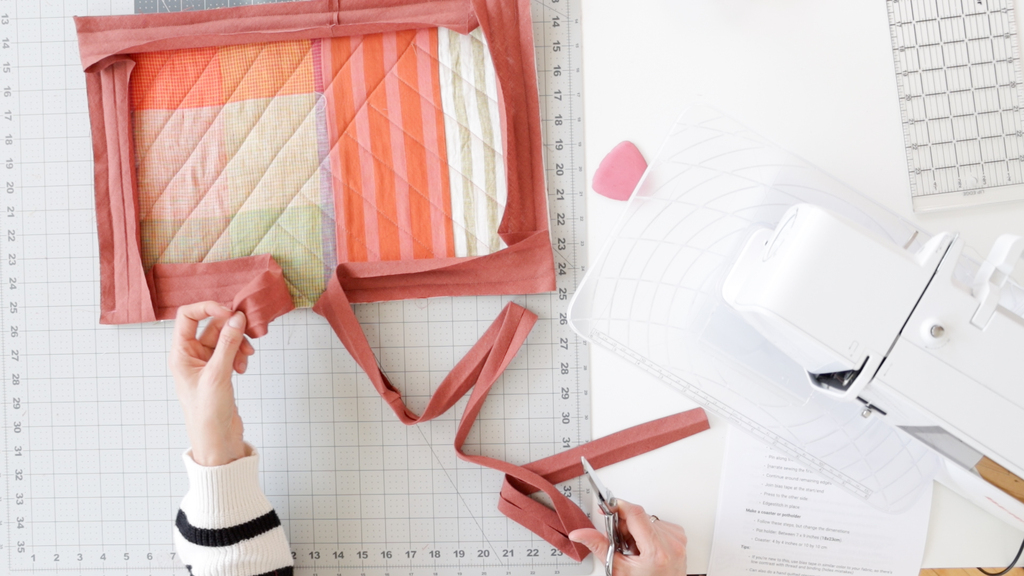
Flip your bias tape over to the other side, and you get this nice, clean mitered corner. Fold out the mitered corner and press them. Flip the project to the other side and fold your bias tape to form another mitered corner. Press. Hold it in place with Wonder Clips or pins as you press the rest of the bias tape, creating the miter at each corner.
Edgestitch along the edge, catching the underside and sealing all the quilting in the bias tape. Give everything a final press, and you’re done!

Sarai Mitnick
Founder
Sarai is the founder of Seamwork. She's been sewing for over 20 years and publishing patterns and writing for over a decade. Sarai believes that sewing is a powerful way to bring creativity into everyday life.

