Sign In
I’m a sewist who screen prints, and I’m always looking for new and accessible ways to screen print on fabric, using methods that can be easily achieved at home. Recently, I discovered discharge printing, a printing technique where the dye of the fabric is removed through a chemical process that uses a special ink called discharge ink. Discharge ink works like bleach. Have you ever seen a garment with a design that looked like it was bleached out of the fabric? It’s likely that it was printed with discharge ink. Discharge prints are soft, and because no ink is added to the fabric, they don’t fade or wash out.
In this tutorial, you will learn how to discharge print on fabric using a common household cleanser like Soft Scrub with Bleach Cleanser. We will do this with the stencil method of screen printing, which can easily be done at home.
Please note: Household cleansers with bleach are toxic and should be used with safety precautions. Products like Soft Scrub with Bleach can produce potentially harmful fumes. Work on this project outdoors to protect your lungs and wear respiratory protection, such as an acid gas respirator (a dust mask won't do it). Children should not participate in this project.
Gather Fabric and Supplies
Selecting Fabric
You can discharge print on knit or woven fabrics. With discharge printing, fiber content matters more than knit versus woven. Natural fibers will discharge, or allow the dye to be removed, while synthetic fibers will not. For example, with a 50% cotton/50% polyester blend fabric, the cotton threads will discharge while the polyester threads will not. So you can choose to avoid discharge printing on blends, or you may like the heathered effect it creates.
Another thing to consider when choosing fabric is color. A dark fabric will show the discharge effect better. Also, some fabric dyes discharge better than others, so it’s always best to do a few tests before diving in. Try printing on a few swatches from your fabric stash, as I did for this tutorial, and see how the results differ. Discharge effects can be hard to predict. Be aware that the final discharged color can vary, and that it likely won’t ever discharge to a true white.
Before you start, wash and press your fabric, as you should before any sewing project. Pre-washing rinses away any sizing and finishing chemicals on the fabric, which can affect printing results.
Printing Supplies
Many of the supplies for this project are common household items. You can get screen printing supplies from a local screen printing supply shop or online.
Look for screen printing supplies at a local screen printing supply shop if you have one nearby, or you can order these supplies online. This tutorial uses the most basic screen printing supplies—a screen and a squeegee—which can be reused many times over.
You will need a 20” x 24” screen that is approximately 155 mesh, and a squeegee that is an inch or two longer than the design you will be printing. A 12” or 14” squeegee is a good all-purpose size if you are unsure of what size to get.
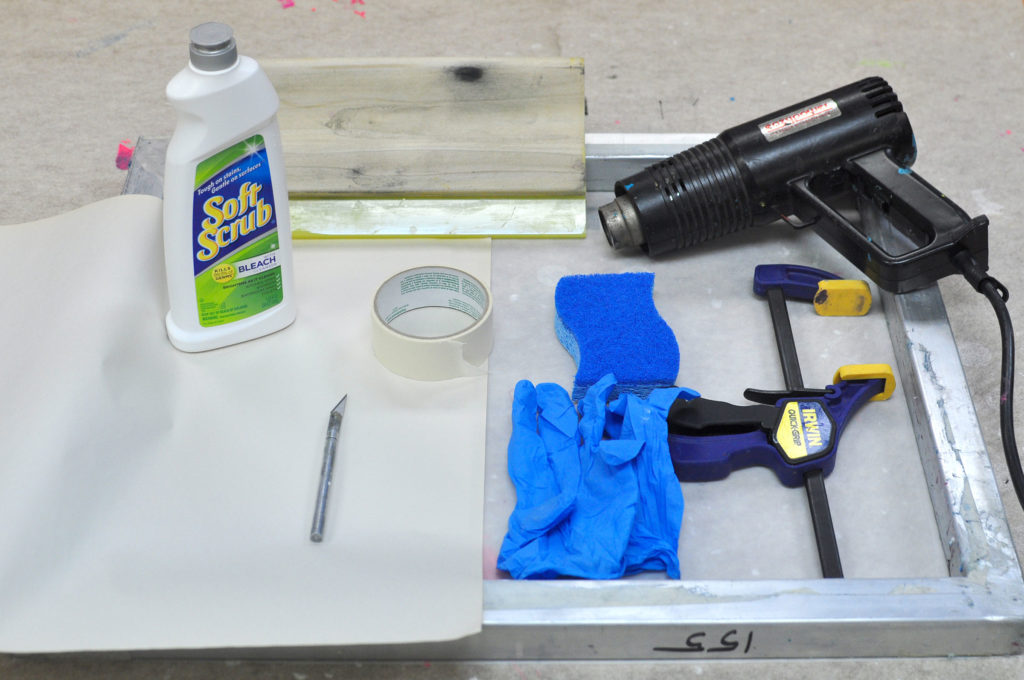
The other supplies that you will need are common household items:
Choosing a Cleanser
My particular experience screen printing with a cleanser has been with Soft Scrub with bleach, but similar cleansers with bleach should also work. Cleansers work best if they are fresh. Because its viscosity is similar to that of screen printing ink, the gel version of a cleanser with bleach is recommended if it is available.
Prepare Your Stencil and Screen
Decide How to Approach Your Print
Before you design your stencil, you will need to decide how you will use the fabric you will be printing. You can print small pieces of fabric, like I have done in this tutorial, and use the pieces as garment accents like pockets, button plackets, and yokes. You can also use the techniques described here and print continuous yardage using Seamwork Magazine’s Screen Printing a Repeat Geometric Pattern; just substitute the cleanser for the screen printing ink.
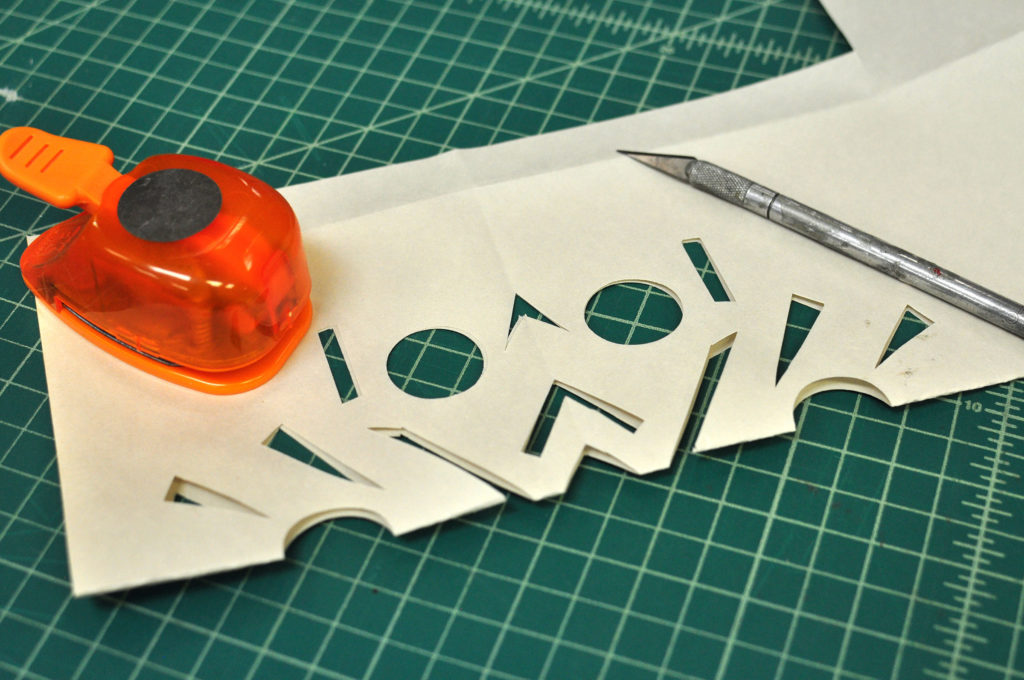
Use the snowflake method to create a stencil by folding and cutting with an X-acto knife and a circle shape cutter.
Why are we creating a paper stencil? Because it’s a simple way to create a screen printable design that doesn’t require a darkroom and photosensitive emulsion, which means you can use this technique at home. You can screen print anything that you can cut out of a piece of paper using an X-acto knife, scissors, and shape cutters.
There are a few different ways you can approach creating your stencil. Using a pencil or marker, you can draw a design onto your paper, keeping in mind that you will be cutting these shapes out on a cutting mat with an X-acto knife. You could also use shape cutters to clip out a pattern of shapes that will then be printed on your fabric. Or you could use what I am calling the snowflake method of creating a stencil, like I did for this tutorial, where you fold and cut the paper the way you would if you were making paper snowflakes. I’ve put together a stencils and paper cuts inspiration board so you can see the variety of possibilities in creating paper stencils.
Keep in mind that what is cut out of your paper is what will print. You can make the design small or large, up to the maximum image size of 12” x 18” (this maximum is so that there is a comfortable amount of space in the screen to print).
Tape the Stencil to Your Screen
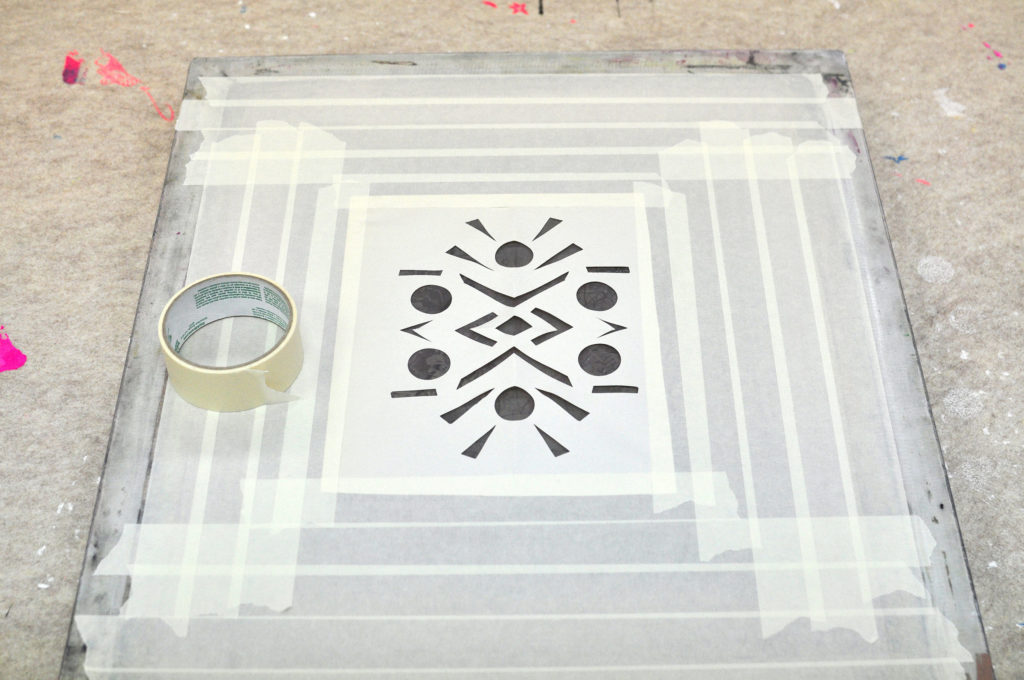
Center the stencil on the back of your screen. Using masking tape, tape around the edges of the stencil all the way to the edge of the frame of the screen.
Once you have cut a stencil you are happy with, the next step is taping the stencil to the back of your screen. First, center the stencil on the back of your screen. Using masking tape, tape around the edges of the stencil all the way to the edge of the frame of the screen. Tape over any areas that are not covered with your stencil and that you do not want to print. Don't worry if the stencil is not perfectly smooth when it’s taped to the back of your screen. It will smooth itself out when you print.
Prepare Your Fabric and Workspace
Preparing Your fabric
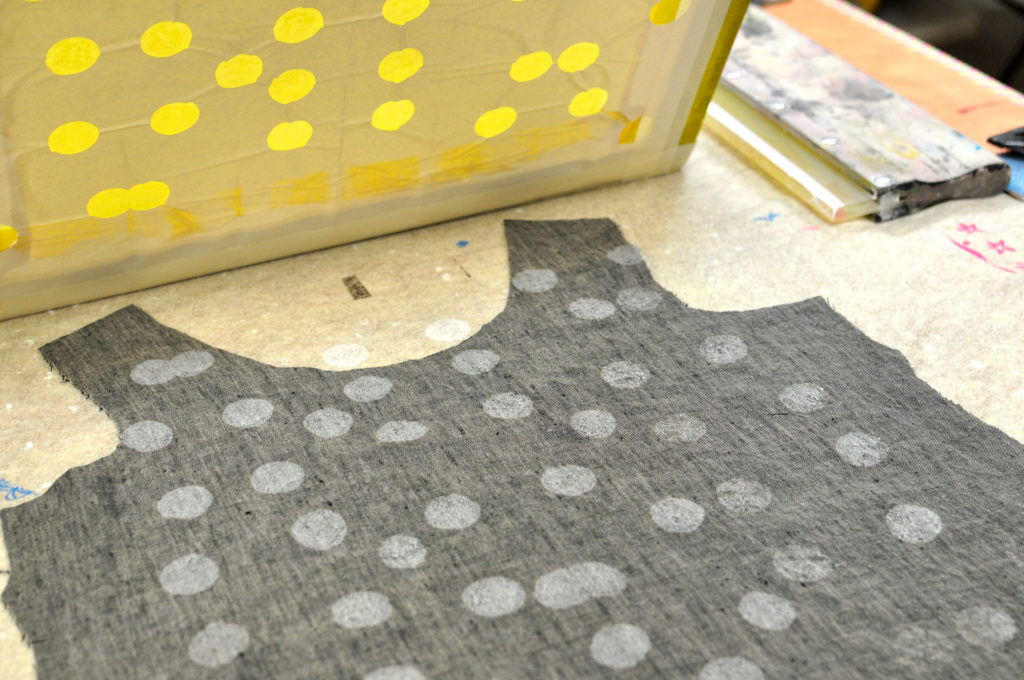
You can print in panels, or you may want to pre-cut your pattern pieces and print on them, as seen in this photo.
By now you will have decided how you’ll use the fabric you will be printing. Prepare your fabric based on how you’ve chosen to use it, and cut it into panels (12” x 12” squares, for example) or into pattern pieces (pocket, yoke, placket, etc.). You may also want to prepare a few small pieces of fabric for test printing.
Preparing Your Workspace
The bigger the space you have to work, the easier it will be, but a small space will work, too. Cover the table you will be printing on with the craft felt and tape it to table. The felt protects your table and allows more give under the screen while you print.
Along with the other supplies for this project, have the C-clamp nearby, which you will use to clamp the screen to the table. In lieu of a C-clamp, you can print with a friend, and they can hold the screen down for you while you print.
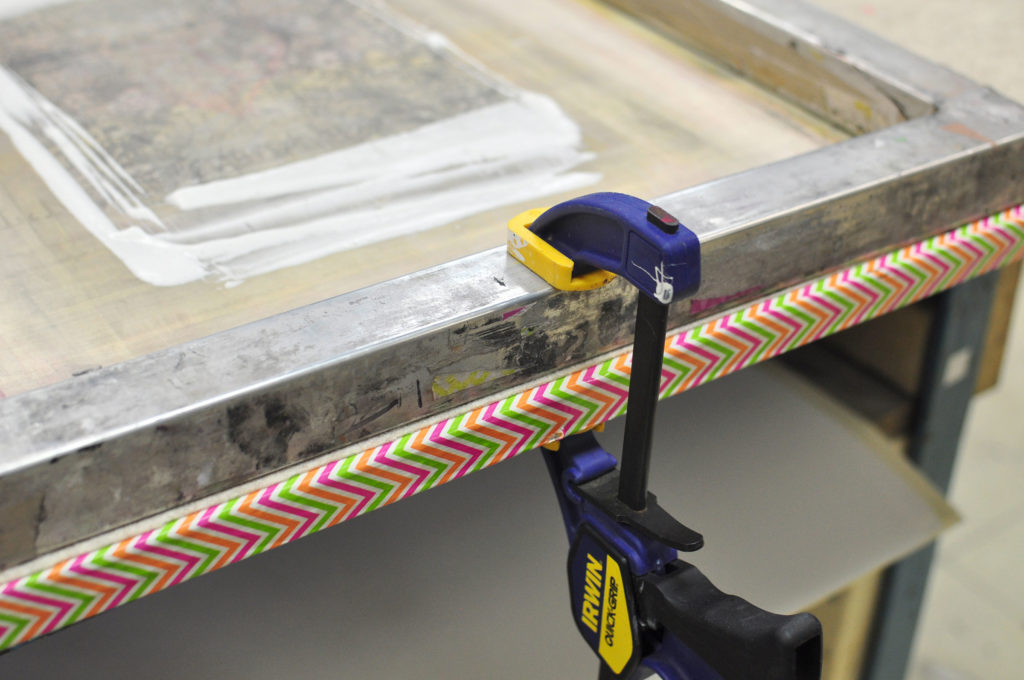
Once you have placed your fabric in the proper place under your screen,
clamp the screen to the table with the C-clamp.
Now you are ready to print. Place your fabric on the table, near one of the table’s edges, so that you will be able to clamp the screen to the table. Place the screen on top of the fabric and center your paper stencil so that it is in the screen over your fabric. Once it’s in place, clamp the screen to the table with the C-clamp.
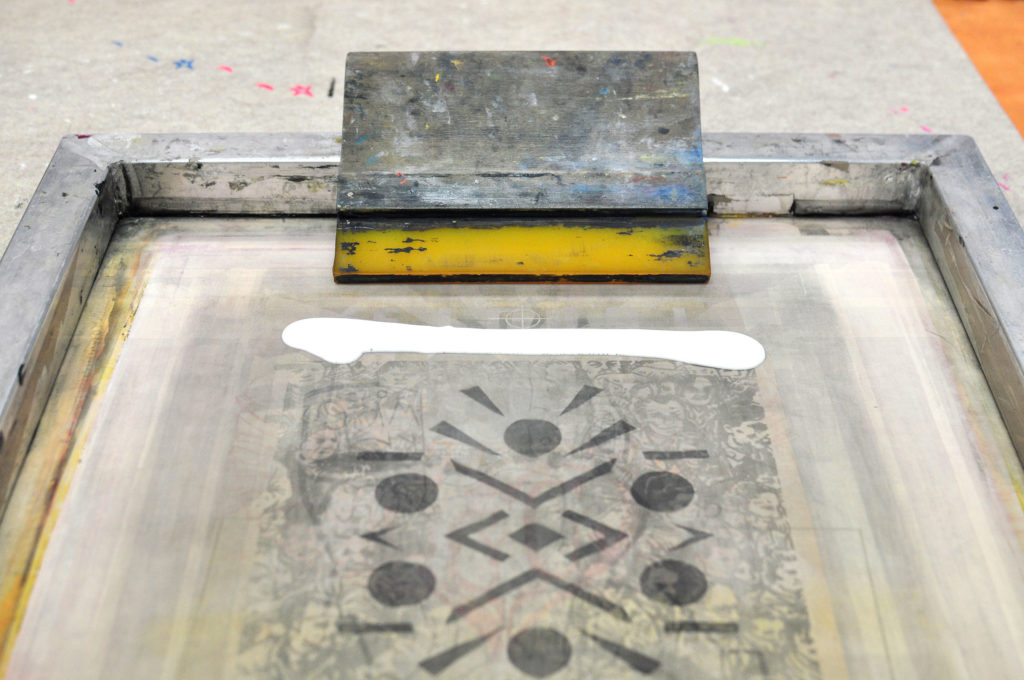
When you are ready to print, squirt a line of the cleanser on the screen. Press down into the fabric with the squeegee then pull the squeegee toward you, bringing cleanser along with it.
Put on rubber gloves to protect your hands from the cleanser. Squirt a line of the cleanser onto the screen. Hold the squeegee at a 45-degree angle with the handle angled towards you. Press the rubber edge of the squeegee down into the fabric and pull the squeegee towards you. As you do this, the thin rubber edge of the squeegee should spread a thin layer of cleanser over the stencil. Do this a few times. The cleanser will be pressed through the open areas of your stencil and onto your fabric. When you are finished printing, unclamp and lift the screen. The fabric may lift with it. If this happens, you can spray the felt with spray tack to make your fabric stick to the felt, or you can tape your fabric to the felt with masking tape.
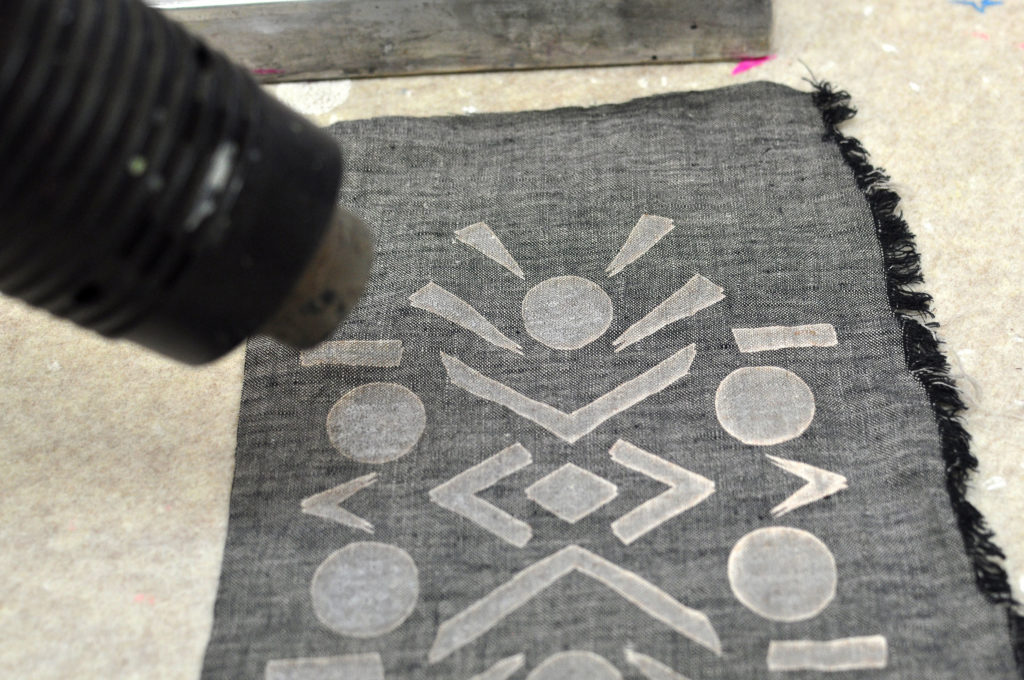
Blow dry your fabric after printing to activate the discharge effect.
Once you’ve lifted the screen, take a look at your fabric. Because the cleanser is transparent, your print may be hard to see at first. As the cleanser settles into the fabric, you will see your design appear on your fabric before your eyes. Because you’ve removed the dye of the fabric, and have not added to its surface as you would with ink, no heat-setting is needed. For more intense results, you may add heat to the fabric with a blow dryer, but be aware that adding heat to the cleanser will produce potentially harmful fumes. Make sure you are working outdoors and wearing respiratory protection, like an acid gas respirator.
Playing with Color, Texture, and Consistency
There are lots of fun things you can play around with while discharge printing. You can add water-based screen printing ink for textiles to the cleanser, which will allow you to print with color. This technique both removes the dye of the fabric and adds color to those areas of removal, and can have interesting results. If you do add ink, keep in mind that you will need to heat-set your fabric (follow the ink manufacturer’s suggestions). You can also discharge print on the wrong side of your fabric, which creates a subtle distressed effect on its right side.
Clean Up and Wash Your Fabric

A few of the fabric pieces I printed for this tutorial. You can see how the discharge effect can vary based on the fabric.
Clean your screen shortly after printing to protect its mesh from the bleach, using a sponge and warm water, in your bathtub or shower. Wash or at least rinse your fabric shortly after printing to stop the bleach action so it doesn't eat through your fabric. Once the fabric is dry, it’s ready to be used for your project.

About the Author
Melissa Dettloff is a seamstress who screen prints in Detroit, Michigan. View her portfolio at melissadettloff.com.