Sign In
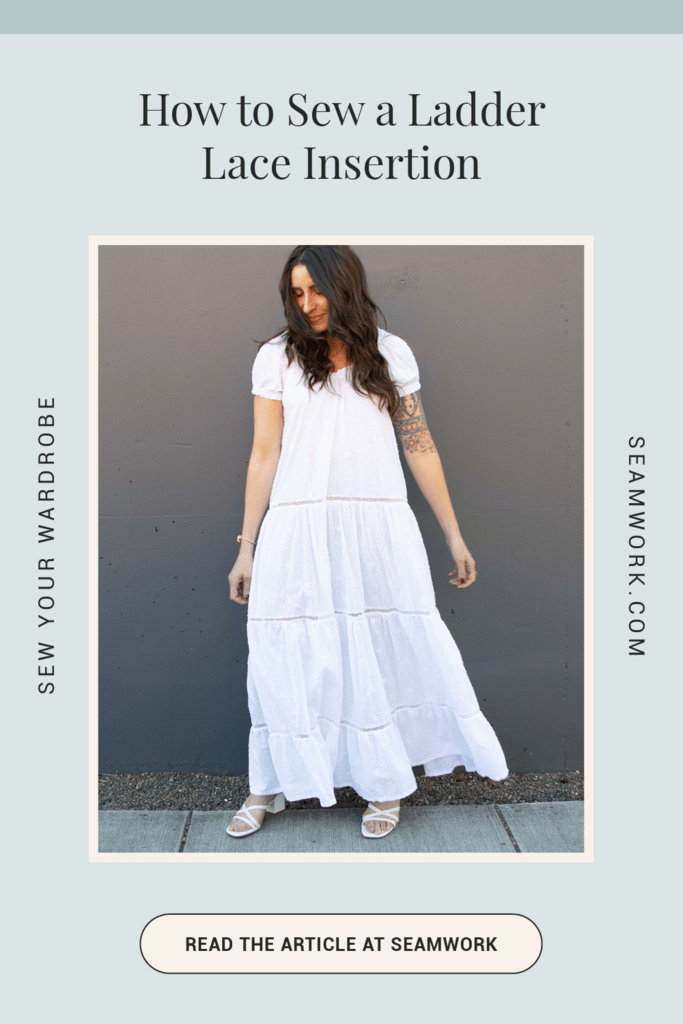
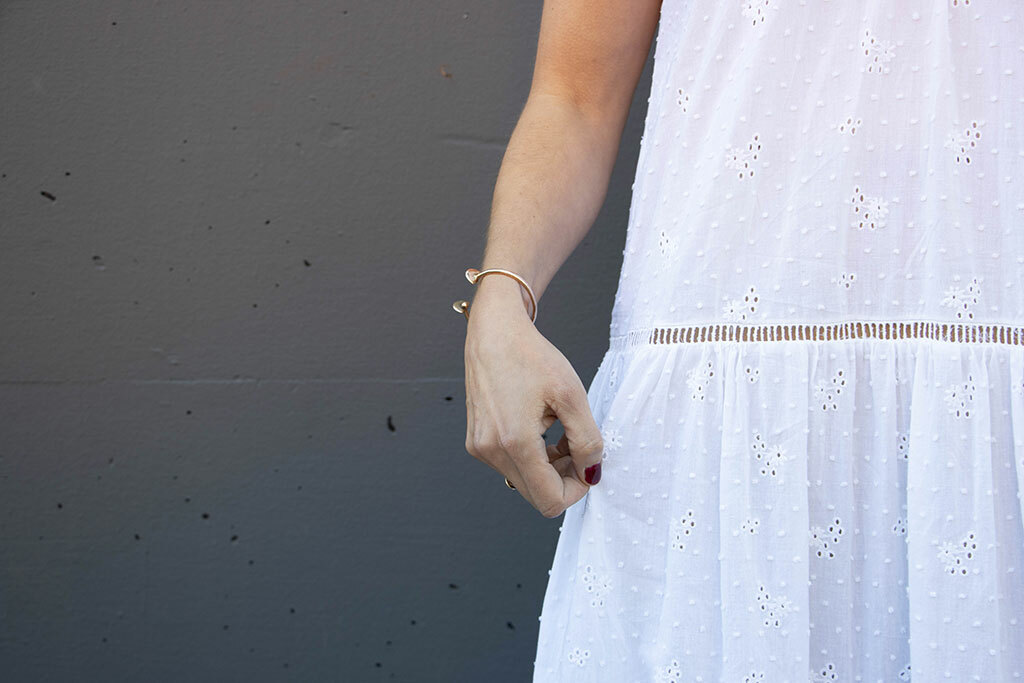
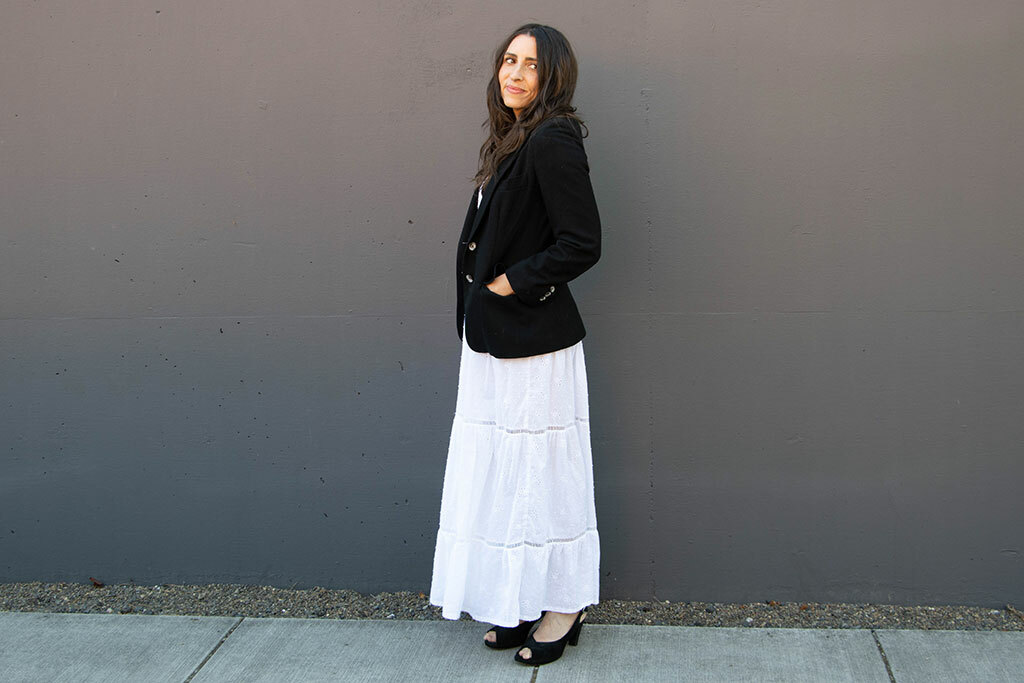
A simple vintage detail can become the focus of an entire garment, like this ladder lace insertion on a tiered dress. The subtle lace between each tier completely transforms how this dress looks and wears.

Want to learn how to sew this look?
In this video, Sarai shows you how she made the Madhu top into a tiered dress. And below is a step-by-step ladder lace insertion tutorial on adding this detail to your sewing projects.
How to make a tiered dress
Before you insert your lace, you’ll want to prepare your pattern. If you have a pattern with tiers or a seam for a peplum, you can skip to the tutorial below. But if you need to create tiers, as Sarai did for the Madhu top, follow these three steps.
You can also reference this pattern hack if you need more visuals.
- Decide if you want a drop waist. If you don’t shorten the top, you’ll get a drop waist silhouette, like Sarai’s dress. You could also shorten it so that the bodice sits at your natural waist.
- Cut three tiers (just big rectangles) for the skirt. Each tier is 1 1/2 times the width of the one above.
- Attach the lace to the top tier, then gather and sew on the next tier down.
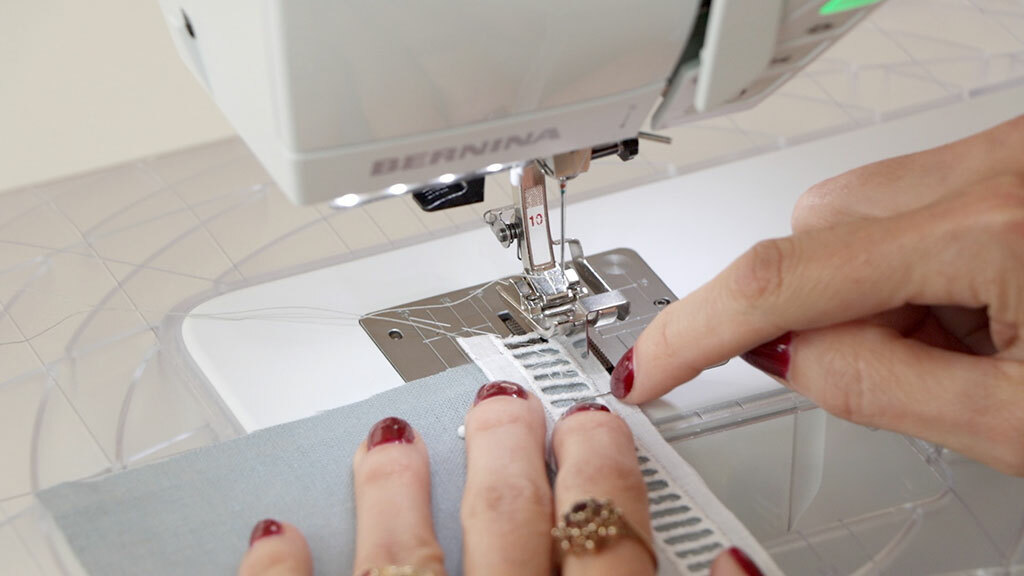
How to sew a ladder lace insertion
This tutorial uses a technique called a rolled and whipped seam.
You'll need:
- An edgestitch foot
- A straight-stitch or all-purpose foot
- Two pieces of fabric
- Your ladder lace insertion
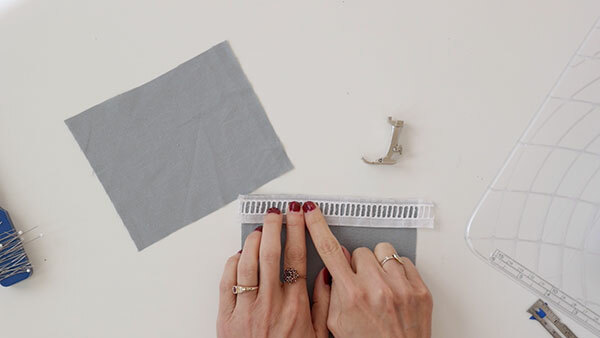
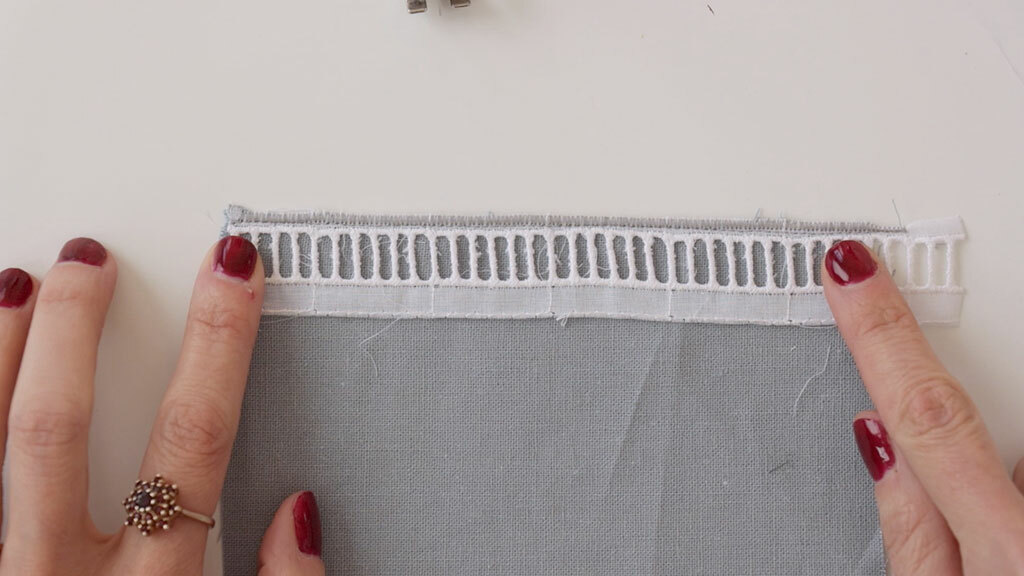
- With right sides together and the lace on top, use your edgestitch foot to sew together along one side of the lace edge. Then, position the blade of the edgestitch foot right up against the embroidered edge of the lace.
- Trim the SA to 1/4 inch (6 mm).
- Change to an all-purpose foot.
- Set your machine to a wide, short zigzag. The length should be between 1/2 - 1, and the width 2 1/2.
- Position your needle so that the left part of the stitch is right up against the first line of stitching. The right part should be past the raw edge so that it will enclose the seam.
- Stitch the entire seam.
- Press the seam towards the fabric.

If you're making a tiered dress like Sarai’s, you'll need to gather the other side before stitching it to the lace with a straight stitch.
And that’s how easy it is to add this stunning vintage detail! You can add one row to a blouse, like a peplum, or you can experiment with panels in almost any way you can imagine.
Want to see more tutorials like this? Leave a comment on our YouTube video with your ideas!
Love the article? Pin it for later.