Sign In
I've heard it said that if you're old enough to have worn a style the first time around, you're too old for it this time. This is plainly nonsense, but I think of it every time I see a fantastic 90s throwback. I admit, instead of horror at seeing the styles of my adolescence labeled "vintage," I feel nothing but unapologetic delight, like I'm greeting an old friend. It's all I can do not to tell that stylish 16-year-old that a.) she looks awesome, and b.) I wore the exact same outfit to see No Doubt in 1996, and she might consider roll-on body glitter for verisimilitude.
The overalls, the crop tops, the combat boots: I love it all, but I found myself specifically hankering after a classic 90s slip dress for summer. One that was easy-going and comfortable, and maybe that little bit cool still (even without the ripped fishnets this time around). I've made a few Savannah camisoles for lingerie and sleepwear, so I know I like the fit. It was just a question of lengthening to a dress, changing the neckline finishing, adding a built-in bra, and in this case, choosing the right fabric.
How I Reimagined the Pattern
- Lengthened 19"
- Straightened the hem
- Drafted a partial lining for a built-in bra (see tutorial below!)
- Cut on the straight grain using a stretch woven fabric
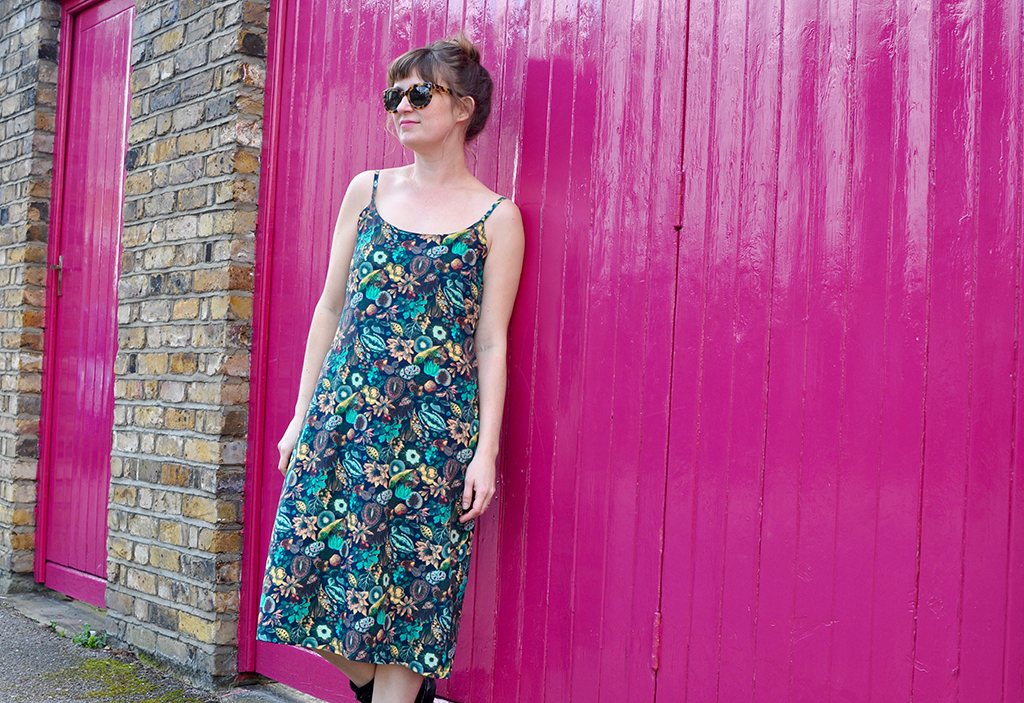
The first order of business when lengthening a top to a dress is to make sure you know where your hips will be, and that they have enough room. I drafted my new pattern in the same way as this recent pattern hack, adjusting for 2" total of positive ease at the hip. I've added 19" in length, almost straight down from the hip, for a column-shaped midi.
Other Ideas for a Savannah Dress:
- Shorter and flared for a flirty trapeze shape (dare I suggest a daisy print?)
- Full-length with side slits for Old Hollywood glamour
- A flounce such as this one seen on the Catarina dress
A major change I made was to cut my fabric on the straight of grain. The Savannah pattern is designed to be cut on the bias and, as you probably know, fabric stretches on the bias. I compensated for this by using a stretch woven fabric. I'm terribly thrifty with my cutting layouts, and I don't always love the way bias-cut fabric clings for daywear, so this lovely fabric from my stash was a perfect solution for me.
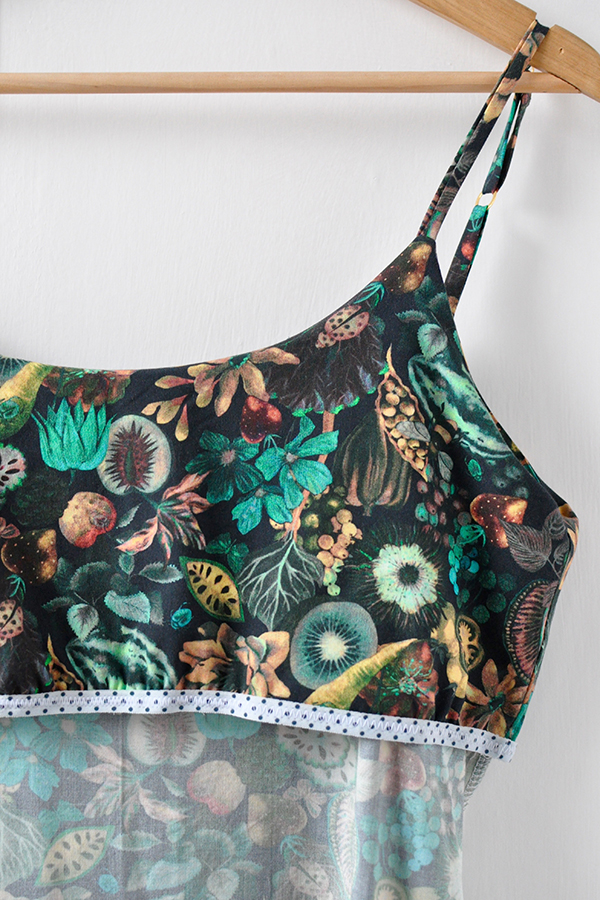
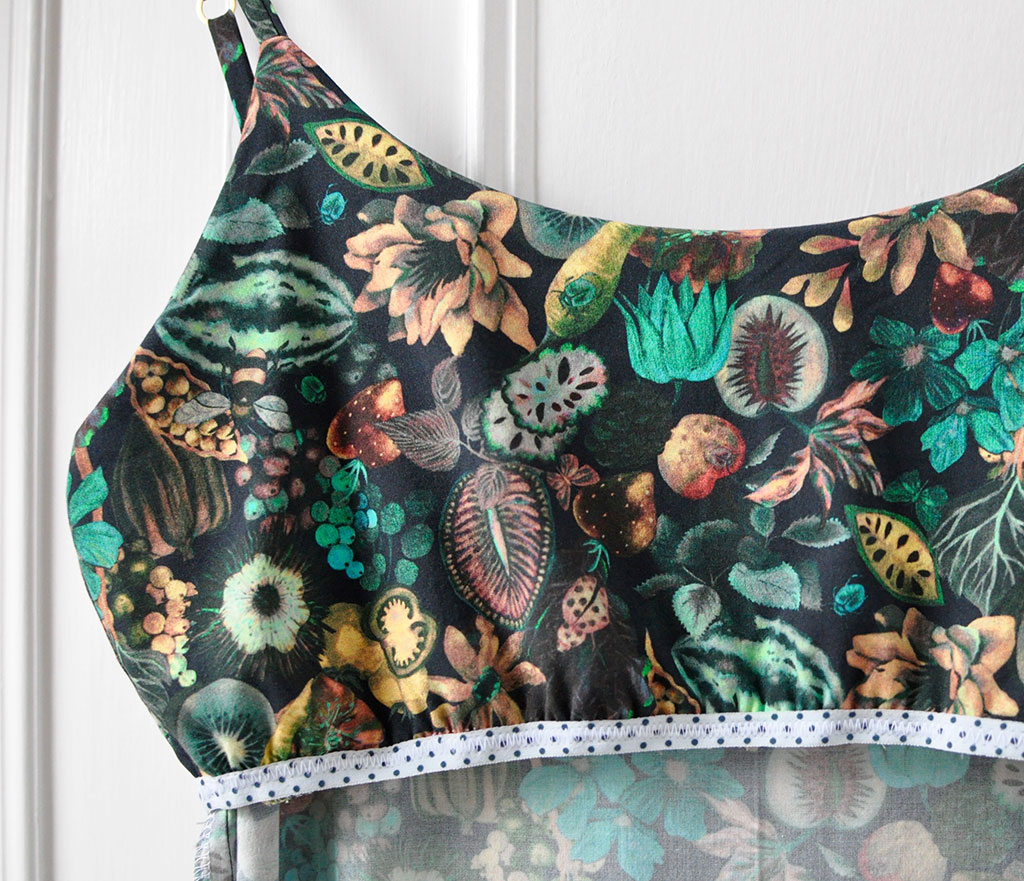
I knew I wanted to draft a facing for a simple neckline finish, but I also thought I might make it of a length that would give me a little more modesty-value. This idea eventually turned into more of a light, built-in bra. For this, I simply mirrored the main camisole piece, cutting off just under the bust, and finishing with soft lingerie elastic. If you want to draft your own built-in bra, read the tutorial below!
How To Draft a Built-In Bra
A built-in bra can lend support and comfort to delicate dresses, especially if they are sleeveless. Below are a few tips before you start.
- If you are bustier, consider using knit fabric for your built-in bra so that you can draft it with negative ease for a closer fit and less bulk.
- Sleeveless dresses, tanks, and camisoles are great options for adding built-in bras so you can avoid your bra straps showing.
- For serious support, a built-in shelf bra may never completely cut the mustard, but you could experiment with higher performance fabrics, such as Powernet.
Drafting Instructions
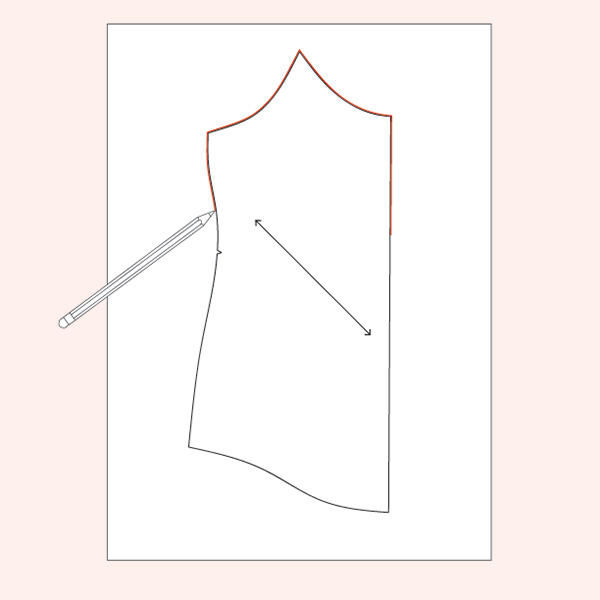
1. On a clean sheet of pattern paper, trace the upper portion of the front bodice.
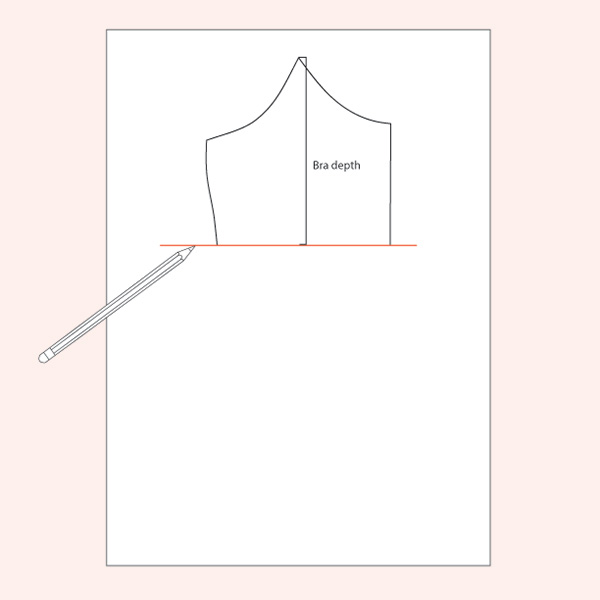
2. Measure the bra depth—you can determine this by measuring your body from where the neckline would fall to where you would like the bra band to fit. Draw a line perpendicular to the center front at this point.
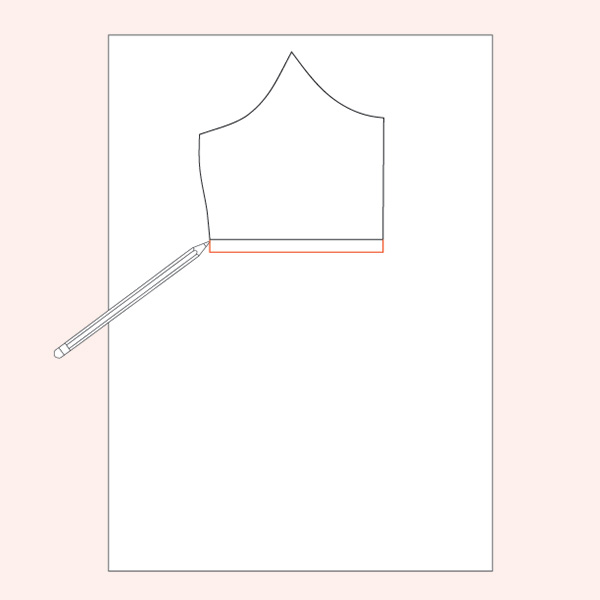
3. Add seam allowance to the bottom edge of the bra.
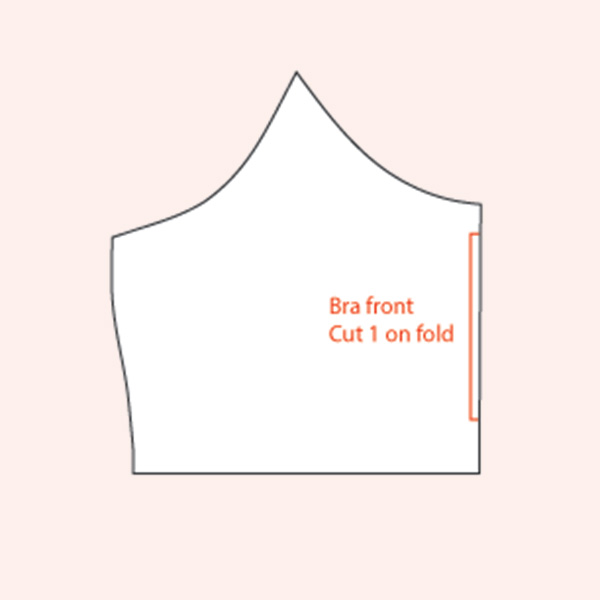
4. Label the bra "front bra, cut 1 on fold.
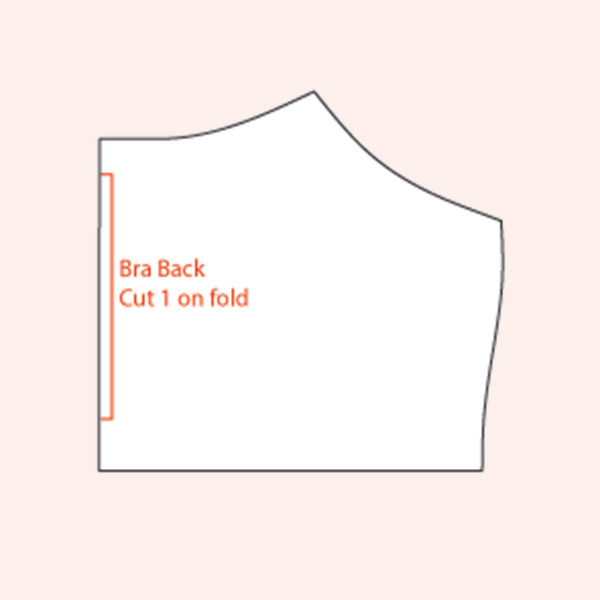
5. Repeat steps 1-4 to create the back bra using the back bodice as a starting point.
Sewing Instructions
1. With right sides together, sew the front bodice to the back bodice at the side seams.
2. Finish the seam allowances separately and press open.
3. Assemble the straps.
4. Align the raw edge of the neckline with the raw edge of the straps and baste in place.
5. With right sides together, sew the front facing to the back facing at the side seams.
6. Finish the seam allowances separately and press open.
7. Sew the lingerie elastic into a continuous loop.
8. Attach the lingerie elastic to the bottom edge of the bra. You have two choices here: you can apply the elastic once to the wrong side of your fabric, flip over to enclose the raw edge fully, and sew again on the right side. Alternatively, you can finish the bottom fabric edge first with a serger, and then apply the elastic along that edge directly on the right side of the fabric. The latter method is faster, but perhaps not as tidy. Either way, make sure it's the soft side of the elastic that will be against the skin.
9. With right sides together, sew the bra to the neckline.
10. Clip and grade the seam allowance.
11. Understitch along the bra catching the seam allowance beneath.
The Results
As for wearing this dress, I'm also aiming for a minimum of effort: maybe layered with a Quince or an Audrey on breezier days. Isn't that the essence of 90s cool, in the end? It all looked so effortless. That body glitter did not roll itself, mind, and I have blocked out the eyebrow maintenance, but in truth, I think I will always be inspired by the era. Thrift was cool, making your own clothes was cool; in my book, it always will be.

About the Author
Jo has been sewing since childhood, but still has plenty to learn. She originally hails from sunny California but has settled in less-sunny London with her family of tomato-mispronouncing Brits.