Sign In
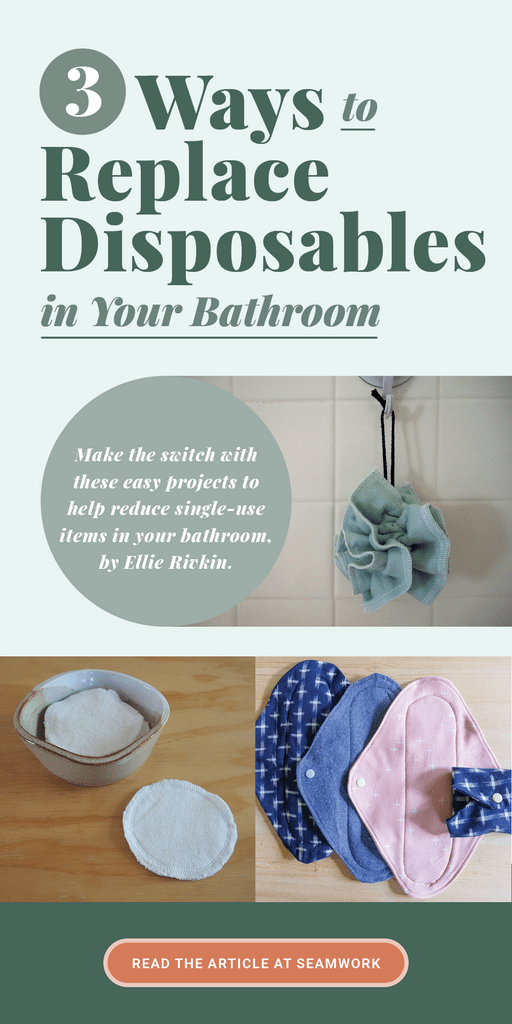
It’s no shock to see daily headlines or social media posts reminding people “the time is now” to act on climate change. We often construct our lifestyle choices around convenience over sustainability. Do you ever find yourself buying the same giant bag of cotton pads from Target simply because you’ve used them since high school, which is basically for-ev-er? Or, you buy sanitary pads because you’re still a liiittle wary of switching over to reusable cloth ones (Don’t they feel like diapers?! Hint: nope). I hear you! It took me years to make switches from single-use items over to reusable items, and I’m not perfect either. The convenience of single-use items can help with speed or accessibility, but you can easily make the switch to reusables with a few changes to your habits. This small switch will greatly benefit our environment—and our wallets.
Single-use items are just that; they are designed to be thrown in a landfill immediately after use. It seems like such a crazy concept when you hear it like that! When it comes to disposables in your home, there’s a good chance you’ve already got some reusable items in your repertoire. Some excellent first steps to replacing single-use plastics around your house are buying reusable water bottles, tote bags, and silicone Ziploc bags. You often find single-use culprits in the kitchen or bathroom, so I’ve rounded up some of our favorite reusable sewing projects that will help you, and maybe a friend, reduce your plastic footprint. Did I mention they are excellent scrap-buster projects?
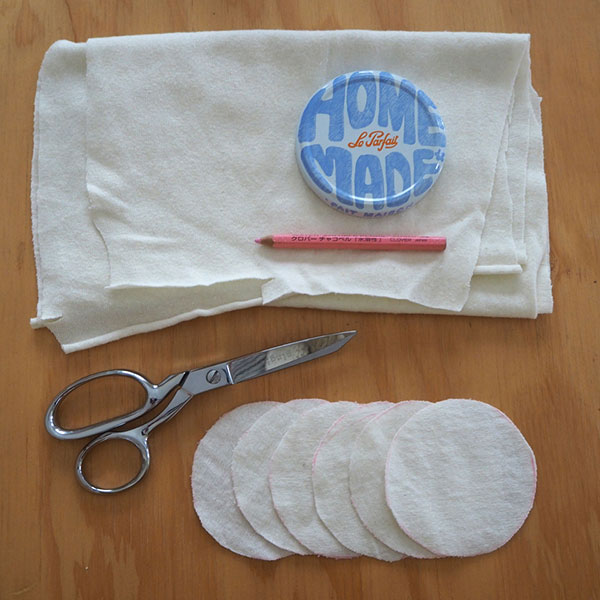
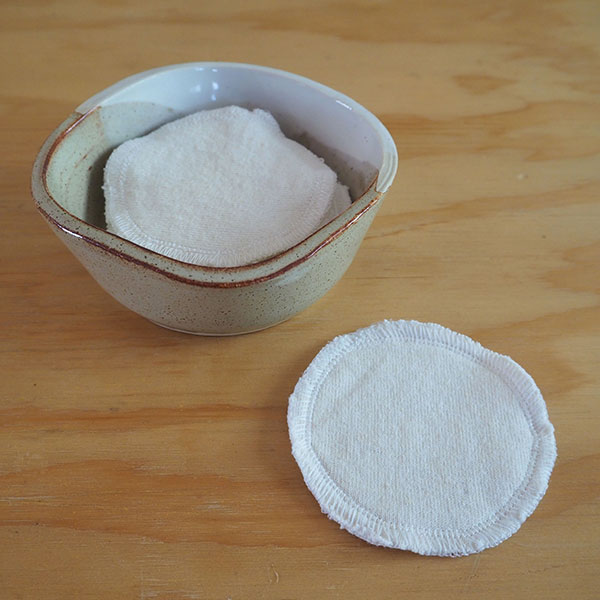
Swap Cotton Rounds for Fabric Rounds
I purchased a dozen of these reusable cotton facial rounds two years ago and never looked back. They are so soft against my skin and easy to throw in the laundry every week or so when I run out. Plus, they make great gifts if you pack them in a cute little tin or box.
French terry or terrycloth work best for this project. To make the rounds, just trace circles onto your fabric, layer the circles to the thickness you’d like, and then serge or zigzag around the edges. That’s it.
These rounds can also quickly become waterproof pads if you’re lactating. Just follow this tutorial from issue 67 of Seamwork to learn how to add darts for shaping and PUL fabric for waterproofing.

Sew Your Own Shower Pouf
Who knew you could make your own shower pouf? This easy scrap buster allows you to give old towels a new life. Follow these simple steps to create your own in an hour.
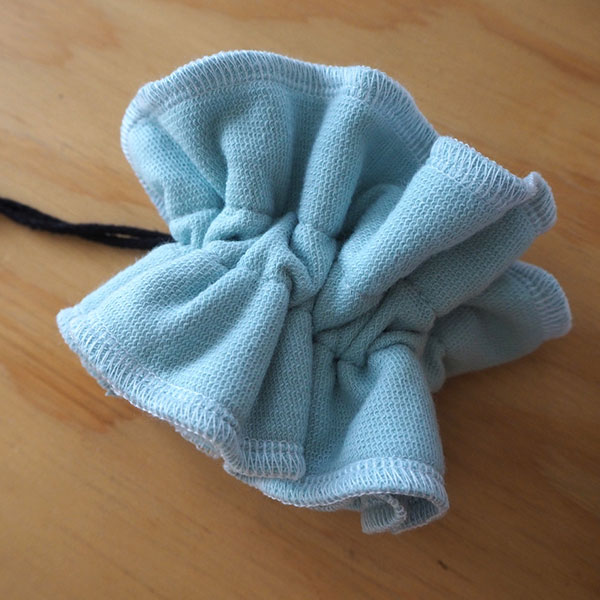
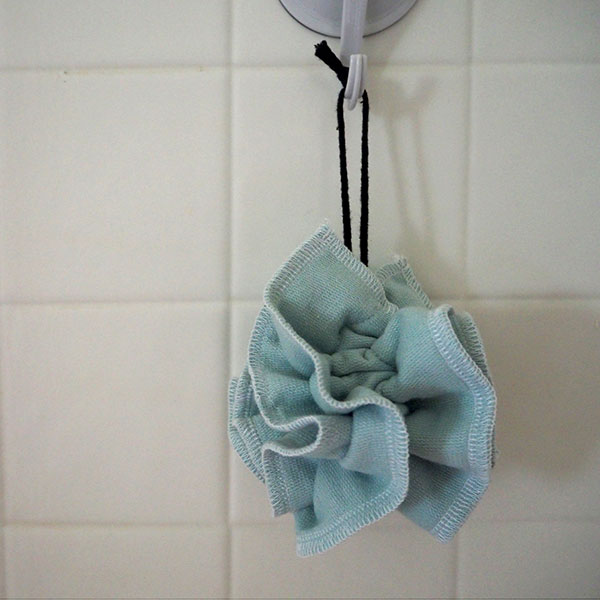
All you need is an old towel or a yard of midweight cotton French terry fabric and about 12 inches of drawstring or cording.
- Following the grainline, cut two rectangles that are 4 inches wide by 17 inches long. If you have a lightweight fabric, you can also double up the layers and cut four total (as I did in my sample).
- Finish the edges before sewing your pieces together. Serge or zigzag all the way around the edges of both rectangles with a 1/2 inch seam allowance. You can either serge around the corners or tie and trim them off.
- If your fabric has two different sides, I found it best to have the more textured side facing up so it acts as your exfoliator. Lay the two pieces together (texture side out), match the sides, and pin lengthwise.
- Make a note of the width of your drawstring. Mine was just under 1/4 inch, so I made the drawstring channel 1/2 inch wide. As a rule, I would add 1/8 inch to both sides for room to thread the drawstring. Draw two lines down the middle of the rectangles to mark your seam line for the channel. Then, stitch lengthwise to make the channel, backstitching at the ends.
- Take a safety pin, attach it to the end of your drawstring, and then pull it through the tunnel. Scrunch and fluff the ruffles to get the size and shape you want, then double knot the drawstring at the middle of the pouf. Tie off the handle about 4 or 5 inches above your double knot, and you’re done. Enjoy the fluff in your next shower!
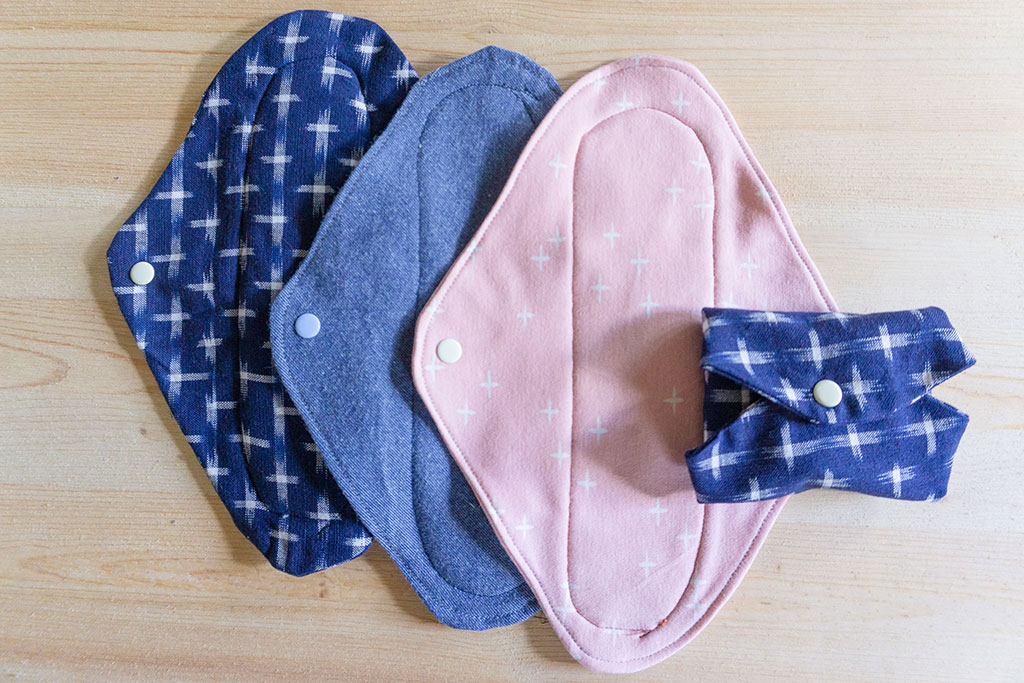
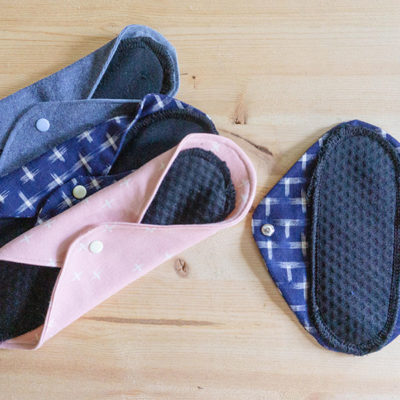
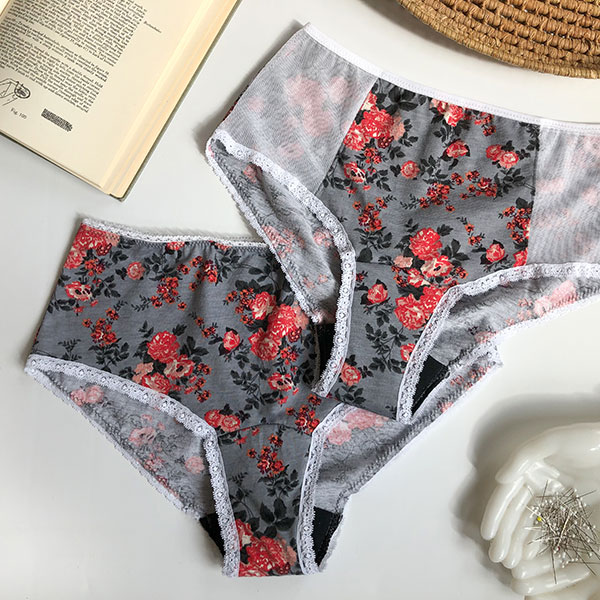
Period Underwear and Reusable Pads
Have you jumped on the period underwear train yet? Making your own underwear is probably the most liberating thing ever. Making your own period underwear takes that one step higher!
- There’s a free period underwear pattern and tutorial in this issue—sew Flo to cut down on waste caused by tampons and pads.
- Here’s another tutorial for hacking any underwear pattern into period underwear.
- There’s also a tutorial for sewing reusable cloth period pads in issue 67 of Seamwork.

I hope these are fun and easy projects to help you be more environmentally friendly. I find that these items last longer—and are honestly easier to use—than some of the disposable alternatives. For me, it all comes full circle because the idea of quality over quantity applies to so much more than just clothing. Low-waste or minimal living has not only become trendy, but it has allowed people to start experiencing the benefits of owning less. Like the Marie Kondo method, it allows us to find joy in possessions we already own, releasing items that don’t serve us anymore. Here’s to saving more money for fun adventures rather than wasting it on throw-away items.
Stay tuned for three ways to replace disposables in your kitchen—in the next issue of Seamwork!

Ellie Rivkin
Contributing Writer
Ellie Rivkin has been a sewer and maker since childhood. Her journey as an apparel designer was driven by the intersection between art and function; most recently portrayed through upcycling textiles and playing with natural dyes. She enjoys advocating for the slow fashion movement by educating the community about thoughtful consumerism in today’s world. Find her on Instagram at @ellierivkin or at ellierivkin.com.
Related Articles
Sewing Your Own Underwear is Empowering
Use this free Seamwork pattern to make a pair of underwear that fits your style and body. By Wallis Smith-Owens.
Pinpoint Your Style (While Minimizing Your Stash)
The most sustainable fabric is the fabric you’ve already got, by Michelle Colistro Brown.