Sign In
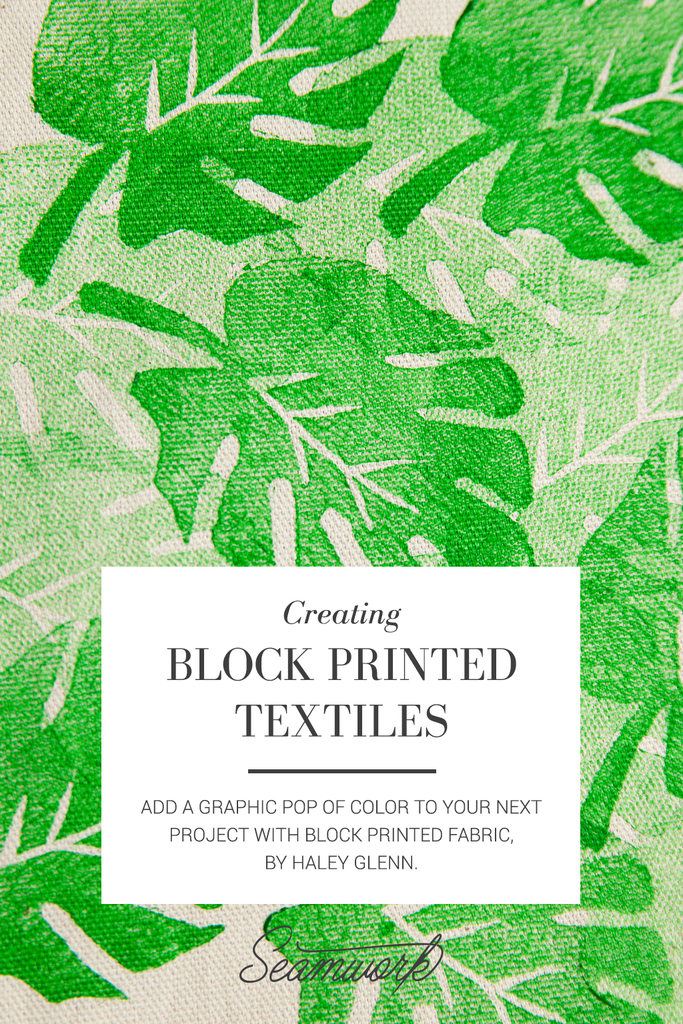
Block printing is a method of printing textiles by stamping ink-dipped blocks—usually made from wood or linoleum—onto fabric. This technique is one of the simplest ways to create custom fabric at home.
One of the wonderful things about block printing is that you have absolute control over the colors, motif, and repeat of your print. This amount of control gives you a chance to create fabric that is unique to your project.
In this tutorial, we will share block printing basics, showing you how you can tap into your inner textile designer and make hand-printed fabrics. Whether your taste is subtle or bold, you can create an array of looks with this easy technique.
You’ll need:
- Fabric
- Wood-mounted linoleum blocks
- Lino cutter
- Butcher paper or newsprint
- An apron
- A large flat surface
- A piece of Plexiglass or a shallow container
- A rubber brayer
- Water-based ink
- An iron
- Two press cloths
Designing
Before you begin your block printing project, it is important to create a design and plan.
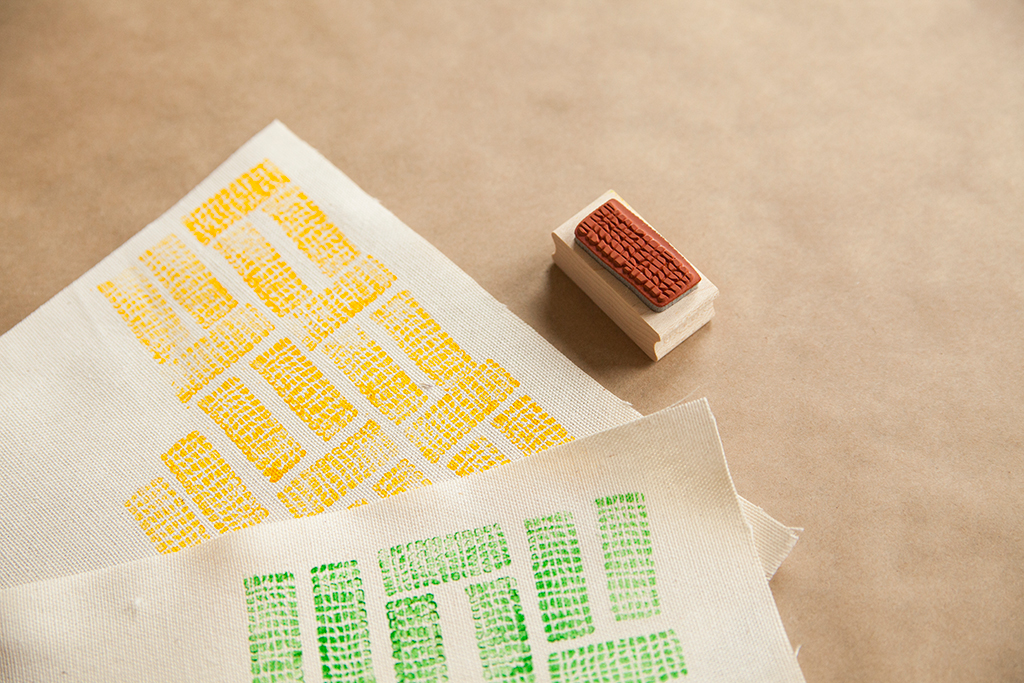
A store bought stamp like this one can be used to create textural patterns.
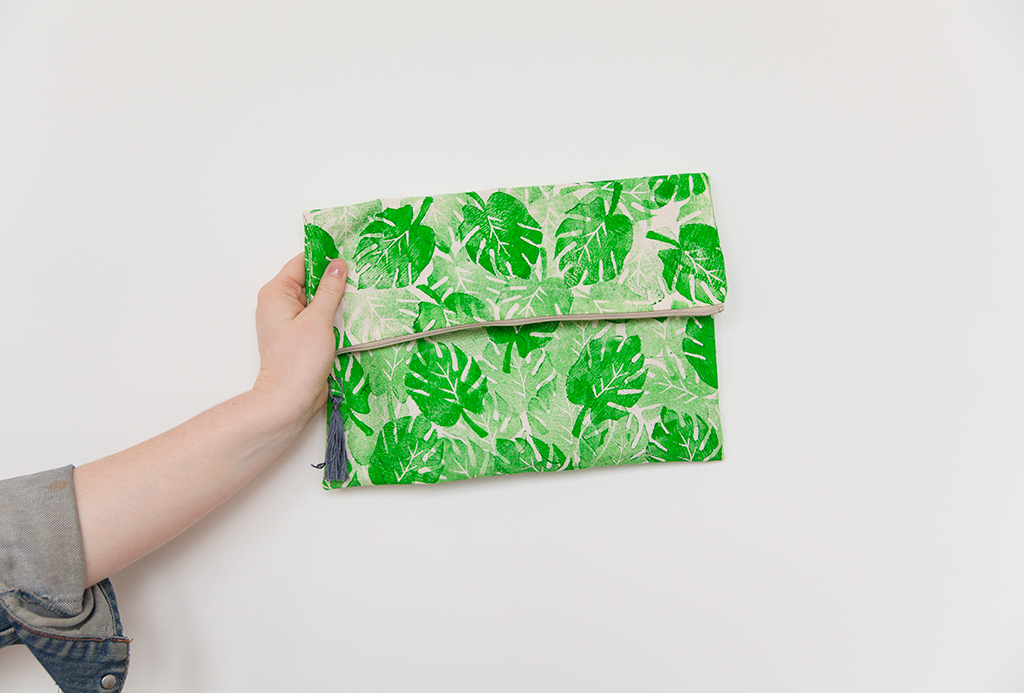
If you are a novice block printer, start small with tea towels or a simple clutch like Valencia. Also, consider using a store bought stamp so you can focus on the process of block printing, rather than create a block from scratch.
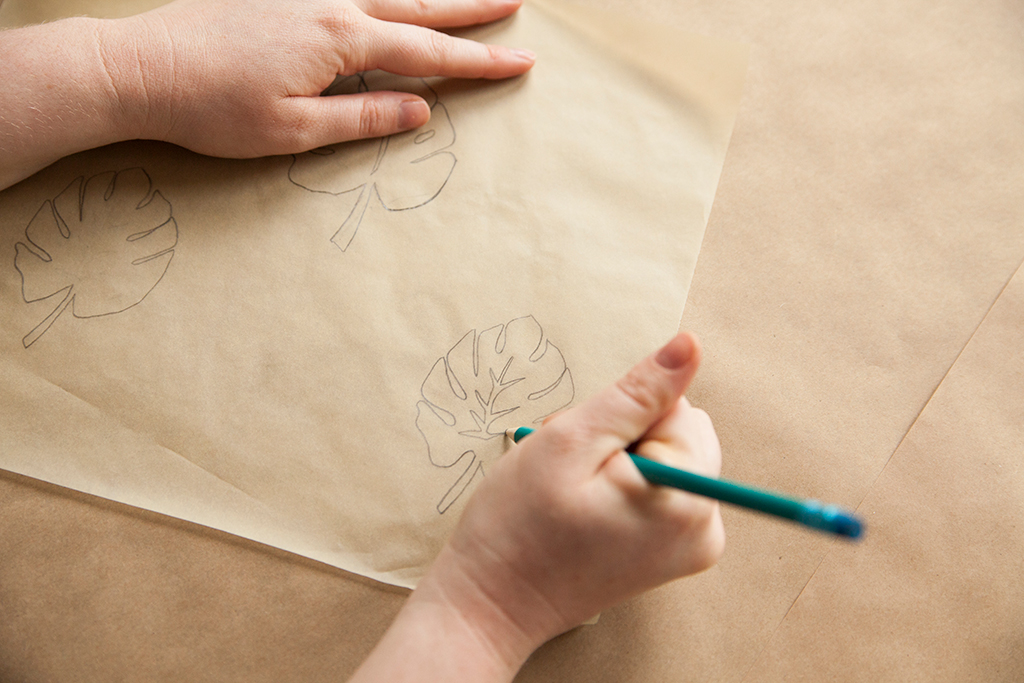
To do this, start by sketching the design you would like to print on a piece of paper.
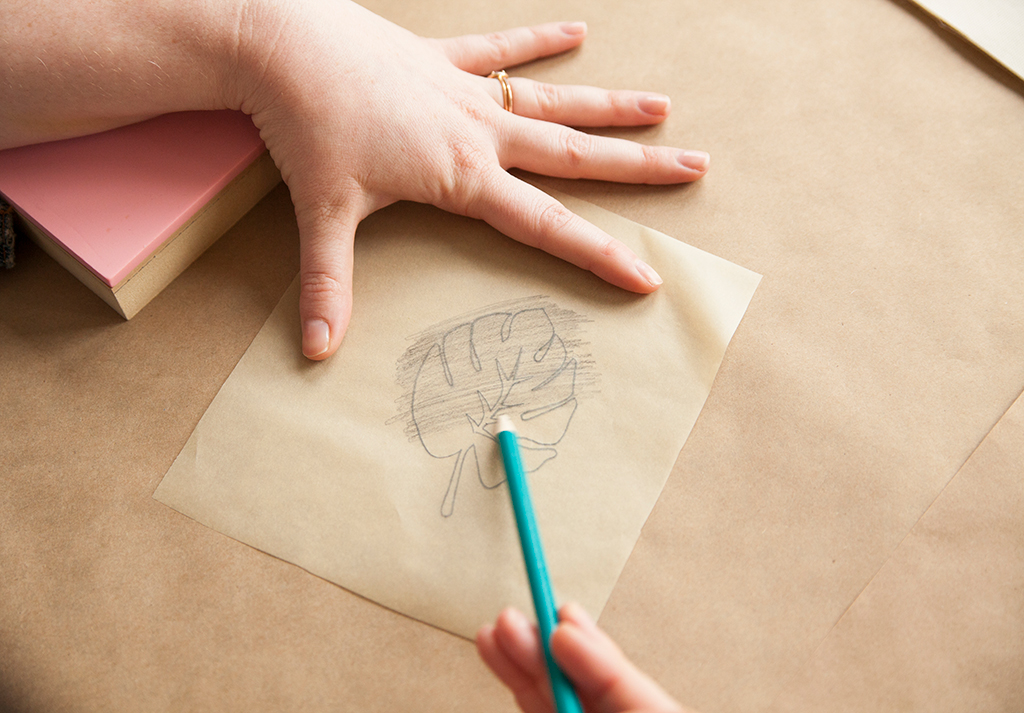
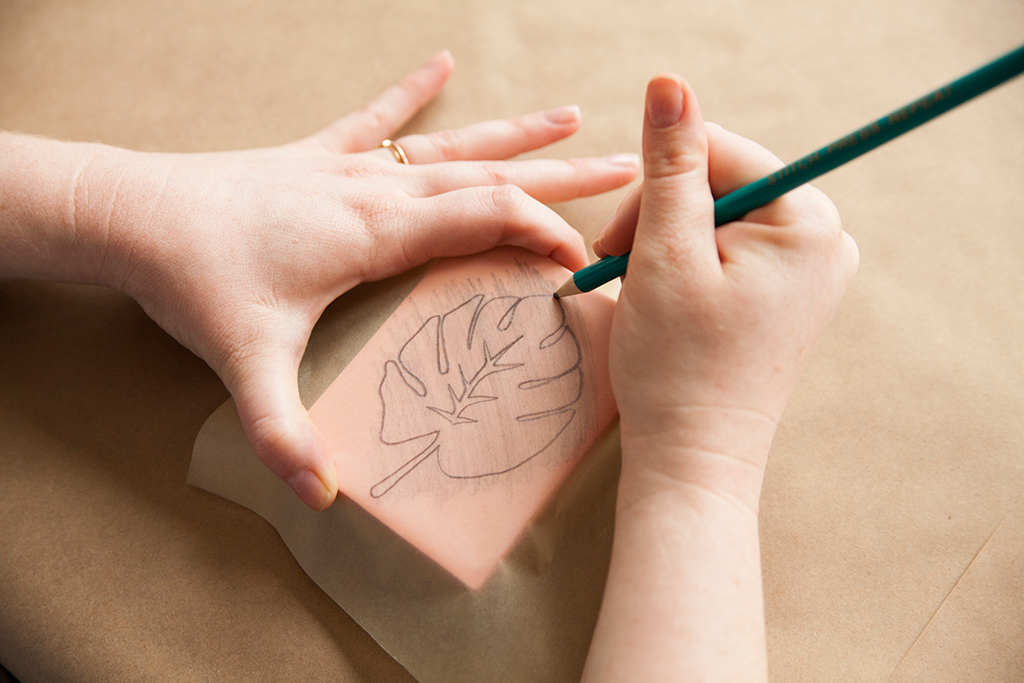
Once you are satisfied with your design, transfer it to a linoleum block. To do this, you can use transfer paper, or create your own carbon paper. By rubbing a graphite pencil on the wrong side of your sketch and then tracing your design, you can easily transfer your drawing to your linoleum block.
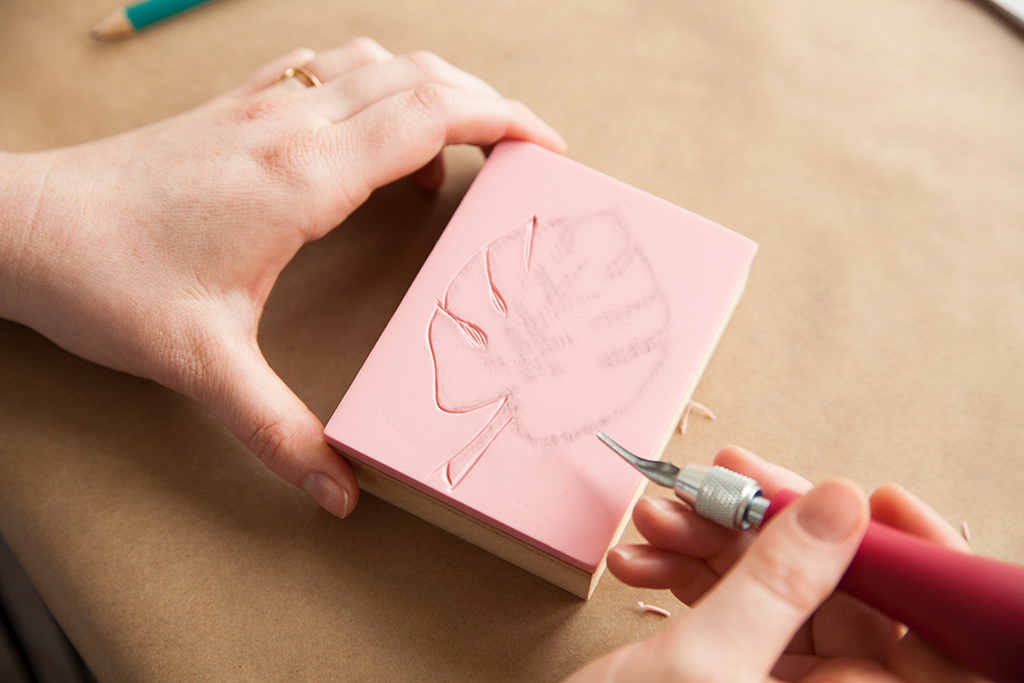
Use a lino cutter to carve away the negative space around your design.
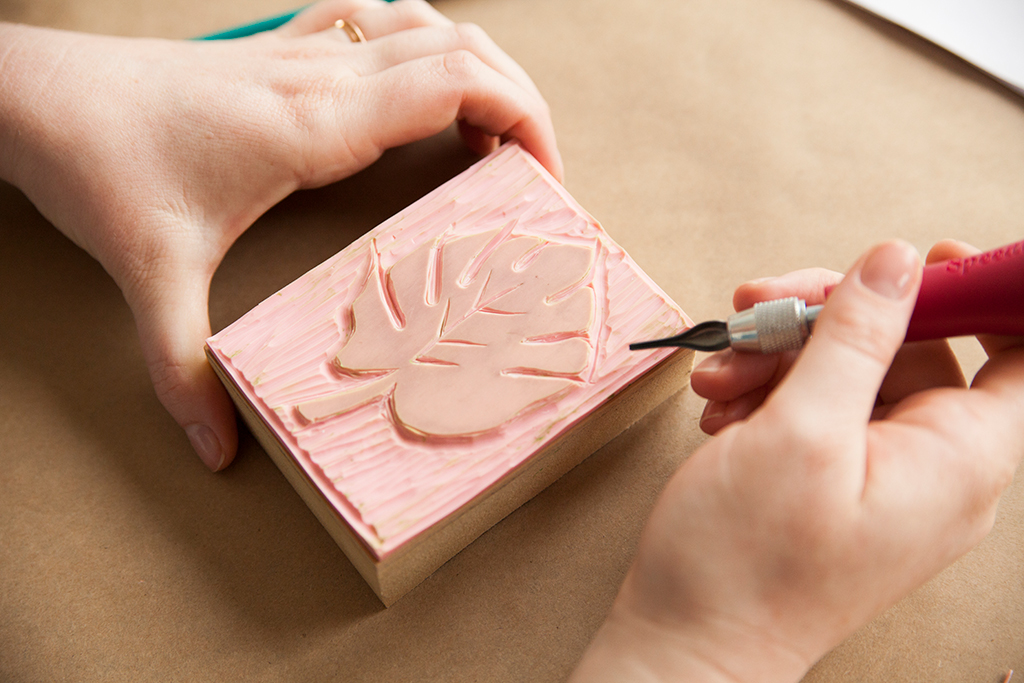
This part of the process can be time-consuming, but when you are done, you will have a stamp you can use time and time again.
Four tips for carving your block
- Practice makes perfect: Buy an extra piece of linoleum to practice your carving technique. Practice creating a range of shapes from angular to curvilinear.
- Start small: Start by using your smallest carving tip to create a border around your design, then gradually build up to a larger carving tip.
- Carve on a non-slip surface: Place your block on a non-slip surface, like a rubber mat, for more control.
- Practice safety: Carve your block with care. This means you should always cut away from your body and hands.
Prepping
Wash and dry your fabric to remove any sizing that might interfere with your ink.
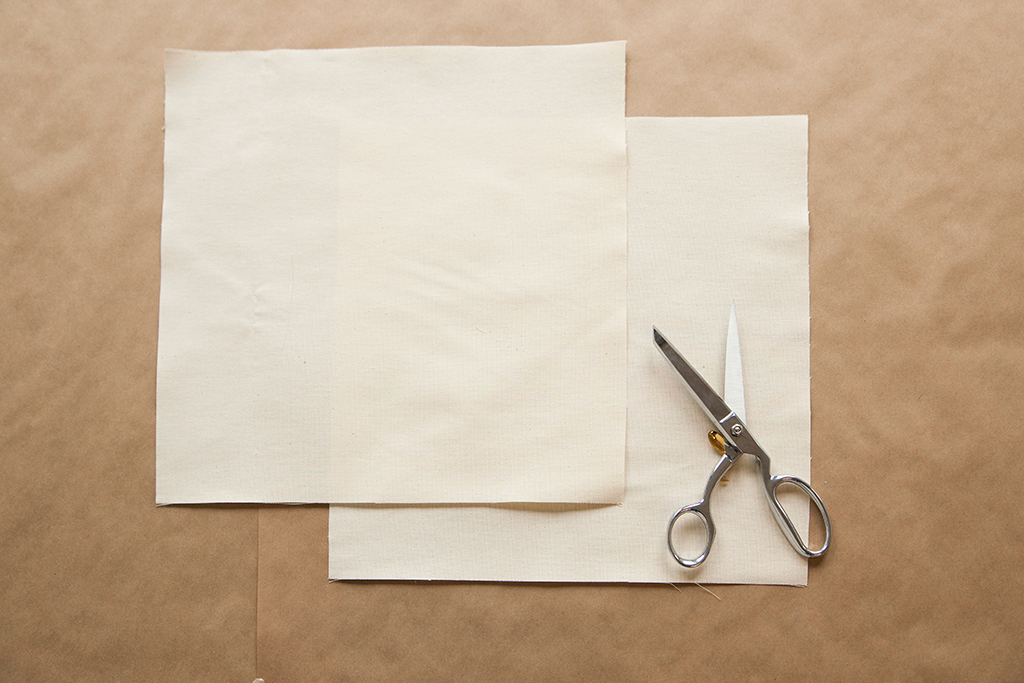
Cut your project pieces from your chosen fabric. Cutting your fabric before printing offers two advantages: The first is that working with smaller pieces is easier and requires less space; the second is that cutting your fabric before printing will allow you to be more intentional with your pattern placement.
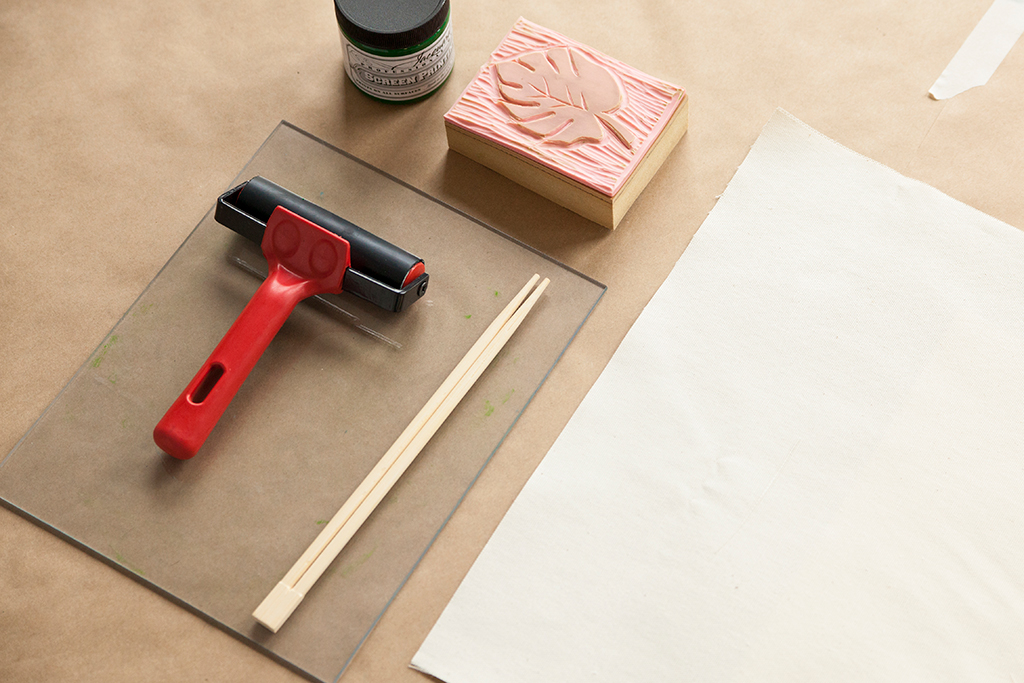
Lay out all of the supplies you will need to block print. This includes a piece of Plexiglass or a shallow container, rubber brayer, water-based ink, the carved block, and the fabric.
Lastly, prepare your workspace by laying down butcher paper or newsprint, because things are about to get messy!
Printing
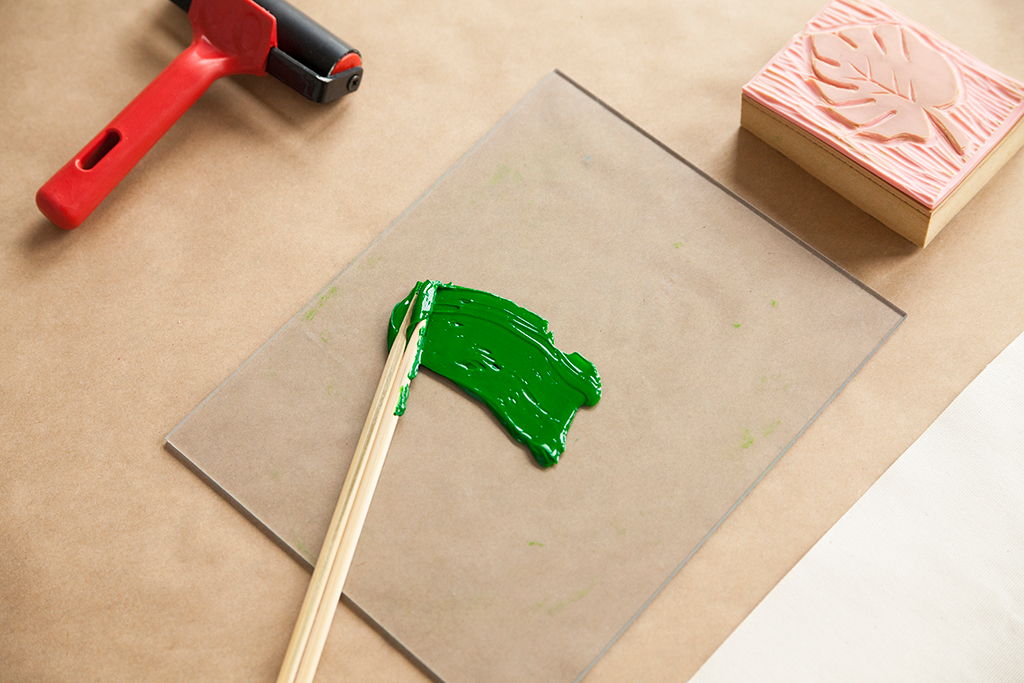
Pour a small amount of ink onto a piece of Plexiglass or into a shallow container.

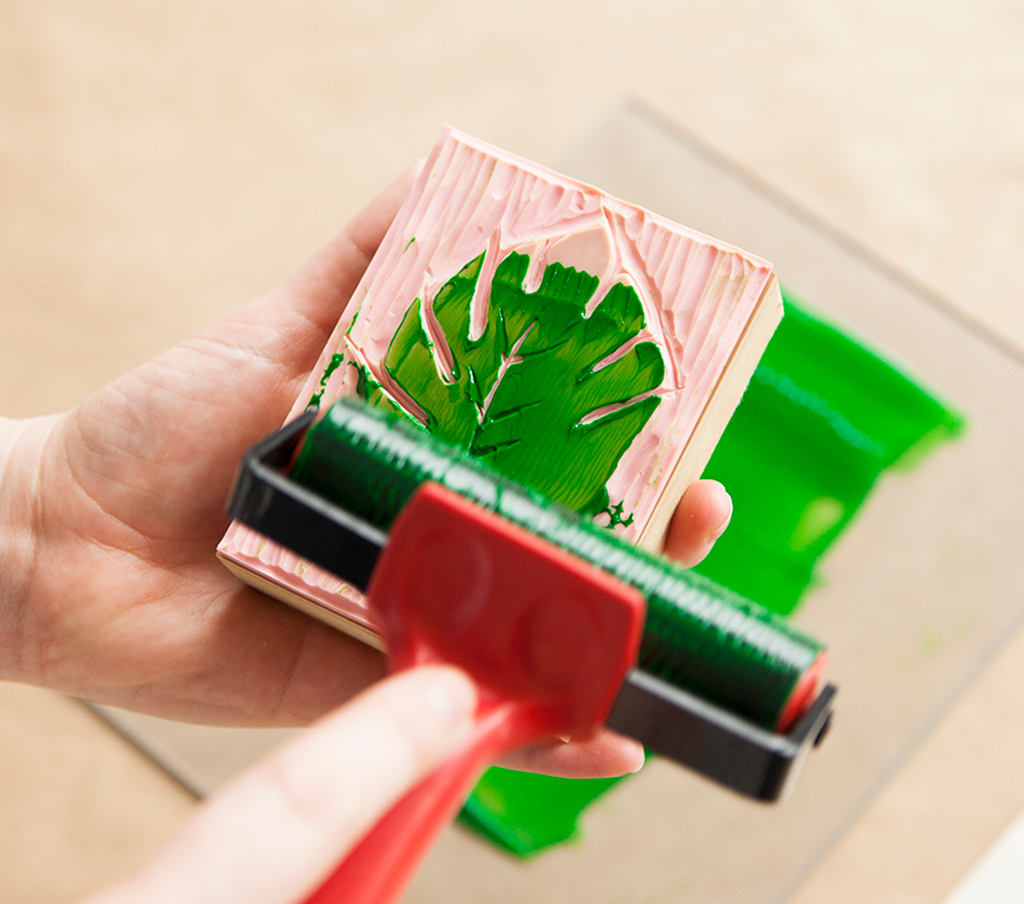
Use a brayer to roll the ink from the container onto the block. Make sure that the block is evenly coated with ink.
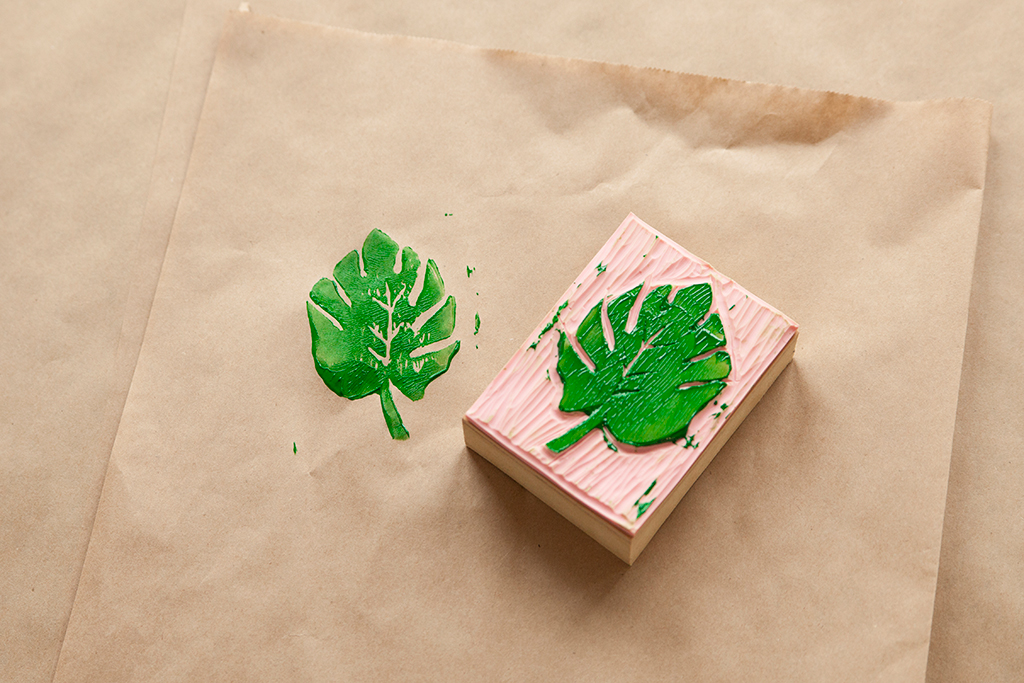
Practicing on scrap paper also allows you to refine your carved block by seeing any areas that need more definition or should be carved deeper.
Practice your stamping technique on a scrap piece of paper. It’s important to apply even, uniform pressure to your block.
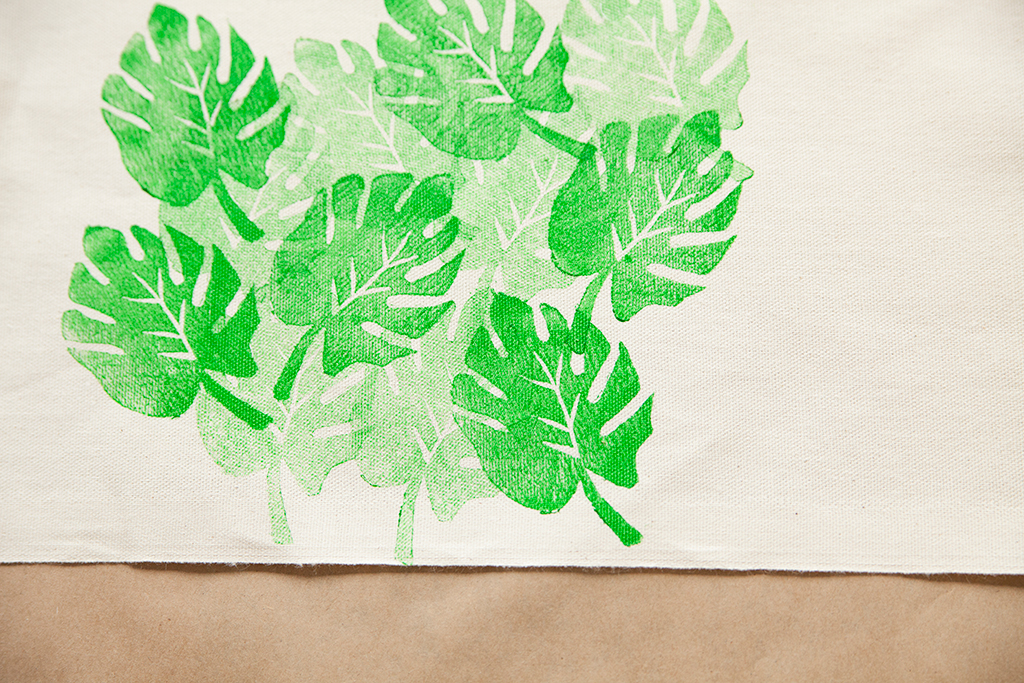
Once you have perfected your technique, you are ready to move on to fabric! Roll the ink on your block and stamp your fabric using even pressure.

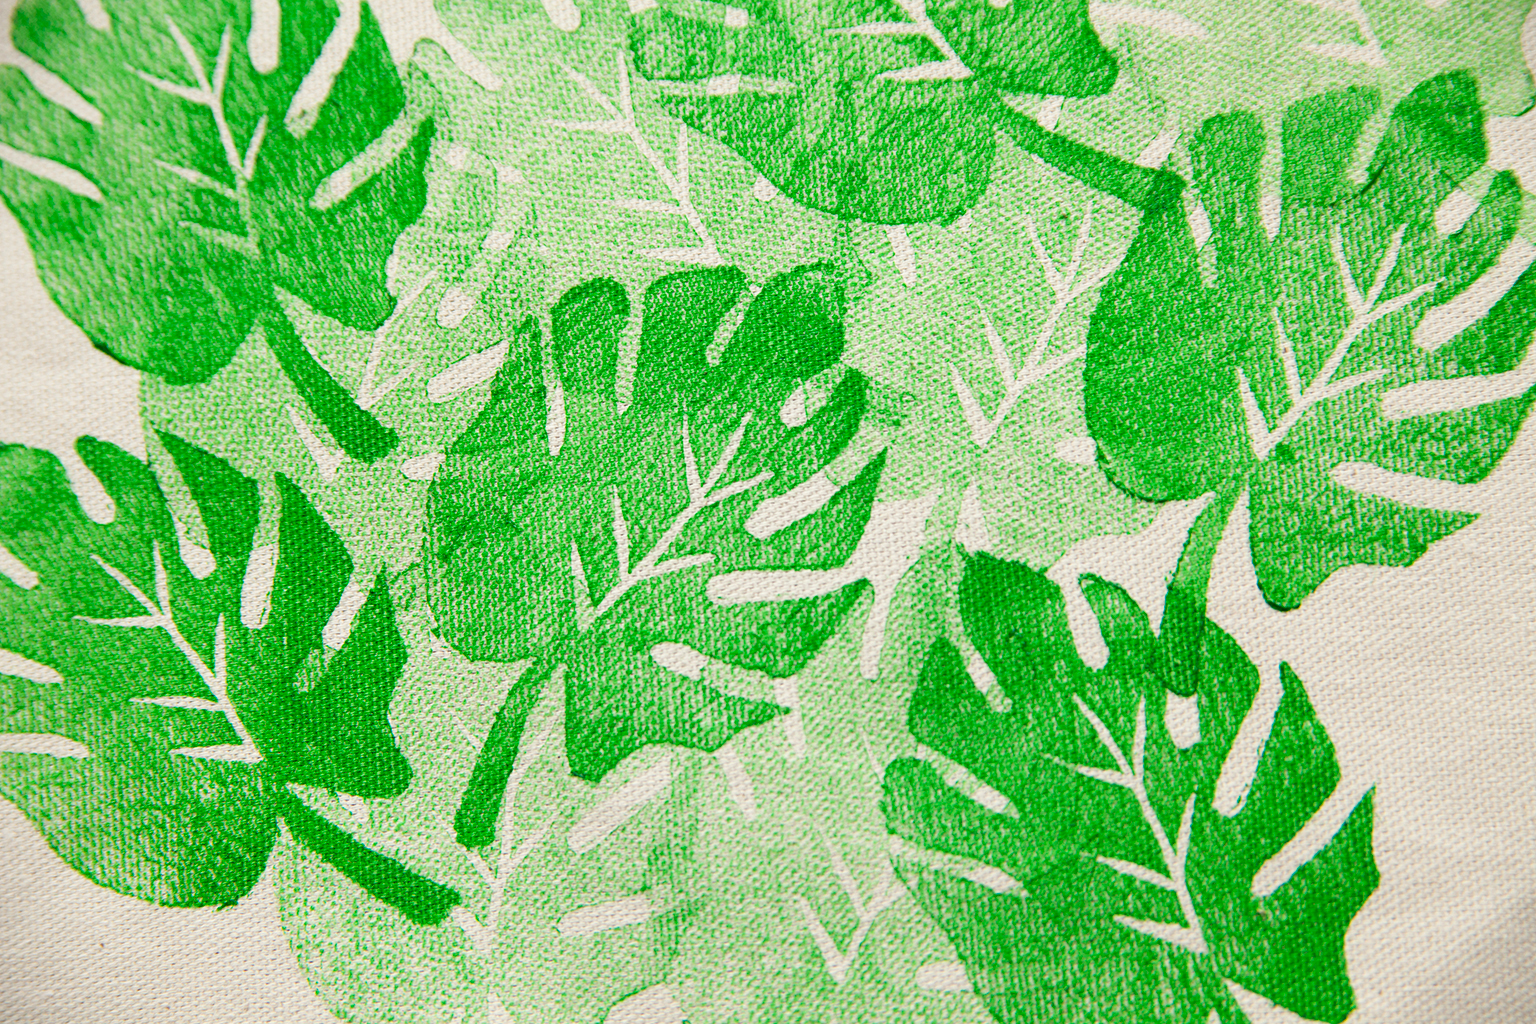
Don’t worry if each stamp yields a small amount of variety. Small imperfections are part of the beauty of this technique!
I chose to create an irregular, layered look with my stamping technique. If you would like a more uniform repeat, use a water soluble marking tool and ruler to mark your fabric to help create a consistent motif.
Setting the ink
Set your printed fabric aside to dry; this can take up to two days depending on your fabric and the amount of ink used.
Once the ink is completely dry, use an iron to set your designs in place permanently.

Heat an iron to the highest heat setting your fabric will tolerate. Sandwich your printed fabric between two press cloths, and iron each piece for 3-5 minutes per side.
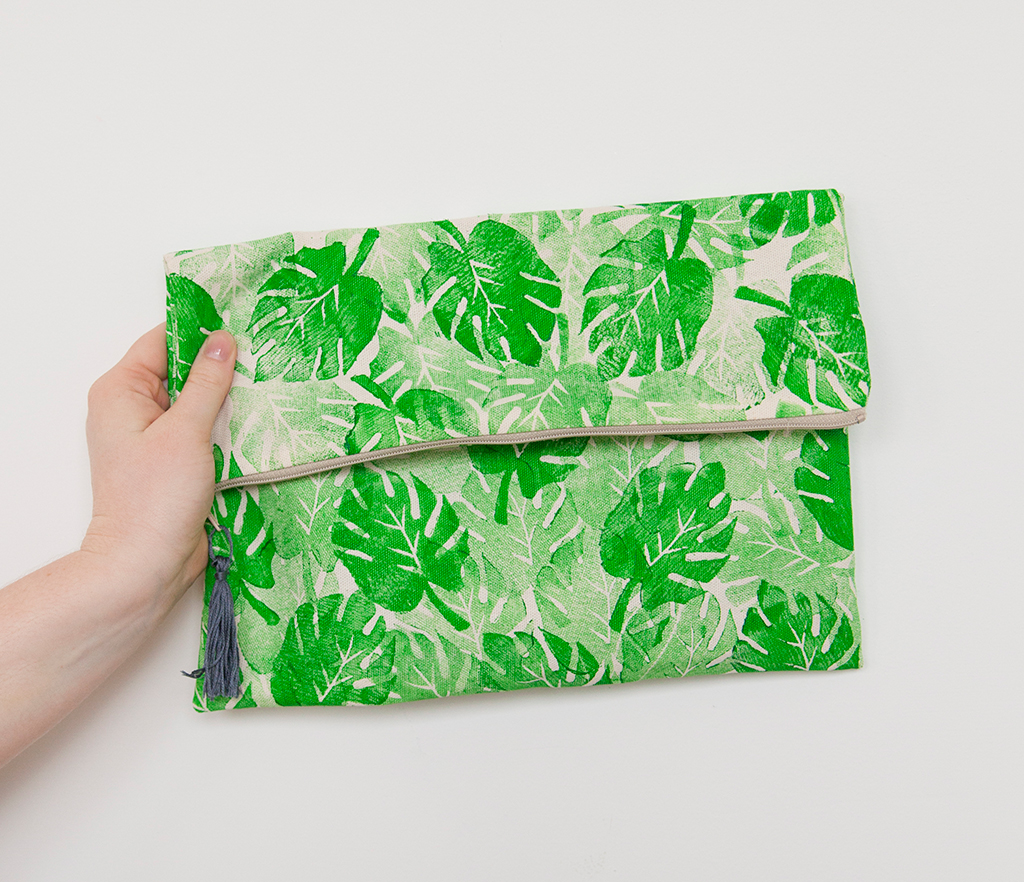
You can now sew your pattern according to the pattern instructions! Care for your garment by washing and drying using normal machine settings. You may find that the look of your printing softens slightly over time. To preserve the look of your block printed textile, wash by hand and hang dry.

About the Author
Five years ago, Haley left the apparel industry to join the world of home sewing. She has been empowering women to sew ever since —first through years of in-person teaching at Sew LA, and now through her writing at Colette. Haley writes tutorials and articles on our blog, and writes and edits for our magazine, Seamwork.