My favorite thing about sewing is that you can take a vision you see out in the world and actually bring it to life yourself.
A few months ago, I saw a pair of jeans on a woman in the Paris Métro, and I haven't stopped thinking about them since. So I decided to make them.
So, I want to walk you through how I brought that vision to life — including the one detail that took a lot more trial and error than I expected.
The Spark: Wide-Leg Trousers Everywhere in Paris
I visited Paris this past spring, and wide-leg trousers were genuinely impossible to miss. I saw them everywhere — on women of every age, in every fabric you can imagine. Some people were wearing this soft, flowy version, almost like a palazzo pant. Others were in something more structured, more menswear-inspired, with a pleat at the front.
Seeing it repeated like that, on so many different women, in so many different ways, got me thinking about how I actually relate to trends in general. I'll notice one, and instead of asking "how do I wear this," I ask "what does this show me about what I'm actually drawn to right now." Most of it, I let go. But every so often, a trend hands me something I didn't know I was looking for.
This time, it was a woman on the Paris Métro. One look, and I knew — this was the version I could actually see myself in.
I was standing on the platform with my mom, and she was behind us — wide-leg dark denim trousers, a crisp white button-up, simple gold jewelry, sunglasses, and silver hair swept up into this effortless chignon. It was almost ninety degrees out, and she looked completely unbothered and put together. Sophisticated. Polished.
The Wager: Chasing a Feeling, Not Just an Outfit
That moment made me think about the first time I went to Paris. I was in my twenties, and I was struck by the beauty and style of women of all ages, especially women in their 50s, 60s, 70s. I remember thinking, that's how I'd like to be when I'm over fifty — cool, and elegant.
So decades later, standing on that platform, I had that same feeling again. Something about this woman spoke to me the same way, and it made me feel good about the idea of growing into a style that's really mine over time. She had this confidence and flair to her. And the jeans themselves captured that — they were of-the-moment and utterly classic at once. The raw denim was slightly dressy, and the cut wasn't overly youthful. It was just right.
I already knew I wanted a pair of jeans for fall — something for the weather turning, that I'd keep wearing for years. But that platform moment gave the idea an edge: it wasn't just about making jeans anymore, it was about making something that actually lived up to the picture in my head. That mix of classic and cool I'd seen on her. Could I get there myself, or would I end up with something that just didn't match the image I was chasing?
Getting jeans to look that effortless mostly comes down to a handful of choices most people skip over: the weight of your denim, how you handle it once you cut it, and even your needle size. Those small decisions add up to the difference between jeans that look homemade and jeans that look intentional.
The Vision: Why I Chose Selvage Denim and the Noah Pattern
At first, I thought I might just buy a pair. So I started investigating raw denim brands. There's actually a whole subculture of folks who are really, really into raw denim, so I read reviews and started looking at different styles. And I noticed I was really drawn to vintage-looking workwear styles, and bright white topstitching.
But the more I looked at these pricey jeans, the more I thought about how fun it would be to make my own instead. I could get exactly the cut and fit I was after — a high waist, semi-fitted hip, and a loose, wide leg. I could add any detail I wanted, too, and get just the right shade of denim.
I'd also wanted to make a pair of selvage jeans for years — the kind where that selvage edge runs right along the outseam as an actual design detail. That's not something every pattern can do. If you're not familiar, selvage denim has these decorative finished edges, and it usually comes in narrower widths than standard denim. You need a straight leg for the outseam to sit flat against that edge, which is a big part of why I chose the Seamwork Noah pattern for this. The pattern's shape is what makes the detail possible.
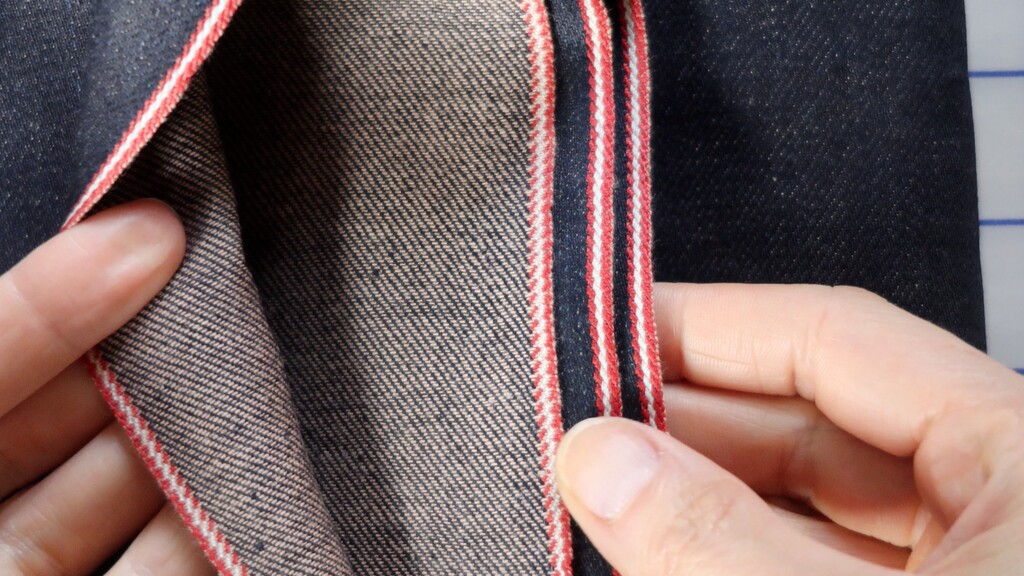
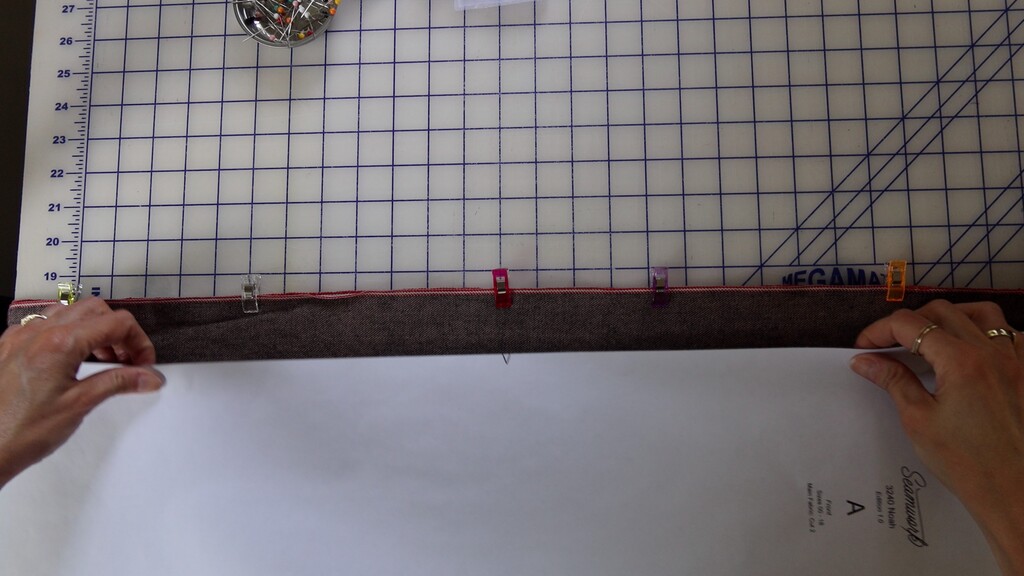
And the fabric itself had me a little nervous going in. I found a Japanese raw selvage denim from Yardblox with the most beautiful red selvage line, but it's not cheap, and mine came in a narrow 32-inch width, so I had to plan carefully. I wanted those two extra inches on the leg too, so I'd have room to cuff them and let that red line show. I ordered extra yardage just to be safe before I'd even cut into it — a real investment, before I knew if any of this was going to work. It's a good thing I ordered extra, because by the time I was done cutting, I had almost nothing left over.
The Good Stretch: Finding the Right Topstitching Thread
I want to be honest with you — I was already worried going in, because of a denim Orla skirt I'd made not long before this, also with white topstitching. I hadn't been that pleased with how it came out. The topstitching just wasn't as visible as I wanted it to be. And this wasn't the first time I've had trouble with topstitching denim. It can be especially tough sewing through multiple layers, like on belt loops and buttonholes. Since I knew I'd be using white thread again, I knew it would be extra visible, for better or worse.
At first, I tried sewing with regular topstitching thread, and the result was okay, but I didn't love it. Then I tried the Gütermann Mara 70 thread, which is what I'd used on my Orla skirt, and it just seemed too light. I tried adjusting the stitch length to get a more prominent stitch, but I still didn't love it.
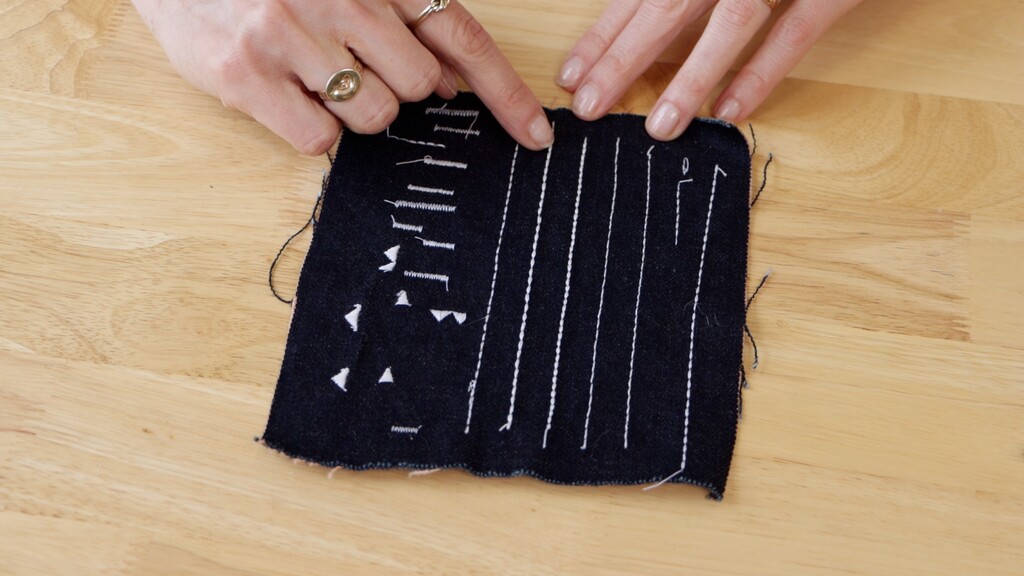
Then I remembered that someone in the Seamwork community had suggested trying a triple stitch for topstitching. If you haven't used one, a triple stitch sews each stitch forward, back, and forward again, so instead of one thin line, you get this thicker, almost hand-stitched look. It's also a genuinely strong stitch, which is part of why it's often used to reinforce high-stress areas.
Whenever I'm trying something new, I like to test it on a scrap first — same fabric, same thread, so I can actually see it before I commit. So I did, and I loved the way it looked. It really stood out against the dark denim.
The Wall: When the Triple Stitch Fought Back
But as I sewed, the triple stitch started presenting its own set of problems.
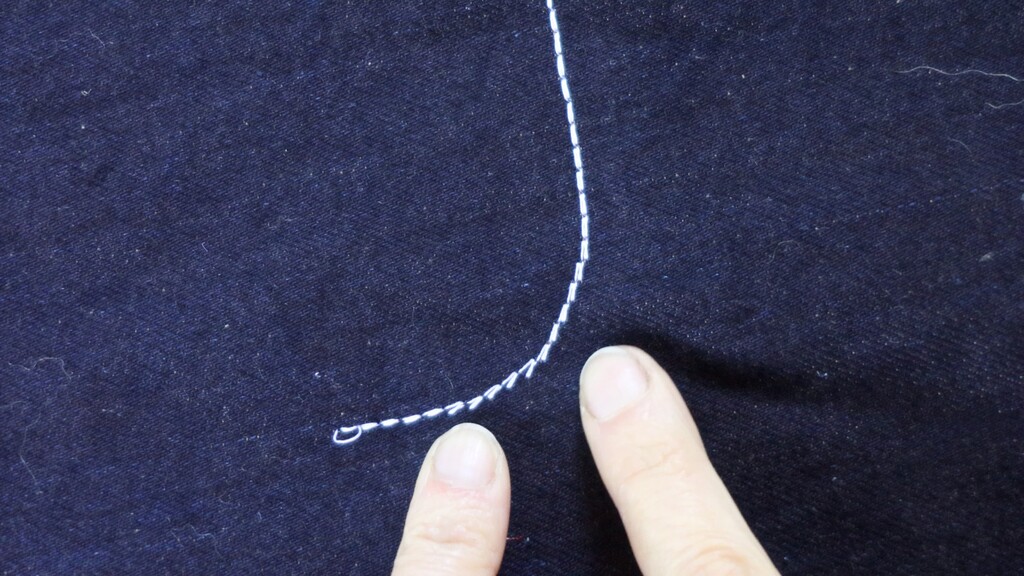
The most frustrating part was sewing around curves and corners. Because a triple stitch sews back and forth over each stitch, it does not want to pivot — at all. The second I hit a curve, like the fly, it came out messy. I kept having to rip out lines of it, and even after seam ripping, I had to go back in with tweezers and yank out the individual stitches by hand.
It wasn't just curves, either. Anywhere multiple layers came together, the triple stitch struggled — even with a walking foot and a lot of pressing to flatten everything first, I was getting uneven stitches wherever the machine hit an intersection of seams.
After I sewed the welt pockets, I actually stopped and asked myself: did I make a mistake? Maybe this thread was too visible. I wasn't sure if, after all this work, it was actually going to look as good as it had in my head.
The Fix: Slowing Down for Maximum Control
I thought a walking foot would help, and it certainly didn't hurt — but it didn't address the real problem. A regular stitch only sews forward, but a triple stitch sews forward and backward on every single stitch. So when you try to move the fabric to shape a curve, like on the fly, the stitches land all over the place. A walking foot can't fix that, because the problem isn't feeding — it's the stitch itself fighting the pivot.
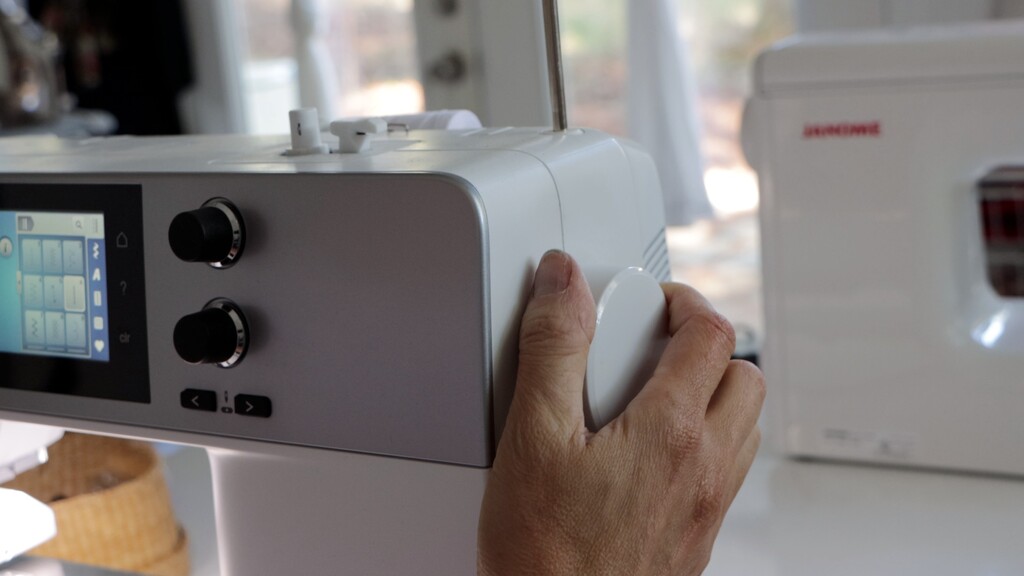
Finally, I realized I needed to sew incredibly slowly, and even use the hand wheel instead of the foot pedal, to get maximum control. This is actually a tip I come back to a lot — slowing your stitching speed gives you the ability to make small adjustments and stop exactly where you need to, instead of trusting the machine to land somewhere close enough. It took a long time, and it still wasn't perfect, but I finally got some corners and curves I was actually happy with.
After that, I decided to lean into the choice rather than second-guess it. I added some subtle details — like triangular tacks at the back pockets and hips — both for reinforcement and just for a little visual interest. I decided to stick with my vision.
The Reveal: The Finished Jeans
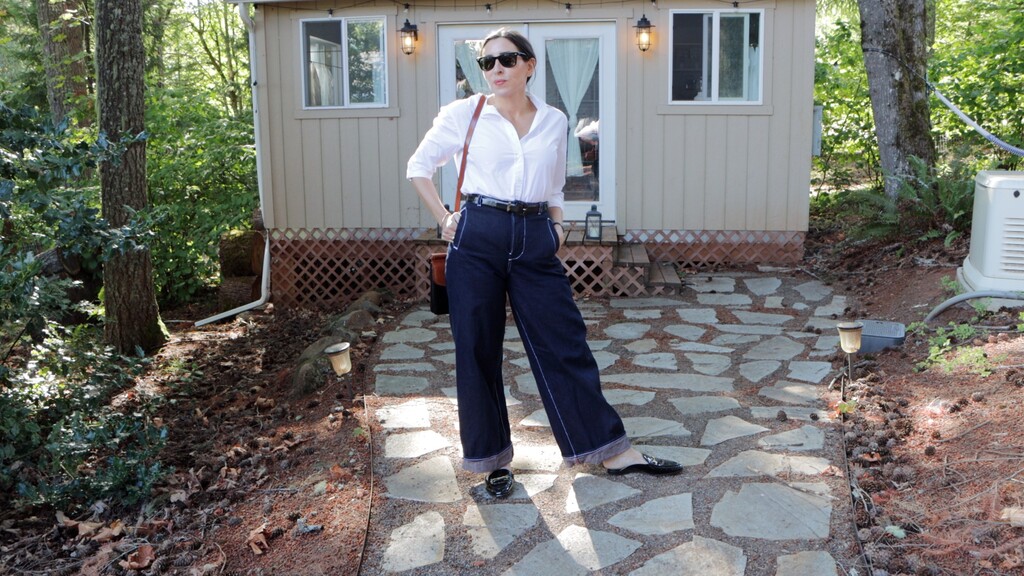
This is it — the finished pair. High waist, wide leg, that red selvage line showing right at the cuff. I actually cut these to the exact length before hemming, so I can wear them cuffed like this to show off that selvage, or let them down uncuffed for a completely different look.
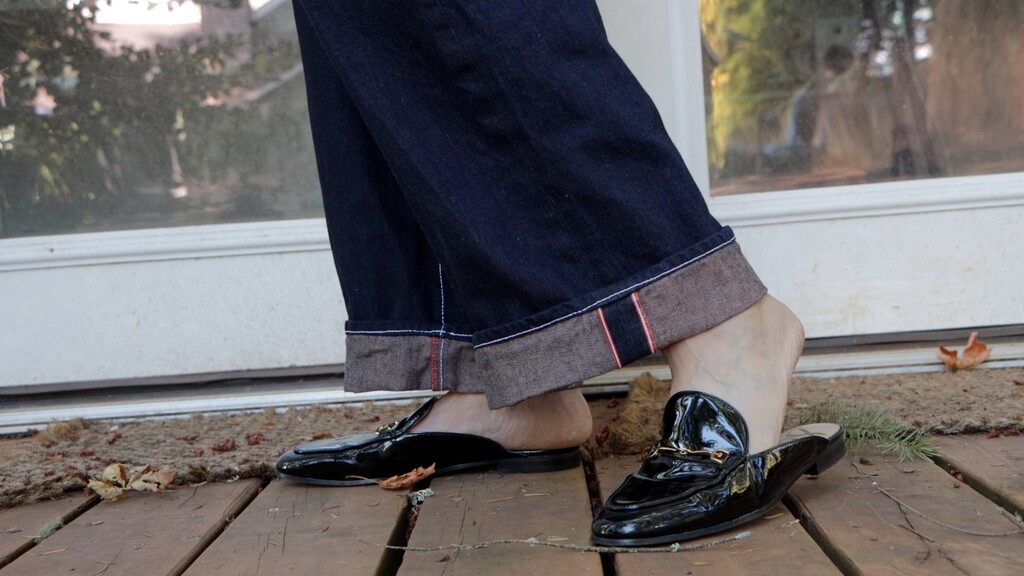
The topstitching is still not perfect in spots, especially at multi-seam joins like the crotch. But luckily, that's the least visible area.
I actually added more topstitching than the pattern even called for — extra rows around the welt pockets, and more along the hip seams for reinforcement.
It's not totally even, and when I look closely, I can let it bug me. But when I look at the pants as a whole, I think they look the way I'd imagined.
What's a piece you've made that took a lot more problem-solving than you expected, but ended up looking exactly like the picture in your head?
 Related Articles

 Best Articles