Sign In
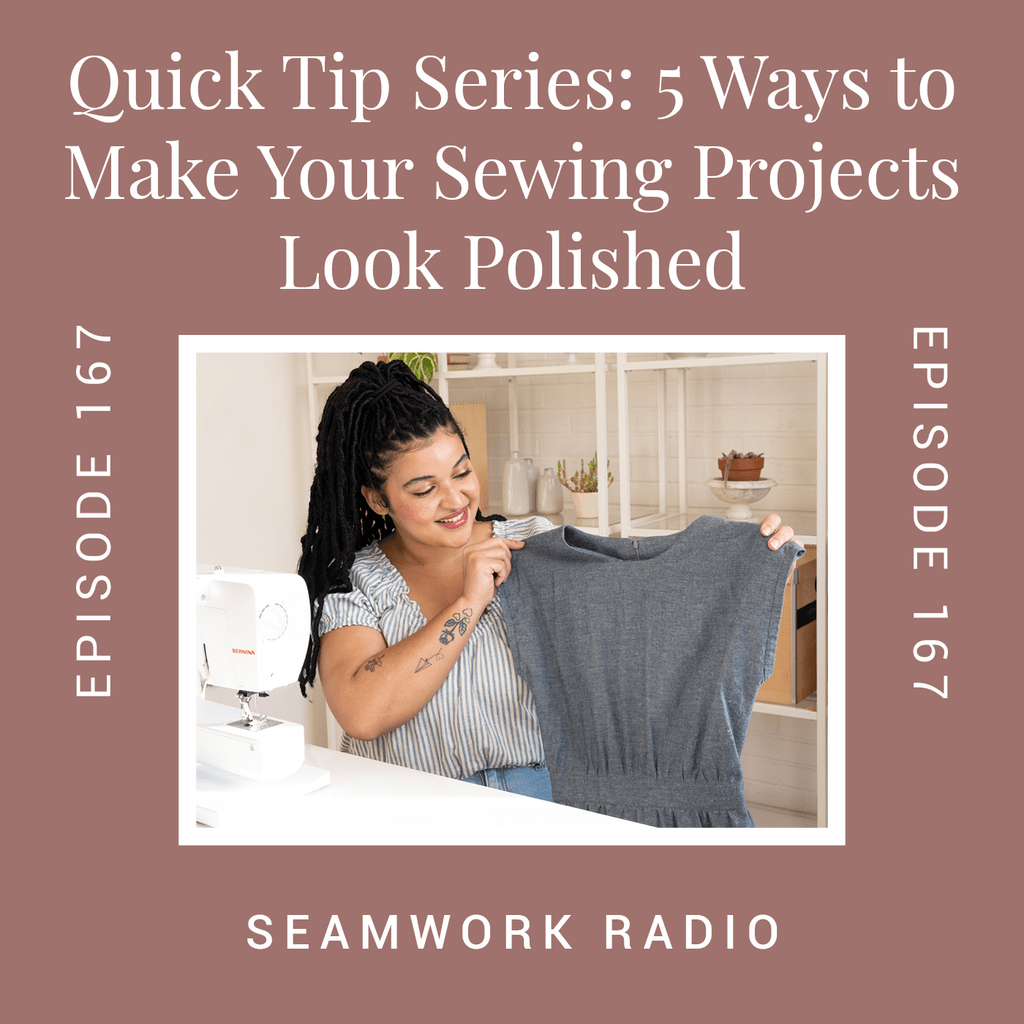
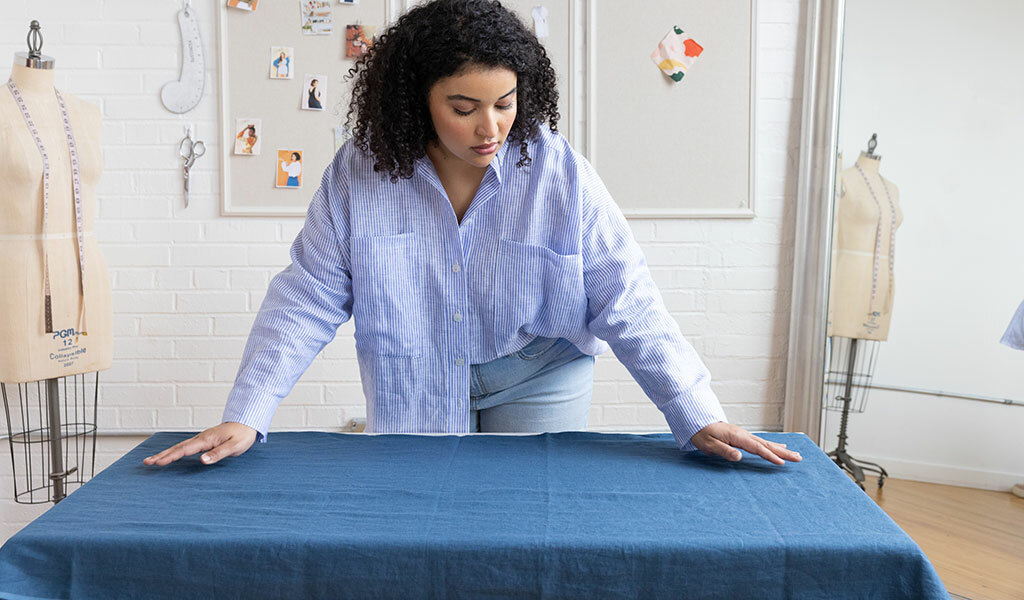
Do you ever wish your home sewing projects looked as polished as the clothes you buy in the store?
This is the third episode in this quick tip series, with episodes full of tips to answer your most burning sewing questions. Today, Sarai and Haley are discussing ways to make your projects more polished. They cover five different tips to help you get a professional-looking finish.
Below are the show notes for this podcast episode and a brief summary of what's covered, followed by a full transcript.
Show Notes
- How to Buy Fabric Online: Know Your Terms | Weight and Drape
- How to Choose the Right Interfacing For Your Sewing Project
-
Larkin Jacket: Haley sewed the green one. -
Podcast listeners get half off an unlimited Seamwork membership when you use this link, plus you get to keep that price as long as you’re a member! - Tell us your idea for the next icebreakers for makers!
5 Tips for Making Your Sewing Projects Look Polished
Tip 1: Press (and invest in pressing tools)
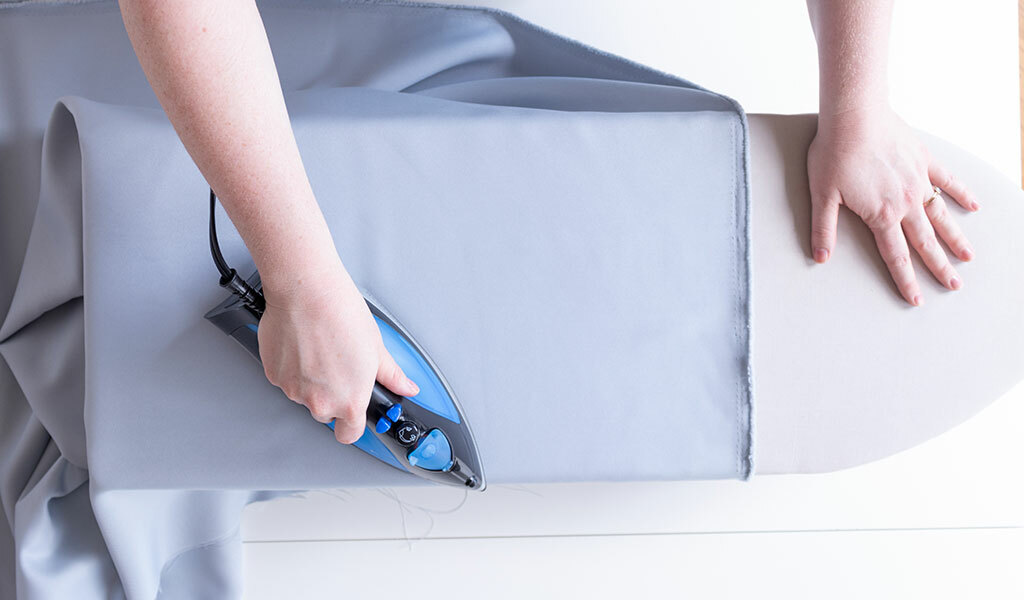
Pressing your seams as you go is the best way to make your clothes look more professionally made.
And it's not just pressing. Make sure that you are using the appropriate tools to get a really good press. Read this article about how to use all of the most important pressing tools.
Tip 2: Don’t skip those little techniques that make a big difference
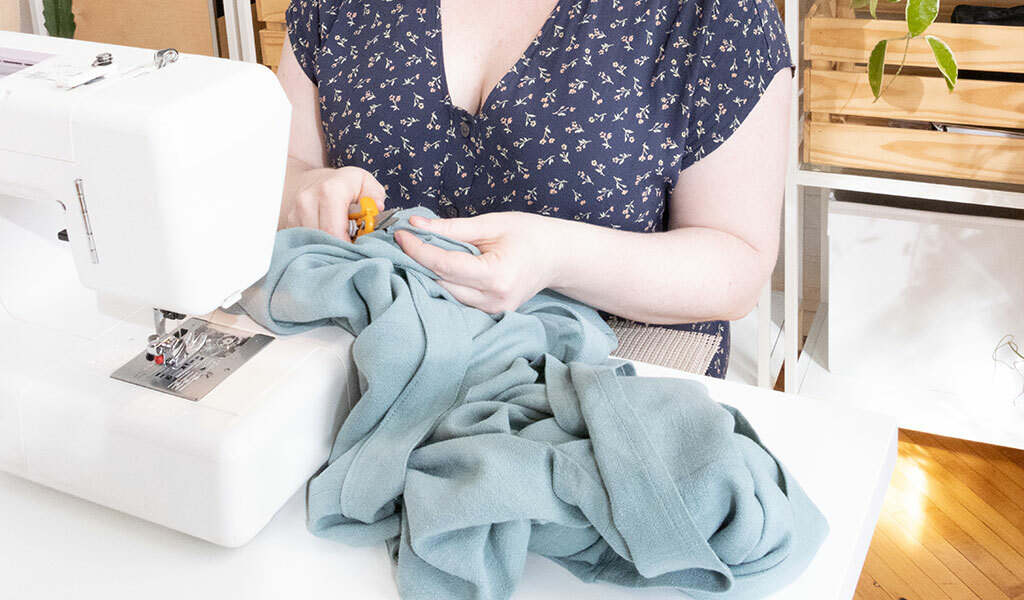
You'll usually find these little techniques in your instructions, and they’re there for a reason. Don't skip things like clipping and notching, trimming your seams, grading your seams, understitching your seams. All of these seemingly trivial steps add up to a polished garment.
Tip 3. Learn as many seam finishes as you can
Make a plan for your seam finishes before you start a project. Would French seams work well for this fabric? Or is a serger perfect? Read through the instructions and figure out what finishes you want to use where—and then make sure your seam allowances are appropriate for them.
Seam finishes can take your project to the next level, even if you’re the only one who sees them on the inside.
Tip 4: Fabric choice plays a big role
No matter how skilled you are at sewing, you’re ultimately at the mercy of your fabric. So having a firm understanding of how fabric behaves in certain types of garments (and on your body) will help you achieve the look you want.
Understand drape, body, and weight to start. We have an article here.
When you get stuck, look in your closet for similar garments and read the fabric contents. You’ll learn how different fibers and their percentages affect how a fabric looks and behaves.
Also, use good quality interfacing that's the correct weight for your fabric. We have an article here!
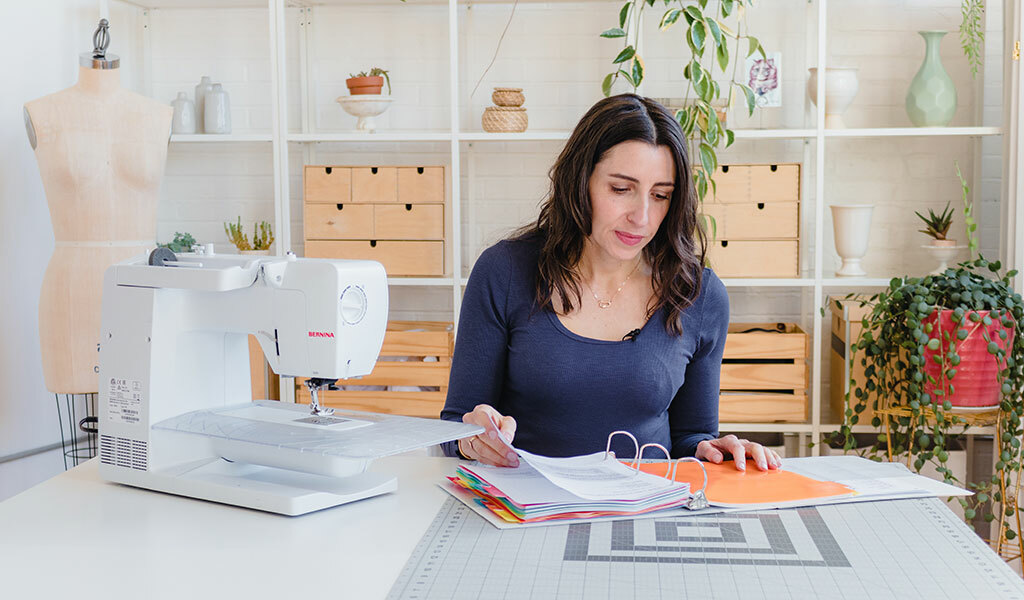
Tip 5: Track your mistakes so you can learn from them
You’ve heard us say this before, and you’ll hear it again. Keep a project diary or use the projects feature on the Seamwork Community to take notes of things you like about a project or the things you would change.
Tracking your measurements, fabric lessons, fitting adjustments, and pattern hacks helps you with each project moving forward. Plus, you get to see how far you’ve come!
Do you have any other tips for making your projects look polished? Comment and share!
Podcast Transcript
Sarai
I’m Sarai.
Haley
And I'm Haley.
Sarai
And this is Seamwork Radio. Welcome back to Seamwork Radio, where we share practical ideas for building a creative process so you can sew with intention and joy.
And this is our third episode in this quick tip series, we're sharing quick episodes full of tips to answer your most burning sewing questions. So today we're talking about ways you can make your projects more polished. We're going to cover five different tips to help you get a professional looking finish.
Okay, our icebreaker for today. Haley, tell me about the messiest thing you've ever sewn.
Haley
So it has to be faux fur, and I've surprisingly, or maybe not surprisingly, have sewn a handful of things out of faux fur in my life.
This one time, when I was in my early 20s, my friend Ruth and I lived together, and we were really into making really extravagant Halloween costumes to go down to West Hollywood and party and have fun on Halloween.
And this one Halloween, I was dressing up as a pig, and she was dressing up as a squirrel, complete with an enormous squirrel tail. I only had, like, a couple fur components. I think my ears. And I had made a little snout. There were, like, bodysuits involved, too. Because it's West Hollywood, you kind of have to turn it out. Also, I had sequins in my ensemble, but our apartment was a mess, was so gross with all of this brown and pink faux fur and sequins everywhere. But we were having fun. We didn't really care.
Sarai
I was at my sister's the other night, speaking of Halloween costumes, and I asked my niece, she's two and a half, I asked her what she's going to be for Halloween, and my sister said, oh, you have to see her Halloween costume from last year. It's so cute. She's going to wear it again this year. And it was this, like, little shark costume. She said, but it was made for 18 months old, so it's really tight on her. So she had her put it on, and she's putting it on, and my niece goes, “mama, it's cozy.”
Haley
It's like a thunder vest for a toddler.
Sarai
I just thought that was so cute. It's cozy.
Haley
Sounds adorable.
Sarai
I think the messiest thing so this question, you could take it one of two ways. You could be, like, the messiest looking thing when you finished with it, or the thing that made the biggest mess. I think the thing that made the biggest mess for me, I was sewing with something that was like a glittery fabric. It was one of those—it was probably for Halloween. I don't think I was sewing a Halloween costume, but it was like a costumey type fabric, and I was making a mini skirt out of it, and there was just glitter everywhere.
I mean, you know how glitter is. It was just everywhere. And I was fishing it out of my machine and out of all my other fabrics for months and months and months, that was probably the messiest thing I've ever sewn with. But you know what you're getting into when you're going to sew with a glittery fabric, you just kind of have to accept that that's what's going to happen. I don't know if I would do it again, to be honest.
I would sew with faux fur, though.
Haley
Never say never.
Sarai
All right, well, give us an icebreaker for a future episode. If you're a member, you can go to Seamwork.com/go/icebreakers and share a question that we can use on a future episode, and we'll probably read it here on the podcast.
All right, so let's get into our topic for today. So when you invest a lot of time and money into something, I think it can be really disappointing when it turns out looking subpar or not like what you had imagined in your head.
I think when you're in your first few years of sewing or when you're kind of in between skill levels, it can be hard to know how certain techniques make your project look much more professional. And it's just kind of that thing where you don't know what you don't know, and so it's hard to know which techniques you need to incorporate in order to get a look that's at the level of quality that maybe you have in your mind. So there's kind of that knowledge gap there. And there may also be a moment in your sewing when you realize that you really care about what your projects look like on the inside.
Maybe when you first start sewing, you didn't really care. You just wanted to make something cool. And then as you get more and more into it, you decide that, hey, I actually feel better when my projects look like the things that are sold in a high end boutique, for example, or whatever it is that you have in your mind. Or like, the beautiful vintage garments that I've seen.
So maybe you don't feel as comfortable wearing a project that looks messy inside, even if you're the only one who sees it. I know that I have definitely felt that way, and that was kind of like an a-ha moment for me in my sewing.
So for you, Haley, what point did you feel like you really began caring about the quality of your garments in that way?
Haley
It's hard because my perspective on this is skewed because I learned how to sew in a school setting, so I was being graded on the quality of my stuff. I'm a straight-A student, so I really care. So it was always really important to me, but I feel like maybe a year in is when, because at first, it's hard to even know what good quality is. You have the reference of ready to wear clothes, but those aren't necessarily really great quality either.
I would say about a year in is when I felt like I had enough knowledge to have expectations of myself. Yeah. What about you?
Sarai
I'd say a year or two into my sewing. I think another factor is we were both pretty young when we started learning to sew. And I think when you're young, you're not as exposed to high-quality clothing. I know for me, I wasn't shopping in fancy stores by any means. I saw probably some good quality clothing at the thrift stores, but knowing that from not so great quality, it was probably not really even on my radar. So I think some of it came gradually as I got older and my tastes changed and developed and I learned more about clothing. So I think that was a big factor for me.
But I do feel like there was a point at which I realized, hey, these garments I'm making kind of look homemade. What could I do to make them not look so homemade? So I think that question started percolating in my mind probably a year or two into my sewing.
At first, I was just cranking stuff out and enjoying that. And that I think that's fine too.
Haley
That's like, an important stage to go through, I think.
So how did you learn to get a more professional finish?
Sarai
I think the first thing for me was realizing that I could finish the seams on the inside, because I never really understood that part of it. My grandmother taught me the basics, but a lot of it I just picked up know, big four sewing patterns from JOANN, and they don't really tell you anything about finishing your seams. So I didn't really know what to do when I saw ready to wear garments. Often the seams are serged, and I don't really know what that was or how you did that. So it took me a while to kind of figure that out and figure out different ways to finish a seam to make the garment more long lasting and look a lot more professional. So that, again, was kind of a trial and error.
Finally, reading books and learning more about sewing gradually over time. I think especially vintage sewing books helped a lot with that because they have techniques that don't involve a serger, especially books that were written before sergers really came into prominence. So that was really helpful for me. What about you?
Haley
I think I did a couple of things, vintage books and just like any kind of sewing reference book, I would go to the library and just sit there in a big chair and read them, look through photo or look through the illustrations, even, just to get, I don't know, better ideas.
And then the two other things, I guess it's kind of one other thing I would do is I would just shop more not to buy, but I would go to fancy stores I couldn't afford because at the time, I'm, like, 17, 18 years old. I'd go to Bloomingdale's, and I would look at high-end clothing and inspect it, which was something that a teacher that I had early on told us to do, was bring a bunch of stuff into the dressing room and spec it.
You can measure it and inspect it, learn about how it's getting put together, feel underneath the lining, just to get some ideas. Are they reinforcing the fabric? Like, what kind of interfacing, padding, whatever? What are they using? That really helped.
And then also, I was always into thrift store shopping as a teenager, but I feel like I started getting—back then, it was just kind of like anything that was cool, or I could cut up and make groovy, punk, whatever.
And then I started getting more into vintage things from the thrift store and seeking those out, specifically seeking out quality pieces. And I just learned so much from just observing. Those were, like, the three tools that were so invaluable to me.
Sarai
Can I tell you about something discovered in a thrift store garment when I was a teenager?
Haley
Yes.
Sarai
Me and my friends love to shop at thrift stores. And my best friend bought this pair of old man pants at a thrift store, like, 70s, tight, kind of bell bottomy old man pants. And she got them home. She didn't try them on in the store for whatever reason. Probably didn't have a dressing room. And she got them home, and she found, like, padding sewn into the crotch of these pants. We thought it was so hilarious. She keep the padding? I don't think so. I don't know if she kept the pants after that. That always sticks in my mind.
Haley
That is hilarious. That is actually tip number one.
Sarai
Yeah, you can pants, you can pad them wherever you want.
Haley
Really. Let's choose your adventure.
So tell me about the most professional looking garment that you've ever made.
Sarai
Oh, I would say it's got to be a piece of outerwear. So thinking about some of the outerwear I've made, I think maybe that short coat that I made with Pendleton wool. It's like a gray and cream check. Pendleton wool. And it's lined in silk. It's fully lined in silk. It has all the tailored trimmings. It's got the shoulder pads and everything, the right interfacing and everything. It's just really well made, and I love wearing it. It feels very luxurious. I think other outerwear things I've made fall into that category too, but that's the one that sticks in my mind. It's one of my most treasured pieces that I've made, for sure.
Haley
It's beautiful. I love that piece.
Sarai
I have good memories associated with it, too, which I think is something that really helps. I wore it when we went to Japan years and years ago, and I have a lot of pictures of me in it from that time and just makes me think about that. So, what about you?
Haley
I mean, not to toot my own horn, but I've made a lot of really nice looking things. The one that most recent, very impressive thing that I made was probably the Larkin I made Eric a couple years ago. The sewing quality is nice and all, but I feel like I did a really good job of sourcing all of the notions and things for it. The ribbing at the cuffs and the neckline is just like coordinates so well with the self fabric. The lining is just like contrasting and interesting. The zipper is nice. It just came together. All of the components came together, which is something you can't take for granted.
I feel like especially in home sewing where we sometimes don't have access to the same range of colors and all of that stuff that they do in ready to wear something like that, that had so many components for all of the pieces to come together so nicely was just so pleasant.
But the worst part is that jerk hardly ever wears it. But it fits me. I can't zip it. He's like a skinny guy, but I wear it sometimes.
Sarai
That's too bad.
Haley
He modeled it actually for us. So if you want to see the jacket I'm talking about, you just go to the Larkin product page and check it out. It's green.
Sarai
Yeah, it is very cool. Well, that's too bad that he doesn't wear it, but maybe he'll find it in his closet sometime and change his mind. That happens to me sometime.
Haley
All right, so I'm going to kick us off with our tips for this episode.
So tip number one for creating projects with more polish. This isn't going to surprise anyone. Pressing, you got to press, not just like sometimes, not just at the end. You have to press constantly at every single step.
And it's not just pressing. You need to be making sure that you are using the appropriate tools to get a really good press. So what are the appropriate tools? I'm talking about seam rolls or hams to help you get into those tight or curved places. Or a sleeve board also can be helpful using a pressing cloth so you're not scorching your fabric.
These details, honestly, I feel like when I learned how to press properly, the quality of my garments just skyrocketed.
Sarai
Yeah, it makes a huge difference, especially if you're sewing with something like wool. If you're sewing an outerwear piece or anything tailored, it's half the project is pressing at least. So that's definitely a skill worth learning.
Tip number two is not to skip those little techniques that really do make a big difference. And you'll usually find these in your instructions. So it's things like clipping and notching, trimming your seams, grading your seams, understitching your seams. I mean, understitching alone, I think that makes a huge difference. Sometimes edgestitching or topstitching, I think those things are at least when I was first learning to sew, I didn't always understand them, and so it was easy to skip them.
And first of all, that held me back in learning about these things. So that's number one. And number two is my garments didn't look as good because I was skipping really actually key steps that I didn't really realize were key steps. So if you find yourself kind of skipping those things that take a little bit of extra time, just recognize that time is going to pay tenfold in the final look of your garment.
And I think even more importantly, how you feel about the garment. I just think if you put time into the things you're making, you just feel so much more attachment to them. I think that's really important to me, at least in my sewing.
Haley
I agree. And something I feel like that's worth mentioning with these techniques that you mentioned that are oftentimes like, a little bit fiddly. And I think that's why people skip over them, is they're like, I don't want to understitch. It's always so crooked. Well, then maybe invest in an edgestitching foot that's going to help you with that.
Or, I don't want to grade my seams because it freaks me out. Well, maybe you need some sharper little trimming scissors that are going to make the job a little bit easier. Also, don't put the blame too inward. Also get curious about what things you might need to be more successful in those techniques.
Sarai
And if you're not sure, our community is a really great place to ask for things like that. If you have trouble with understitching, let's say you don't know what's going on, but every time you try to understitch, it seems to get screwed up. The community is a great place to go and just ask for advice, and somebody there will probably bring up either a tool you've never heard about or a technique you could try, or diagnose whatever problem is going on. And that's just invaluable. I think having a community to support you is just such a game changer when it comes to improving your skills.
Haley
All right, let's check out tip number three, which is learn as many finishes as you can and learn about what kinds of fabrics and which kind of seams they're appropriate to use on.
And don't just stop at learning about different seam finishes. It's really important to make a plan for how you're going to finish your garment before you jump into it.
Something that I like to do always is I always skim the instructions before I start any project just to get them in my brain, start marinating on them, and also so that I can look at like, okay, what seam finishes are going to work where, and make a little plan. You can write in your instructions what you want to do, and I think just going in with a plan is going to help you to have much better seam finishes.
The other thing that I think is worth mentioning is this also includes closures. Making a plan for those closures as well and taking the time to practice them or do the couple extra steps that are going to make them really successful. For example, if you are sewing in a zipper, maybe taking the time to baste it in before you just like full speed ahead on your sewing machine.
Or if you're sewing buttonholes, use your fashion fabric to do a couple of tests so that you can adjust the tension and make sure that you don't have any puckery buttonholes or anything like that.
Sarai
Yeah, definitely makes a big difference. Tip number four, this is something to keep in mind, which is that fabric choice really plays a big role in the final look of your garment.
So, the first thing I'd recommend when it comes to picking out your fabric is to understand drape, body, and weight of fabric and what those terms mean and how to assess them in any fabric you're buying and make sure that your fabric and your project go together. So we have an article that can help you with this and it is called How to Buy Fabric Online: Know Your Terms | Weight and Drape.
So you can find that we'll put that in the show notes as well. You can read that and get more of a sense of what those terms are if you're not already really familiar with them. I think if you're stuck, a really great way to figure out a good fabric and pattern match is to look in your closet for similar garments and look at the fabric contents. Not just the fiber content, but also what does this fabric feel like? Is it stiff? Is it flowy? What kind of a weight does it have to it?
And those are things that you can just, even if you're not super familiar with fabric, you can start to get a feel for them over time just by looking at the clothes that you already own and seeing why they work or why they don't work. So that'll teach you a lot about fabric.
Another thing that you can do to make sure that you have a polished finish is to use good quality interfacing and interfacing that's the right weight for your fabric. We also have an article on that, how to choose the best interfacing for your sewing project. Really helpful. There are a lot of different types of interfacing out there.
I think that's another thing when I was a beginner that I did not realize at all that there's more than just the Pelon fusible stuff that you find in big box stores. And so finding the right interfacing for your exact project and your exact fabric can make a really big difference. I think oftentimes that interfacing, which is often the default in some of the bigger sewing stores, can provide a look that's a little too stiff for a lot of applications, especially for facings and things like that. And there are other options out there that you can learn about.
Haley
My collars, how they improved when I learned about good quality interfacing and learned about a truly lightweight interfacing.
Sarai
Yeah, I really like a lightweight knit interfacing.
Haley
Yeah, that's my go-to for most projects.
Sarai
Yeah.
Haley
All right. And our final tip is to track your mistakes and your victories and learn from them.
I think it's so important to keep some kind of project diary just so that you can reflect on the things that have gone really well for you, the things that maybe you don't want to repeat again in the future.
And you can do this in various ways. You could have a straight-up journal that you just write your project, what you made it out of, what you liked about it, what you didn't. We also have a projects feature in the Seamwork community that can be really helpful. You could post pictures and get compliments from your sewing friends, ask questions, all that kind of stuff.
But I feel like when I started really cataloging my makes, it made a really big difference. And also using that cataloging method because you think you'll remember, but you don’t.
And just simple things like what were my body measurements when I made this pattern last? I love writing down stuff like that because then I don't have to assume that something that fit me two years ago is going to fit me the exact same because I have, like, straight-up data. Tell me what's up.
Sarai
You can even make a little template for yourself. Whether you're posting them online, if you're posting them on social media, or if you're posting them in our community, which is kind of a dedicated space for your sewing projects, I think it can be helpful to have we have some of that information in there for you to put in, but you can also add your own and kind of customize it so you could put in things like what I liked about this project, what I didn't like about this project, what I would do differently next time, all those kinds of questions and just do it for every project.
I think the other good thing about that is it gives you kind of a format almost like filling out a questionnaire rather than feeling like you have to come up with something to say about it. I mean, I find that really helpful.
Haley
And then you get to look back and admire how far you've come because because I think that it can be really easy to forget all of the ways in which we've improved.
Sarai
That's true of so many things in life, not just sewing.
All right, well, I'm going to recap our five tips for you guys. So tip number one is to focus on pressing and pressing tools. If you want a more polished look.
Tip number two is not to skip those little techniques that make a big difference, like clipping notching, understitching, grading, trimming, all those little things.
Tip number three is to learn as many finishes as you can and on what kinds of fabrics and what kind of seams to use them.
Tip number four is to learn about fabrics and understand that fabric choice plays a big role in the final look of your garment.
And tip number five is to track your mistakes so you can learn from them—and your successes, your mistakes and your successes so that you can learn from them.
All right, well, another layer of making clothes that look really professional and well-done is, of course, fitting. And if you're interested in learning more about fitting, I recommend downloading our free Fit journal. It walks you through a simple fitting process that helps to demystify getting the fit you want.
So it includes worksheets for taking and comparing measurements. It includes worksheets for choosing your size and for making adjustments. And the cool thing is that when you use it over time, it really helps you to find your fit. So it's available for free at seamwork.com/go/fitjournal.
And if you like this episode, I have a favor to ask you, which is whether you are willing to forward this episode to one of your sewing friends who you think would find it helpful. And that's not to insult their sewing quality, but to help spread the word.
So if you think somebody else would enjoy this, please go ahead and share it. We really appreciate that. Again, word of mouth is the way this podcast grows. That's how people hear about it and learn about what we're doing, and it really keeps us going, too.
So thank you so much to everybody who's recommended the podcast. We really appreciate it. It always makes my day when I see somebody who came to the podcast saying that a friend of theirs had recommended it to them. I mean, that's just awesome. So thank you to everybody who's done that.
And if you know somebody who might enjoy it, please let them know. That wraps us up for this week. I'm Sarai.
Haley
And I'm Haley.
Sarai
And this is Seamwork Radio.