
 Sign In
In part 2 of the burrito method series, we’ll show you how to use this technique on a sleeveless garment.
If you’re looking for how to do the burrito method on a garment with a yoke, head over to part 1 here.
So what’s the burrito method? It’s a technique to get a clean finish inside your garment when you have a lining or a facing. You'll neatly enclose your allowances in the lining, and you won’t see any raw edges. It’s a moment of total sewing satisfaction.
The first time you try this technique, you might feel like you’ve created a giant twisted pretzel with your fabric. So we made a video for our YouTube channel to show the burrito method up close. This tutorial will make it so easy!
You’ll see how it works step by step and get tips for doing it right the very first time.
When to use the Burrito Method
This technique works on sleeveless garments that are lined or feature an all-in-one facing. Unfortunately, it won’t work for garments with sleeves. When you learn how to do it, you’ll understand why!
You can also use it for lined yokes. Again, you can find that tutorial here.
The Burrito Method Demystified
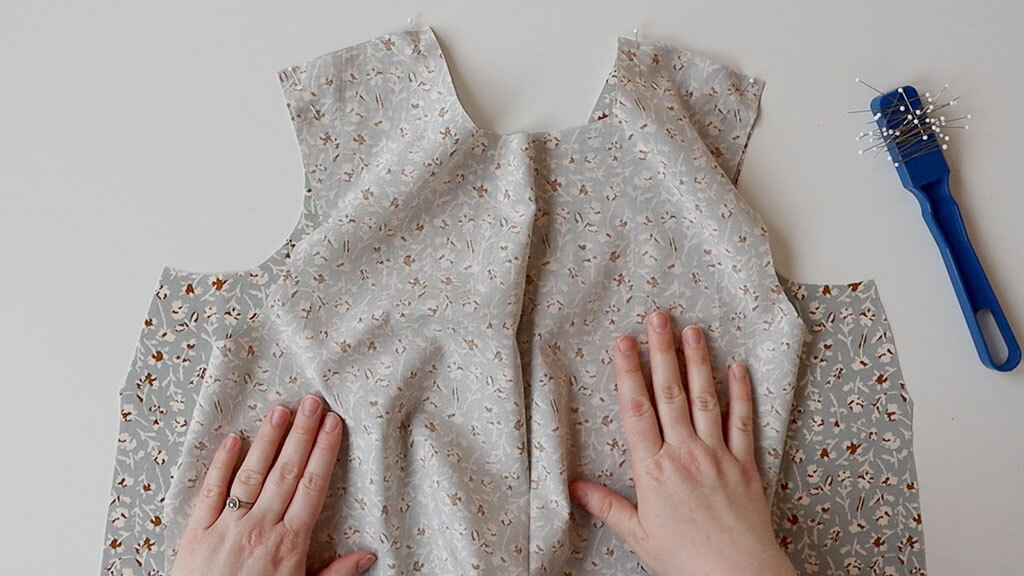
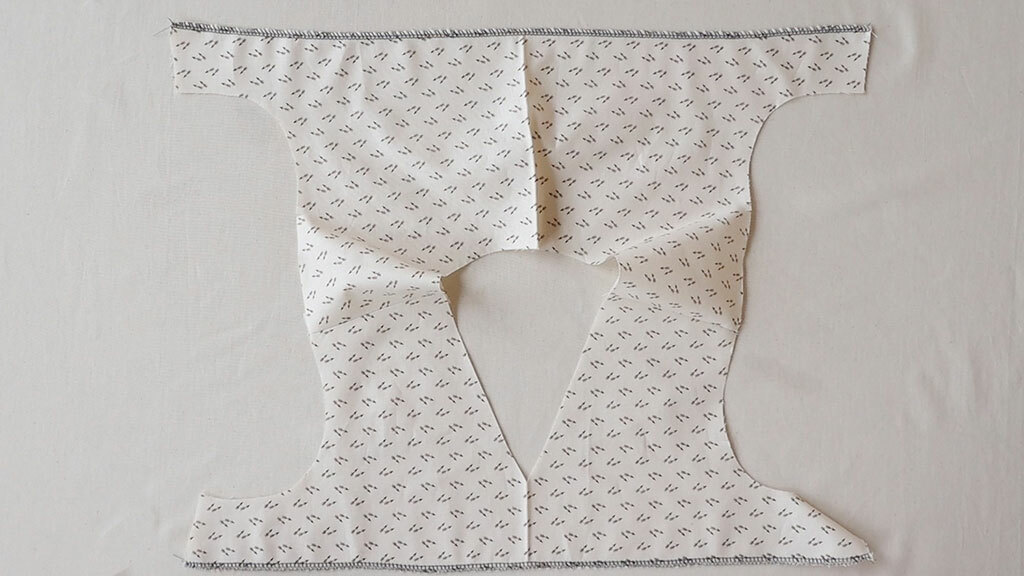
Start by sewing your shoulder seams.
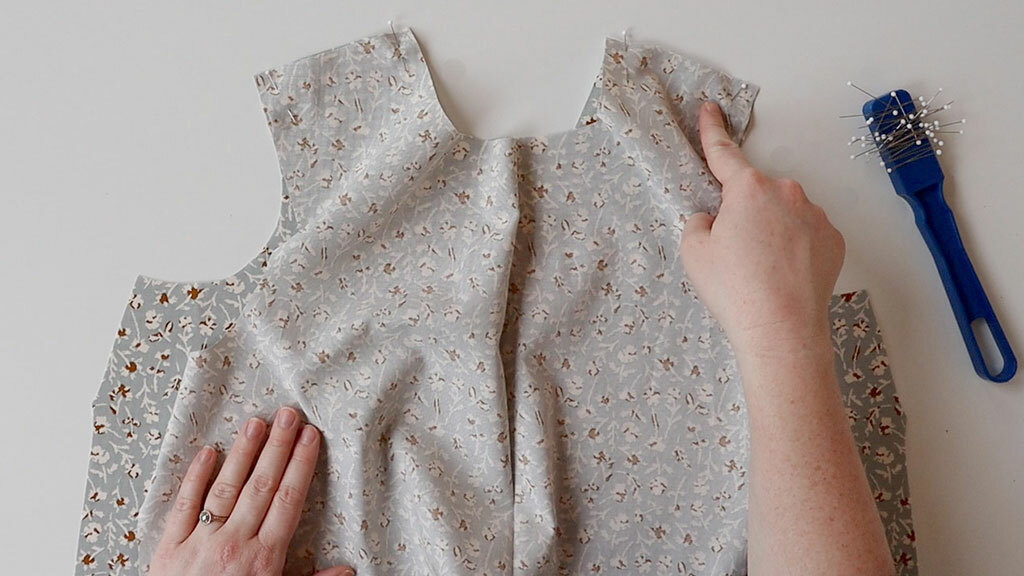
With right sides together, match the front outer shell to the back outer shell at the shoulder seams. Pin. Stitch. Press the seam allowances open. No need to finish your seam allowance here—that’s why this method is so awesome.
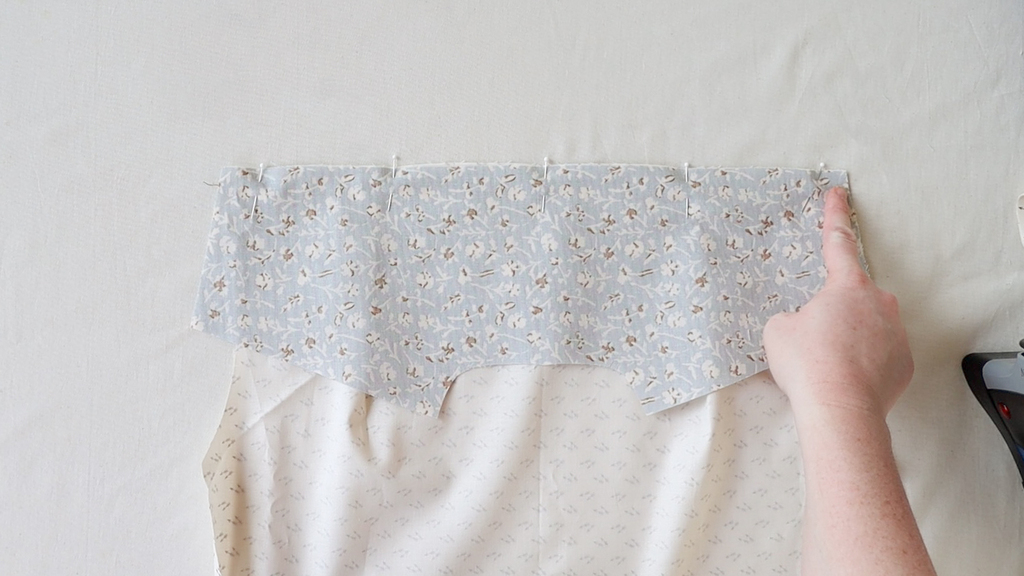
Repeat these steps with your facing or lining pieces.
If you are sewing an all-in-one facing, like in this tutorial, you can finish the bottom edge of the facing at this time.

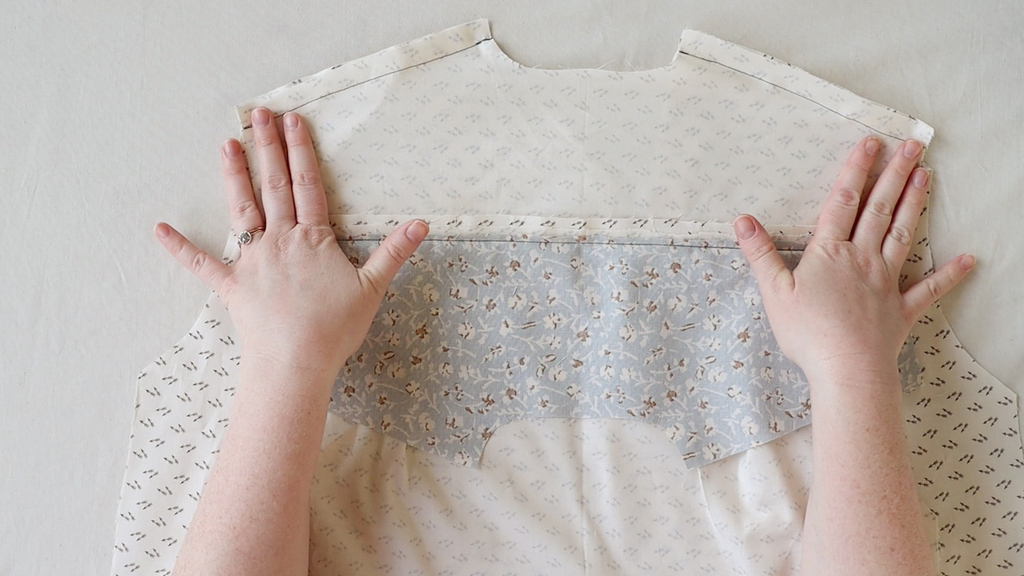
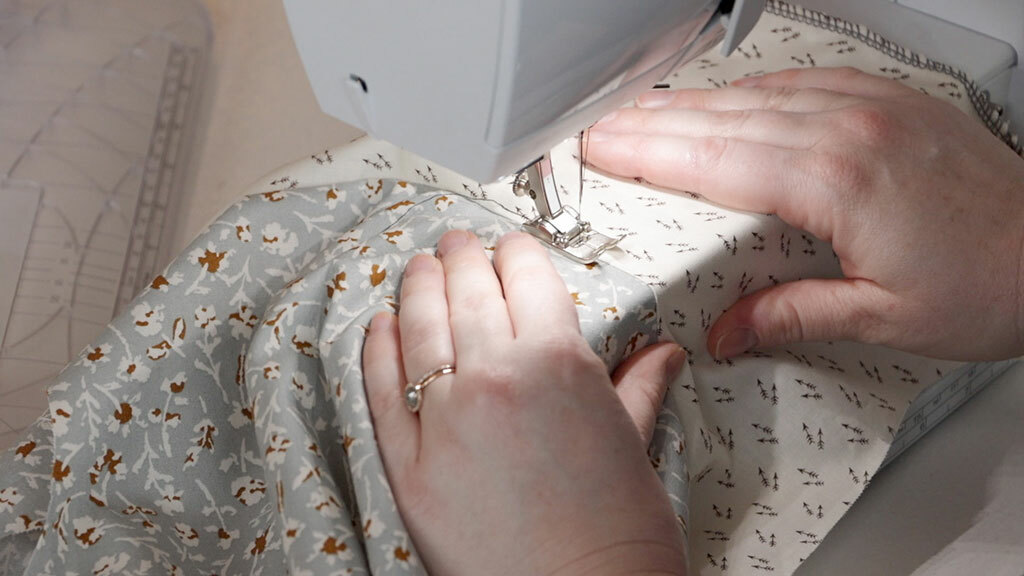
Now it’s time for the neckline.
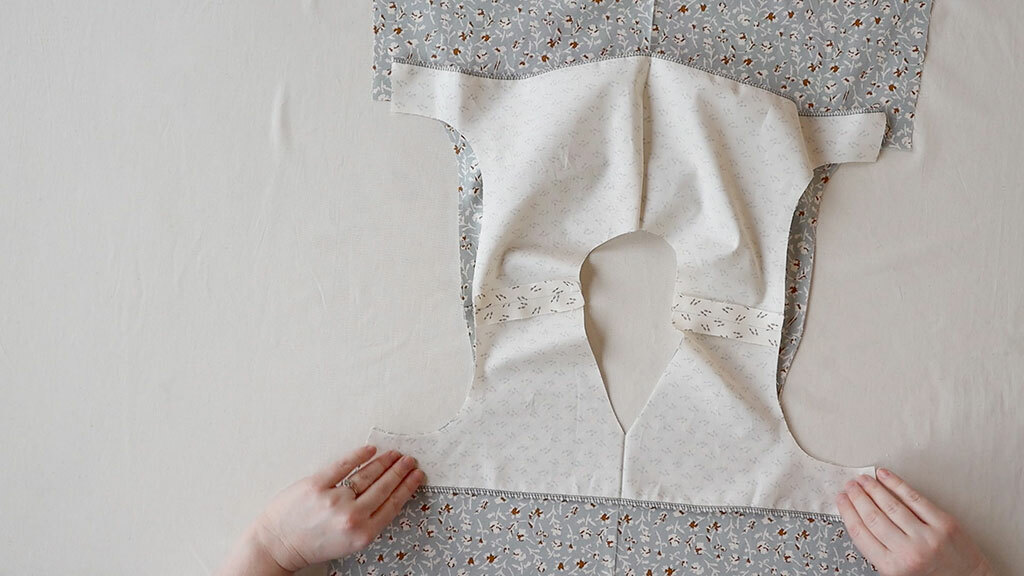
Place your outer shell on your work surface, with the right side facing up. Then place the facing or lining on top of the shell so that they are right sides together.
Pin along the neckline and sew.
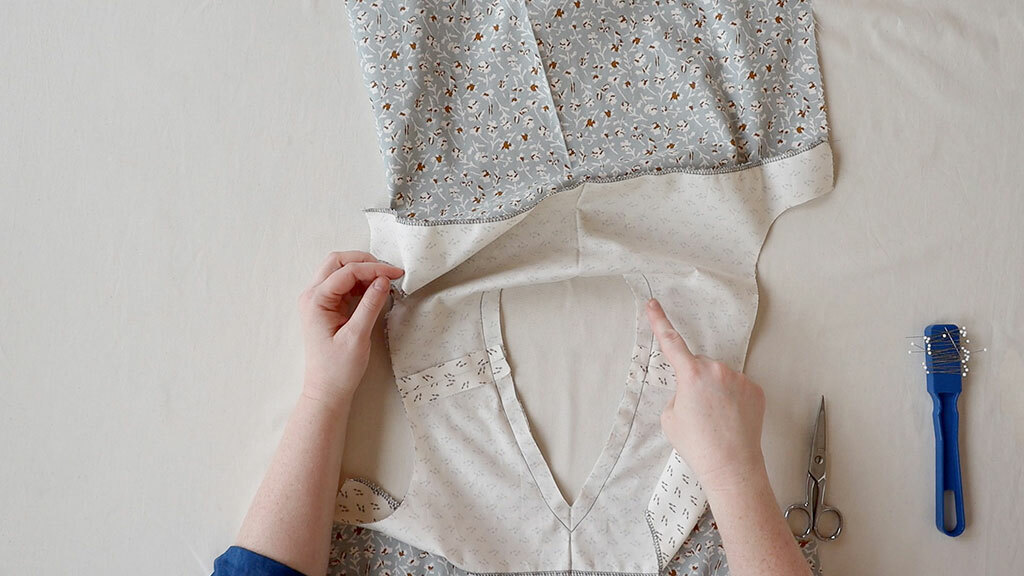
Once it is sewn, grade and clip the seam allowance.
Then understitch that seam allowance to the facing or lining. Give that a good press.
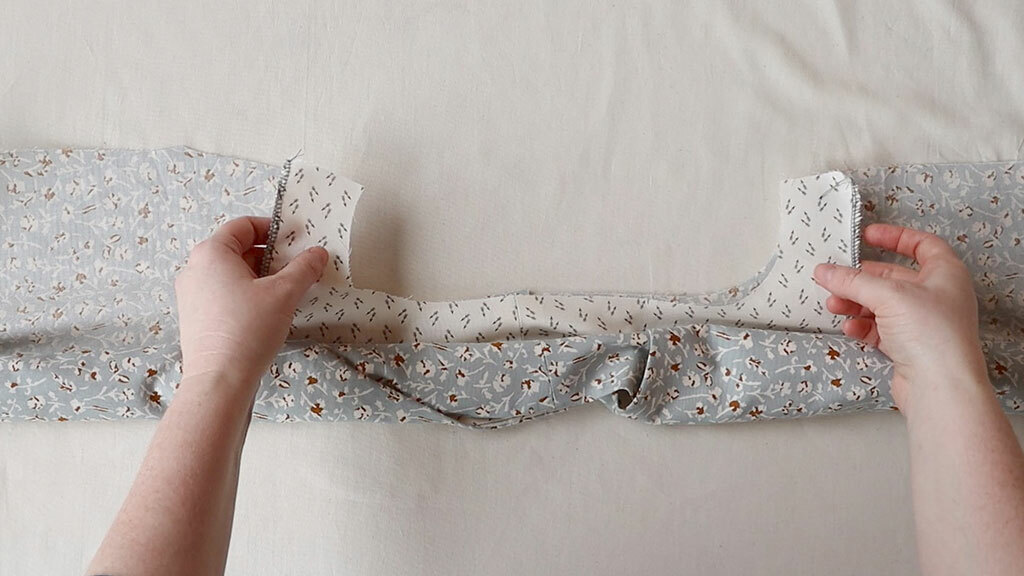
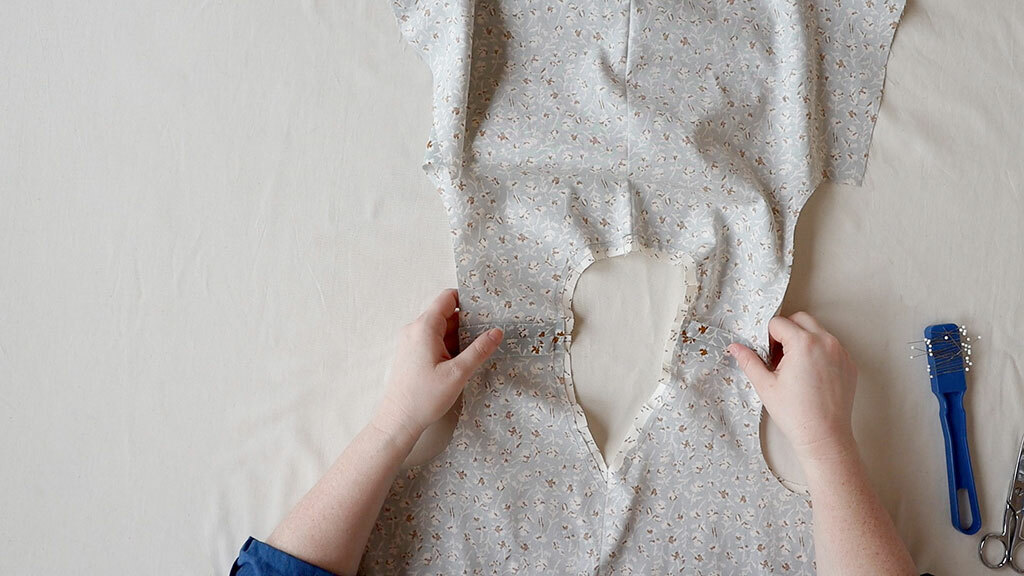
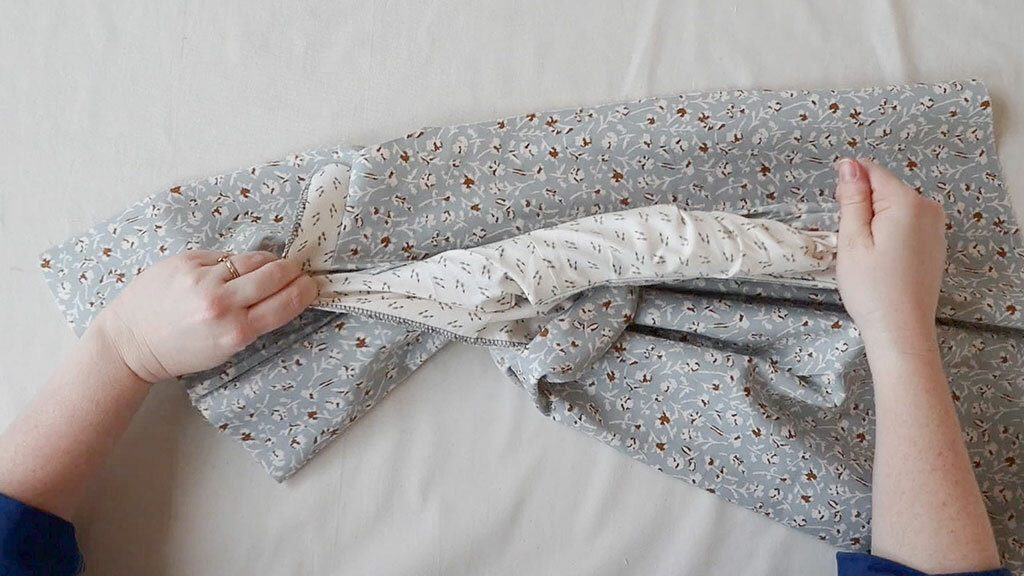
Now it is time to sew the armholes—it’s time for the burrito!
Starting at one armhole, roll the shell and facing towards the other armhole.

Flip out the garment so that the right sides of the facing and bodice match at the armhole, and the rolled-up portion is between them.
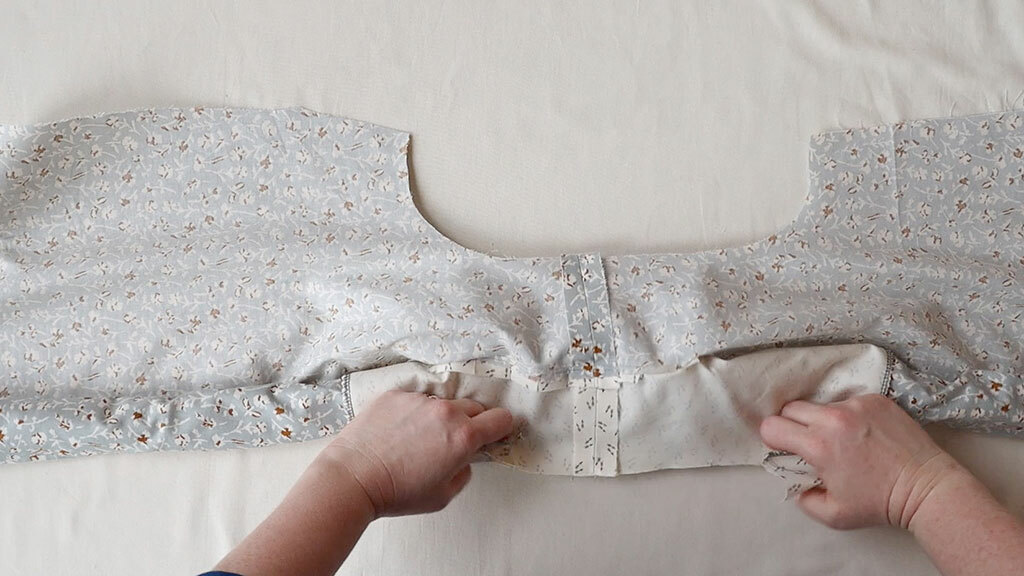
Pin. Think of the rolled-up portion as your burrito filling, and the shell and facing are your tortillas.
Stitch the bodice to the facing along the armhole seam, ensuring the rolled-up portion of the garment is not caught in your stitch line. Be careful not to sew “the filling” of your burrito here.
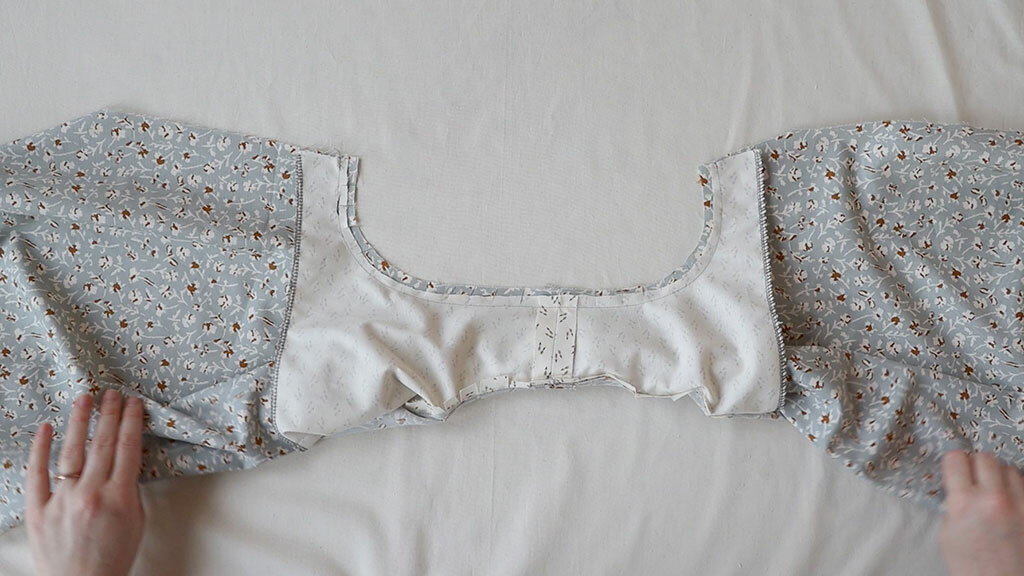
Trim and grade the seam allowance. Clip along the curved edges. Gently press the seam allowance toward the facing.
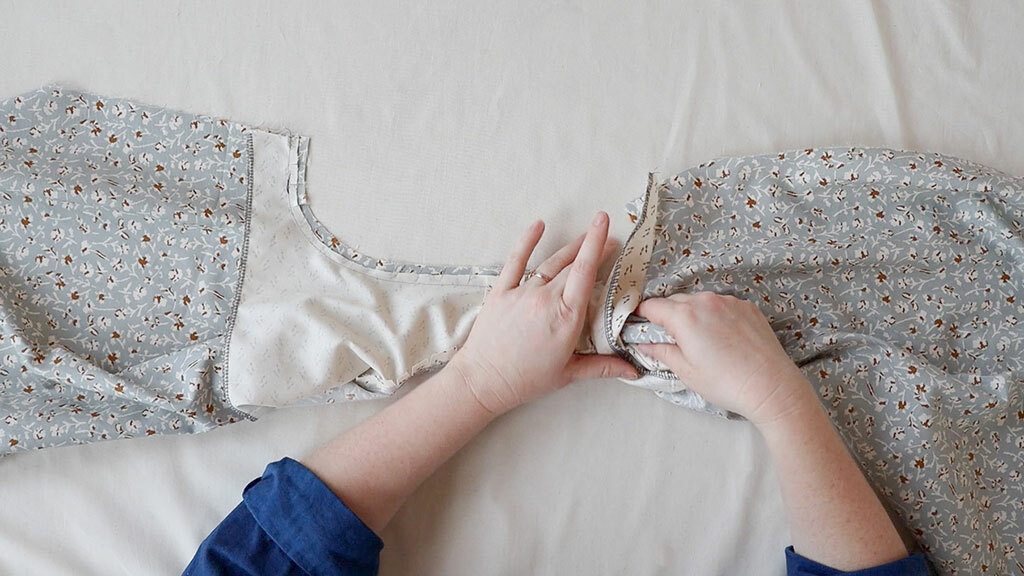
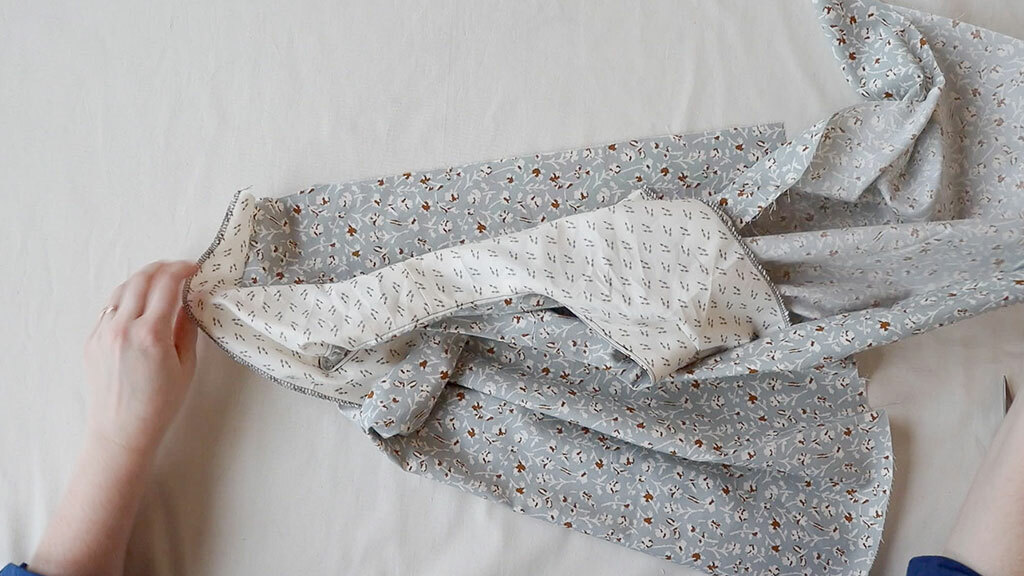
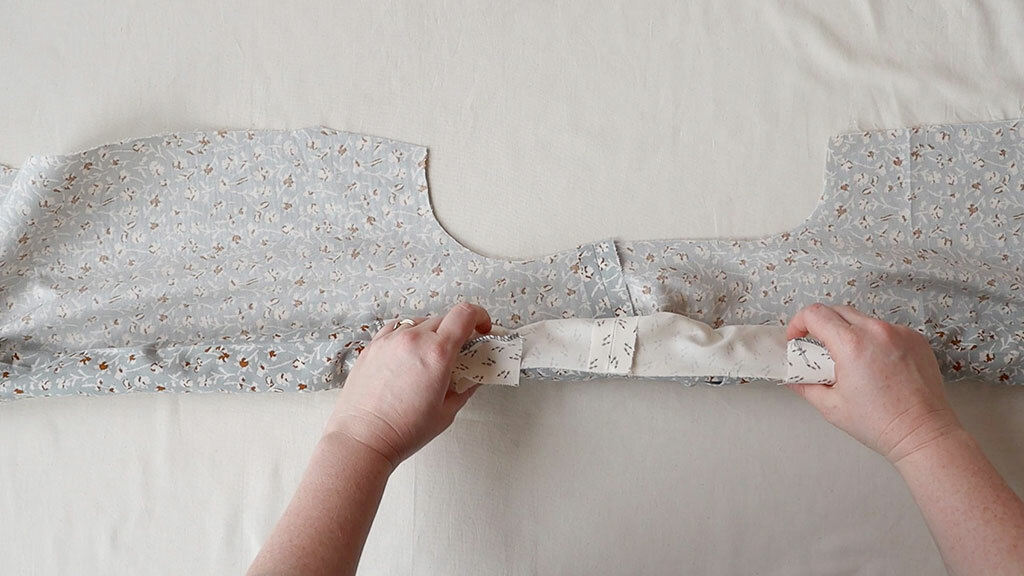
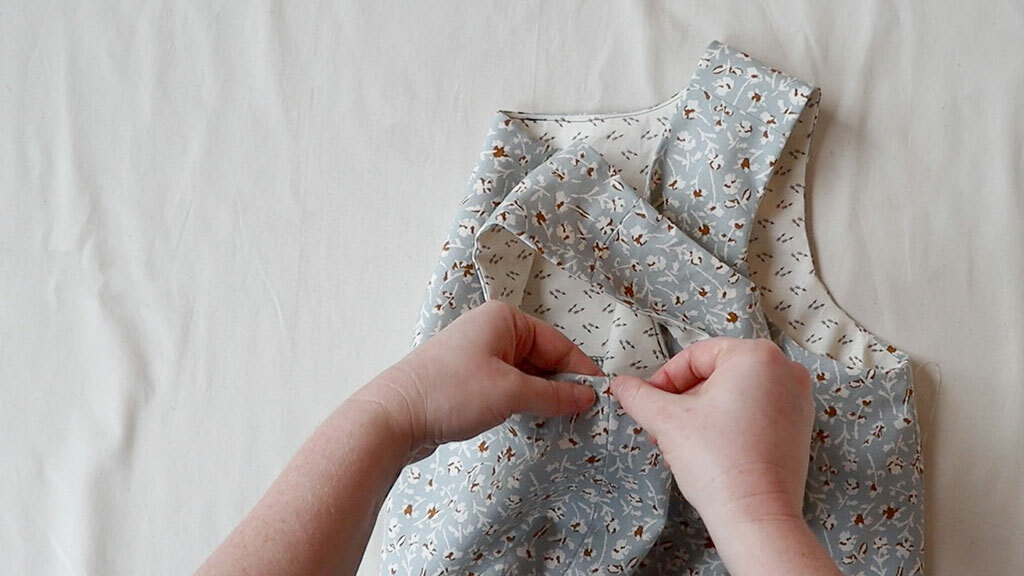
Pull the entire garment right sides out through the shoulder channel.
Then, neatly press the armhole in place.
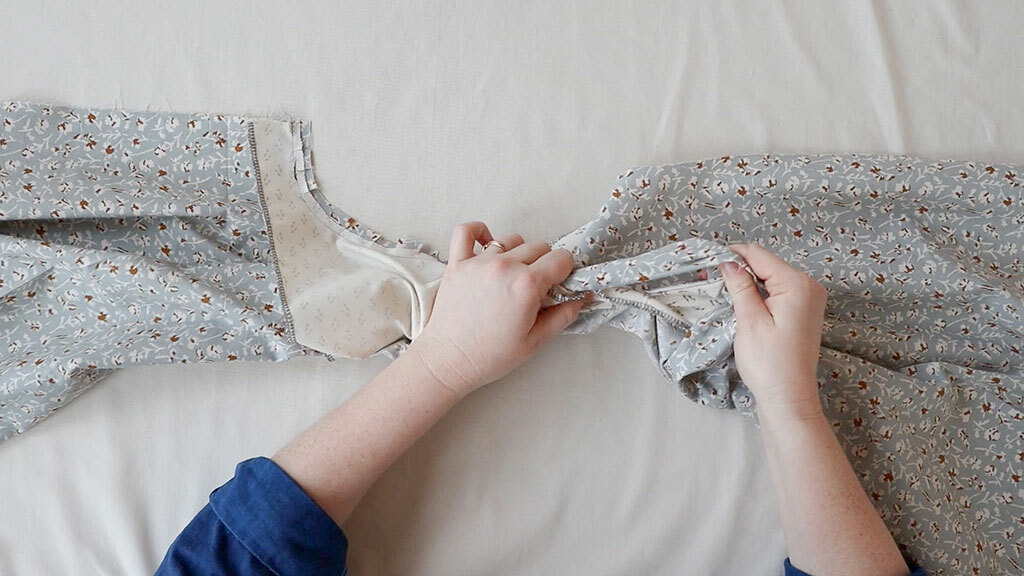
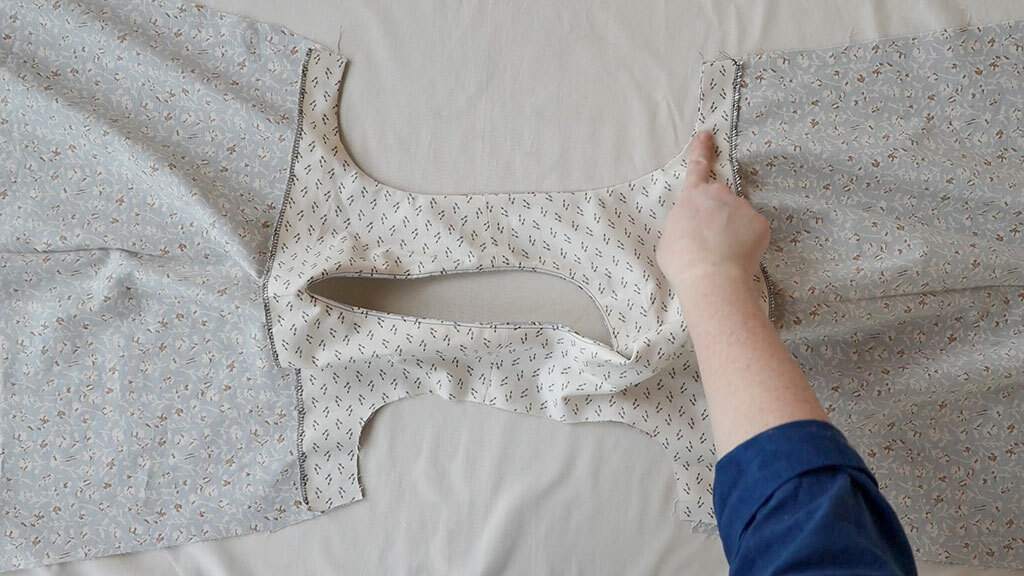
Repeat these steps on the second armhole! Roll so that the right sides of the facing and bodice match at the armhole, and the rolled-up portion is between them. When you pull the garment out through the second shoulder channel, you’ll have a clean-finished shirt with no raw edges exposed.

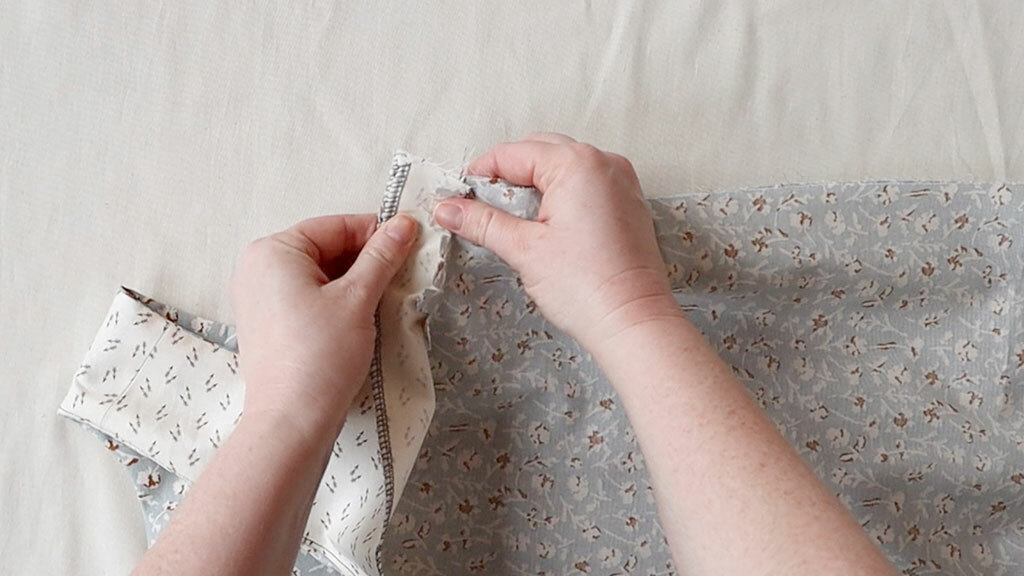
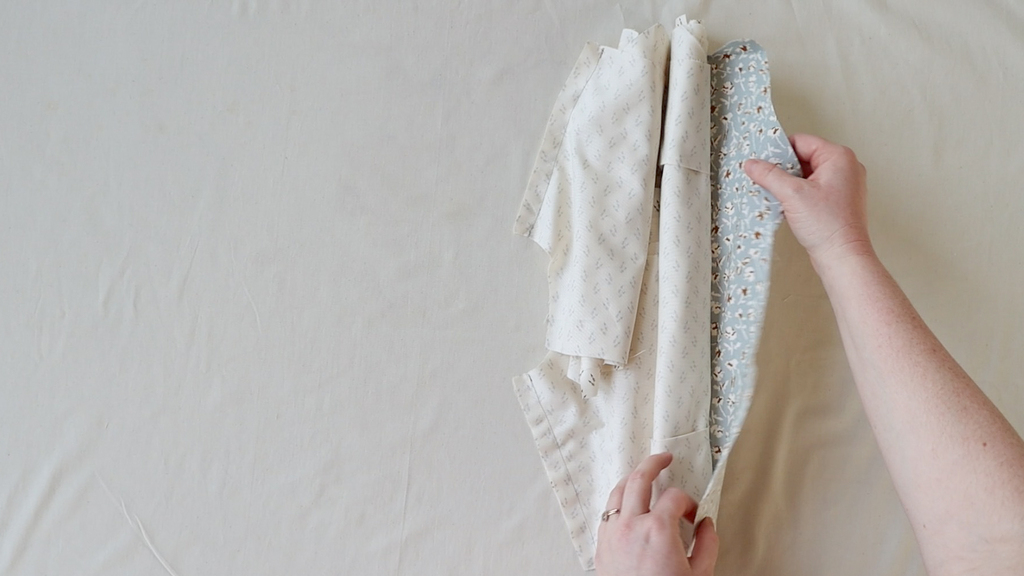
To finish your top, sew the side seams. With right sides together and the facing pressed up and away from the bodice, sew along the entire side seam.
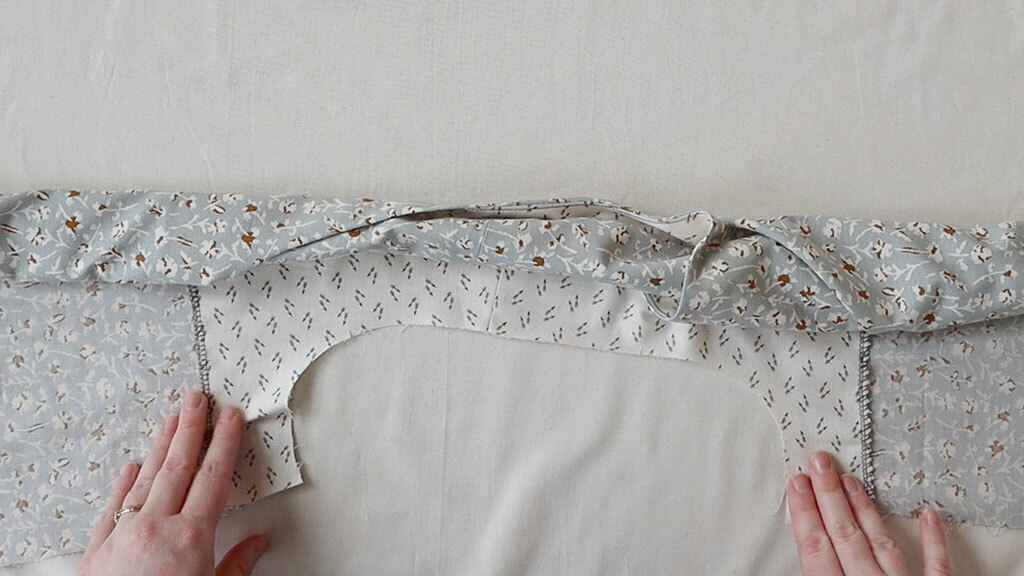
Finish your side seam as desired.
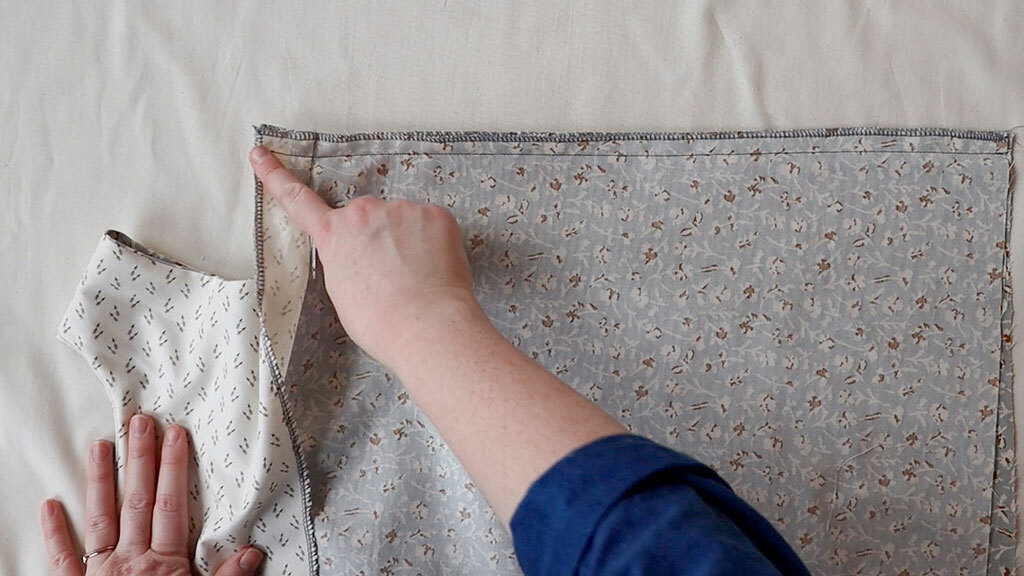
Flip the lining back toward the bodice and press in place. Secure the lining by stitching in the ditch at the side seam under each arm.
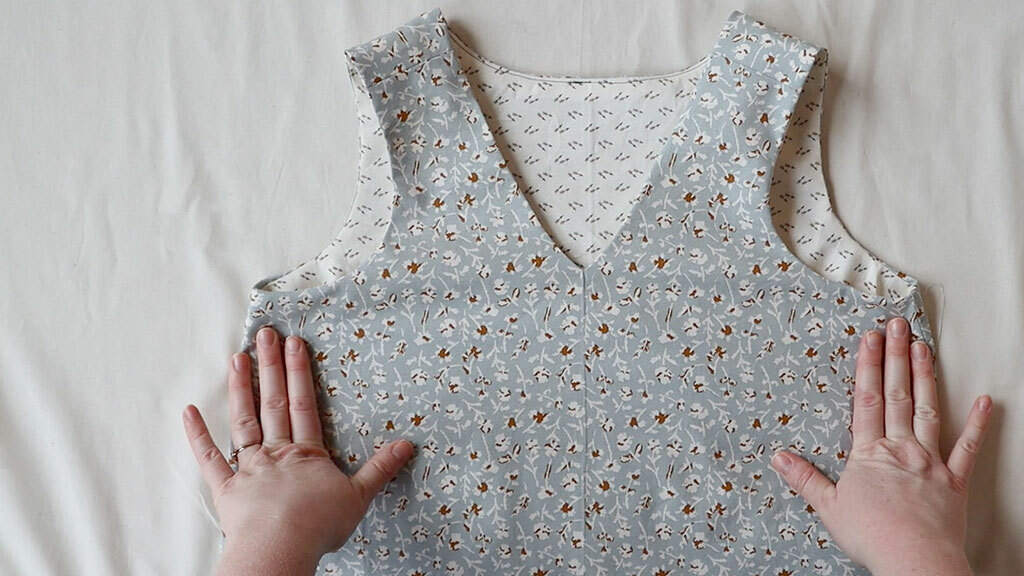
And now you have a neat and tidy sleeveless bodice!
Do you want to see more tutorials like this? Leave a comment and let us know what techniques make you scratch your head. We can help break it down in a video tutorial.

