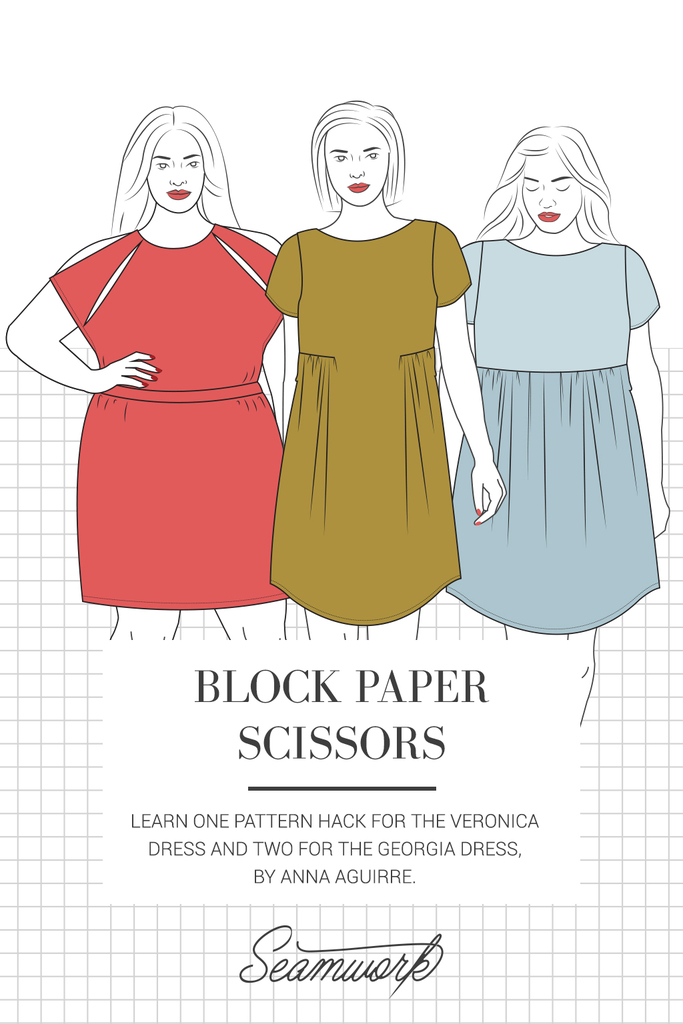
Block Paper Scissors is a monthly column that teaches three pattern hacks. These hacks help you give your Seamwork patterns a custom spin—all you need is paper, a ruler, and a pencil!
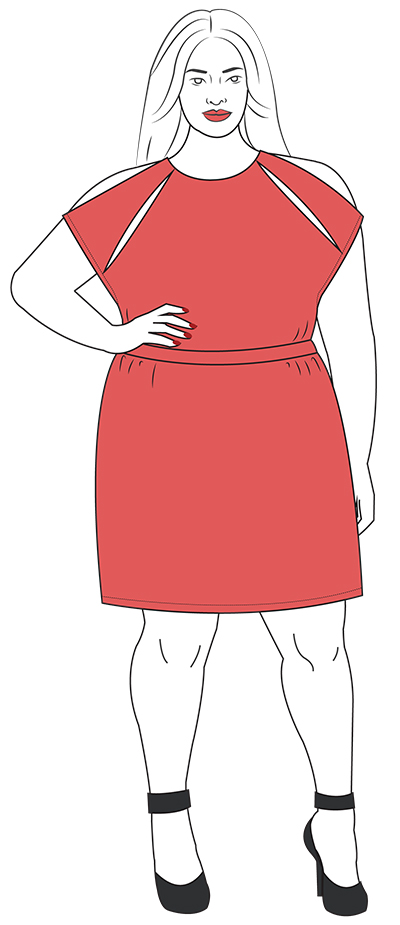
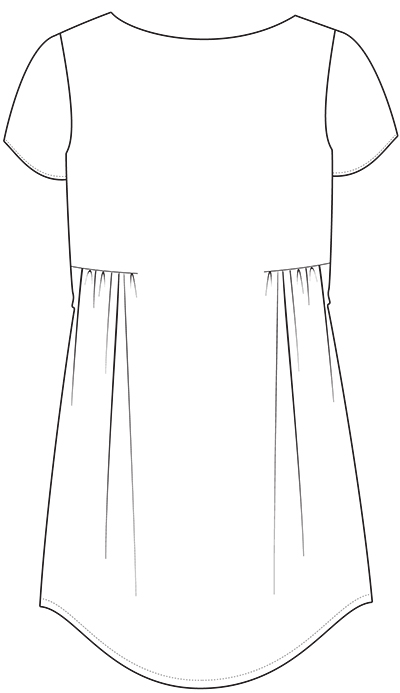
This month, we walk you through one hack for the Veronica pattern and two for the Georgia pattern. For Veronica, learn how to create shoulder slits in the bodice. For Georgia, create two new skirt options: a half gathered front skirt and a full gathered skirt.
Note: For best results, be sure to make any necessary fit adjustments before hacking your pattern.
You'll Need:
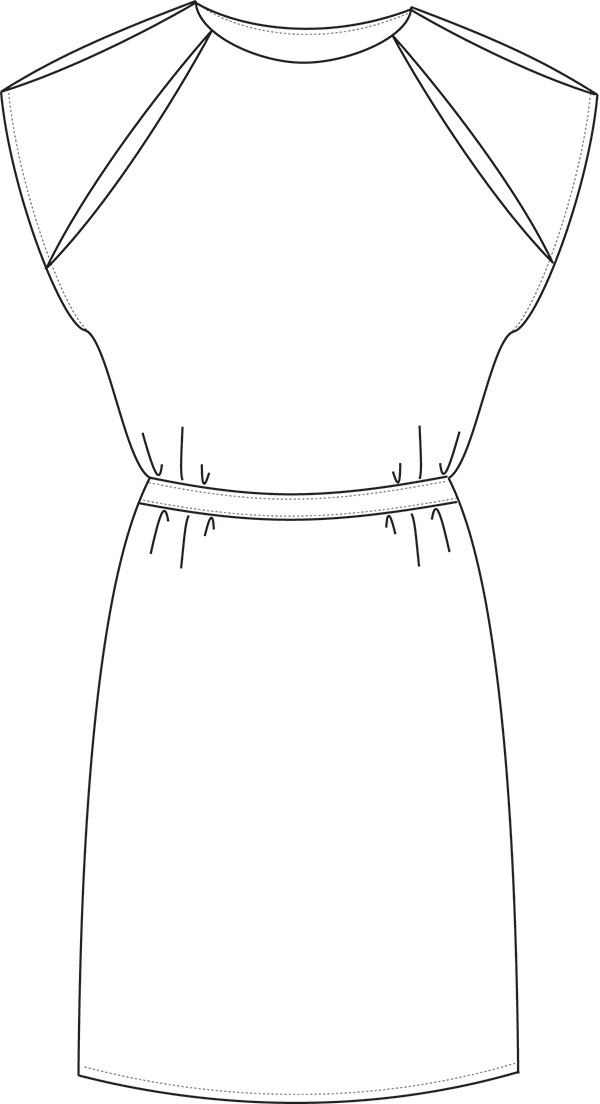
Shoulder Slits on the Veronica Bodice
Step | 01
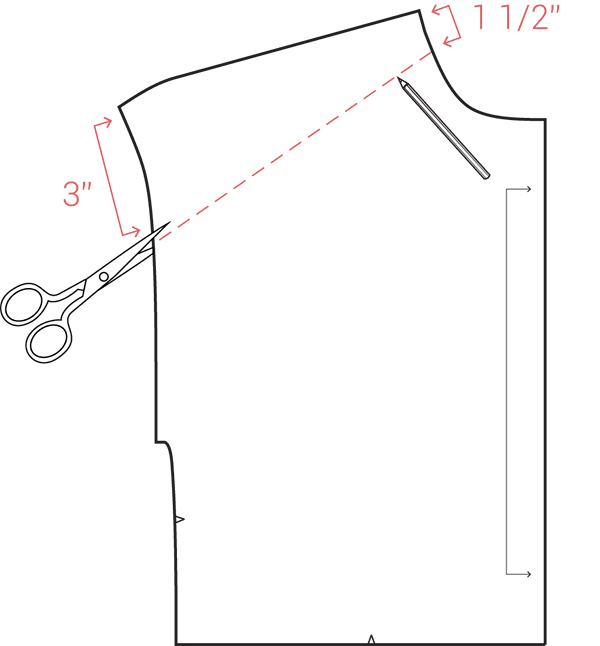
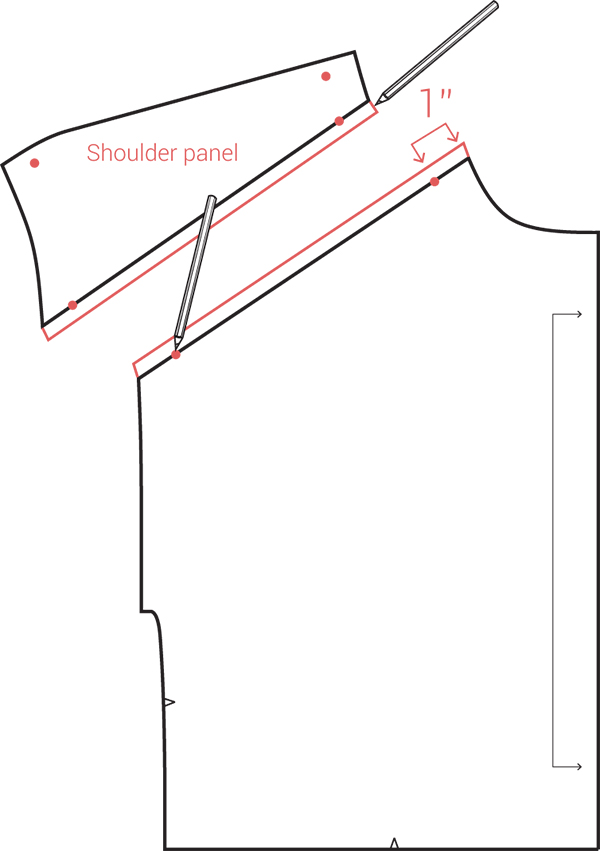
At the neckline, mark approximately 1 1/2” down from the shoulder. At the armhole, mark approximately 3” down from the shoulder. Draw a line connecting the marks. Cut along this line.
Step | 02
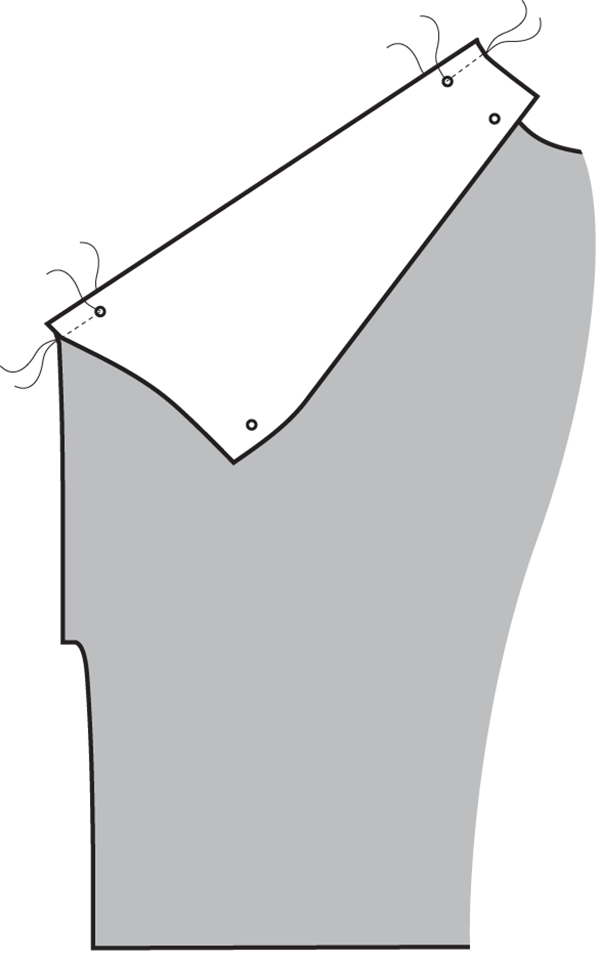
Add 5/8” seam allowance to the shoulder panel and front bodice (A) at the cut line. Along the cut line, mark circles 1” in from the neckline and armhole. Along the shoulder panel seam, mark circles 1” in from the neckline and armhole.
Step | 03
Cut all pattern pieces out of fabric.
Step | 04
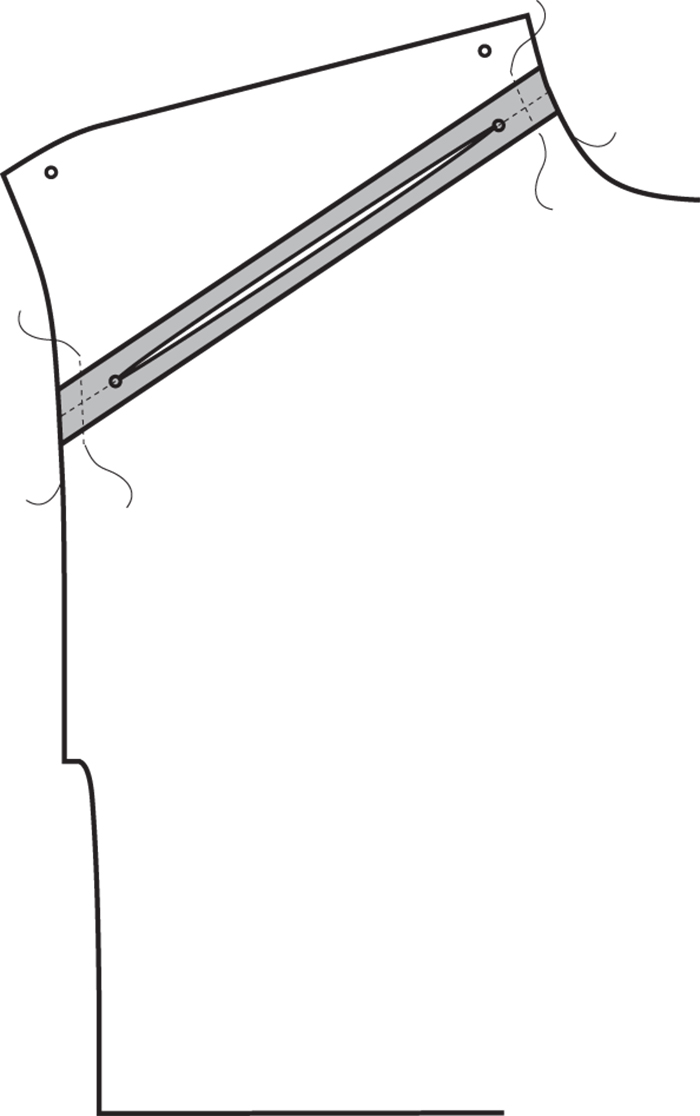
With right sides together and circles aligned, match one shoulder panel to the front bodice (A). Pin.
Step | 05
Stitch from the raw edge of the armhole to the nearest circle. Backstitch several times to secure the stitch.
Step | 06
Stitch from the raw edge of the neckline to the nearest circle. Backstitch several times to secure the stitch.
Step | 07
Finish the raw edges of the seam allowance and press open.
Step | 08
Baste along the armhole and neckline to keep the seam allowance in place.
Step | 09
Repeat steps 4-8 for the other shoulder panel.
Step | 10
Repeat steps 4-9 for the shoulder panel and back bodice (B) shoulder seams.
Step | 11
Finish the garment according to the pattern instructions.
Half Gathered Front Skirt for Georgia
Step | 01
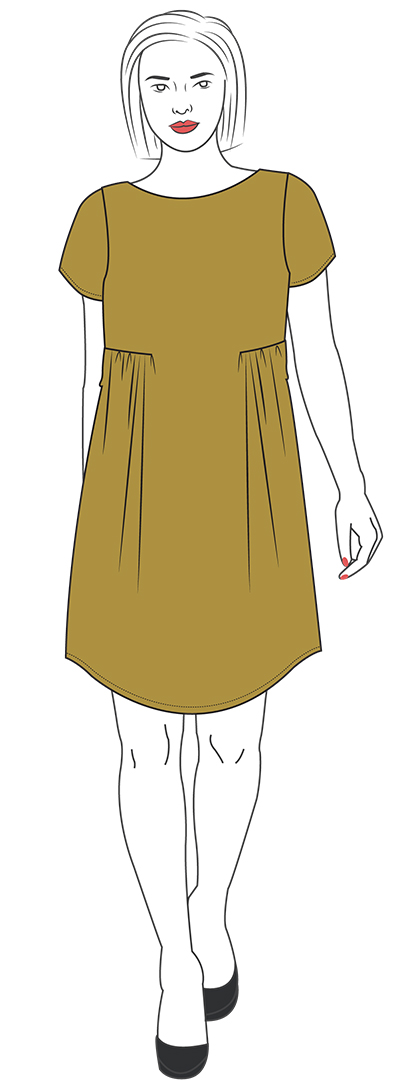
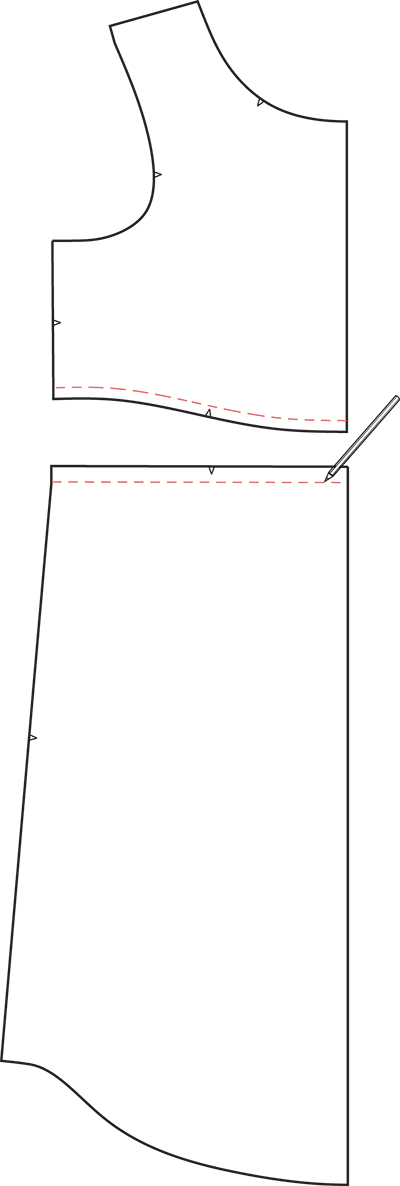
Draw in the waist seam lines of the front bodice (A) and front skirt (C).
Step | 02
Tape the front bodice (A) to the front skirt (C), aligning the center front and seam lines.
Step | 03
Draw a circle where the seam lines begin separating.
Step | 04
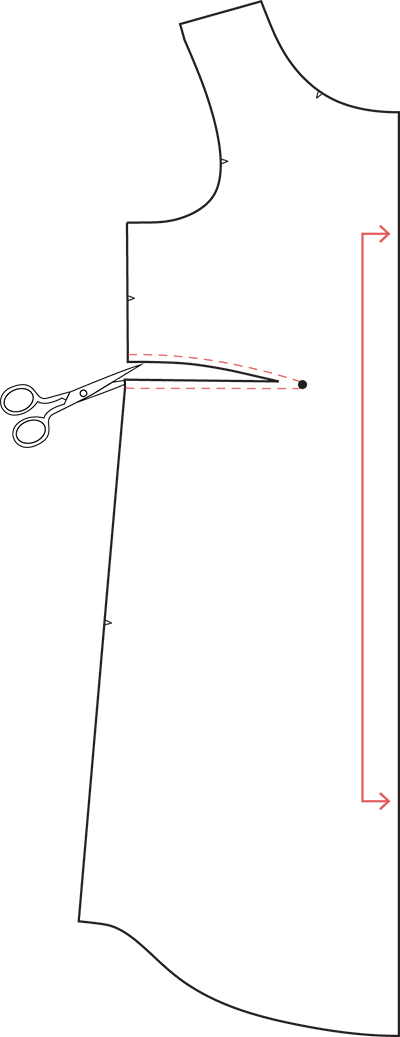
Trace off a new front dress piece. Label it cut 1 on fold.
Step | 05
Trim the seam allowance at the waist slit to be 1/4”, meeting at the circle.
Step | 06
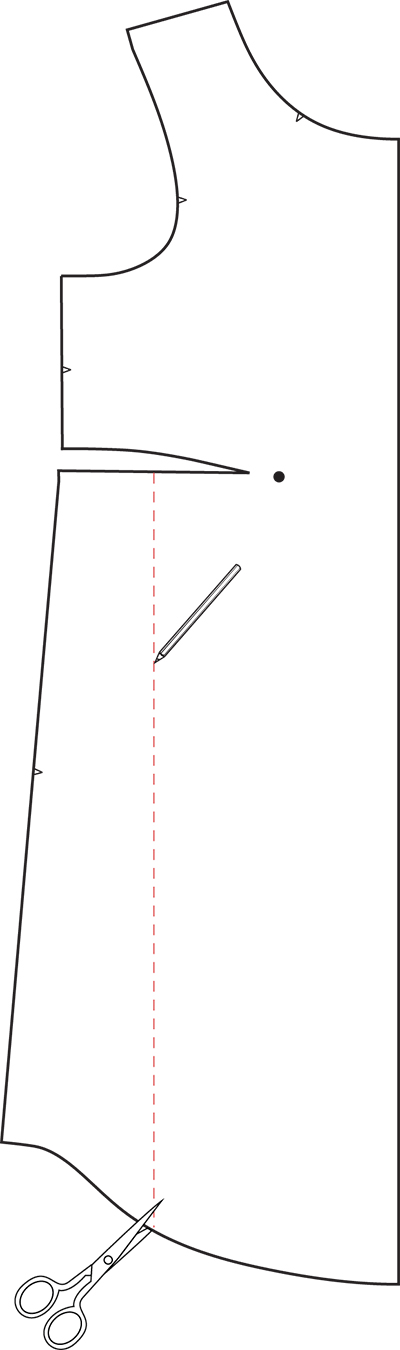
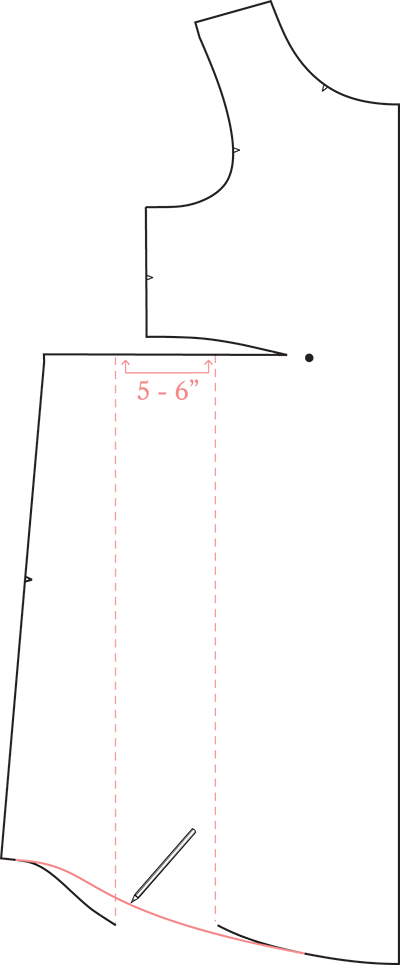
Draw a line parallel from the center front fold line, about halfway through the skirt waist slit. Cut along this line.
Step | 07
Add approximately 5-6” between the cut lines. You can add more or less, depending on your preference for the amount of gathering.
Step | 08
Redraw the hem curve of the skirt, blending between the cut pieces.
Step | 09
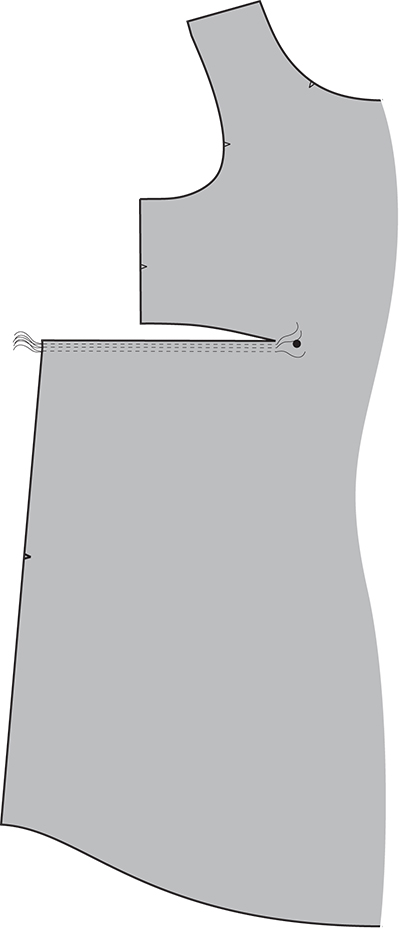
Cut all pattern pieces out of fabric.
Step | 10
Sew three rows of gathering stitches to one of the skirt waist slits, leaving long thread tails. Make one row a scant 1/4” away from the raw edge. Make the second and third rows 3/8” and 5/8” away from the raw edge respectively.
Step | 11
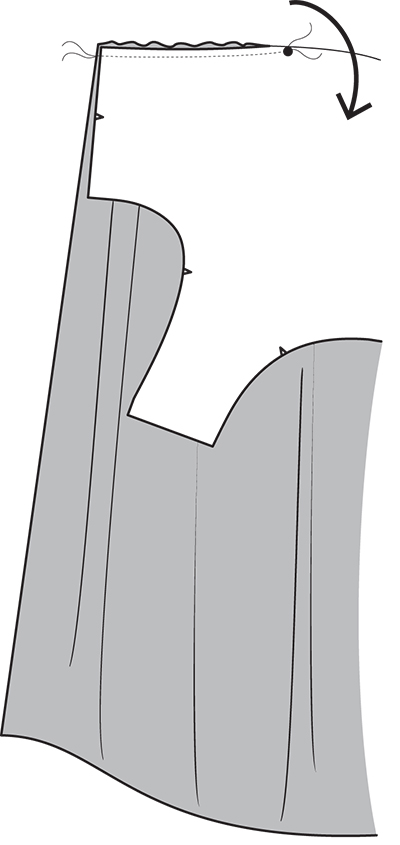
With right sides together, fold the bodice portion of the front dress down toward the skirt. Match the edges of the waist slits together. Adjust the gathers on the skirt to align with the bodice by pulling on the thread tails. Pin. Stitch at 1/4”.
Step | 12
Repeat steps 10-11 for the other waist slit.
Step | 13
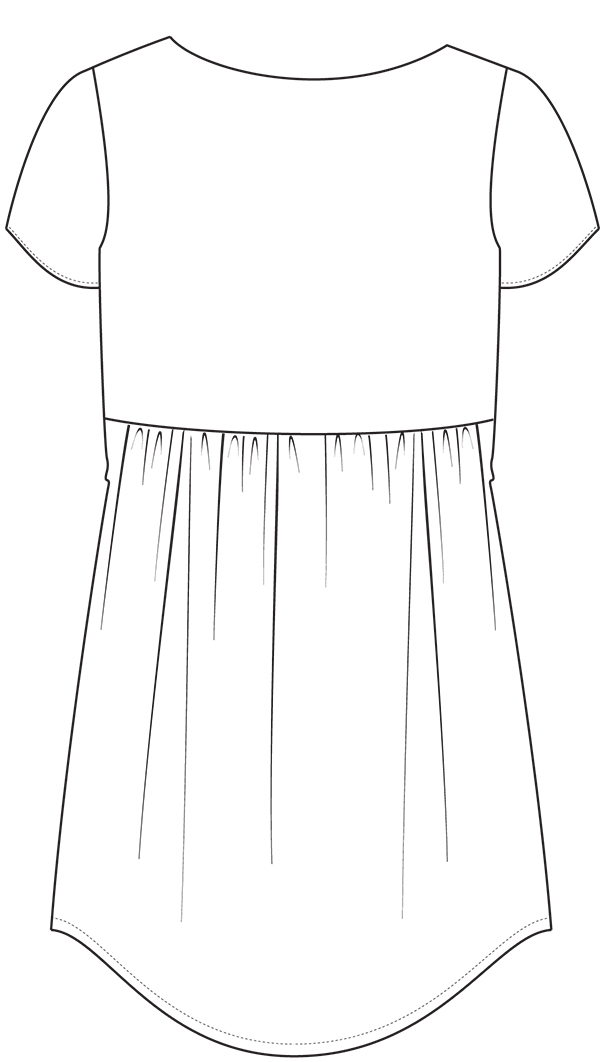
Finish the garment according to the pattern instructions.
Full Gathered Skirt for Georgia
Step | 01
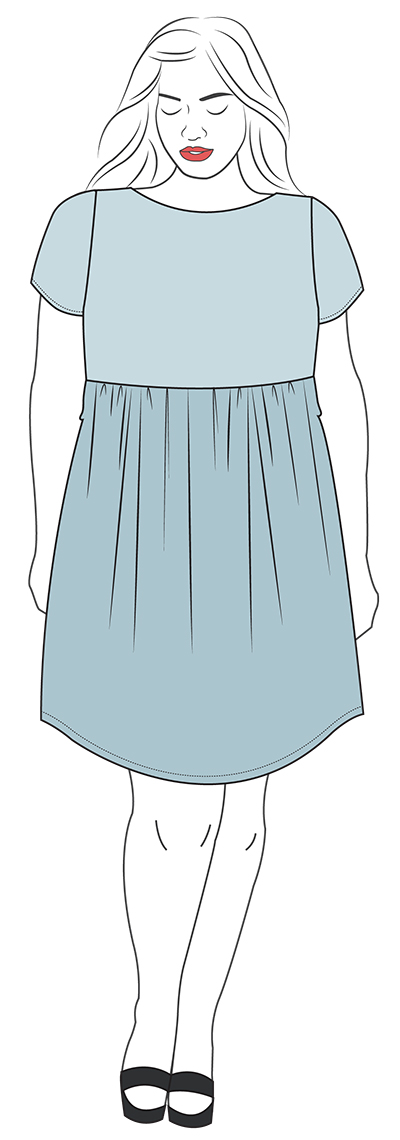
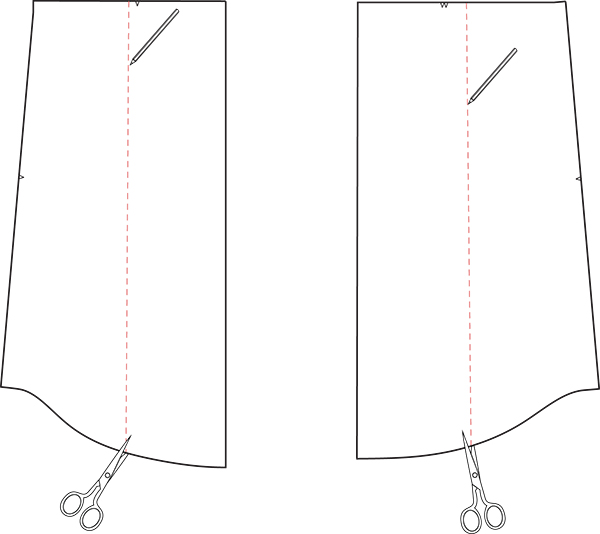
Draw a line through the middle of the front skirt (C), parallel to the center front. Cut along this line.
Step | 02
Repeat step 1 for the back skirt (D).
Step | 03
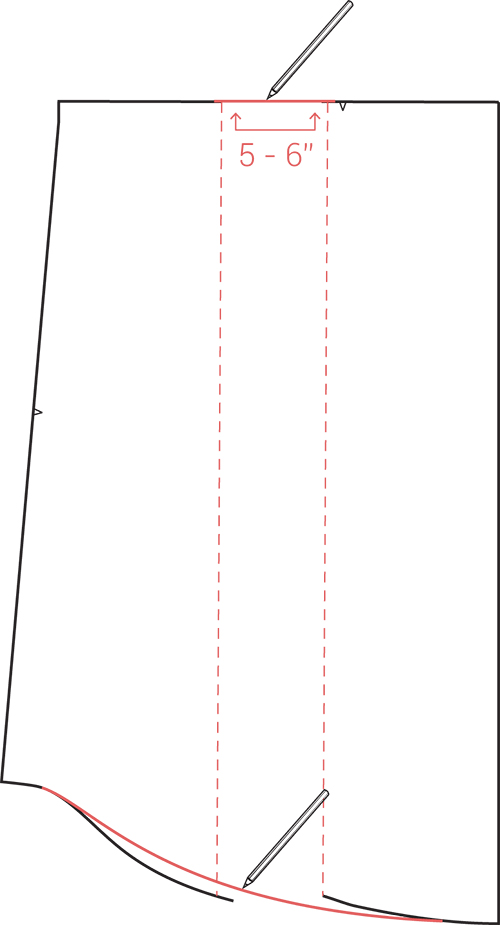
Add 5-6” between the cut lines on the front skirt (C). You can add more or less, depending on your preference for the amount of gathering.
Step | 04
Redraw the hem curve of the skirt, blending from the side seam to the center front.
Step | 05
Repeat steps 3-4 for the back skirt (D).
Step | 06
Cut all pattern pieces out of fabric.
Step | 07
Sew three rows of gathering stitches along the top edge of the front skirt, leaving long thread tails. Make one row 1/4” away from the raw edge. Make the second and third rows 3/8” and 5/8” away from the raw edge respectively.
Step | 08
With right sides together, match the front bodice (A) to the front skirt (C), with the edges of the waist seam together. Adjust the gathers on the skirt to align with the bodice by pulling on the thread tails. Pin. Stitch at 5/8”.
Step | 09
Repeat steps 7-8 on the back bodice (B) and back skirt (D).
Step | 10
Finish the garment according to the pattern instructions.

About the Author
As pattern designer, Anna works hard to make sure our sewing patterns boast both great style and instructions. She believes in the power of chocolate and coffee to cure just about anything.
 Related Articles
 Best Articles