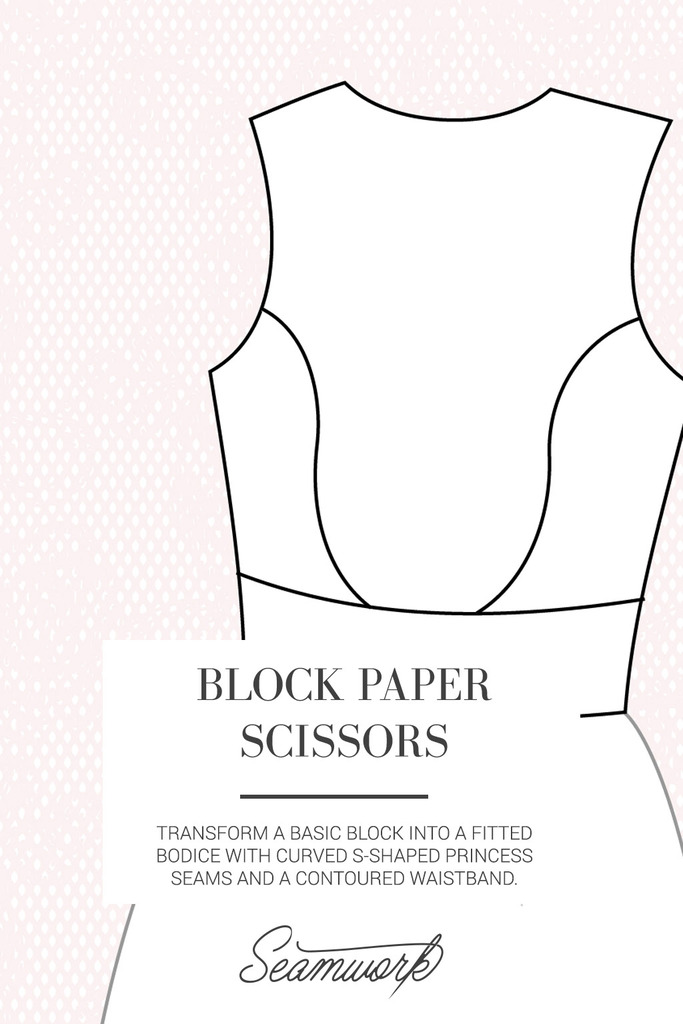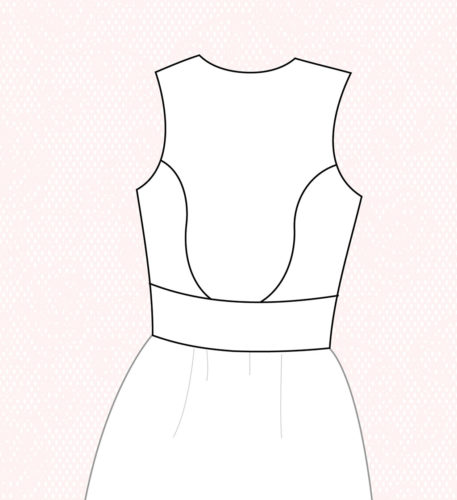
Block Paper Scissors is a patternmaking series featuring easy-to-follow tutorials—no experience necessary to join in! Each time we’ll start with a basic bodice pattern (also called a block or a sloper) with an underarm bust dart and a waist dart. We’ll use that as a jumping off point to create a different bodice design each time.
You can use nearly any basic bodice pattern for this, even if it doesn’t look exactly like the one in the illustrations; the principles will be the same. Make sure you do any and all fit adjustments to the pattern first.
Usually, flat patternmaking is done before the seam allowances are added in. For this particular Block Paper Scissors, we’ll be removing seam allowances to make things a little easier.
In this tutorial, we’ll transform our basic block into a fitted bodice with curved S-shaped princess seams and a contoured waistband.
How to:
Step | 01
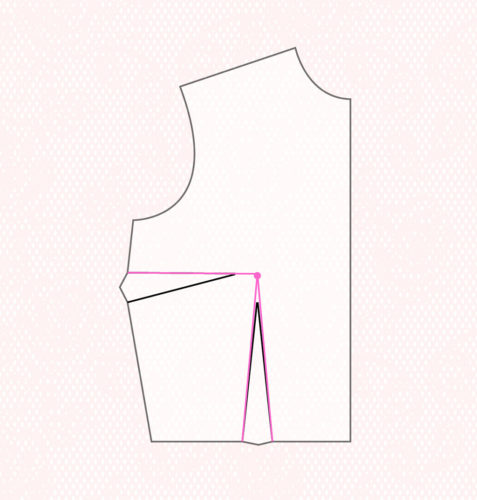
Mark your bust apex on your front pattern piece by placing the pattern piece over your body and aligning the center front and side seam. Mark the fullest point. Draw lines from the ends of the waist dart legs to the bust point. Draw a line along the bust dart’s upper leg to apex.
Step | 02
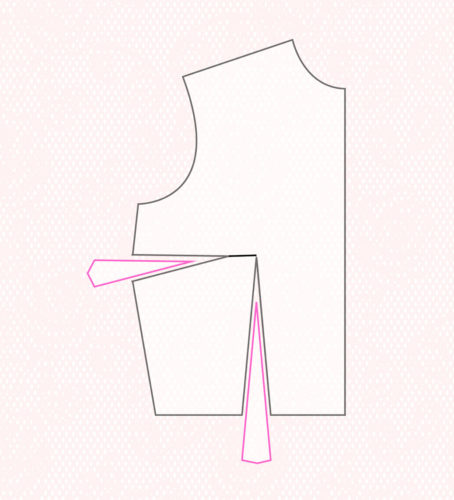
On the waist dart, cut along lines to the bust point. On the bust dart, cut along both lines of dart to apex. Remove wedges.
Step | 03
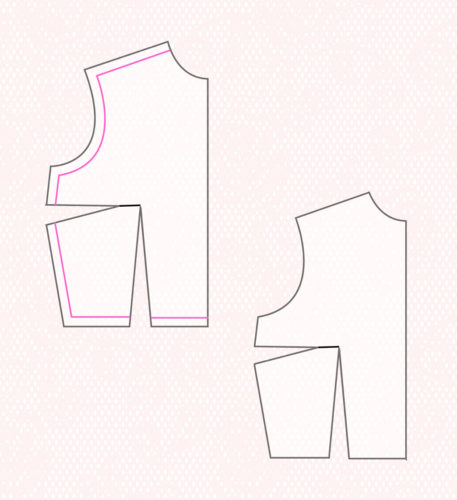
Measure and mark seam allowance along all edges except the edges cut on fold. Trim and remove.
Step | 04
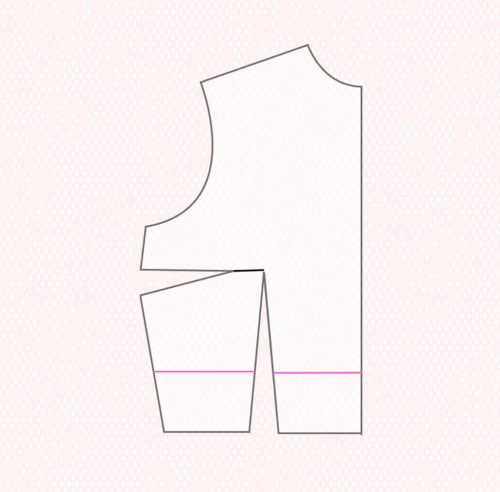
Determine the desired finished width of the waistband. Mark a line this distance from waist edge. If your waist edge is curved, be sure to follow curve.
Step | 05
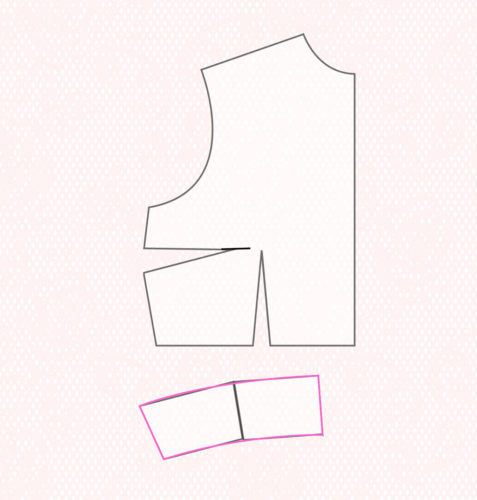
Cut along the upper waist band edge. Bring both sides of waistband together along trimmed dart legs and tape. Blend any jagged edges with a curved ruler.
Step | 06
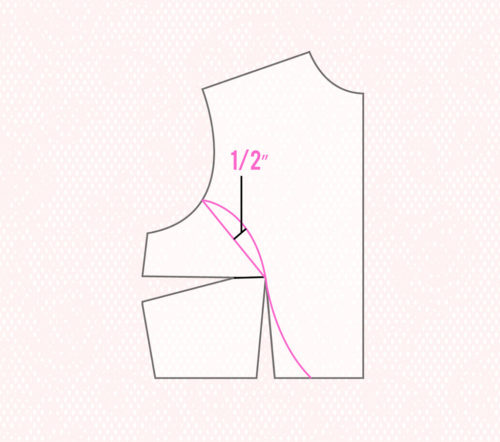
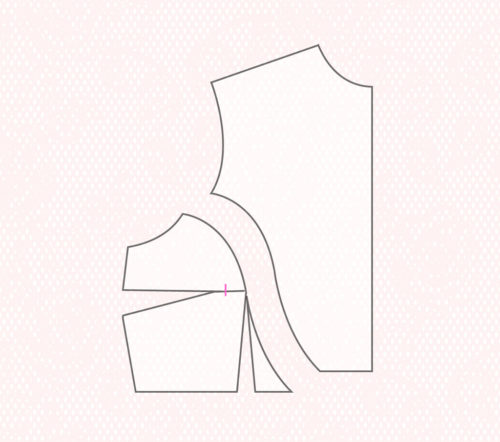
Draw a guideline from the bust apex up to middle of armscye. In the center of this line, square a mark ½” away on the upper side. Draw a curved line from bust apex through this mark to armscye. Draw a lower portion of style line curving from bust apex toward the center to lower edge.
Step | 07
Cut along curved lines. Mark a point ¾” from the apex along upper bust dart line. Cut through but not to the point. Cut from the bust dart apex through but not to the mark to create hinge.
Step | 08
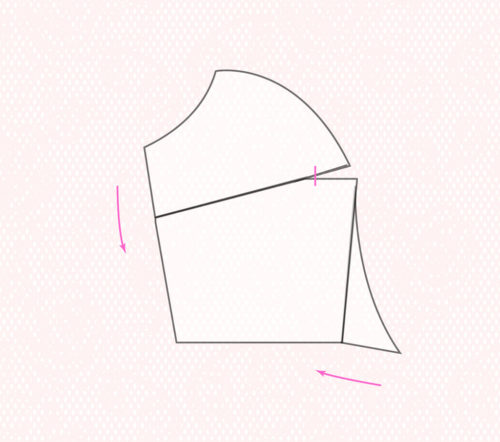
Close both darts. Tape in place.
Step | 09
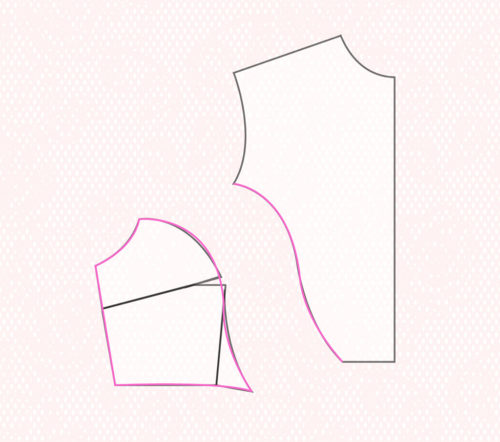
Use a curved ruler to blend jagged edges.
Step | 10
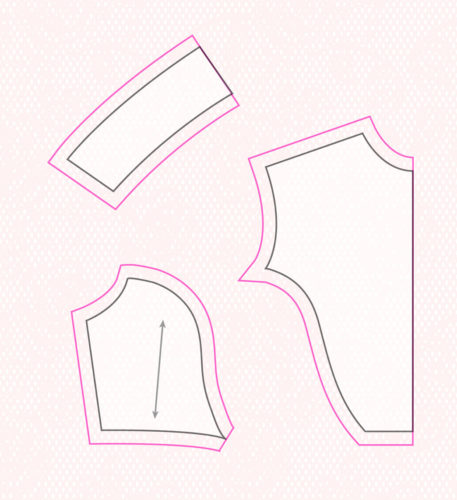
Add seam allowances to all edges except the center front of the waistband and upper bodice. For lower bodice, draw the grainline squared up from center of bottom edge.
Sewing notes:
Cut and sew a muslin to test fit.

About the Author
Devon Iott is a sewing teacher that works for Husqvarna Viking® and Pfaff® brand sewing machines. She blogs at Miss Make and lives in Nashville, TN with two chickens and a cat.
 Related Articles
 Best Articles